This site is supported by our readers. We may earn a commission, at no cost to you, if you purchase through links.

Your bearded dragon huddles in the corner, shivering under a desk lamp that barely raises the tank temperature. Or maybe your chicks aren’t thriving because your bathroom heat bulb just isn’t cutting it in the coop. Heat lamps for beginners seem straightforward—screw in a bulb, flip a switch, done—but the wrong choice can waste money, create safety hazards, or leave your pets cold.
Infrared technology works differently than standard lighting, delivering focused warmth through radiation instead of heating the air around it. Getting the wattage, wavelength, and placement right makes the difference between a cozy basking spot at 95°F and a dangerous fire risk.
Once you understand how these lamps convert electricity into targeted heat, you’ll know exactly which type suits your setup and how to install it without second-guessing every decision.
Table Of Contents
- Key Takeaways
- What is a Heat Lamp?
- Types of Heat Lamps for Beginners
- Choosing The Right Heat Lamp Bulb
- Essential Components of a Heat Lamp Setup
- Setting Up Your Heat Lamp Safely
- Using Heat Lamps for Pets and Reptiles
- Tips for Efficient and Safe Operation
- Common Mistakes Beginners Should Avoid
- Top 9 Heat Lamps for Beginners
- 1. Fluker’s Infrared Heat Lamp for Chickens
- 2. Simple Deluxe Adjustable Clamp Lamp
- 3. Bongbada Red Infrared Heat Lamp Bulb
- 4. Simple Deluxe Clamp Light
- 5. Ceramic Reptile Heat Emitter Bulb
- 6. Simple Deluxe Reptile Heat Lamp Combo
- 7. Premier Prima Heat Lamp
- 8. Woods Aluminum Clamp Lamp Light
- 9. Chicken Coop Heat Lamp
- Frequently Asked Questions (FAQs)
- Conclusion
Key Takeaways
- Heat lamps work by converting electrical energy into infrared radiation that warms surfaces directly rather than heating the air, with wavelengths ranging from short-wave (intense, focused heat) to long-wave (gentle, widespread warmth) depending on your space and species needs.
- Proper setup demands three critical safety moves: position the bulb 12-18 inches from basking surfaces using a digital thermometer to verify species-specific temperatures, secure the lamp with heat-resistant mounting hardware and a metal guard, and maintain 18+ inches clearance from flammable materials to prevent fires.
- Ceramic heat emitters outlast standard infrared bulbs by thousands of hours and provide consistent warmth without visible light for nocturnal animals, while infrared bulbs deliver faster heating but require more frequent replacement and can disrupt sleep cycles.
- Common beginner mistakes include selecting bulbs with incorrect wattage for enclosure size, leaving heat lamps running continuously without thermostat control (which creates fire hazards and equipment failure), and positioning lamps too close or without guards (causing burns and uneven temperature gradients exceeding 20-30°F).
What is a Heat Lamp?
A heat lamp is a simple device that uses infrared light to generate warmth in a focused area, whether that’s a reptile tank, a chicken coop, or even your chilly bathroom. Think of it as a targeted heater that doesn’t warm the whole room—just the spot where you need it most.
Before you pick one up, though, you’ll want to understand how they actually work, where beginners commonly use them, and what makes infrared technology different from your standard light bulb.
How Heat Lamps Work
Heat lamps convert electrical energy into infrared radiation that objects and animals absorb as warmth. When you flip the switch, the bulb emits infrared wavelengths—invisible light that heats surfaces on contact rather than just warming the air. Reflectors concentrate this radiant heating downward, creating focused basking spots with measurable temperature gradients.
It’s direct thermal dynamics at work, delivering efficient energy conversion exactly where you need it. Understanding the science behind heat lamps requires knowledge of clear science concepts.
Common Uses for Beginners
Now that you understand the thermal dynamics, let’s explore where beginners put that knowledge to work. You’ll find heat lamps serving as reliable heat sources across a few core applications:
- Reptile Care: Establishing basking zones with adjustable temperature targets for turtles, lizards, and snakes
- Pet Warmth: Warming chicks, small mammals during recovery, or young birds before integration
- Thermal Management: Creating species-specific day-night gradients and maintaining consistent temperatures across seasonal changes
- Beginner Safety Practice: Learning proper positioning with lamp guards while testing temperature probes
- Short-Duration Heating: Supporting digestion cycles or temporary warmth during enclosure maintenance
These reptile heat lamps and chicken heat lamps offer straightforward heat lamp uses before you tackle sophisticated setups. When setting up heat lamps, it’s vital to guarantee the well-being of the animals by examining research methodology.
Infrared Technology Explained
Behind every infrared heat lamp sits a simple principle: electrical energy converts to infrared radiation, spanning wavelengths from 0.75 to 1000 micrometers. IR lamps emit near, mid, or far bands depending on filament temperature, each offering distinct heat transfer characteristics.
Short-wave types warm surfaces fast, while long-wave models provide sustained thermal efficiency—making infrared technology both adaptable and predictable for beginners.
Types of Heat Lamps for Beginners

Not all heat lamps are created equal, and picking the wrong one can waste energy or even put your setup at risk. The main categories—short wave, medium wave, long wave, ceramic, and infrared—each shine in different situations, from warming reptiles to keeping chicks cozy.
Let’s break down what makes each type tick so you can choose the right tool for the job.
Short Wave, Medium Wave, Long Wave Lamps
When you’re picking infrared heat lamps, the wavelength matters more than most beginners realize. Think of it like choosing the right tool—short wave hits hard and fast, medium wave balances coverage with punch, and long wave spreads gentle warmth across bigger spaces. Here’s what you need to know about each:
- Short wave (0.75–1.5 micrometers) delivers focused, intense heat for precise basking spots, perfect when you need quick surface warming in smaller enclosures.
- Medium wave (1.5–3 micrometers) offers broader heat distribution with solid efficiency, making it ideal for standard terrariums where you want uniform thermal gradients.
- Long wave (3–10 micrometers) provides widespread, gentler infrared heating across larger areas, reducing overheating risks while maintaining ambient warmth.
Each type uses infrared radiation differently, so matching wavelengths to your setup size and heat lamp safety needs keeps everything running smoothly. Lamp efficiency improves when you position heat lamp bulbs at the right distance—closer placement with short wave maximizes radiant flux, while long wave ceramic heat lamps work better with more spacing to prevent heat buildup on flammable materials.
Ceramic Heat Emitter Bulbs
You’ll want ceramic heat emitters when you need warmth without visible light disrupting sleep cycles. These ceramic heat lamps use solid ceramic elements instead of glass, boosting ceramic element durability and ceramic bulb safety by preventing shattering.
Reptile heat lamps benefit most—broad infrared wavelengths create even basking zones in small enclosures. Just check your fixture accommodates high wattage, since emitter bulb efficiency depends on proper heat lamp bulbs rated for those temperatures.
Infrared Heat Lamp Bulbs
Infrared heat lamp bulbs glow red while radiating warmth directly onto surfaces, making them ideal for targeted heating without waiting for air to warm up. Their infrared radiation travels straight to your pet’s basking spot, delivering heat output faster than ceramic heat lamps.
- Short-wave bulbs heat small areas quickly with higher thermal efficiency
- Long-wave options spread gentler warmth across larger enclosures
- Standard wattages range from 60W to 250W for most beginner setups
- Bulb durability averages 2,000–5,000 hours with proper voltage matching
- Radiation safety requires guards preventing direct skin contact during infrared heating
Choosing The Right Heat Lamp Bulb

Picking the right bulb isn’t just about grabbing whatever’s on the shelf—it’s about matching wattage, wavelength, and bulb type to your specific setup. You need to think about the size of your space, what you’re heating (pets, food, or yourself), and how each bulb design performs under those conditions.
Let’s break down the key factors so you can make a smart, safe choice.
Wattage Options and Room Size
Wattage selection starts with room sizing—75 to 150 watts covers small enclosures up to 2 feet square, while 150 to 250 watts manages medium spaces around 2 to 4 feet.
For thermal coverage, heat calculation matters: each infrared heat lamp generally spreads warmth across a 1.5 to 2.5 foot radius.
Proper space heating depends on matching your setup to these heating solutions for homes, ensuring energy efficiency and temperature control.
Wavelengths and Species Needs
Wavelength matters more than you’d think—reptiles need infrared wavelengths around 760 to 1200 nm to replicate natural basking behavior and support thermal comfort.
Your turtle basking lights should target species temperature preferences without disrupting day-night cycles, while infrared radiation from a reptile heat lamp creates focused heat emission.
Separate your UVB light from the heat lamp to avoid spectral conflicts that mess with circadian rhythms and basking patterns.
Comparing Bulb Types
You’ll find that ceramic heat lamps outlast standard infrared heat lamps by thousands of hours, thanks to their solid construction and consistent emission spectra.
Heat output varies wildly—infrared options like halogen bulbs concentrate intense warmth at shorter heat lamp distances, while ceramic benefits include gentle, sustained heating across broader zones.
Compare bulb durability, wattage, and infrared heat lamp wavelengths against your specific needs before buying heat lamp bulbs.
Essential Components of a Heat Lamp Setup
A heat lamp isn’t just a bulb you screw in and call it done—it’s a system with several key parts working together to deliver safe, effective heat. Understanding what each component does helps you choose the right setup and avoid common beginner mistakes that lead to poor performance or safety issues.
Let’s break down the three essential pieces every beginner needs to know about before plugging anything in.
Bulb, Reflector, and Housing

Think of your heat lamp setup like a team: the bulb generates warmth, the reflector directs it where you need it, and the housing keeps everything secure. Each piece matters for safety and performance.
- Heat lamp bulbs come in infrared or ceramic varieties—match the wattage (60–250W) to your enclosure size
- Reflector shapes like parabolic dishes focus heat into a defined basking zone
- Housing designs must handle high temps and fit your space, whether that’s a clamp fixture or permanent mount
Mounting Styles and Accessories

Once you’ve picked your bulb and housing, you’ll want solid mounting options. Clamp styles let you reposition heat lamps fast—grip thickness matters for stability. Suspension chains work great when you need adjustable height as your animals grow.
Reflector options vary from wide flood to focused spot patterns, so match your basking zone needs. Mounting kits with sturdy brackets prevent tipping, keeping infrared heat lamps secure and your setup safe.
Importance of Lamp Guards

Once you’ve secured your mounting, wrap a guard around that bulb—it’s the best safety feature in heating you can add. Guards prevent direct contact burns from hot surfaces, keeping hands and curious pets safe.
They’re built from heat-resistant materials rated for high temperatures, reducing shattered glass risk if something bumps your heat lamp bulbs. That simple barrier means serious accident reduction.
Setting Up Your Heat Lamp Safely

Getting your heat lamp installed correctly isn’t just about plugging it in and hoping for the best—there’s a right way to do it that keeps everyone safe. You need to think about where you’re mounting it, how you’re locking it down, and what could go wrong if things get too hot.
Let’s walk through the three critical steps that’ll help you avoid the most common setup mistakes.
Proper Placement and Distance
Getting the distance right between your heat lamp and the basking surface makes all the difference—too close, and you risk burns; too far, and your pet stays cold. Most reptile setups work best with the bulb positioned 12 to 18 inches away, depending on wattage and species needs.
- Measure spot temperature directly at the basking surface using a digital thermometer, aiming for species-specific targets like 90-95°F for many lizards
- Use a thermostat or rheostat for precise temperature control instead of guessing based on distance alone
- Adjust mounting hardware and reflective hoods to improve heat distribution across basking spots
- Monitor for hotspots that exceed safe levels, which can cause burns if the lamp sits too close
- Follow distance guidelines based on bulb wattage: higher wattage bulbs need greater clearance for safety precautions
Securing The Lamp
Once you’ve found the right distance, locking your heat lamp in place prevents dangerous shifts that can cause overheating or falls. Mount it on a sturdy, heat-resistant surface using a clamp or arm with tight screws—wobbling can lead to broken bulbs or tipped fixtures. Add a metal guard around the bulb to block direct contact and contain glass if it shatters, protecting both you and your animals.
| Lamp Mounting Component | Safety Features |
|---|---|
| Sturdy clamp or bracket | Prevents wobbling and detachment |
| Heat-resistant base | Withstands high temperatures safely |
| Metal lamp guard | Blocks direct contact, contains broken glass |
| Locking screws | Maintains position, avoids drift over time |
Preventing Burns and Fire Hazards
Fire safety tips start with clearance—keep your heat lamp at least 18 inches from bedding, wood, or fabric to prevent ignition. A heat guard provides thermal protection around the bulb, blocking accidental contact and stray infrared rays.
Burn prevention depends on three key moves:
- Install a thermostat for thermal management systems that avoid dangerous overheating
- Check cords and plugs weekly; frayed wires cause electrical fires fast
- Mount securely so tipping can’t shatter the heat lamp bulb or trigger flames
Using Heat Lamps for Pets and Reptiles

If you’re keeping reptiles, amphibians, or small animals, your heat lamp becomes more than just a warmth source—it’s a lifeline for their health. These creatures can’t regulate their body temperature like we do, so you’ll need to create specific temperature zones and lighting schedules that mimic their natural habitat.
For reptiles and small animals that can’t regulate their own body temperature, your heat lamp isn’t just warmth—it’s survival
Let’s walk through the three essential elements every beginner needs to understand for proper pet heating.
Creating a Basking Spot
Your reptile needs a proper basking spot where it can soak up radiant heating and achieve thermal comfort. Position your reptile heat lamp over a dedicated platform, creating a heat gradient from 90 to 110°F (32 to 43°C) depending on species. The basking area should stay warmer than the rest of the enclosure temperature, letting your pet move between zones freely.
| Basking Spot Design Element | Recommended Setup |
|---|---|
| Platform height | 6–12 inches below heat lamp |
| Ideal temperature range | 90–110°F (32–43°C) |
| Reflector use | Concentrates heat, prevents hot spots |
| Enclosure gradient | Warm basking area + cooler retreat zones |
Maintaining a Day-Night Cycle
Your reptile’s circadian rhythms depend on consistent light cycles—aim for 12 hours of light, 12 hours of darkness. Use timer settings to automate your heat lamps and UVB lighting, ensuring steady temperature control without manual adjustments. Monitor humidity management during these shifts, since heating affects moisture levels.
Here’s your daily checklist:
- Set programmable timers for automatic on/off cycles
- Track temperature regulation during lighting transitions
- Minimize disruptions during designated dark periods
- Adjust schedules based on species-specific needs
UVB Vs. Heat Lamps for Turtles
Turtle lighting isn’t a one-bulb solution—you need both UVB light and a heat lamp working together. UVB benefits include vitamin D3 synthesis and calcium absorption, preventing metabolic bone disease.
Your heat lamp provides the basking spot warmth for reptile thermoregulation, but it won’t deliver UVB.
Combining proper reptile lighting and heating ensures turtle care that promotes shell health and basking techniques without overexposure risks.
Tips for Efficient and Safe Operation

Getting your heat lamp up and running is only half the battle—keeping it running safely and efficiently takes some ongoing attention. You’ll want to keep tabs on temperature, stay on top of basic maintenance, and know when it’s time to swap out worn parts.
Let’s walk through the practical habits that’ll help you get the most out of your setup without cutting corners on safety.
Monitoring Temperature and Usage Time
You’ll want to check temperatures at the basking spot two or three times daily—aim for 85–95°F for most reptiles, adjusting based on species. Use a digital thermometer for reliable thermal monitoring, and set up timer settings to create consistent 12-hour heat cycles.
Track your usage patterns in a simple log; this temperature control method catches equipment drift early and prevents overheating. Adjustable temperature distance matters more than you’d think.
Cleaning and Maintenance Routines
A dirty heat lamp can lose up to 30% of its heat distribution efficiency, so regular cleaning isn’t optional. Consistent temperature control starts with clean equipment.
Follow this maintenance scheduling routine:
- Unplug before any lamp inspection to eliminate electrical shock hazards
- Wipe exterior surfaces weekly for dust removal using a damp cloth and mild detergent
- Clean reflector cleaning monthly with non-abrasive sponge and warm soapy water
- Inspect guards and cords for wear that compromises safety features
- Polish cool bulbs gently with lint-free cloth to restore heat lamp performance
Replacing Bulbs and Parts
Once you’ve kept your lamp spotless, bulb replacement becomes the next maintenance achievement. Heat lamp bulbs typically deliver hundreds to thousands of operating hours before needing swaps.
Always power off and unplug first—wait 30 minutes for cooling. Check part compatibility using manufacturer numbers, verify wattage matches your thermostat’s temperature control specs, and handle new bulbs with clean gloves.
Proper safety features like guards protect during replacement, ensuring continued heat distribution without compromising safety precautions.
Common Mistakes Beginners Should Avoid

Even with the best intentions, first-time heat lamp users often make a few critical mistakes that can compromise safety or waste energy. These missteps usually stem from misunderstanding how heat lamps work or underestimating their power.
Let’s walk through the most common errors so you can avoid them from day one.
Incorrect Bulb Selection
Choosing the wrong heat lamp bulbs is one of the fastest ways to create problems. Bulb wattage directly affects heat output and thermal control—too high burns delicate skin, too low leaves your pet shivering.
Species needs vary wildly, so infrared radiation wavelengths matter as much as raw temperature.
Pair your heat lamps with a thermostat for reliable temperature control and heating, keeping lamp safety front and center.
Improper Placement or Coverage
Even the perfect bulb fails when placed poorly. Heat distribution depends on distance—keep your heat lamps at least 12 inches from animals to prevent burn risks.
Coverage gaps create thermal gradients that exceed 20–30°F across one basking zone, leaving cold spots your pet can’t escape. Obstructions block radiant heating, while reflective surfaces without safety features concentrate heat into dangerous focal points.
Temperature control and heating demand proper positioning.
Overheating or Continuous Operation
Leaving your heat lamp running nonstop is asking for trouble. Continuous operation without overheat protection dries out substrates and pushes equipment past safe heat cycles, risking fire or sudden failure.
That’s where thermal management matters—use a thermostat for temperature control methods and continuous monitoring. Safety protocols demand regular bulb replacement and thermal sensors to maintain proper heat distribution before safety features become your last line of defense.
Top 9 Heat Lamps for Beginners
Now that you know the basics of setup and safety, let’s talk about actual products that work well for beginners. I’ve pulled together nine heat lamps that balance ease of use, reliability, and safety—covering everything from chicken coops to reptile tanks.
These picks give you solid starting points whether you’re warming pets, livestock, or outdoor spaces.
1. Fluker’s Infrared Heat Lamp for Chickens
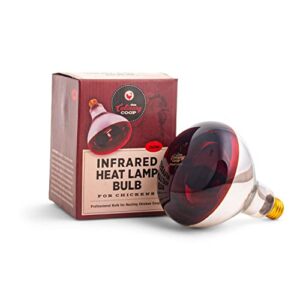
Fluker’s Infrared Heat Lamp is built for poultry, offering focused radiant warmth that chickens actually absorb instead of just heating empty air. This infrared heat lamp keeps chicks cozy without disrupting their rest, which matters for chicken health and steady growth.
You’re looking at 60 to 150 watts depending on your brooder size, and it mounts with a clamp or hanging setup so you can dial in the right distance.
Just remember, lamp durability varies—some users report burnout issues within weeks, so keep spare bulbs handy and inspect connections regularly for infrared safety.
| Best For | Poultry owners needing a focused heat source for brooding chicks or warming chickens in cold weather without lighting up the coop at night. |
|---|---|
| Wattage | 250W |
| Base Type | E26 |
| Voltage | 120V |
| Material | Ceramic |
| Cord Length | Not specified |
| Usage | Livestock/Chickens |
| Additional Features |
|
- Infrared heat warms birds directly rather than wasting energy heating air, making it more efficient for small brooder spaces
- Adjustable clamp or hanging mount lets you control temperature by changing the lamp height instead of fiddling with thermostats
- Doesn’t disturb sleep cycles since infrared light won’t keep chickens awake like bright white bulbs
- Durability is hit-or-miss with some units burning out in just a couple weeks, so plan on keeping backups around
- Requires careful positioning to avoid burns—too close and you risk overheating chicks, too far and it’s ineffective
- No built-in temperature control means you’re manually adjusting height and checking on birds more often than with thermostat-equipped heaters
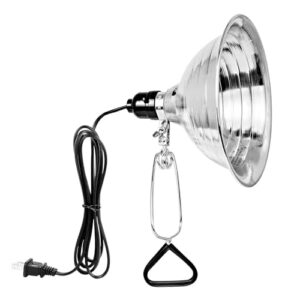
2. Simple Deluxe Adjustable Clamp Lamp
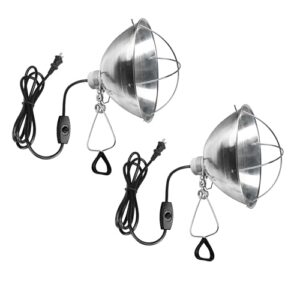
The Simple Deluxe Adjustable Clamp Lamp gives you a 10.5-inch aluminum reflector with clamp styles that grip workbenches, tank rims, or shelving—no wobble if you mount it right.
You’re getting a ceramic socket rated for 250W, solid lamp materials with a protective metal guard, and adjustable arms that let you aim heat distribution exactly where your basking spot or seedlings need it.
It’s not a ceramic heat lamp itself, but drop in any compatible infrared bulb and you’ve got adaptable heating solutions for reptiles, plants, or workshop tasks at a beginner-friendly price.
| Best For | Hobbyists and beginners who need a budget-friendly, adjustable clamp light for reptile basking spots, seedling grow areas, or workshop tasks where you can position the heat exactly where it’s needed. |
|---|---|
| Wattage | 250W |
| Base Type | E26 |
| Voltage | 120V |
| Material | Aluminum |
| Cord Length | 6 ft |
| Usage | Multi-purpose |
| Additional Features |
|
- 10.5-inch aluminum reflector with adjustable positioning lets you aim light and heat precisely at basking zones or workspaces
- Ceramic socket rated for 250W handles high-wattage bulbs safely, plus the metal guard protects the bulb from accidental bumps
- Sturdy clamp design with scratch-resistant sleeves grips securely on tank rims, shelves, or benches without slipping
- Bulb sold separately, so you’ll need to buy a compatible heat lamp or LED before you can use it
- Metal reflector gets very hot during operation, which means you need to be careful about placement and avoid touching it
- Assembly required and you’ll need to match bulb wattage carefully—max 150W for heat lamps despite the 250W socket rating
3. Bongbada Red Infrared Heat Lamp Bulb
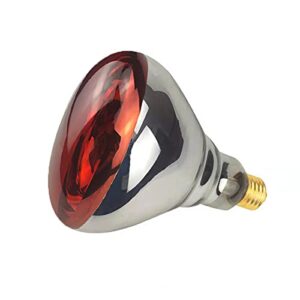
The Bongbada Red Infrared Heat Lamp Bulb delivers 250W of long-wavelength heat distribution through thickened glass rated for up to 7,000 hours—solid bulb durability if you keep it dry and inspect regularly. You’re getting infrared wavelengths around 700–1,000 nanometers, perfect for reptile heat lamp basking zones or light red light therapy setups, with claims of 30% energy efficiency over standard bulbs.
Mount it in a heat-rated E26 socket with a guard, because mixed reviews flag early burnout and color accuracy—some users say the red tint fades fast.
| Best For | Pet owners needing an affordable 250W basking spot for reptiles, amphibians, or chicks in medium enclosures where you can monitor bulb performance and replace as needed. |
|---|---|
| Wattage | 250W |
| Base Type | E26 |
| Voltage | 120V |
| Material | Glass |
| Cord Length | Not specified |
| Usage | Reptiles/Pets |
| Additional Features |
|
- Long-wavelength infrared (700–1,000 nm) penetrates deeper for effective basking heat without disrupting nighttime routines with harsh visible light.
- Thickened explosion-proof glass and lead-free design offer decent safety margins when paired with a heat-rated guard and proper ventilation.
- Claims up to 7,000 hours of life with 30% energy savings compared to standard bulbs, making it budget-friendly if it lasts.
- Mixed reviews report early burnout within months, inconsistent heat output, and red tint fading faster than advertised.
- Requires careful setup—you need a heat-rated E26 socket, reflector guard, and correct distance to avoid burns or fixture damage.
- Not suitable for damp environments or continuous high-duty cycles where ceramic emitters typically outperform in longevity.
4. Simple Deluxe Clamp Light
Need flexibility without breaking the bank? The Simple Deluxe Clamp Light pairs an 8.5-inch aluminum reflector with a double-swivel clamp and 360-degree ball joint, letting you dial in heat distribution across terrariums or workshops up to 150W. Clamp styles like this adapt to shelves or cage bars, though some users note the joint loosens over time—tighten it monthly.
Reflector materials direct infrared heat lamp warmth downward, boosting lamp durability when you pair it with ceramic heat emitter bulbs and keep mounting options dust-free.
| Best For | Hobbyists and pet owners who need an affordable, adjustable clamp light for reptile terrariums, small workshops, or indoor plant setups where flexible positioning matters more than heavy-duty performance. |
|---|---|
| Wattage | 150W |
| Base Type | E26 |
| Voltage | 120V |
| Material | Aluminum/Plastic |
| Cord Length | 6 ft |
| Usage | Multi-purpose |
| Additional Features |
|
- 360-degree ball joint and double-swivel clamp let you position the 8.5-inch reflector at almost any angle to create focused basking spots or task lighting
- Handles up to 150W bulbs with a 6-foot cord, giving you enough reach and power for most small-scale heating or lighting projects
- Budget-friendly aluminum and plastic construction keeps costs low while the clamp grips shelves or cage bars up to a few inches thick
- Ball joint and clamp can loosen over time with continuous use, requiring monthly checks and tightening to prevent wobbling or slipping
- No bulb included, so you’ll need to buy a compatible E26 heat lamp or grow bulb separately and verify wattage limits
- Not built for heavy-duty or high-heat applications—prolonged use at maximum wattage may reduce durability or cause uneven heat distribution
5. Ceramic Reptile Heat Emitter Bulb
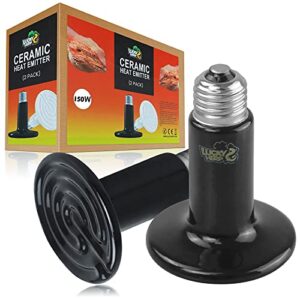
Looking for steady warmth without disrupting your pet’s sleep cycle? Ceramic heat emitter bulbs run up to 10,000 hours, delivering infrared reptile heat management through thick ceramic coating benefits instead of fragile glass.
This 150W A19 emitter bulb fits standard E26 bases, reaching rated temperature in four minutes—ideal for heating reptiles at night. Ceramic bulb safety requires quality holders and 30cm clearance; avoid frequent switching to extend lifespan.
Heat distribution methods concentrate warmth downward with a reflector, making reptile lighting and heating predictable for terrariums and pump houses alike.
| Best For | Reptile and amphibian owners who need consistent overnight heating without light interference, plus anyone maintaining warmth in small animal enclosures or pump houses. |
|---|---|
| Wattage | 150W |
| Base Type | E26 |
| Voltage | 120V |
| Material | Ceramic |
| Cord Length | Not specified |
| Usage | Reptiles/Poultry |
| Additional Features |
|
- Heats fast and lasts long—reaches full temperature in 4 minutes and runs up to 10,000 hours without filament burnout
- No visible light emission keeps nocturnal routines intact while delivering steady infrared warmth
- Thick ceramic construction resists thermal shock and breakage better than traditional glass heat bulbs
- Requires careful setup with quality ceramic holders and at least 30cm clearance to prevent burns or fixture damage
- Higher upfront cost than basic incandescent bulbs, though longer lifespan offsets replacement frequency
- Gets extremely hot to the touch and needs proper guards or cages to avoid accidental contact in high-traffic enclosures
6. Simple Deluxe Reptile Heat Lamp Combo
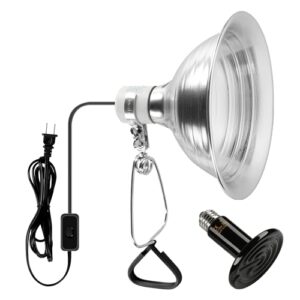
When you want the full setup in one package, this combo pairs a 100W ceramic bulb with a 150W clamp light featuring an 8.5″ aluminum reflector. The reptile heat lamp delivers consistent pet warmth through ceramic bulbs that emit zero visible light—perfect for heating for reptiles without disrupting sleep cycles.
You’ll appreciate the 360° adjustability for precise positioning, though lamp efficiency depends on proper distance.
Heat lamp safety matters here: the clamp can get hot after extended use, and some users report shorter bulb lifespans.
For reptile care and animal heat lamps, it’s a solid starter kit that covers both reptile lighting and heating basics.
| Best For | Reptile owners who need an all-in-one heating solution with adjustable positioning and 24/7 heat without visible light. |
|---|---|
| Wattage | 100W |
| Base Type | E26 |
| Voltage | 120V |
| Material | Ceramic/Aluminum |
| Cord Length | Not specified |
| Usage | Reptiles/Poultry |
| Additional Features |
|
- Complete kit includes both 100W ceramic bulb and 150W clamp light with reflector, so you’re ready to go out of the box
- Zero light emission means your pet can maintain natural sleep patterns while staying warm
- 360° adjustable clamp lets you position heat exactly where needed in the terrarium
- Bulb longevity can be hit-or-miss, with some users reporting early burnout
- Clamp light gets quite hot during use, requiring careful handling to avoid burns
- May struggle to heat larger enclosures or particularly cold spaces adequately
7. Premier Prima Heat Lamp
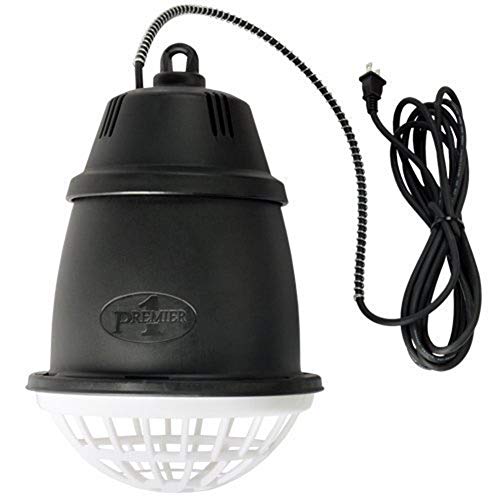
If you’re heating for reptiles and animals that need serious warmth, the leading Prima Heat Lamp steps up with higher-wattage infrared emission—usually 250W—focused through a durable reflector housing.
Prima lamp features include a heavy-duty plastic grill and glass-reinforced construction that manages high temps without cracking, boosting heat lamp safety around livestock, poultry, or large reptile enclosures.
Animal heat lamps like this deliver efficient heating across bigger spaces, though you’ll need to supply your own heat lamp bulbs and monitor placement closely to prevent overheating.
| Best For | Farmers, breeders, and pet owners who need a durable, high-wattage heat source for livestock, poultry, or large reptile enclosures in barns, coops, or indoor spaces. |
|---|---|
| Wattage | 250W |
| Base Type | E26 |
| Voltage | 120V |
| Material | Plastic/Glass |
| Cord Length | 16 ft |
| Usage | Livestock/Poultry |
| Additional Features |
|
- Heavy-duty plastic grill and glass-reinforced body stand up to high temps without cracking, making it safer than basic heat lamps around animals.
- Compatible with standard 250W infrared bulbs and includes a reflector housing to focus heat downward where animals need it most.
- Long 16-foot cord with anti-chew wire lets you position the lamp where it works best without straining your setup.
- Bulb sold separately, so you’ll need to buy the right wattage bulb before you can use it.
- Indoor-only rating limits use in fully outdoor setups, even though it’s built tough.
- Some users report burn marks even with recommended bulbs, so you’ll need to watch placement and check it regularly.
8. Woods Aluminum Clamp Lamp Light

The Woods Aluminum Clamp Lamp Light offers multipurpose metal tasking with a 150W capacity and an adjustable ball-joint reflector that helps you direct heat distribution exactly where you need it. Its clamp mechanism grips surfaces up to standard desk thickness, and the six-foot cord includes a push-button switch for quick control.
While aluminum construction dissipates heat efficiently and the UL listing confirms lamp safety, you’ll want to match your heat lamp bulbs—whether infrared heat lamp or ceramic heat emitter—to the 150W max to prevent overheating and guarantee reliable performance in your setup.
| Best For | Hobbyists and DIY users who need an adjustable, budget-friendly clamp lamp for indoor plant lighting, workshop tasks, or art studio use with standard medium-base bulbs up to 150W. |
|---|---|
| Wattage | 150W |
| Base Type | E26 |
| Voltage | 120V |
| Material | Metal |
| Cord Length | 6 ft |
| Usage | Multi-purpose |
| Additional Features |
|
- Adjustable ball joint and 6-foot cord give you flexibility to direct light exactly where you need it
- Lightweight aluminum reflector dissipates heat well and the UL listing confirms it meets safety standards
- Affordable multi-use option that works in home offices, workshops, garages, or as supplemental grow lighting
- Clamp strength and overall build quality get mixed reviews, with some users reporting it feels flimsy for heavy-duty use
- Not ideal for larger or heavier bulbs like PAR38 LEDs—the fixture may not support the weight or heat output reliably
- Some customers have received dented or damaged units, suggesting inconsistent quality control during shipping
9. Chicken Coop Heat Lamp
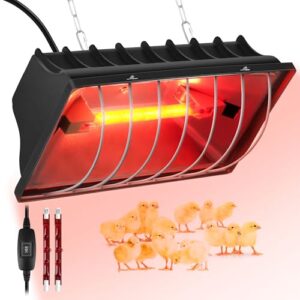
The POMINEL Chicken Coop Heat Lamp steps up for poultry-specific needs with dual infrared bulbs—175W and 250W—so you can adjust heat distribution as your flock health demands. Its ceramic base insulates well, the aluminum hood shrugs off weather, and the two-position thermostat switch lets you dial coop temperature without constant fiddling.
Lamp placement is simplified with 9.84 feet of cord and metal chains for secure hanging, while the guard protects your birds and reduces fire risk—chicken safety features that matter when you’re keeping chicks warm through winter nights.
| Best For | Poultry owners who need adjustable, weather-resistant heat for chicken coops and want dual-wattage infrared bulbs to customize warmth levels throughout winter. |
|---|---|
| Wattage | 175W/250W |
| Base Type | E26 |
| Voltage | 120V |
| Material | Ceramic/Aluminum |
| Cord Length | 9.84 ft |
| Usage | Poultry/Livestock |
| Additional Features |
|
- Dual-wattage infrared bulbs (175W and 250W) with a two-position thermostat let you fine-tune heat without swapping equipment
- Durable aluminum lampshade and ceramic base handle outdoor moisture while the guard protects birds from direct bulb contact
- Extra-long 9.84ft cord and included metal chains make hanging and positioning straightforward in coops of different sizes
- Replacement infrared bulbs can be tough to source and pricey when you need them
- Some users report switch failures and reliability hiccups that require monitoring or early replacement
- Not ideal for extreme outdoor weather—requires sheltered installation and regular checks to avoid moisture damage or overheating
Frequently Asked Questions (FAQs)
Can heat lamps be used outdoors in winter?
Yes, but only if they’re rated IP66 or higher for weatherproofing. You’ll need GFCI protection, higher wattage for cold weather, and regular checks to prevent moisture damage and fire hazards outdoors.
How much does running a heat lamp cost monthly?
Running a 100-watt heat lamp for 8 hours daily costs about $40–$80 monthly. A 250-watt model? You’re looking at $6–$15, depending on your local electrical rates and energy efficiency.
Are heat lamps safe to leave on overnight?
While heat lamps can technically run overnight, they’re safer with timers or thermostats. Continuous use raises fire risks from overheating wiring, so thermal monitoring and proper burn prevention features are essential for overnight safety.
Whats the lifespan of different heat lamp bulbs?
Standard incandescent infrared heat lamp bulbs burn for about 750 to 1,000 hours, while ceramic heat emitters offer 5,000 to 10,000 hours of steady heat output—ceramic wins on bulb durability and energy savings.
Do heat lamps work with dimmer switches or timers?
Most infrared heat lamps aren’t compatible with standard dimmer switches—they can flicker or fail. Timers work well for day-night cycles, but thermostatic control devices offer safer, more reliable temperature control than dimmers.
Conclusion
You’ve got the wattage charts, the safety checklist, the product lineup—everything heat lamps for beginners demand before you flip that switch. No more guessing whether your gecko’s basking spot hits 95°F or whether that clamp lamp will melt your coop rafters.
The difference between a thriving pet and a close call with a fire inspector comes down to deliberate choices: right bulb, correct distance, constant monitoring. Install it smart, run it safe, and your animals stay warm without keeping you awake at night.
- https://e28k54zpzqk.exactdn.com/wp-content/uploads/2023/10/turtle-basking-infographic.pdf
- https://www.sciencedirect.com/science/article/pii/S2351989423000793
- https://academichelpexpress.blog/2024/08/please-use-the-bulleted-points-and-the-rubric-below-to-guide-your-work-your-pa/
- https://onlinepubs.trb.org/onlinepubs/nchrp/cd-22/manual/v1appendixb.pdf
- https://x.com/godofprompt/status/1990526288063324577