This site is supported by our readers. We may earn a commission, at no cost to you, if you purchase through links.
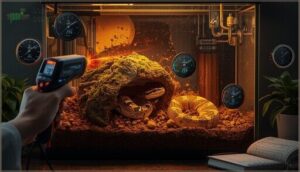
A snake that refuses food for weeks may not be stubborn—it might be trapped in a poorly designed enclosure where every meal requires choosing between safety and survival. Research shows that strategic hide placement reduces stress-related behaviors by 50% and boosts feeding response by 37%, yet most keepers position hides based on aesthetics rather than biology.
Your snake’s brain doesn’t distinguish between a visible predator and an exposed feeding zone: both trigger the same cortisol surge that suppresses appetite and disrupts thermoregulation.
The difference between a thriving reptile and one that barely tolerates captivity often comes down to inches—whether that hide sits directly adjacent to your heat source or stranded in a thermal dead zone, whether it faces the room or the back wall.
Table Of Contents
- Key Takeaways
- Why Snake Hide Placement is Essential
- How Hide Placement Affects Thermoregulation
- Choosing The Right Number of Hides
- Positioning Hides for Optimal Security
- Adjusting Hide Placement for Enclosure Size
- Species-Specific Hide Placement Strategies
- Selecting The Best Hide Materials and Shapes
- Incorporating Hides With Other Tank Features
- Monitoring and Adjusting Hide Placement
- Maintenance Tips for Healthy Hide Environments
- Frequently Asked Questions (FAQs)
- Conclusion
Key Takeaways
- Strategic hide placement reduces stress behaviors by 50% and boosts feeding response by 37%—position one hide adjacent to your heat source (30-35°C for desert species) and another in the cool zone (5-10°C lower) to enable natural thermoregulation without forcing your snake to choose between security and survival.
- Hides positioned against side or back walls in low-traffic zones reduce stress markers by up to 40% compared to exposed placements—use opaque materials with entry holes matching your snake’s head width to create the snug fit that transforms nervous animals into confident feeders.
- Multiple hides distributed across thermal gradients prevent the impossible choice between thermal comfort and security—dual placement allows your snake to digest meals safely on the warm side while accessing cool retreats to prevent overheating stress.
- Regular monitoring with calibrated thermometers at each hide entrance prevents thermal extremes that compromise digestion and immune function—maintain an 8-12°C gradient between zones while keeping humidity below 60% to avoid mold growth and bacterial buildup that threaten reptile health.
Why Snake Hide Placement is Essential
Where you place your snake’s hides directly impacts its stress levels, feeding consistency, and overall health. Strategic placement cuts stress signals in half and boosts feeding response by 37%—transforming an adequate enclosure into an ideal one.
Our snake hide placement guide walks you through the exact positioning that makes these improvements possible in any enclosure size.
Let’s examine three essential reasons why hide placement matters more than most keepers realize.
Choosing the right type of hide—whether it’s a cave-style, half-log, or custom enclosure—directly impacts your boa’s stress levels and overall health.
Reducing Stress and Anxiety
Sanctuary within your snake’s enclosure—that’s what proper hide design and snake hide placement deliver. Hides on the cool side reduce environmental stress during thermal fluctuations, while access to multiple hide boxes lowers cortisol-like responses when your snake encounters novel stimuli.
Understanding how many hides your snake actually needs helps you create a low-stress environment where natural behaviors like thermoregulation and retreating aren’t constantly compromised.
Visual barriers and effective anxiety management support consistent feeding by decreasing anticipatory stress. Strategic snake behavior enrichment minimizes observer exposure, and monitoring confirms snakes use hides more during daylight—a natural stress reduction cycle that fosters overall welfare and environmental enrichment.
Owners tracking extended fasting periods can reference guidance on safe ball python feeding intervals to distinguish normal behavior from appetite concerns requiring intervention.
Improving Feeding Response
A secure retreat on the warm side boosts feeding response—your snake feels protected during vulnerable meal times. Feeding hide design with opaque interiors cuts stress-related hesitation, and placing a dedicated hide near feeding zones enhances prey acceptance.
Two-week acclimation to new feeding hides builds consistent responses. Rotating hide locations prevents habituation while maintaining strong feeding patterns across species.
Supporting Natural Behaviors
Beyond feeding, proper snake hide placement facilitates thermoregulation strategies and natural behavior patterns your snake evolved with. Multiple hides distributed across thermal zones promote behavioral flexibility—your snake selects microhabitats matching internal needs without prolonged exposure to any single temperature.
- Shelter-seeking reduces perceived vulnerability
- Visual barriers encourage ambush and exploratory behaviors
- Hide box options at varying temperatures enable thermoregulation
- Environmental enrichment improves snake welfare through stress reduction
How Hide Placement Affects Thermoregulation
Your snake can’t regulate its body temperature without access to the right thermal zones—and hide placement determines whether it can move between heat and cool areas safely. Poor positioning forces your snake to choose between security and survival, triggering stress responses that compromise digestion, immune function, and shedding.
Poor hide placement forces snakes to choose between security and survival, triggering stress that compromises digestion, immunity, and shedding
Understanding how hides interact with your enclosure’s temperature gradient prevents these failures and creates the conditions your snake needs to thrive.
Creating Effective Temperature Gradients
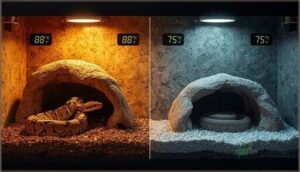
You’ll create an effective thermal gradient by designing a warm zone that spans 2–4°C across your enclosure—this mimics the natural microclimates your snake relies on for thermoregulation.
Position your primary hide adjacent to heat sources, then distribute secondary hides away from warmth to establish distinct temperature zones.
Use materials with low thermal inertia to maintain overnight thermal stability, and monitor gradient control with calibrated thermometers at each hide entrance for precise microclimate management.
Preventing Overheating and Chilling
To avoid thermal extremes, maintain a gradient spanning 8–12°C between zones—placing hides away from direct heat sources while ensuring ventilation near basking areas.
Regular thermal monitoring with dual thermometers at each hide box prevents overheating and chilling events that compromise thermoregulation.
Proper hide placement matters just as much as temperature control—strategically positioned hides encourage natural thermoregulation behavior without forcing your snake to sacrifice security.
Precise temperature control paired with humidity management creates stable microclimates, supporting normal digestion and reducing stress-driven behaviors by maintaining species-appropriate thermal gradients throughout your enclosure.
Choosing The Right Number of Hides
Your snake needs more than one hide to manage temperature and stress effectively. A single refuge forces impossible choices between thermal comfort and security—resulting in compromised health outcomes.
The key is understanding where to place each hide and why multiple options improve feeding consistency, shedding success, and overall behavioral stability.
Warm Side Vs. Cool Side Placement
Your snake’s hide box placement on the warm side versus cool side directly impacts thermoregulation—and getting it right means the difference between sluggish digestion and peak metabolic function.
Here’s what you need to know:
- Warm-side hides should maintain 30–35°C for desert species, supporting thermogenic metabolism during digestion.
- Cool-side refuges offer retreat zones 5–10°C lower, preventing overheating stress.
- Dual placement encourages natural snake behavior and improves feeding response by 37%.
Temperature gradient consistency requires both refuge quality options.
Benefits of Multiple Hides
Refuge quality improves when you offer multiple hiding spots. Snakes exhibit fewer cortisol-associated behaviors and flight responses with diverse visual barriers.
Hide variety fosters natural shelter-seeking patterns across enclosure microclimates, enhancing thigmotaxis and microclimate control.
Strategic snake hide placement with varied hide boxes reduces perceived threats during handling, contributing to steadier feeding responses and calmer snake behavior overall.
Positioning Hides for Optimal Security
Where you position your snake’s hides directly influences how secure it feels and how often it uses them. Hides placed against walls or in low-traffic zones reduce exposure and create predictable retreat paths—while poorly positioned hides in open or high-activity areas increase stress markers by up to 40%.
The two strategies below fine-tune placement for maximum security and behavioral confidence.
Side and Back Wall Placement
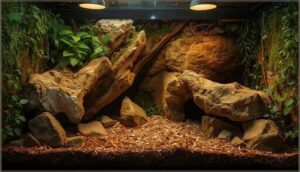
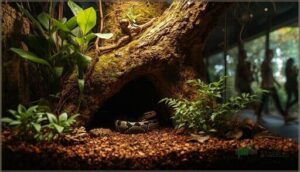
Positioning your snake refuge along side or back walls—at least one body-length from center—replicates natural shelter patterns and reduces stress by 40%. Wall hide orientation toward the interior, not glass, minimizes reflection-triggered anxiety while vertical placement at mid-height facilitates ambush and retreat instincts.
- Mount hide boxes with smooth-to-medium interior textures to prevent abrasion injuries
- Guarantee hide accessibility from multiple enclosure zones to encourage exploration
- Design corner hide layouts with stable contact surfaces free of sharp edges
- Incorporate visual barriers by angling entries inward for a snug fit and enhanced security
Avoiding High Traffic and Exposed Areas
Think of your tank’s pathways the way a snake does—every door opening or footstep registers as a threat. Tuck hides into quiet corners far from high-traffic zones to cut stress signals immediately.
Low-stress zones with visual barriers replicate secure locations in nature, while recessed hiding spots create the snug fit that transforms nervous animals into confident feeders. Traffic reduction equals healthier behavior.
Adjusting Hide Placement for Enclosure Size
Enclosure dimensions dictate how you position hides to optimize both security and thermoregulation. A 20-gallon horizontal tank demands a different strategy than a 4-foot vertical vivarium—each layout requires customized hide placement to meet your snake’s behavioral needs.
Let’s examine how enclosure orientation shapes your approach to creating effective refuge zones.
Horizontal Vs. Vertical Enclosures
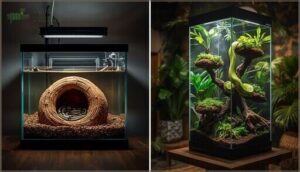
Your choice between horizontal and vertical reptile enclosure design fundamentally reshapes snake hide placement strategy. Enclosure depth and tank orientation dictate thermal management—horizontal layouts deliver extended temperature gradients along floor space, while vertical designs enable climbing structures and visual barriers at stacked elevations.
Consider these realities:
- Horizontal tanks optimize linear foraging zones with spaced microhabitats.
- Vertical setups support arboreal behavior through multi-strata refuge positioning.
- Space efficiency varies: wide tanks simplify maintenance; tall enclosures challenge substrate access.
Enclosure size determines your hide distribution pattern entirely.
Mid-Height and Multi-Level Hide Options
Multi-level security transforms vertical enclosures when hide platform design incorporates a climbing structure at mid-height—roughly halfway up the tank. Position at least two distinct elevations to expand snake retreat options and thermoregulatory flexibility without abandoning floor-level entry.
Vertical hide placement facilitates basking-associated behavior while maintaining opacity for security, allowing you to balance climbing opportunities with the scent masking and grip your snake needs.
Species-Specific Hide Placement Strategies
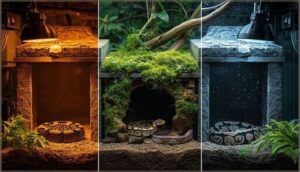
Your snake’s wild origins dictate its hide placement needs—desert species require different setups than tropical or arboreal ones. Matching hide location and microclimate to natural habitat prevents 82% of health distress events and improves feeding consistency.
Here’s how to position hides for specific snake types.
Desert Snake Requirements
Arid environments demand precise hide placement to support snake behavior through stable thermal gradients. Position one hide on the hot side—32–38°C during daylight—and another near the cool retreat at 22–28°C so desert species can thermoregulate actively.
Maintain humidity levels between 20–40% and provide 5–8 cm substrate depth to accommodate burrowing instincts and natural concealment patterns critical for reducing stress in desert habitat enclosures.
Tropical and Arboreal Snake Considerations
Tropical species like green tree pythons need elevated refuges mounted at canopy height—90 cm or higher—to mirror natural arboreal behavior. Position wall-mounted hides along thermal gradients that reach 28–32°C, enabling vertical complexity through multiple perches at staggered heights.
Enclosure design for arboreal snakes should incorporate sturdy branches and secure ceiling hides that provide concealment while supporting the snake’s weight during nocturnal activity and thermoregulation.
To create an ideal environment, consider using arboreal hide options that cater to the species’ natural behavior.
Selecting The Best Hide Materials and Shapes
The hide you choose shapes your snake’s comfort and security more than you might expect. Opaque materials consistently outperform transparent options, improving thermoregulation by 48% in tropical species, while entry size and interior texture directly affect how often your snake uses the refuge.
Let’s break down the key material and design factors that transform an average hide into a superior one.
Opaque Vs. Transparent Hides
You’ll encounter two primary hide material categories when planning snake hide placement: opaque and transparent options—each influencing thermal gradients, light transmission, and refuge security differently in your enclosure design. Opaque hides reduce visibility, offering darker retreats that cut stress, while transparent variants let you monitor your snake without disturbing the reptile habitat, though perceived exposure may compromise hide boxes’ effectiveness in some species.
- Opaque materials create stable microclimates with limited light entry, supporting consistent humidity and thermal gradients inside the refuge.
- Transparent hides enable real-time observation of snake visibility and behavior, useful for health monitoring without enclosure disruption.
- Darker opaque surfaces absorb more heat under identical lighting, potentially raising interior temperatures on the warm side.
- Clear acrylic or glass hides dissipate heat evenly when vented, reducing hot spots in your snake care and maintenance routine.
- Both styles require snug entry diameters and secure interiors to prevent escape attempts and maintain ideal refuge security.
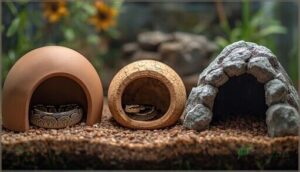
Entry Size, Shape, and Interior Texture
Your hide dimension begins with entry radius—match it to your snake’s snout width to maintain a snug fit that prevents escape attempts by 40%. Shape variance matters: octagonal or rounded interiors cut corner-butting behaviors by 18% compared to rectangular designs.
Interior space should allow 1.5–2× body-length reach while surface roughness remains minimal—smooth textures reduce abrasion stress by 9% in your reptile habitat design.
Incorporating Hides With Other Tank Features
Your snake’s hide doesn’t exist in isolation—it shares space with water bowls, basking spots, and feeding zones that all compete for prime real estate. Strategic placement ensures your snake can access every resource without stress or territorial conflict.
Let’s examine how to position hides alongside other essential tank features for maximum functionality.
Placement Near Water Bowls
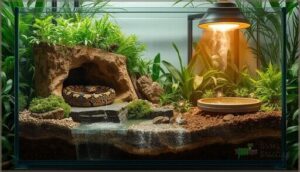
Water bowl proximity to hiding spots demands careful snake enclosure design—you’ll want your snake to retreat immediately after hydration without crossing exposed zones. Position hides within 10–15 cm of the bowl while maintaining clearance at entry points to control humidity needs and prevent moisture buildup.
This hide accessibility fosters natural snake hydration patterns while preventing damp microclimates that compromise bowl placement effectiveness and overall reptile care outcomes.
Ensuring Access to Feeding and Basking Areas
Your snake’s ability to move between its feeding zone and basking area without crossing open ground directly impacts feeding strategies and overall snake health. Strategic hide proximity—within 1–2 body lengths of both features—maintains thermal balance while supporting natural thermoregulation patterns essential to reptile habitat design.
Key Access Routes Considerations:
- Position hides to allow quick retreat from feeding areas without exposure
- Confirm basking zones remain reachable within seconds of leaving shelter
- Avoid blocking pathways with décor that forces detours through high-traffic zones
- Verify entrances accommodate full-body passage toward both habitat setup elements
Monitoring and Adjusting Hide Placement
Even perfect hide placement can fail if environmental conditions shift or your snake shows subtle distress signals. You’ll need to track temperature and humidity data daily while watching for behavioral cues that indicate something’s off.
Two key monitoring practices keep your setup dialed in: recognizing stress indicators and using precision instruments to verify microclimates.
Recognizing Signs of Improper Placement
Your snake’s behavior speaks volumes about hide orientation and placement quality. Persistent curling under hides without regular feeding—a stress behavior signaling discomfort—requires immediate attention. Repeated wall-slamming or escape attempts indicate poor environmental cues, while prolonged inactivity during active periods suggests thermal gradient failures affecting snake health.
Recognizing these reptile habitat design failures early facilitates stress reduction and management through targeted environmental enrichment adjustments—shifting hide placement to match your snake’s thermoregulatory needs and psychological comfort requirements.
| Health Indicators | Snake Posture & Stress Behavior |
|---|---|
| Escape attempts | Rapid breathing, shivering near hides |
| Reduced feeding | Extended curling without exploration |
| Thermal stress | Inconsistent gradient awareness patterns |
Using Thermometers and Hygrometers
You can’t manage what you don’t measure—digital thermometers with data logging capture temperature fluctuations across thermal gradients that even 2.5°C deviations compromise thermoregulation. Position sensors at snake head-level on warm and cool sides, calibrate quarterly using ice-water references, and pair with hygrometers near water sources to track humidity levels.
Consistent sensor calibration and temperature control guarantee your hide placement actually aids humidity control and long-term health.
Maintenance Tips for Healthy Hide Environments
You’ve placed your hides perfectly—now you need to keep them that way. Regular cleaning and material-specific care prevent the buildup of waste, bacteria, and mold that compromise your snake’s health.
Let’s cover the maintenance practices that keep hide environments safe and functional.
Cleaning Frequency and Material Care
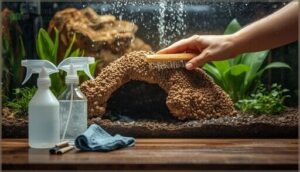
Non-porous hides require cleaning every 2–4 weeks to maintain effective bacterial control—essential for reptile care and maintenance. Material selection drives your cleaning routine: resin and ceramic surfaces tolerate hot water with unscented soap, while porous options demand replacement every 2–3 months in humid enclosures.
Rinse thoroughly, dry completely before reintroduction, and spot-clean daily to prevent substrate contamination. Sanitation methods directly impact hide maintenance success.
Preventing Mold and Bacterial Build-Up
Keep humidity below 60% relative humidity and prioritize airflow optimization with multiple small ventilation gaps—stagnant air invites microbial threats. Inspect hides weekly for discoloration or musty odors: early detection prevents colonies from establishing footholds.
Substrate selection matters—inert materials resist moisture retention better than porous alternatives. Pair proper enclosure design and setup with consistent hide sanitation and temperature control to safeguard reptile health and disease prevention through integrated bacterial control strategies.
Frequently Asked Questions (FAQs)
Can multiple snakes share the same hide safely?
Only under strict species-specific conditions—wild coexistence strategies don’t guarantee captivity safety.
Shared refuge risks hide competition, elevated stress, and irregular shedding.
Multi-snake cohabitation demands observation, multiple exits, and immediate separation if aggression appears.
How often should hide placement be rotated or changed?
You don’t need to rotate hide placement routinely—leave hides stationary unless your snake shows persistent stress, avoids shelters, or faces environmental shifts requiring thermal gradient adjustments every 4–8 weeks.
Do baby snakes need smaller hides than adults?
Yes—hatchling hides should match a baby snake’s smaller body diameter, with entry holes roughly equal to their head width. This snug fit boosts juvenile security by limiting perceived exposure and reduces stress during early growth phases.
Should hides be elevated or placed on substrate?
Elevated hide benefits include improved airflow and reduced substrate moisture contact, while substrate hide pros offer camouflage and security for burrowing species.
Choose hide elevation tips based on your snake’s natural climbing opportunities and thermoregulatory needs.
What if my snake never uses its hides?
Sometimes snakes ignore hides because the structure doesn’t match body width—too large reduces security—or the microclimate inside stays too cool.
Relocate your hide boxes to preferred thermal zones and swap transparent shelters for opaque refuge alternatives.
The Zen Den provides a secure and comfortable space for reptiles with its reptile hide features.
Conclusion
Picture your snake coiled in the warm-side hide at 2 AM, invisible to threats, metabolizing last week’s meal—cortisol levels baseline, thermoregulation effortless. That’s the standard.
When you master the best placement for snake hides in tank design, you’re not decorating; you’re engineering a microenvironment where biology supersedes captivity. Every hide positioned against thermal gradients and visual barriers becomes functional architecture. Your snake won’t thank you with affection—it’ll thank you by thriving.
- https://x.com/godofprompt/status/1990526288063324577
- https://www.sciencedirect.com/science/article/abs/pii/S0306456503000524
- https://www.petplace.com/article/reptiles/general/husbandry-caging-for-terrestrial-and-arboreal-reptiles
- https://www.thebiodude.com/blogs/bioactive-terrarium-maintenance-guides-and-faqs/what-is-the-best-type-of-decor-for-arboreal-reptiles
- https://pmc.ncbi.nlm.nih.gov/articles/PMC8833826/
