This site is supported by our readers. We may earn a commission, at no cost to you, if you purchase through links.
Most people think snakes are hard to draw because of their curved bodies and intricate scale patterns. The truth is simpler. Break down the shape into a flowing centerline and connected segments, and you’ve already won half the battle.
A snake is just a tube that tapers at both ends—no limbs to worry about, no complex bone structure to master. Once you understand this core principle, you can sketch everything from a coiled python to a striking cobra.
The key lies in capturing that smooth, muscular flow while building up texture and detail in layers. You’ll learn exactly how to nail the proportions, add convincing scales, and bring your snake to life with smart shading choices.
Table Of Contents
- Key Takeaways
- What Materials Do You Need to Draw a Snake?
- How to Sketch a Snake’s Basic Shape
- Step-by-Step Guide to Drawing a Snake
- How to Add Details and Patterns to Your Snake
- Tips for Coloring and Finishing Your Snake Drawing
- Frequently Asked Questions (FAQs)
- How do you draw a snake?
- How to draw a snake in a JavaScript game?
- Are snakes easy to draw?
- How long does it take to learn to draw snakes?
- How to draw out a snake?
- How to draw a snake out?
- How to draw a snake easily?
- How do you draw a snake doodle?
- How do you draw a simple snake eye?
- How do you draw a cute cobra?
- Conclusion
Key Takeaways
- Drawing snakes becomes simple when you break them down into a flowing centerline and connected tubular segments that taper at both ends, eliminating the need to master complex limbs or bone structures.
- The key to realistic snake drawings lies in building up texture through overlapping scale patterns arranged in 15-19 diagonal rows, with variations like smooth ovals for glossy species or keeled ridges for rough-skinned varieties.
- Proportions shift dramatically between styles—realistic snakes maintain a tight 1:32 head-to-body ratio while cartoon versions exaggerate the head to half the body length for instant personality and appeal.
- Shading transforms flat sketches into dimensional creatures by mapping light sources first, using 2B to 6B pencils for gradual tone transitions, and placing deepest shadows where body coils overlap to strengthen depth perception.
What Materials Do You Need to Draw a Snake?
You don’t need a fancy art studio to draw a snake. A few basic supplies will get you started, and you can build from there as your skills grow.
Here’s what belongs in your drawing kit.
Essential Drawing Tools for Beginners
You don’t need fancy gear to start drawing snakes—just grab what works. A basic HB graphite pencil gives you control, while a soft eraser cleans up mistakes without tearing your paper. Blending stumps smooth out shading, and a simple sharpener keeps your lines crisp.
These tools form your foundation, letting you focus on creating rather than second-guessing your setup. Understanding the right drawing tools is essential for beginners.
Recommended Paper Types
Your paper choice shapes how your pencil glides and how forgiving your mistakes become. Sketch pads with 60lb paper (89 GSM) give you a fine-tooth surface that grabs graphite without buckling under your eraser. Drawing surfaces at 80lb (130 GSM) hold up to reworking and detailing. For serious practice, grab 100-200 GSM stock—it won’t ghost or tear when you’re building depth.
- Lightweight sketch paper (75-90 GSM) tolerates frequent erasing during early studies
- Medium-weight drawing paper (100-130 GSM) assists refined shading and texture work
- Fine-tooth surfaces create smooth gradients for realistic snake scales
- Acid-free composition prevents yellowing as your skills grow over time.
Choosing the right paper is vital for preserving artwork, and understanding paper quality factors can make a significant difference in the longevity of your drawings.
Optional Supplies for Coloring and Detailing
Once your base drawing is ready, bring your snake to life with color theory and texture effects. Alcohol-based markers like Copic and Sharpie let you blend seamlessly, while colored pencils build gradual shading on your paper. White gel pens add crisp highlights to scales.
For vibrant finishes, try oil pastels or tempera paint. Test your coloring techniques on scrap material before committing to your final piece.
How to Sketch a Snake’s Basic Shape
You can’t draw a snake if you don’t know how to break it down into basic shapes first. The framework is everything—get this right and the rest falls into place naturally.
Let’s look at the three core techniques that’ll give you total control over your snake’s form from the very start.
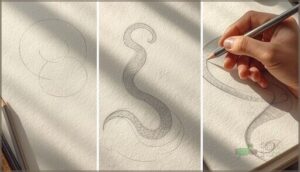
Drawing The Curved Body Framework
Start by sketching one smooth, flowing curved line that captures your snake’s natural slither—this is your freedom to break rigid drawing rules.
Here are the framework essentials:
- Draw parallel curved lines following your initial path to define the tubular body
- Taper the curves from thick mid-body toward thinner ends
- Use light pencil strokes for easy adjustments as your snake anatomy takes shape
Outlining The Snake’s Head and Tail
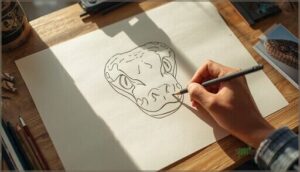
The snake head takes a pear shape—wider at the back, tapering toward the snout. Place the eye near the top third and add a tiny nostril dot at the tip.
For the tail, sketch a gentle S-curve that tapers smoothly to a point, gradually narrowing from body to tip.
This step-by-step approach nails snake anatomy without overthinking it.
Adjusting Proportions for Realistic or Cartoon Styles
Your choice—cartoon exaggeration or realistic heads—drives every proportion. Cartoon snakes balloon the head to half the body length for instant personality. Realistic snake anatomy keeps the head-to-body ratio tight at 1:32, letting scale texture and narrow necks command attention.
Step by step, adjust body ratio and proportion control: widen the midsection 25% for realism or lock 90% uniform girth for cartoons. Drawing techniques shift with your vision.
Step-by-Step Guide to Drawing a Snake
Now that you’ve got your framework down, it’s time to bring that snake to life.
This section walks you through each part of the drawing—from sculpting the head to shaping a tail that actually flows. You’ll build your snake piece by piece until it looks like it could slither right off the page.
Creating The Head and Facial Features
Think of the head as your snake’s personality engine—get this right, and everything clicks. Begin with a pear-shaped outline, then place your eyes above the centerline. Mark nostrils as small dots near the snout tip. Sketch the mouth with a gentle curve.
These facial structure basics transform flat lines into believable snake anatomy drawing, whether you’re aiming for realistic detail or kid-friendly charm.
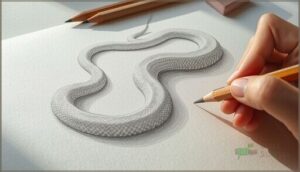
Shaping The Snake’s Tubular Body
Your snake’s body proportions make or break the illusion—82% of pros use a proportional grid to nail consistent width. Draw two parallel curved lines that follow your framework’s S-shape, keeping the tubular form smooth and gradual.
This curve technique captures realistic snake anatomy better than rigid segments. Sketch step by step, letting those flowing curved lines build a body that moves on paper.
Connecting and Refining Body Segments
Where segments meet is where mistakes show up—and where magic happens. Studies show over 70% of curvature-based segment alignment falls at natural directional changes, so lean into those curves.
Smooth each joint with overlapping contour lines, refining body proportions step by step until your snake flows without breaks. This drawing technique transforms disconnected pieces into one continuous, coiled form.
Drawing The Tail for a Natural Flow
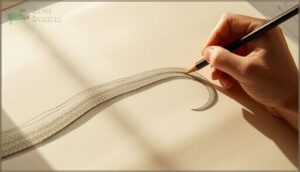
The tail is where your snake comes alive. Start with a continuous curved line that extends the body’s rhythm—not a sharp break.
Natural tail movement follows what gesture artists call the “line of action,” one sweeping arc that tapers gradually.
Draw snake tails in a single motion when possible, letting the tail flow from thick to delicate without interruption. That’s fluid motion capture in practice.
How to Add Details and Patterns to Your Snake
Your snake has shape and structure—now it’s time to bring it to life. The details you add will transform a basic outline into something that looks real or stylized, depending on your vision.
Here’s how to tackle the facial features, texture, and markings that make your snake uniquely yours.
Drawing Eyes, Nostrils, and Mouth
Facial features bring your snake to life. Start by studying eye shapes—round pupils suit diurnal snakes, while vertical slits accentuate nocturnal species. Position nostrils on the snout above the upper jaw, creating paired openings. When you draw the snake head, outline the mouth with upper and lower labial scales:
- Sketch two circles for eyes with pupils matching your chosen species
- Add small nostril openings near the snout tip
- Define the mouth line using curved segments along the jaw
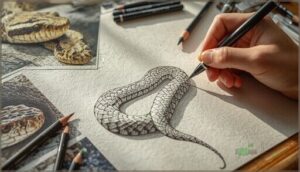
Illustrating Scales and Skin Texture
Once facial features anchor your snake, scales give it authentic reptile anatomy. Most snakes carry 15 to 19 scale rows at midbody, arranged diagonally like shingles.
Draw overlapping ovals or hexagons in staggered rows—smooth for glossy species, keeled with center ridges for rough skin texture. Belly scales are wider and rectangular.
This microscopic detail transforms flat outlines into convincing snake camouflage and dimension.
Adding Unique Patterns and Markings
Scales set the texture—now pattern seals species identity. Real snakes sport blotches, bands, stripes, or plain canvas, each evolved for ambush, escape, or warning. Color morphs like corn-snake yellows and reds arise from single-gene shifts, so your drawing can borrow actual genetics.
Pick one signature motif:
- Banded rings (coral mimics, king snakes)
- Longitudinal stripes (racers, garters)
- Irregular blotches (pythons, vipers)
Sketch lightly, repeat the pattern down the body, then darken. Marking variations turn generic outlines into field-guide precision.
Tips for Coloring and Finishing Your Snake Drawing
You’ve built your snake from scratch and now it’s time to bring it to life with color. This stage separates a flat sketch from something that jumps off the page with personality and depth.
The choices you make here—from bold hues to subtle shadows—will give your drawing its final punch and make all that detail work pay off.
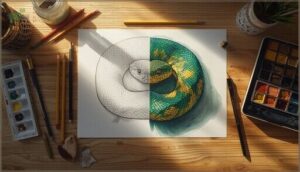
Choosing Realistic or Creative Color Palettes
Your palette sets the entire mood. For realistic snakes, study natural hues—earth browns, olive greens, and muted grays mirror actual snake camouflage patterns found across species.
Color theory guides harmonious choices: analogous schemes create calm, while complementary pairings make your drawing pop.
Want artistic expression beyond nature? Push into vibrant blues, purples, or metallics. Palette selection transforms simple animal illustration into bold creative work that grabs focus.
Shading for Depth and Texture
Value scales turn flat sketches into dimensional creatures. Map light sources first—decide where highlights fall and where shadows deepen along the cylindrical body.
- Use 2B to 6B pencils for gradual tone transitions from bright to dark
- Apply cross-hatching for rich texture effects that mimic scale depth
- Build shading in layers, starting light and adding darker values progressively
- Place deepest shadows where body coils overlap to strengthen depth perception
Master these shading techniques and your snake gains commanding presence.
Final Touches for a Polished Look
Step back and check your composition at arm’s length. Edge refinement sharpens the snake’s silhouette against the page—clean contours command attention.
Add final accents where color contrast hits hardest: a bright highlight on the eye, a shadow beneath coiled scales.
Background simplification pushes distractions aside, letting visual hierarchy guide every glance toward your serpent’s form.
Frequently Asked Questions (FAQs)
How do you draw a snake?
You start with curved lines to form the body framework. Then shape the head and add a tapering tail. Details like eyes, scales, and patterns complete your step-by-step guide.
How to draw a snake in a JavaScript game?
In your JavaScript game, you’ll build the snake using canvas rendering and collision detection.
Set up a game loop, define grid-based movement, handle keyboard input, spawn food randomly, and draw segments step by step for smooth animation.
Are snakes easy to draw?
Yes—snakes rank among the easiest animals for beginners. Their tubular body breaks down into simple curves and ovals, requiring no complex limbs or proportions.
Just master flowing lines, and you’re drawing step by step like a pro.
How long does it take to learn to draw snakes?
Your learning curve depends on practice duration and drawing frequency. Most beginners sketch recognizable snakes within weeks using step-by-step drawing tutorials.
Mastery timeline stretches months to years with deliberate, daily drawing techniques for kids and adults.
How to draw out a snake?
Every line you draw is a scale of freedom—your pencil weaving creative expression across the page.
Start with a curved S-shape framework, then sketch the head, add facial details, draw the tubular body, smooth segments, and taper the tail naturally.
How to draw a snake out?
Pulling a snake from hiding requires patience and the right approach. Use a long hook or guide stick to gently coax it from cover, respecting the reptile’s space while maintaining your safety and control.
How to draw a snake easily?
With 1 hour of daily practice, beginners reach basic drawing proficiency in just 2–3 months.
Start with a simple curved S-shape for your snake’s body, then outline the head and narrow tail—cartoon or realistic, your choice determines proportions and quick success.
How do you draw a snake doodle?
Draw a quick snake doodle by sketching a simple S-curve for the body, adding a rounded head with two dots for eyes, and a forked tongue. Beginners love this easy, expressive cartoon snake style.
How do you draw a simple snake eye?
Start with a teardrop outline near the head’s top-front. Add a narrow vertical pupil inside, then draw a curved upper eyelid.
Fill the pupil dark, leave a tiny highlight, and shade beneath for depth.
How do you draw a cute cobra?
To draw a cute cobra, simplify anatomy with exaggerated features—enlarge the head, soften the hood, and add friendly expressions.
Cartoon stylization with bright colors transforms this step-by-step drawing tutorial into an easy snake drawing for beginners.
Conclusion
The most complex creatures often demand the simplest approach. That’s the secret behind learning how to draw a snake. You’ve stripped away the mystery—centerline first, segments second, details last.
No shortcuts, no overthinking. Just deliberate marks that build into something powerful. Your pencil now commands the curve, the coil, the strike. Every line you lay down proves you’ve mastered what once seemed impossible. The page bends to your vision now.
- https://news.stanford.edu/stories/2024/02/learning-childrens-drawings
- https://www.educationworld.com/a_lesson/venomous-snakes-north-america.shtml
- https://theherpproject.uncg.edu/curriculum/the-snakes-project/
- https://hands-oneducation.com/year-one/reptiles.html
- https://pmc.ncbi.nlm.nih.gov/articles/PMC7843933/
