This site is supported by our readers. We may earn a commission, at no cost to you, if you purchase through links.
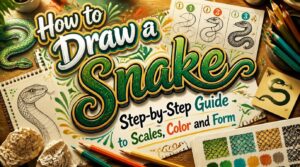
Most snake drawings fail for one reason: a stiff, straight body that looks more like a garden hose than a living animal. The magic lives in the curves. Snakes move in smooth S-shapes, and once you understand that flow, everything else falls into place.
This guide breaks the whole process down into small, manageable steps. You’ll start with basic shapes, build a flexible body structure, then layer on scales, patterns, and color until your snake looks ready to slide off the page. No fancy art degree required, just a pencil and a little patience.
Table Of Contents
Key Takeaways
- Everything starts with a loose S-shaped spine, since that curve is what makes a snake look alive instead of stiff like a garden hose.
- Build your snake in layers: basic shapes first, then a tubular body, then coils, then scales and pattern, then color and shading.
- Get the head right with lidless almond eyes, a forked tongue, and correctly placed nostrils, since the face is what really sells the drawing.
- Keep patterns and scale rows curving along with the body’s coils rather than sitting flat, so the whole thing reads as one believable, textured surface.
What Supplies Do You Need to Draw a Snake?

Before you sketch a single scale, let’s get your tools sorted. The right supplies make every curve and coil easier to draw. Here’s what you’ll want on hand.
A good set of feeding tongs made for small apartment snake setups keeps mealtime tidy and gives you the steady, close-up control you’ll want when studying scale patterns for your sketch.
Light Pencil and Eraser
Grab a 2H or HB pencil first. These give you light, erasable lines perfect for mapping the head and spine without digging into your paper.
For erasing, keep both a kneaded eraser and a plastic one handy. The kneaded type lifts graphite cleanly and shapes into points for tight scale details, while plastic erasers handle full corrections.
Smooth Drawing Paper
Once your pencil’s picked, paper choice matters just as much. Go with smooth drawing paper, hot pressed or silk finish, for the best pencil glide and clean curved lines along the spine and coils.
Its fine surface offers real texture contrast against your marks, resists fraying, and keeps ink compatible for later outlining. This smoothness comes from heated cylinders during production, which press the paper’s tooth down for precise, clean marks. Standard pads work fine, but heavyweight bristol adds durability if you’re pressing hard.
Fineliner for Clean Outlines
Once your pencil sketch feels solid, it’s time to lock in those lines with a fineliner. Pick one with a 0.05mm to 0.3mm tip for scale detail and smooth curves. Water based, pigment ink gives clean, consistent flow with barely any bleed.
Test on your paper first, smooth surfaces prevent smudging and keep your serpent illustration crisp from head to tail.
Colored Pencils or Markers
Once your ink dries, it’s time to think about color. Colored pencils give you fine control, building up scales layer by layer with soft pressure.
Markers dry fast and deliver bold, saturated color with smooth blending, great for vivid corn snake reds or yellows.
Either works, pick based on the texture and finish you want.
Snake Reference Photos
A good photo teaches you more than memory ever will. Pull up real reptile reference images showing habitat context, forests, deserts, dawn light. Notice how lighting effects change scale texture, and how species variation shows up in color and pattern. Study close-up angles of the head, then wide shots of coiled bodies. These details guide every curved line in your drawing.
How Do You Draw a Snake Step by Step?
Every great snake drawing starts with a few basic shapes. Once you get the framework down, the rest just falls into place. Here’s how to build one step by step.
Draw The Head Guide
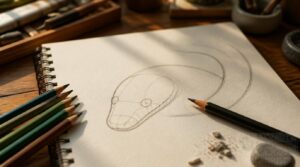
Every good snake starts with a simple oval, nothing fancy. Draw a rounded teardrop shape for the head, tapering toward the snout. Add two small circles above that oval for eye placement, sitting slightly above the midpoint.
Once the sketch is done, add a small forked line near the snout to suggest the flicking tongue snakes use to sense their environment—curious about the science behind it? Check out why snakes yawn and flick their tongues for a deeper dive.
Then draw a curved shape that overlaps the circle a little at the right. This acts as a framework for the snake’s body, whether you’re going cartoon or realistic.
Sketch an S-Shaped Spine
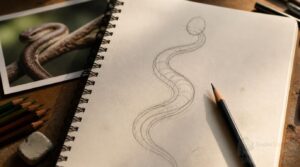
Once your head guide is set, it’s time to give your snake some flow. Sketch a light S-shaped spine down the page, three gentle curves stacked like vertebrae aligning naturally.
Keep the bend soft near the head, wider through the middle, for real curved body shaping. This natural S-curve sketching step guides every coil you’ll add next.
Build The Tubular Body
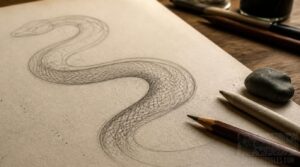
Now thicken that spine into a real body. Follow your S-curve with two parallel lines, keeping consistent body width throughout the midsection.
Think of it like drawing complementary body halves, mirrored curves that trace each other’s rhythm. Widen slightly at the shoulders, then taper gradually. This overlapping shapes technique builds smooth, scaly tubular bodies ready for coiling next.
Add Overlapping Body Coils
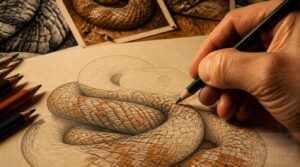
Coiling is where your snake starts feeling alive. Draw curved lines that loop over the tubular body, letting each coil offset slightly along the spine.
Tuck edges under neighboring loops, add shadow between coils for depth, and taper coil lines toward inner curves. Keep spacing consistent, following the body’s natural rhythm for a detailed snake illustration.
Taper The Body Into Tail
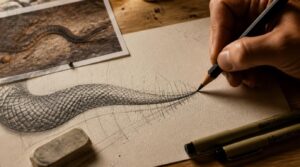
Watch where your spinal curve starts to straighten, that’s your cue to begin tail tapering. Reduce body width in small, even steps rather than one sharp cut.
Keep the taper aligned with the spine so curves stay smooth. Texture lines should converge slightly, and the tail proportion should land between a quarter and a third of total length.
How to Draw a Snake’s Head and Face
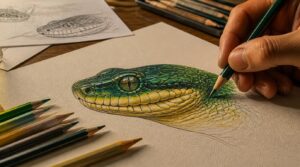
The head is where your snake really comes to life. Get the face right, and the whole drawing feels alive. Here’s how to shape it, piece by piece.
Shape The Snout and Jaw
Start narrowing that pear shape into a proper snout. Snout shape varies by species, some rounded, some pointed, so pick your reference and follow it.
- Curve the jaw smoothly into the neck
- Angle the mandible slightly downward
- Keep the mouth line curving upward at the rear
Mark nostril placement near the tip, and let the jaw hinge suggest a wide, silent opening.
Position Lidless Eyes Correctly
With the snout shaped, it’s time to place the eyes. Snakes have no eyelids, so draw a clean almond shape, wider in the middle, resting right on the eye socket.
Keep eye placement symmetrical, one eye width apart, sitting in the upper third of the head. Add a round pupil centered in the socket for balanced, believable anatomy.
Add Nostrils and Mouth
Two small dots above the mouth line finish the face. Place the nostrils close to the snout tip, sitting just above where the jaw curves.
Draw the mouth as one curved line sweeping toward the jaw. Keep it closed for now, no need to reveal the tongue yet. That detail’s coming next.
Draw The Forked Tongue
Now open that mouth just a touch and let the tongue slip out. Draw two thin curved lines from the lips, splitting near the tip into a forked tongue.
This isn’t just decoration, real snakes use it to taste the air, guiding scent to sensors in the roof of their mouth. A little flick brings your snake to life.
A flicking tongue tastes the air, guiding scent to sensors that bring a snake to life
Adjust Cartoon or Realistic Features
Now decide which path your snake takes. Cartoon snake illustration uses a bigger head, bold eyes, and thick border lines. Realistic snake art keeps true proportions, fine texture, and softer shading.
Key differences:
- Head-to-body ratio
- Eye size and expression
- Border line thickness
- Scale texture detail
- Lighting and color mood
How to Draw Snake Scales and Patterns
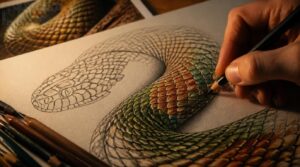
Your snake has a body now, but it still looks bare. Scales are what bring it to life and give it that reptile feel. Here’s how to build them up, step by step.
Map Back and Belly Scales
Every snake wears two different coats at once. Back scales run the spine in a shield-like pattern, while belly scales grow larger and rectangular for smooth ground contact.
| Back Scales | Belly Scales |
|---|---|
| Keeled or smooth texture | Flat, rectangular shape |
| Overlap at an angle | Align in parallel rows |
| Higher pigment, bold pattern | Paler, reflects heat |
That contrast drives camouflage and defines your snake’s silhouette.
Create Curved Scale Rows
Once your body outline sits ready, it’s time to bring it to life with scales. Draw curved lines that hug your snake’s contour, keeping row alignment even along the spine. Vary tilt slightly for natural scale variation.
Taper rows near joints, add gentle shading beneath each curve, and let edge scales taper toward the belly for realistic depth.
Add Bands, Blotches, or Diamonds
Pick your pattern, since it defines your snake’s whole personality. Bands wrap around like stripes, blotches sit as irregular ovals, diamonds stack in a checkerboard row.
- Bands: widen midbody, narrow at head and tail
- Blotches: larger centrally, taper outward
- Diamonds: lighter centers, darker edges
Choose contrasting colors so the pattern actually pops against your base coat.
Follow Body Curves With Patterns
A flat pattern kills the illusion, so let your marks bend where the body bends. Keep pattern flow continuity by drawing curved lines that hug each coil’s radius.
Tighten spacing on inner curves, widen it on outer ones. This spacing adjustment, paired with careful curved scale alignment, blends pattern and coil into one believable, textured surface.
Shade Overlapping Coils
Where coils overlap, shadow does the heavy lifting. Pick one light source and stick with it.
Draw curved lines along each coil shadow edge, darker where coils press together, softer near the tail. Mix with gentle gradient transitions, never a hard line.
Add color texture variation, cooler shadows, warm highlights, for real depth through layering across your coiled body.
How to Color and Finish a Snake Drawing
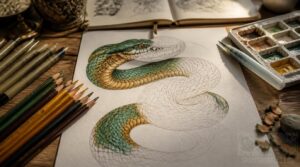
Your snake has shape and pattern now, so it’s time to bring it to life with color. This last stretch is where all your hard work really pays off. Here’s how to finish it strong, step by step.
If you’re still deciding on a design, check out this guide to drawing a cute snake for extra inspiration on patterns and coloring techniques.
Choose Species-Inspired Colors
Before grabbing any pencil, decide what species inspires your snake. Natural habitat palettes matter most: desert dwellers wear sandy tans, jungle species flash vibrant greens, and rocky mountain snakes match gray-brown with rust flecks.
Want realism? Study camouflage color matching. Feeling bold? Try warning signal hues like coral snake’s red-yellow-black bands, nature’s way of saying "back off.
Layer Colors for Texture
Once you’ve settled on colors, don’t slap them on flat. Real scales catch light in tiny, uneven ways, so build them with thin transparent layers instead of one solid coat.
Start light, then add mid tones gradually. Try a cooler shade beneath warm highlights for separation, and soften edges so color shifts look natural rather than blocky.
Add Highlights and Shadows
Now pick your light source and stick with it. Highlights go on raised scales and ridges facing that light, leaving tiny gaps for reflected sparkle.
Shadows fall opposite, softer on curves, sharper at scale edges. Layer midtones between them, soften edges gently, and squint often to check your value balance reads as one light source.
Erase Unwanted Guidelines
Once your colors and shading feel solid, it’s time to clean up. Grab a clean white eraser and lift stray graphite lightly, no smudging. Rotate your paper for tight spots between coils. Use gentle strokes so you don’t damage the paper surface. Step back often to check that all guidelines have vanished naturally.
Strengthen Outlines and Final Details
Now retrace every line with your fineliner, pressing evenly for line weight consistency. Bold the outer silhouette, keep inner scale lines lighter. This detail gradation adds depth without clutter.
Clean stray marks, sharpen corners, then step back for a final silhouette check. A crisp outline turns your reptile illustration from sketch into finished art.
Frequently Asked Questions (FAQs)
How to draw a super snake?
Picture lightning frozen mid-strike: that’s your super snake. Draw exaggerated curves through the spine, a lively strike pose, an almond-shaped eye, big back scales, and a forked tongue stretched mid-length for fierce, mythical energy.
How to draw out a snake?
Sketching an initial outline starts with a curved backbone guide. From there, shape the head, adjust body coiling with tapered curves, detail facial features, add scale patterns, then finish with layered color for a lifelike snake drawing tutorial.
How to draw a biggest snake?
Think of a tree trunk tapering into rope. Keep a thick midsection, small head, and gradual tail tapering. Curve overlapping coils for depth, align scale patterns along the spine, and stretch the pose to show off that impressive length.
How to draw a reptile snake?
Start with basic shapes, then build snake anatomy: tapered head, S-shaped spine, tubular body. Add coiling, scale pattern, forked tongue, and shading for depth. This step by step drawing method turns any reptile drawing into a lifelike, confident sketch.
How do you draw a snake?
Coax an S-curve to life with flowing lines, then build the coil depth with overlapping curves. Shape a tapering head and tail, add lidless eyes, forked tongue, and scale patterning for a lifelike reptile illustration.
How to draw a snake in a JavaScript game?
Here the snake becomes an array of grid coordinates. Canvas collision detection checks the new head against walls and body segments, snake movement logic shifts each tick, and food spawning mechanics trigger growth, scoring, and rendering updates.
Are snakes easy to draw?
Yes, snakes are one of the easiest animals for beginner drawing lessons. No limbs or tricky proportions, just flowing curves and simple shapes. Master the S-curve and gesture practice, and you’ll sketch snakes step by step with real confidence.
How long does it take to learn to draw snakes?
Rome wasn’t built in a day, and neither is a confident snake sketch. Beginners see recognizable results in 2 to 4 weeks; true mastery of patterns and shading can take 6 to 12 months of steady practice.
Starting with a docile, well-handled species like a corn snake or ball python builds the steady confidence sketch artists need, and this beginner’s guide to gentle reptile handling shows how to observe them safely up close.
How to draw a snake out?
Getting a real snake into the open takes patience, not force. Use a long hook or guide stick, coax gently from cover, and respect its space.
On paper, though, "drawing a snake out" means the initial shape setup, that first curved outline guiding your whole coiling body.
How to draw a snake easily?
Keep it simple: one curved S-shape for the body, a rounded head, and a tapering tail. This quick outline method skips fussy detail, giving beginners an easy, confident first sketch in minutes.
Conclusion
Feel that curve come alive under your pencil? That’s the moment learning how to draw a snake stops feeling like instructions and starts feeling like art. Every S-curve, scale row, and shaded coil you practiced builds toward one thing: confident, natural motion on paper. Your snake shouldn’t just sit there, it should look ready to move.
Keep sketching, keep observing real snakes, and trust your hand. The slither is yours now, earned one patient curve at a time.