This site is supported by our readers. We may earn a commission, at no cost to you, if you purchase through links.
Breeding corn snakes isn’t something you can rush into on a whim. Your female needs at least two years of maturity and a solid 300 grams of body weight before she’s ready to carry eggs. Your male needs proper brumation—that winter cooldown period that flips the biological switch for reproduction. Miss these markers, and you’re setting yourself up for failed clutches or health complications.
The corn snake breeding timeline from start to finish spans roughly nine months when you factor in pre-breeding prep, brumation, mating, incubation, and hatching. Each phase has specific temperature requirements, feeding protocols, and timing windows that directly impact your success rate.
Understanding this timeline helps you coordinate everything from nutrition schedules to incubator setup, ensuring your snakes stay healthy and your hatchlings emerge strong.
Table Of Contents
Key Takeaways
- Breeding corn snakes requires careful preparation, including waiting until females reach at least 2 years old and 300 grams before breeding, while males need proper brumation to trigger their reproductive cycle.
- The complete breeding timeline spans roughly 9 months from pre-breeding preparation through brumation (6-12 weeks at 50-55°F), mating, egg incubation (60-65 days at 82-84°F), and hatching.
- Genetic diversity is critical—track pedigrees for three generations to keep inbreeding coefficients below 6.25% and avoid pairing related snakes to prevent birth defects like kinked spines or eye abnormalities.
- Hatchlings need individual enclosures with proper temperature gradients (88-92°F warm side, 75-82°F cool side) and should be fed pinkie mice every 5-7 days, with weight gain of 2-5 grams monthly indicating healthy development.
Preparing Corn Snakes for Breeding
Breeding corn snakes successfully starts long before you pair your animals. You need to make smart choices about which snakes to breed, when they’re ready, and how to prepare their bodies and environment.
Let’s walk through the essential steps that set the stage for healthy offspring.
Selecting Healthy, Unrelated Breeding Pairs
Selecting healthy snakes starts with a visual health assessment—clear eyes, smooth skin, and a body condition score of at least 3 out of 5. Disease screening through PCR testing and a 30-day quarantine protects your breeding program.
Genetic compatibility matters: track pedigrees for three generations to keep inbreeding coefficients below 6.25%. Understanding breeding pair compatibility can increase the chances of successful breeding and healthier offspring.
Ethical breeding means choosing unrelated pairs, maintaining genetic diversity, and excluding any candidate showing hereditary defects.
Breeding Age and Sexual Maturity Requirements
Once you’ve confirmed good genetics, the next checkpoint is age and development. Sexually mature snakes aren’t just about calendar time—they need the right body condition.
Here’s what you need for breeding corn snakes:
- Minimum Breeding Age: Wait until females are 2 years old; males mature slightly earlier at 18-24 months
- Weight Requirements: Females should weigh at least 300 grams before mating corn snakes
- Length Standards: Aim for 3 feet minimum to reduce reproductive risks
- Seasonal Breeding Timing: Plan for spring mating after brumation
- Lifespan Fertility: Both sexes breed successfully for years when properly conditioned
Choosing corn snakes under these thresholds invites complications—smaller clutches, weaker hatchlings, and health strain on immature females. The Okeetee region is well known for its corn snake population.
Importance of Genetic Diversity and Avoiding Inbreeding
Age and weight are only half the equation—genetics drive the long-term health of your offspring. Inbreeding risks emerge when you pair closely related snakes, increasing the chance of birth defects like kinked spines or eye abnormalities.
Outcrossing benefits your program by introducing new genetic combinations, boosting population resilience and reducing harmful recessive traits.
Genetic screening helps you avoid pairing carriers of mutations affecting pattern or health.
Nutrition and Feeding Schedules Before Breeding
Once you’ve confirmed genetic health, you need to build your female’s energy reserves through strategic nutrition. Ideal prey sized at 1–1.5 times her body width, fed every 14–21 days, prevents obesity while supporting follicle growth.
Your feeding schedule should include:
- Whole frozen-thawed rodents totaling 10% body weight per session
- Calcium and multivitamin supplementation every second meal
- Fresh water daily for proper hydration practices
- Monthly weight monitoring to track pre-laying care progress
Females approaching 300–350 grams show breeding readiness.
Setting Up Optimal Habitat Conditions (temperature, Humidity, Lighting)
With proper nutrition in place, you’ll need to dial in your habitat setup. Temperature gradients from 75°F to 85°F with a basking spot at 88–90°F create essential thermoregulation zones. Humidity control stays at 65–75% using moisture-retentive substrates and daily misting.
A 12-hour lighting cycle regulates breeding behavior, while digital monitoring tools track these parameters precisely.
Habitat enrichment like climbing branches reduces stress during courtship.
Brumation and Breeding Initiation
Brumation is the key that unlocks your corn snakes’ breeding instincts, mimicking the natural winter cycle they’d experience in the wild. Without this cooling period, your snakes won’t breed successfully, so getting the process right is non-negotiable.
Brumation mimics the natural winter cycle that triggers breeding instincts in corn snakes, making it essential for successful reproduction
Let’s walk through each step, from preparing your snakes before brumation to recognizing when they’re ready to mate.
Pre-brumation Preparation and Gut Clearance
Before your corn snakes enter brumation, you must stop feeding them two to three weeks in advance. This fasting duration allows complete gut clearance, preventing dangerous intestinal blockages during the cooling period.
Offer lukewarm water baths to stimulate final bowel movements and maintain gut health.
Watch for behavioral changes like increased hiding as metabolism slows. Only proceed with the brumation process once their digestive systems are completely empty.
Brumation Process and Temperature Management
Once you’ve cleared their digestive systems, begin the brumation process with gradual changes in temperature control. Lower the enclosure setup incrementally from room temperature to 50-55°F over two weeks using reliable monitoring tools like digital thermometers. This cooling method mimics natural seasonal shifts and meets essential brumation requirements.
Maintain this stable range for 6-12 weeks while adjusting light cycles to 10 hours daily.
Hydration and Monitoring During Brumation
Even during winter cooling, hydration remains essential for snakes. Check your corn snake weekly for dehydration signs like wrinkled skin or sunken eyes. Keep fresh water available throughout brumation, though your snake likely won’t drink often.
Maintain humidity levels between 65-75% to meet brumation requirements. Consider brief lukewarm soaking once weekly, and track weight monitoring—losses exceeding 5% warrant attention.
Gradual Warming and Post-brumation Care
After brumation, you’re basically waking your snake from winter sleep—patience is key. Raise temperature gradually over 1-2 weeks from 50-60°F back to 85°F, warming up in small daily increments to prevent shock.
Resume feeding within a week using smaller prey items.
Watch for postbrumation shedding around 2-3 weeks; this signals recovered health and breeding readiness, along with increased activity and behavior changes.
Introducing Male and Female Snakes
Timing your introduction correctly makes all the difference—wait until both snakes have shed and defecated after warming. Introduce your male to the female’s enclosure for 2-7 days, rotating him between multiple females if needed.
- Start with supervised sessions lasting a few hours
- Maintain temperatures around 80°F with minimal stress
- Watch for rejection signs like defensive posturing or avoidance
- Remove males immediately if aggression appears to prevent cannibalism risks
Courtship behaviors and mating techniques naturally follow proper timing.
Observing Courtship and Signs of Successful Mating
Once your snakes are together, watch for courtship behaviors that signal real interest. Males generally tongue-flick constantly, vibrate their tails, and rub against the female—these courtship rituals can last several hours. Successful copulation involves cloacal alignment lasting 30–60 minutes, with body intertwining clearly visible.
Monitor signs like increased female feeding and cloacal swelling after mating sessions—these mating techniques confirm you’re on track. Multiple mating sessions over several days improve your odds, with most successful pairings showing clear copulation signs within two weeks.
| Mating Sign | What It Means |
|---|---|
| Tail vibration and tongue-flicking | Male initiating courtship rituals |
| Female stays still, body relaxed | Receptivity indicators present |
| Sustained body contact (30+ min) | Active copulation signs |
| Female eats more, male refuses food | Post-mating behavior shift |
| Pre-laying shed (3–4 weeks later) | Confirmation of mating success |
Egg Laying and Incubation Timeline
Once your female corn snake has mated successfully, the next phase begins with egg laying and the careful incubation period that follows. You’ll need to watch for physical changes in your female, prepare a proper laying box, and set up your incubator before the eggs arrive.
This stage usually spans 30 to 40 days from laying to hatching, and getting the details right makes all the difference in your breeding success.
Recognizing Pregnancy Signs in Females
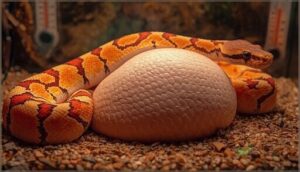
Once your female has mated, watch for physical signs like mid-body swelling and stretched skin between scales—these corn snake pregnancy signs mean she’s gravid. Behavioral changes matter too: restlessness, appetite loss, and temperature-shifting signal egg development. You can use gentle palpation techniques to feel firm, rounded eggs, though hormonal indicators remain subtle.
Timeline events unfold quickly—expect prelaying care needs within weeks, with observing signs of swelling peaking before egglaying begins.
Preparing Nesting and Egg-laying Environments
Once you’ve spotted pregnancy signs, set up a proper egglaying box before she starts searching for a spot. Female behavior shifts as she hunts for a nest location, so having this ready lessens stress and aids successful egg handling later.
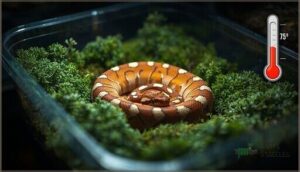
Use a nest box with damp sphagnum moss or vermiculite at the cooler end—around 75°F works well. The nesting substrate should be 1-2 inches thick and kept semi-moist.
Transferring Eggs to Incubator and Egg Handling
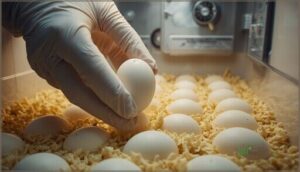
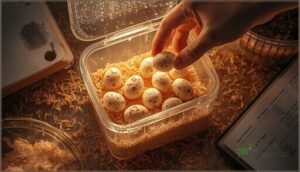
Once she’s laid her clutch, move eggs to the incubator within 24 hours. This protects egg viability and avoids environmental shifts that harm developing embryos. Handle each one carefully—egg rotation risks embryo damage, so keep the same upright position you found them in.
Here are handling best practices for safe transfer:
- Use clean, dry hands or gloves and support from below
- Mark the top with a pencil if unsure about orientation
- Space eggs apart in incubation materials like vermiculite to prevent clutch mold
- Press roughly 1/5 of each egg into the substrate for stability
Environmental monitoring starts the moment you place them in the incubator, setting up proper egg incubation conditions for the weeks ahead.
Incubation Temperature and Humidity Requirements
Temperature control anchors everything during egg incubation. Aim for 82°F, within the 78-84°F range. Temperature stability matters; fluctuations beyond 2°F reduce hatchling traits like size and color.
Humidity levels should stay between 85-90% to prevent desiccation and support proper embryonic water transfer. Humidity control affects survival rates too—higher moisture yields stronger hatchlings.
Temperature and humidity control directly shape your incubation timeline and success.
Monitoring Egg Health and Daily Ventilation
Check your eggs every day—candling techniques reveal veins and embryo development within two weeks, confirming viability. Watch for mold or dehydration, which can claim 15% of clutches if airflow falters.
Ventilation requirements vary; open containers every 7–14 days to prevent carbon dioxide buildup without drying eggs. Egg hydration stays stable near 85% humidity.
Recordkeeping impact on hatch rates proves undeniable—detailed logs boost success by 12–15%.
Timeline From Laying to Hatching
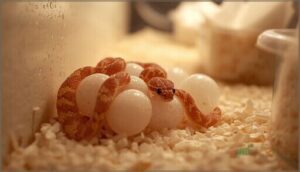
Within 30 to 45 days after mating, your female deposits her clutch over 12 to 24 hours—an egg-laying duration that kicks off the incubation process.
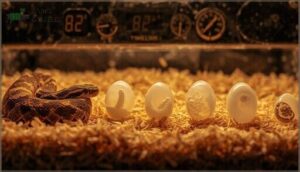
Corn snake eggs need 60 to 65 days at 82–84°F, though the hatching timeline shrinks to 55 days at higher temps. Temperature control and humidity effects drive hatching success above 90%, transforming egg development into healthy hatchlings by the hatching period’s end.
Caring for Hatchlings After Hatching
Once your hatchlings emerge, they enter a vulnerable stage where proper care directly influences their survival and growth. Setting up the right environment from day one prevents common health issues and helps young snakes thrive.
Let’s walk through the specific steps you’ll need to take during those critical first weeks.
Setting Up Individual Enclosures for Hatchlings
Once your hatchlings emerge, individual housing isn’t optional—it’s essential for their survival. Each baby corn snake needs its own enclosure, at least 20″ x 10″ x 12″, with secure locking lids to prevent escapes through surprisingly small gaps.
Add 3 inches of substrate depth, two hides for security measures, and enrichment items like cork bark.
Daily spot cleaning and monthly full substrate changes keep your hatchling housing hygienic and safe.
Temperature Gradients and Humidity for Young Snakes
Think of temperature and humidity control as the foundation your hatchlings build their health on. Without proper thermal gradients—88-92°F on the warm side, 75-82°F on the cool end—respiratory health deteriorates fast. Maintain 40-50% humidity with digital monitoring to prevent shedding issues.
- Use moisture-retentive substrate choice like coconut fiber for stable humidity levels
- Place two digital thermometers to track both temperature zones accurately
- Add a humid hide with sphagnum moss during incubation conditions overlap periods
Feeding Schedules and Prey Selection for Hatchlings
Your hatchling’s first meal sets the stage for everything that follows. Start feeding pinkie mice every 5–7 days—that’s the sweet spot for hatchling feeding without overloading their system. Offer frozen-thawed rodents equal to their body width; prey size matters more than you’d think. Watch for feeding refusals during sheds or temperature drops, and adjust your regimen as they grow past 30 grams.
| Hatchling Stage | Feeding Frequency | Prey Types |
|---|---|---|
| 8–20 inches | Every 5–7 days | Single pinkie mouse (1–3g) |
| 20–30g body weight | Weekly intervals | Pinkies or day-old quail chicks |
| 30–45g shift | Every 7–10 days | Fuzzies or two small pinkies |
| Post-refusal recovery | Resume 5–7 day schedule | Return to previous prey size |
Monitoring Growth and Health in Early Weeks
Once you’ve dialed in hatchling feeding, tracking progress becomes your daily ritual. Weight gain should hit 2–5 grams monthly—anything less signals trouble. Watch for these benchmarks:
- Shedding frequency every 4–6 weeks confirms healthy growth
- Feeding response stays strong between shed cycles
- Activity levels remain consistent during enclosure checks
Early illnesses like respiratory issues or lethargy demand immediate action. Mortality rates drop dramatically when you catch problems fast, making posthatching care for hatchlings your most critical window for raising baby corn snakes successfully.
Safe Handling and Hygiene Practices
Health and hygiene practices are essential for protecting both you and your hatchlings. Handwashing protocols before and after contact significantly reduce bacterial transmission by 40%, while regular equipment disinfection prevents fungal buildup. Bite prevention is also crucial, and limiting handling sessions to 10–20 minutes is key, as longer sessions can increase stress levels by 25%. These safe handling practices are vital in reducing zoonotic diseases, such as Salmonella, which are responsible for the majority of reptile-related infections.
| Hygiene Task | Frequency | Impact |
|---|---|---|
| Handwashing | Before/after each session | 40% contamination drop |
| Tool cleaning | After every use | 35% pathogen reduction |
| Vivarium disinfection | Weekly minimum | 60% illness risk cut |
| Handling time limit | 10–20 minutes max | 30% fewer bites |
Stress reduction is another critical aspect of hatchling care. By implementing gentle and consistent contact over a period of 4–6 weeks, defensive behavior can be significantly lowered, making the care requirements more manageable for new breeders.
Top 3 Essential Products for Breeding Success
The right tools make all the difference when you’re breeding corn snakes. You’ll need equipment that keeps temperature and humidity stable, fosters healthy egg development, and takes the guesswork out of monitoring conditions.
Here are three products that consistently deliver results for breeders at every experience level.
1. Reptile Egg Digital Incubator Box
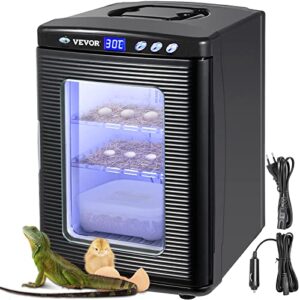
A reliable incubator is your foundation for successful egg incubation. Digital temperature control ensures precise thermal regulation between 78-84°F, while humidity control maintains the 70-90% levels corn snake eggs need. Easy-to-navigate interfaces with LED displays let you monitor conditions without opening the chamber—reducing disturbances that compromise hatch success. Look for models with automatic regulation to minimize fluctuations. Warranty considerations matter too; a 2-year guarantee protects your investment.
Quality incubators consistently outperform natural incubation methods, giving you control over every variable that determines whether your eggs thrive or fail.
2. Josh’s Frogs ProHatch Incubation Media
Your incubator needs the right incubation medium to succeed. Josh’s Frogs ProHatch excels at moisture retention, absorbing and releasing water slowly throughout incubation—eliminating the guesswork that causes collapsed or moldy eggs.
This incubation medium maintains stable humidity levels without constant adjustments, boosting hatch rates considerably compared to vermiculite.
However, species safety requires careful handling. The product contains silica hazard chemicals, and you should keep hatchlings from ingesting any media stuck to shed skin.
Product availability runs around $10-$13 per pound through reptile suppliers. Always dispose of ProHatch after use to prevent contamination in future clutches.
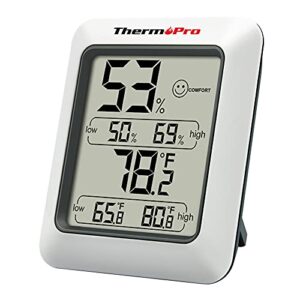
3. ThermoPro Digital Thermometer and Hygrometer
Precision matters when you’re monitoring temperature and humidity levels during incubation. The ThermoPro TP50 delivers device accuracy within ±1°F and ±2-3% RH, updating data every 10 seconds—critical for thermostat control during breeding.
User reviews consistently rate this unit 4.6 stars, with 87% reporting reliable performance over 12 months. Remote monitoring isn’t available, but the display tracks high and low records for data logging. Calibration needs remain minimal, though placement affects readings. At under $15, it’s essential for temperature control success in your incubator setup.
Frequently Asked Questions (FAQs)
How many clutches can females produce yearly?
Most females lay one clutch yearly in the wild.
However, captive breeding programs often see double clutching—two clutches per breeding cycle—when nutrition is excellent and conditions favor sperm retention and fertility.
What causes eggs to develop mold during incubation?
Mold manifests when excess humidity, poor ventilation, or contaminated substrate quality create conditions fungi favor.
Infertile eggs deteriorate rapidly, while handling contamination and temperature variations compromise egg health, weakening mold resistance without proper airflow in your incubation environment.
When do hatchlings shed for the first time?
Your hatchlings will shed for the first time between 5 and 10 days after hatching. This proto-integument removal improves water retention and chemical crypsis, with humidity levels accelerating the shedding timeline naturally.
Can breeding occur without a brumation period?
Like skipping spring training before a big game, breeding without brumation can happen—up to 40% of breeders succeed—but fertility impact and hormonal effects often result in smaller clutches, more slugs, and unpredictable mating success.
How long until hatchlings reach breeding maturity?
Sexually mature snakes generally emerge around 18-24 months, though breeding corn snakes should wait until two years minimum.
Size matters more than age—hatchlings need proper growth rate and environmental impact considerations before breeding success occurs.
Conclusion
Like building a house, you can’t skip the foundation and expect the roof to hold. The corn snake breeding timeline from start to finish demands patience, precision, and planning at every stage.
Your snakes won’t breed on your schedule—they’ll breed when conditions align with their biology. Master the prep work, respect the timeline, and you’ll consistently produce healthy clutches. Rush it, and you’re gambling with their health and your results.
- https://animaldiversity.org/accounts/Pantherophis_guttatus/
- https://meridian.allenpress.com/herpetologica/article/79/4/207/497956/Frequency-and-Timing-of-Ecdysis-in-Free-Ranging
- https://www.petplace.com/article/reptiles/general/snake-egg-incubation
- https://herpetologicalassociates.com/wp-content/uploads/2023/08/Captive-breeding-of-corn-snake.pdf
- https://reptilesmagazine.com/corn-snake-egg-duration/


