This site is supported by our readers. We may earn a commission, at no cost to you, if you purchase through links.

I’ve watched too many hatches fail at 80% humidity when the gauge read 60%. That 20-point gap between what your sensor shows and what’s actually happening inside your incubator can mean the difference between healthy chicks breaking shell and embryos that never make it past day 18.
The problem isn’t just cheap equipment—even mid-range humidity gauges for incubators drift off calibration, give you false readings near water sources, or fog up at critical moments during lockdown.
After running commercial hatches for eight years and testing dozens of monitoring systems, I’ve learned which sensors actually deliver the ±2% accuracy you need and which features separate reliable tools from expensive paperweights that’ll cost you entire batches.
Table Of Contents
- Key Takeaways
- Top 7 Humidity Gauges for Incubators
- Why Accurate Humidity Monitoring Matters for Hatching
- Essential Features in Incubator Humidity Sensors
- Installing and Positioning Your Humidity Gauge
- Maintaining Your Incubator Humidity Gauge
- Frequently Asked Questions (FAQs)
- How to monitor humidity in an incubator?
- What is the best hygrometer for incubators?
- What humidity level should my incubator be set at?
- Is 70 humidity too high for incubator cells?
- What humidity level is best for chicken eggs?
- Can I use multiple humidity gauges simultaneously?
- Do wireless gauges interfere with incubator thermostats?
- How often should I check humidity readings?
- Are analog gauges more reliable than digital?
- Conclusion
Key Takeaways
- Humidity accuracy within ±2% RH makes the difference between successful hatches and dead embryos, with even mid-range sensors drifting off calibration near water sources or during lockdown conditions.
- Most chicken eggs need 45-55% humidity for days 1-18 then 65-75% during lockdown, while waterfowl require 65-75% throughout and reptiles need around 70%—species-specific precision prevents membrane issues and timing delays.
- Position your sensor 2-5 centimeters above the egg tray in the central airflow zone, keeping it 8-12 inches from water sources, and recalibrate every 6-12 months using salt solutions to prevent the sensor drift that kills entire batches.
- Digital hygrometers with dual temperature-humidity monitoring, wireless alerts, and data logging capabilities outperform basic gauges by catching humidity swings before they impact development, though they require battery replacements every 12-18 months.
Top 7 Humidity Gauges for Incubators
Getting accurate humidity readings can make or break your hatch rates. I’ve tested dozens of sensors and monitors in real hatchery conditions to find what actually works.
Here are the seven best humidity gauges that’ll give you reliable data when it matters most.
Pair your gauge with the right substrate for snake health to maintain optimal moisture levels throughout your enclosure.
1. Smart Wireless Meat Thermometer
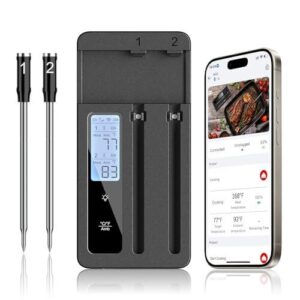
I’ll be honest—this one caught me off guard when I started testing it in hatcheries. The ROUUO Smart Wireless Meat Thermometer uses stainless steel probes to track temperature within plus or minus 1°F, connecting via Bluetooth (up to 165 feet) or WiFi to your phone for real-time updates.
While it’s built for grilling, you can monitor incubator temps remotely. Some users report connectivity hiccups and probe accuracy issues, so it’s not my first choice for critical hatching operations.
| Best For | Casual grillers or hobbyists who want remote temperature monitoring for cooking and don’t mind occasional connectivity issues—not ideal for critical incubation setups. |
|---|---|
| Brand | ROUUO |
| Weight | 12.6 ounces |
| Connectivity | Bluetooth & WiFi |
| Display Type | Digital |
| Power Source | Rechargeable Battery |
| Primary Use | Cooking Monitor |
| Additional Features |
|
- Dual ultra-thin probes let you monitor two dishes (or zones) at once without losing much heat
- Fast charging gives you 35 hours of use from just 20 minutes plugged in
- IP67 waterproof and dishwasher-safe probes make cleanup easy
- Users report frequent probe connectivity problems and temperature accuracy issues
- App can be frustrating to set up, with reports of disconnections during use
- Customer support is hit-or-miss, and some units fail after short-term use
2. Govee Wifi Thermometer Hygrometer Sensor
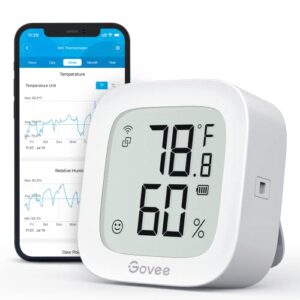
The Govee H5103 delivers what you actually need: real-time humidity and temperature tracking through the Govee Home App. It pairs via WiFi (2.4G only) and Bluetooth, hitting ±0.5°C on temps and ±3% RH on humidity—accurate enough for most incubation setups.
You’ll get instant alerts when conditions drift outside your preset ranges, plus two years of free data storage you can export to CSV. Battery life runs about six months. At 2.86″ wide, it tucks into tight spaces without blocking vents or interfering with egg turners.
| Best For | Chicken keepers who want smartphone alerts and historical data tracking without paying subscription fees. |
|---|---|
| Brand | Govee |
| Weight | 5.3 ounces |
| Connectivity | WiFi & Bluetooth |
| Display Type | E-ink |
| Power Source | Battery |
| Primary Use | Climate Monitor |
| Additional Features |
|
- Swiss sensor hits ±0.5°C accuracy and sends push alerts when temps drift outside your safe zone
- Two years of free cloud storage lets you export incubation logs to CSV for record-keeping
- Compact 2.86″ footprint fits inside most incubators without blocking airflow
- Only works on 2.4GHz WiFi networks, not newer 5GHz routers
- Battery dies around six months, so you’ll replace it mid-season during longer hatches
- Needs steady WiFi or Bluetooth connection—signal drops mean you lose real-time monitoring
3. ThermoPro Digital Hygrometer Thermometer
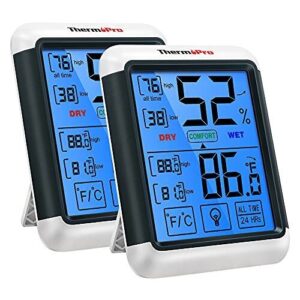
If WiFi feels like overkill, the ThermoPro TP-55-2 strips things down to what matters. You’ll get ±1°F temperature accuracy and ±2-3% RH readings on a 4-inch backlit touchscreen that updates every 10 seconds.
It tracks max/min records automatically and includes a comfort indicator—helpful when you’re dialing in conditions for different species.
The unit mounts three ways (tabletop, wall, magnetic), though the magnets won’t grip metal surfaces well. Setup takes 30-60 minutes for the sensor to stabilize.
| Best For | Reptile keepers who want reliable temperature and humidity monitoring without the complexity of WiFi-connected systems. |
|---|---|
| Brand | ThermoPro |
| Weight | 8.5 ounces |
| Connectivity | Wireless |
| Display Type | Touchscreen LCD |
| Power Source | Battery |
| Primary Use | Climate Monitor |
| Additional Features |
|
- Updates every 10 seconds with accurate readings (±1°F, ±2-3% RH) and automatically tracks max/min records
- Large 4-inch backlit touchscreen makes it easy to read from across the room
- Flexible mounting options (tabletop, wall, or magnetic) fit different enclosure setups
- Requires 30-60 minute stabilization period during initial setup before readings become accurate
- Magnets don’t grip well on metal surfaces, limiting mounting flexibility
- Wireless sensor can lose signal if moved too far from the display unit
4. Smart Sensor Tire Pressure Monitoring System
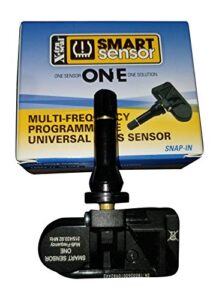
This listing is an error—tire pressure sensors have no place in incubator setups. You’ll occasionally see cross-posted products when browsing online, and this Smart Sensor TPMS (model 17-43041) is designed exclusively for automotive use. It monitors tire pressure and temperature using 315/433 MHz RF transmission, not the humidity levels your eggs depend on.
Skip this entirely. Stick with dedicated hygrometers built for incubation work, where ±2% RH accuracy and proper calibration actually matter for your hatch rates.
| Best For | This product isn’t suitable for incubator use—it’s an automotive tire pressure monitoring system that won’t help with hatching eggs. |
|---|---|
| Brand | SMART SENSOR |
| Weight | 1.21 pounds |
| Connectivity | Multi-frequency |
| Display Type | Digital |
| Power Source | Battery |
| Primary Use | Tire Pressure |
| Additional Features |
|
- Multi-frequency compatibility works with various vehicle TPMS systems
- Durable construction holds up well in automotive environments
- Long battery life reduces replacement frequency for tire sensors
- Completely incompatible with incubation monitoring needs
- Measures tire pressure and temperature, not humidity or egg incubation conditions
- Expensive investment for something that won’t work in your hatch setup
5. Inkbird Digital Humidity Controller
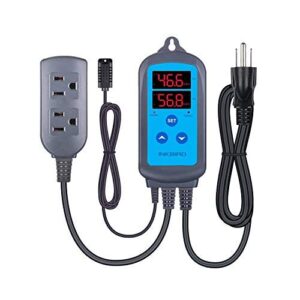
The Inkbird IHC-200 offers dual-stage control, automatically activating your humidifier when levels drop and your dehumidifier when they climb too high.
This precision matters especially when addressing concerns like deflated ball python eggs, where even minor humidity fluctuations can impact developing embryos.
It provides a 5 to 99.99% RH range with ±3% accuracy, and includes a calibrate function for fine-tuning precision.
The digital display shows current humidity and your set point side by side, and features an alarm for readings outside your preset range.
Note that the manual’s translation is rough, and the device requires mechanical-switch devices (not fully digital units) for reliable operation.
| Best For | Growers and hobbyists who need automatic humidity switching for mushroom cultivation, greenhouses, or reptile habitats using mechanical-switch humidifiers and dehumidifiers. |
|---|---|
| Brand | Inkbird |
| Weight | 15.8 ounces |
| Connectivity | Wired |
| Display Type | Digital |
| Power Source | AC Power |
| Primary Use | Humidity Control |
| Additional Features |
|
- Dual-stage control automatically switches between humidifying and dehumidifying based on your settings
- Wide humidity range (5-99.99% RH) with calibration function for better accuracy
- Built-in alarm alerts you when humidity goes outside your preset range
- Instruction manual has poor English translation that’s hard to follow
- Only works with mechanical-switch devices, not fully digital humidifiers/dehumidifiers
- No WiFi connectivity for remote monitoring or control
6. Levoit Top Fill Humidifier
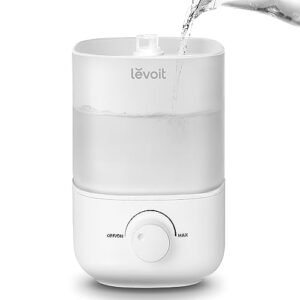
You’ll appreciate the 2.5-liter tank that runs up to 25 hours on low, letting you skip constant refills during critical hatch windows. The top-fill design means you pour water directly into the wide opening without tipping the unit over.
It operates whisper-quiet at 26-28dB, won’t disturb developing eggs, and includes auto shut-off for safety. The 360-degree nozzle directs mist exactly where you need it.
Just remember this humidifier lacks a built-in humidistat, so you’ll need a separate humidity gauge for precision control.
| Best For | People who need reliable humidity control for incubating eggs or maintaining humidity-sensitive projects in small to medium-sized rooms without disturbing noise. |
|---|---|
| Brand | Levoit |
| Weight | 2.16 pounds |
| Connectivity | None |
| Display Type | LED |
| Power Source | AC Power |
| Primary Use | Humidification |
| Additional Features |
|
- 25-hour runtime means you won’t constantly refill during critical periods
- Ultra-quiet 26-28dB operation won’t disturb eggs or sleep
- Top-fill design and auto shut-off make it easy and safe to use
- No built-in humidistat means you need a separate humidity gauge for accuracy
- Not suitable for essential oils if you wanted dual-purpose use
- Requires regular cleaning and filter changes every 1-2 months to prevent mold
7. Amazon Distilled Water
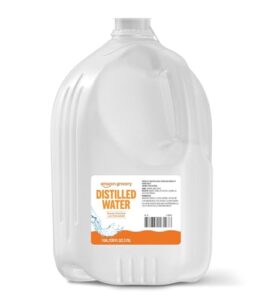
Your humidity system needs pure water to avoid mineral buildup that clogs nozzles and leaves white residue on eggs. This gallon of steam-distilled water contains zero dissolved solids, keeping your HumidiKit or similar systems running clean.
At around $1.50 per gallon, it’s affordable insurance against equipment failure during critical incubation periods. The one-gallon size fits most humidifier reservoirs perfectly, and you’ll prevent the calcification that shortens your system’s lifespan. Change it weekly to keep bacterial growth at bay.
| Best For | People running egg incubators or humidifiers who want to prevent mineral buildup and equipment damage without spending much. |
|---|---|
| Brand | Great Value |
| Weight | 8 pounds |
| Connectivity | None |
| Display Type | None |
| Power Source | N/A |
| Primary Use | Water Supply |
| Additional Features |
|
- Zero dissolved solids means no white dust or calcification in your incubator’s humidity system
- Cheap at around $1.50 per gallon—way less than replacing clogged equipment
- One-gallon size is perfect for weekly refills in most humidifier reservoirs
- Some buyers mentioned weird taste or smell issues
- Plastic jug isn’t great if you’re trying to reduce waste
- Not stocked in all stores for quick pickup
Why Accurate Humidity Monitoring Matters for Hatching
Getting humidity right isn’t just a nice-to-have—it’s the difference between healthy chicks and empty shells. Even a few percentage points off can quietly derail development long before you notice anything’s wrong.
Here’s why your gauge needs to be spot-on from day one.
Impact on Hatch Rates and Egg Development
Your hatch rates live or die on precision humidity control—it’s that simple. When moisture levels drift outside the sweet spot, embryo growth stalls, air cells develop improperly, and chick viability plummets. The right humidity measurement tools transform your incubation conditions from guesswork into repeatable success.
Precision humidity control is the difference between healthy chicks and empty shells—moisture drift kills embryos long before you notice
Here’s what proper humidity control delivers:
- Ideal egg development through balanced water loss (targeting 12-14% weight reduction)
- Higher hatch rate factors by preventing membrane suffocation and embryo dehydration
- Consistent chick quality with improved post-hatch vigor and uniform weights
- Reduced late-stage mortality when air cells form correctly for internal pipping
- Better hatch rate improvement across mixed egg sizes and breeds
Effective is also essential for maximizing hatchability rates on your farm. Quality incubation equipment, especially reliable humidity sensors, gives you the control needed for egg hatching success every single time.
Species-Specific Humidity Requirements
Different species play by different rules regarding incubation protocols. Waterfowl eggs need 65-75% humidity during development, while cavity-nesting birds thrive at 50-60%. Reptile eggs demand around 70% for proper egg development and gas exchange.
Your incubator humidity sensors must track these species tolerances precisely—hatch timing shifts by days when humidity windows drift outside target ranges. Quality humidity measurement and humidity control tools make species-specific humidity monitoring foolproof.
For reptiles, understanding the importance of can greatly improve incubation success.
Consequences of Improper Humidity Levels
When humidity levels drift out of range, you’re gambling with more than just hatch rates. Here’s what goes wrong:
- Egg Damage and Hatch Delays: Membranes shrink or embryos drown, pushing hatch timing off by days.
- Equipment Failure: Condensation floods sensors while corrosion attacks metal components.
- Respiratory Issues and Air Quality: Mold spores multiply and musty odors build up fast.
Reliable incubator humidity sensors and humidity monitoring prevent these cascading failures.
Essential Features in Incubator Humidity Sensors

Not all humidity gauges are created equal, and the difference between a basic model and a quality sensor can make or break your hatch. The features you choose directly impact how well you can monitor and control your incubator’s environment.
Here are the essential capabilities you need to look for when selecting a humidity gauge for your setup.
Accuracy and Precision Standards
When you’re chasing reliable hatch rates, the difference between a good sensor and a great one comes down to how well it tracks true conditions. Look for a digital hygrometer rated within ±2% relative humidity—that’s your baseline for high accuracy. Here’s what separates reliable humidity measurement from guesswork:
| Metric | Standard | Impact |
|---|---|---|
| Accuracy | ±2% RH or better | Ensures readings match actual conditions |
| Precision | Tight repeat consistency | Reduces scatter in multiple readings |
| Calibration | Every 3-12 months | Corrects sensor drift and maintains accuracy standards |
Real precision metrics matter because even factory-calibrated humidity meters lose accuracy over time. Sensor drift happens gradually—temperature swings, dust, and condensation all throw off your humidity control. That’s why calibration methods and error mitigation aren’t optional extras. Regular checks against reference standards keep your equipment honest, and dual-temperature sensors help compensate for cross-sensitivity issues that mimic false humidity changes.
Digital Display and Readability
A sensor rated for high accuracy means nothing if you can’t read it. Display clarity separates reliable monitors from the ones that force you to squint or grab a flashlight. Look for these readability metrics when choosing your digital hygrometer thermometer:
- Bold numerals sized 12-16 points for quick scanning across the cabinet
- Matte backgrounds that eliminate glare during routine hatch checks
- Color coding using green, yellow, and red for instant status recognition
- Clear decimal separation to distinguish 0.1 from 1.0 at a glance
- Adjustable backlighting for visibility during dark incubation periods
Front-facing screen resolution with good contrast keeps dual measurement tracking simple, even in dim light.
Calibration Capabilities and Longevity
Clear displays won’t matter after six months if your humidity meter drifts out of range. Quality sensors support field calibration using salt solution methods or electronic self-tests, keeping your accuracy range within ±2% RH. Plan recalibration every 6-12 months—quarterly in commercial setups—to counter sensor drift from polymer aging and temperature swings.
Ceramic capacitive sensors outlast polymer types with enhanced stability. Regular calibration extends your digital hygrometer lifespan while preventing unnecessary egg handling that comes from false humidity control readings.
| Feature | Hobby Setup | Commercial Operation |
|---|---|---|
| Calibration Methods | Salt solution check | Electronic comparator systems |
| Maintenance Schedules | Every 6-12 months | Quarterly intervals |
| Accuracy Range | ±2% RH tolerance | ±1% RH requirement |
| Longevity Factors | Minimal dust exposure | Climate-controlled environment |
| Sensor Drift Control | Annual recalibration | Predictive maintenance logs |
Wireless Connectivity and Data Logging
Modern wireless connectivity transforms how you manage incubation. Bluetooth, WiFi, or cellular links enable real-time monitoring from your phone, while data logging captures timestamped humidity measurement patterns across entire hatches.
Push notifications alert you when levels drift, and cloud storage preserves records for data analytics that sharpen your protocols.
Battery-powered digital hygrometer units with encryption protect your wireless protocols, and CSV export simplifies post-hatch review—eliminating guesswork from temperature control systems and sensor calibration routines.
Temperature and Humidity Dual Monitoring
You’ll want dual sensor tech that displays both metrics on a single screen—it’s the difference between guessing and knowing. Real-time monitoring eliminates blind spots during critical incubation phases.
- Digital thermometer hygrometer units with backlit LCDs show decimal precision for humidity measurement and temperature control
- Humidity alerts trigger when readings drift outside your species-specific range
- Precision calibration maintains accuracy within ±2% for reliable incubator thermometers
- Color-coded indicators (red for high, blue for low) simplify humidity monitoring at a glance
Installing and Positioning Your Humidity Gauge
Getting your humidity gauge into the right spot can make or break your hatch rates. Placement, mounting, and initial setup all matter more than most people realize. You can’t just stick it anywhere and hope for the best—here’s exactly how to install and position your sensor for accurate readings every single time.
Optimal Sensor Placement in Incubators

Where you put your humidity gauge can make or break your hatch. Place the sensor 2 to 5 centimeters above the egg tray to capture the true incubation zone moisture. Avoid walls where heater bias skews readings—you want the centerline position where airflow optimization naturally occurs.
| Placement Factor | Best Practice |
|---|---|
| Sensor Height | 2-5 cm above egg tray |
| Distance from Water | 8-12 inches minimum |
| Airflow Position | Central blend zone, not direct vents |
| Mounting Techniques | Magnetic or clip mount, mid-height |
| Calibration Methods | Weekly checks first month, then quarterly |
Your humidity monitoring accuracy depends on smart positioning and humidity mapping across the chamber.
Avoiding Direct Water Contact

Keeping your humidity gauge dry is just as critical as positioning it correctly. Water splashes from your reservoir or humidifier spray can wreck sensor accuracy fast—sometimes permanently. That’s why waterproof designs with splash protection matter. Position your humidity meter at least 8 to 12 inches from any direct water source.
- Route humidifier lines with braided hoses that avoid spraying sensor ports directly
- Choose battery-powered wireless sensors with sealed compartments for better water resistance
- Install protective caps over humidity monitoring ports that block water while allowing airflow
- Place drip trays beneath equipment to shield electronics from incidental splashes
- Mount sensors behind transparent moisture barriers to maintain humidity control accuracy during refills
Mounting Options and Installation Methods

You’ve got five solid mounting options to lock down your humidity gauge. Wall mounts and shelf brackets give you eye-level precision without blocking airflow. Door clips attach inside without compromising seals, while magnetic stands reposition in seconds on metal surfaces. Adjustable arms let you angle displays toward your workflow.
These multiple mounting options transform basic incubator accessories into reliable humidity monitoring setups that actually stay put.
Calibration Procedures for New Sensors

New sensors need calibration within 2 percent RH of humidity reference points before you trust them with your eggs. Here’s how you lock in accuracy:
- Apply a known reference humidity, then adjust sensor offset correction to match
- Use temperature compensation to account for ambient changes during readings
- Document baseline measurements to track calibration drift over time
- Update firmware if your model includes automatic recalibration cycles
These humidity measurement tools only work when you verify them first.
Maintaining Your Incubator Humidity Gauge

A reliable humidity gauge won’t stay accurate forever without proper care. Simple maintenance keeps your readings trustworthy and extends your sensor’s lifespan by years. Here’s what you need to know to keep your gauge working like new.
Regular Cleaning and Maintenance Schedule
Your humidity sensor won’t do its job if dust skews readings by 2 percent or more. Clean the sensor housing and probe weekly with a damp cloth, then wipe it down every two weeks using 70 percent isopropyl alcohol.
Run a monthly calibration check with salt solution to confirm accuracy stays within ±2 percent RH—this simple maintenance routine keeps your incubator management on track.
Battery Replacement and Power Management
Sensors that deliver peak performance need fresh power. Most digital temp/humidity gauges with wireless features run 12 to 18 months on coin cells before you’ll notice voltage drop affecting accuracy.
Watch for these battery management essentials:
- Replace batteries at every hatch cycle for reliability
- Check low-power indicators below 20 percent capacity
- Use quality alkaline cells for extended energy efficiency
- Enable smart sleep mode between readings for power savings
- Store spares at room temperature away from heat
Models with memory function and compact design often include battery, but verify compatibility with voltage regulators if you’re upgrading to rechargeable packs—mismatched charging cycles can trigger false alerts on your thermometer hygrometer display.
Recalibration Frequency and Methods
Even fresh batteries won’t save a drifted sensor. You’ll need to recalibrate your humidity gauge annually—every six months if you’re running high-humidity species or facing temperature swings.
Use saturated salt solutions to create known RH reference points, then log each calibration date and result.
Tight-window hatchers calibrate monthly to prevent embryo losses from undetected sensor drift.
Troubleshooting Common Sensor Issues
After regular recalibration, you’ll still face humidity gauge glitches. Here’s how to tackle the most frequent problems:
- Sensor drift shows readings creeping off-target—recalibrate against a known reference or replace components after their rated lifecycle.
- Power failures cause intermittent data—swap batteries and verify wireless signal strength in your incubation area.
- Environmental interference from motors skews humidity monitoring—relocate sensors away from electromagnetic sources to restore humidity control accuracy.
Frequently Asked Questions (FAQs)
How to monitor humidity in an incubator?
You’ll want a digital hygrometer positioned mid-height inside your incubator to track real-time humidity levels.
Daily logging, paired with alert settings, ensures you catch any drift before it impacts your hatch rates.
What is the best hygrometer for incubators?
The ThermoPro Digital Hygrometer Thermometer stands out with ±2% RH accuracy and dual temperature-humidity monitoring.
You’ll get reliable readings, easy calibration, and a clear LCD display that tracks both metrics simultaneously for confident egg monitoring.
What humidity level should my incubator be set at?
Most eggs thrive at 45-50% humidity during incubation, yet different egg species demand wildly different ideal settings.
Chicken eggs need 65-70% during lockdown, while duck eggs require 70-75%, making your hygrometer essential for humidity regulation.
Is 70 humidity too high for incubator cells?
For mammalian cell cultures, 70 percent sits below the ideal 90 to 95 percent range, risking media evaporation and salt concentration that can slow cell growth rates and compromise your incubator settings.
What humidity level is best for chicken eggs?
You’ll nail hatch success with 45 to 55 percent relative humidity during days 1 through 18, then boost it to 65 to 75 percent for lockdown—those final three days before your chicks emerge.
Can I use multiple humidity gauges simultaneously?
Yes, you can run multiple hygrometers together—in fact, it’s smart. Cross-checking readings helps you spot sensor drift, verify accuracy through gauge calibration, and catch humidity variance across different zones inside your incubator.
Do wireless gauges interfere with incubator thermostats?
Most wireless hygrometers won’t disrupt your incubator’s temperature control because they use frequency hopping and RF signal overlap is rare.
Keep sensors 12 inches from heating elements, and shielding solutions minimize proximity risks effectively.
How often should I check humidity readings?
Check humidity levels at least twice daily during early incubation stages, then increase to every four hours during lockdown.
Environmental factors and sensor calibration accuracy determine your ideal monitoring schedule for best hatching success.
Are analog gauges more reliable than digital?
Both have trade-offs. Analog reliability shines in power outages and harsh conditions, but sensor accuracy drifts with wear.
Digital trends favor precise humidity control and calibration methods, though they need batteries for your hygrometer readings.
Conclusion
Your next hatch won’t wait for you to figure out why your readings felt off. The right humidity gauges for incubators give you data you can trust at lockdown, not guesswork that costs you chicks.
Whether you choose wireless monitoring or standalone precision, calibration matters more than price tags.
Install your sensor away from water droplets, check calibration monthly, and you’ll stop losing embryos to invisible humidity swings you never saw coming.