This site is supported by our readers. We may earn a commission, at no cost to you, if you purchase through links.
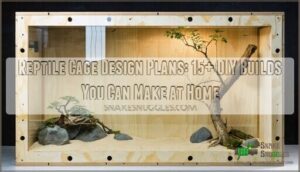
Plywood, melamine, or MDF sheets form your main structure, while glass or acrylic panels create crystal-clear viewing windows.
You’ll want to match your design to your reptile’s natural behavior – horizontal layouts work best for ground-dwellers like bearded dragons, while vertical builds suit tree-climbing geckos.
Don’t forget proper ventilation holes, secure latches, and waterproof sealing to prevent escapes and moisture damage.
The secret lies in planning for your pet’s adult size and specific temperature needs from day one.
Table Of Contents
Key Takeaways
- You’ll save hundreds of dollars by building your own cage using plywood, melamine, or MDF sheets instead of buying commercial enclosures
- You must match your design to your reptile’s behavior – use horizontal layouts for ground-dwellers like bearded dragons and vertical builds for climbing species like geckos
- You can’t skip proper ventilation holes, secure latches, and waterproof sealing since these prevent escapes, suffocation, and moisture damage
- You need to plan for your pet’s adult size from the start to avoid costly rebuilds later, as most reptiles grow substantially after you bring them home
Essential Materials for DIY Reptile Cages
You’ll need the right materials to build a safe, durable reptile home that meets your pet’s specific needs.
The foundation materials include plywood, melamine, or MDF sheets for the main structure, while glass or acrylic panels provide viewing windows and doors.
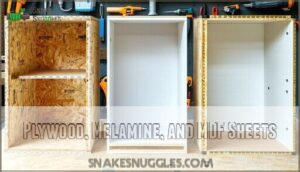
Plywood, Melamine, and MDF Sheets
When building reptile cage plans, these three sheet materials offer different advantages for your reptile enclosure design.
Each material has unique properties affecting sheet material cost, moisture resistance, and cutting challenges.
- Plywood: Budget-friendly option requiring proper sealing techniques to prevent moisture damage
- Melamine: Superior moisture resistance with smooth finish, ideal for easy cleaning
- MDF: Needs coating for waterproofing but offers excellent workability and weight considerations
- All materials: Require careful sealing techniques along edges to maintain structural integrity
Consider buying a plywood cage for convenience.
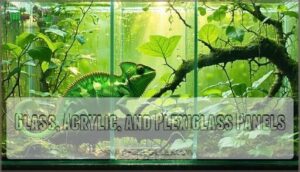
Glass, Acrylic, and Plexiglass Panels
Transparent panels form your terrarium’s viewing windows and structural walls.
Glass terrariums offer excellent material clarity but lack shatter resistance compared to acrylic alternatives.
Plexiglass provides superior impact protection while maintaining crystal-clear visibility.
Panel thickness affects durability—quarter-inch works for most builds.
Glass doors require careful handling during installation.
Acrylic terrarium panels excel at heat retention and resist scratching better than glass.
Many builders source specialized reptile enclosures for custom projects.
Simple cleaning methods keep all materials spotless, ensuring a crystal-clear view and maintaining the overall durability of the terrarium.
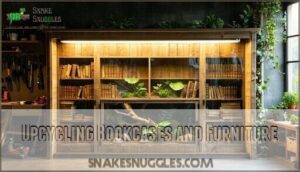
Upcycling Bookcases and Furniture
Your old bookcase can become a perfect reptile cage with simple modifications.
Furniture conversion saves money compared to buying new materials. Remove shelves and add ventilation holes using a drill.
Install acrylic panels for viewing windows and secure all joints with wood screws. Check for stability and seal gaps to prevent escapes.
Upcycling furniture reduces waste while creating custom enclosures.
Hardware and Tools Checklist
Your toolkit’s backbone includes essential tools like drills, jigsaws, and sanders for reptile cage building.
Gather measuring tools, cutting implements, and safety gear before starting construction. Stock various fastener types including deck screws and corner braces.
A staple gun helps secure mesh and screens. These building materials and tools guarantee your DIY reptile enclosure project runs smoothly from start to finish.
Remember to prioritize proper ventilation techniques for a healthy habitat, as seen in resources like proper ventilation techniques, and consider essential tools, DIY reptile enclosure, and healthy habitat when planning.
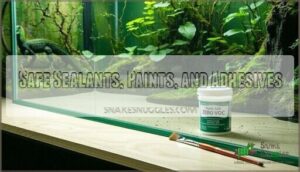
Safe Sealants, Paints, and Adhesives
Your reptile cage design needs the right nontoxic materials to keep your pet safe.
Choose 100% aquarium-safe silicone without mold inhibitors for sealing.
Water-based polyurethane offers excellent wood protection with low VOC concerns.
Zero-VOC acrylic paints work best for interior surfaces.
Silicone sealant options are readily available online.
Allow 24-72 hours curing time before introducing reptiles.
Proper application techniques guarantee long-term safety in your pet enclosure.
Choosing The Right Enclosure Design
Choosing the right design starts with understanding your reptile’s natural habitat and behavior patterns.
You’ll need to match the enclosure layout to whether your pet climbs, burrows, or stays ground-level, while planning for its adult size to avoid costly rebuilds later, considering its natural behavior and patterns.
Horizontal Vs. Vertical Layouts
Your choice between horizontal and vertical reptile cage designs affects everything from space utilization to your pet’s wellbeing.
Horizontal enclosures work best for ground dwellers like bearded dragons, while vertical setups suit arboreal species that need climbing space and better lighting access.
- Watch your snake stretch fully across a horizontal enclosure—pure contentment in motion
- Picture your gecko scaling branches in a tall vertical setup, living its natural climbing instincts
- Feel confident knowing your reptile habitat design matches your pet’s natural behaviors perfectly
Horizontal enclosures provide more floor space for terrestrial reptiles to roam and establish territories. Vertical enclosure ideas maximize height for species that naturally climb trees and rocks. Consider your reptile’s natural habitat when choosing between these reptile enclosure ideas.
Species-Specific Habitat Requirements
Different species have vastly different needs that’ll make or break your reptile habitat design.
Desert reptiles need temperature gradients from 75°F to 90°F with low humidity levels around 30-50%, while tropical species require 80-90% humidity and consistent warmth.
Substrate needs vary dramatically—sand for bearded dragons, coconut fiber for ball pythons.
Your lighting needs depend on species too, with most requiring UVB for proper calcium absorption.
Minimum Size and Space Considerations
Before diving into reptile cage ideas, you need proper measurements for your pet’s comfort.
Adult snakes require enclosures at least as long as their body length, while lizards need space for behavioral needs like basking and hiding.
Your reptile habitat plans should account for species needs – arboreal reptiles need height for climbing, terrestrial ones need floor space.
Most reptile enclosure plans recommend doubling minimum requirements for space enrichment and reptile comfort.
Planning for Growth and Future Needs
Your baby gecko won’t stay small forever.
Most reptiles grow substantially after you bring them home, so you’ll need reptile enclosure plans that accommodate their adult size.
A 20-gallon tank might work for a juvenile bearded dragon, but adults need 40+ gallons.
Factor in species lifespan when planning enclosure upgrades – your pet could live 15-20 years.
Consider future expansion options and long-term costs for larger reptile habitat plans.
Step-by-Step Reptile Cage Construction
Now you’re ready to build your custom reptile enclosure with the right materials and design plan in hand.
This step-by-step construction process will guide you through each phase, from cutting your first piece of wood to adding the final decorative touches that make your cage both functional and attractive.
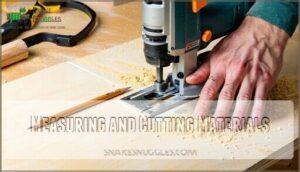
Measuring and Cutting Materials
Accurate measurements prevent material waste and guarantee your wooden enclosure fits together perfectly.
Mark your cuts twice using a square and sharp pencil for precision cuts. Choose appropriate cutting tools like circular saws for plywood or jigsaws for curves.
Different wood types require specific techniques—pine cuts easily while PVC needs slower speeds.
Plan your jointing techniques before cutting to minimize errors and maximize material efficiency. This step is crucial for ensuring that your wooden enclosure is not only functional but also visually appealing.
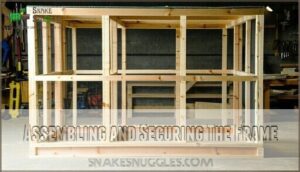
Assembling and Securing The Frame
You’ll start by joining your frame materials using the strongest joint types for your reptile cage design.
Position corner pieces first, then secure fasteners like deck screws every six inches along each joint.
Apply wood glue before fastening for extra strength.
Check frame stability by gently rocking the structure – it shouldn’t wobble.
Proper ventilation is key, so consider strategic vent placement during this stage.
Add reinforcement methods like corner braces if needed for larger wooden enclosure projects.
This step ensures your reptile cage is both stable and well-ventilated, providing a healthy environment for your pet.
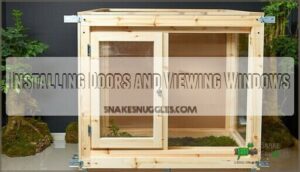
Installing Doors and Viewing Windows
Position your sliding door tracks at the bottom of the frame for smooth operation.
Cut plexiglass windows to fit your viewing angle optimization needs.
Install top-hinged doors using piano hinges for easy access.
Mount secure door latches to prevent escapes.
These reptile tank design elements guarantee proper functionality while maintaining your terrarium design plans and reptile terrarium plans requirements.
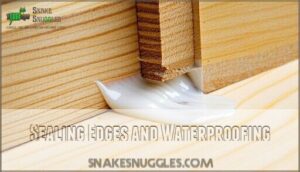
Sealing Edges and Waterproofing
Your enclosure’s longevity depends on proper moisture prevention and sealing techniques.
Apply GE Silicone I or similar aquarium-safe sealants along all joints to create watertight barriers. This material waterproofing prevents humidity damage and guarantees mold resistance in your reptile tank design.
- Run silicone beads along all corner joints and seams
- Seal gaps between different materials like wood and glass
- Apply extra sealant around ventilation holes and hardware
- Allow 24-48 hours curing time before adding substrate
Adding Wood Trims and Decorative Finishes
Wood trims transform your reptile habitat from basic box to furniture-grade masterpiece.
Cut oak or pine strips to frame edges and doors using standard woodworking techniques. These decorative touches hide imperfections while adding professional polish.
Consider background textures like faux rock panels for natural aesthetics. Plant integration spots and trim aesthetics work together, creating custom reptile cages that blend seamlessly into your home’s DIY projects, with a focus on professional polish.
Ventilation, Heating, and Lighting Solutions
You’ll need proper ventilation, heating, and lighting to keep your reptile healthy and comfortable in their new home.
Getting these three elements right means your pet can regulate body temperature, breathe fresh air, and maintain natural behaviors just like they’d in the wild, which is crucial for them to be healthy.
Drilling and Placing Ventilation Holes
Proper ventilation prevents your reptile from suffocating in stagnant air.
Strategic hole placement creates cross-ventilation that maintains ideal humidity while preventing mold growth in your DIY reptile enclosures.
- Drill Size: Use 1/4-inch bits for small cages, 3/8-inch for larger enclosures
- Hole Placement: Position holes on opposite walls for cross-airflow design
- Airflow Design: Space holes 2-3 inches apart in rows for even distribution
- Humidity Impact: More holes reduce humidity; fewer holes retain moisture for tropical species
Sliding Doors and Mesh Top Options
Glass sliding doors offer smooth operation when installed on proper tracks at the enclosure’s base.
You’ll need perspex or glass panels that glide effortlessly for daily maintenance access.
Mesh tops provide essential ventilation integration while preventing escapes – use poultry fabric or wire mesh secured with clips.
These access point designs balance visibility with airflow control perfectly.
Integrating Heating and UVB Lighting
Position your heating elements at one end to create a proper heat gradient from 75°F to 90°F.
Place UVB lights 6-18 inches above basking spots, depending on bulb strength.
Install thermostats to prevent overheating and burns.
Use timers for consistent lighting schedules of 10-12 hours daily.
Mount fixtures outside the enclosure to avoid contact injuries while maintaining effective heat distribution.
Humidity Control and Misting Systems
Automated misting systems deliver precise water cycles for your reptile’s health.
Set misting schedules based on species needs – rainforest reptiles need 2-3 daily cycles while desert species require minimal moisture.
Install humidity sensors to maintain proper levels and prevent mold.
A digital hygrometer is an essential accessory.
Balance ventilation with humidity by adjusting airflow vents.
Monitor substrate moisture to avoid bacterial growth in your vivarium.
Monitoring With Hygrometers and Thermometers
Digital instruments beat analog hands-down for reptile care.
Position your hygrometer at substrate level for accurate humidity readings – overhead placement gives false numbers.
Calibration matters: check your devices monthly against known standards.
Modern data logging units track temperature and humidity patterns, helping you spot problems before they affect your reptile’s health in enclosures.
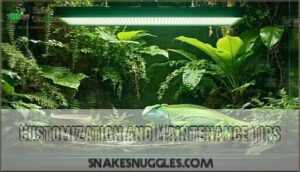
Customization and Maintenance Tips
Once you’ve built your reptile enclosure, the real fun begins with personalizing it for your pet’s specific needs.
Smart customization choices and proper maintenance will keep your DIY cage functional and your reptile healthy for years to come, with proper maintenance being key to its success.
Interior Finishes and Substrate Selection
After construction, you’ll transform your bare cage into a comfortable home.
Contact paper provides Non-Toxic Finishes that resist Substrate Moisture while guaranteeing Cleaning Ease.
Choose substrate based on your reptile’s needs – coconut fiber for humidity-loving species, sand for desert dwellers.
Seal all interior surfaces with Safe Sealants before adding substrate.
This foundation guarantees Reptile Comfort and proper enclosure maintenance for years.
Escape Prevention and Security Features
Reptile breakouts happen fast—that’s why secure latches and keyed locking mechanisms are your first defense line.
Install mesh barriers over ventilation holes and seal gaps with silicone caulk. Check substrate depth regularly since some species dig escape tunnels.
Strong hinges prevent door forcing, while proper gap sealing stops determined snakes from squeezing through tiny openings.
Regular inspections can help identify potential escape routes to ensure an escape-proof environment with proper gap sealing and secure housing.
Cleaning and Long-Term Maintenance
Daily maintenance prevents bigger headaches down the road. Your reptile enclosures need regular attention to stay healthy and functional. Smart cleaning routines save money and protect your pets from harmful conditions.
A healthy reptile is a happy reptile—daily care keeps both thriving
Here’s your maintenance schedule:
- Weekly substrate replacement – Remove waste and spot-clean soiled areas
- Monthly mold prevention – Check corners and seal joints for moisture buildup
- Quarterly sealing maintenance – Inspect silicone edges and reapply as needed
- Bi-annual deep clean – Disinfect all surfaces and replace worn materials
- Annual cost review – Budget for long-term costs like substrate and replacement parts
Watch for aromatic hydrocarbons from wood degradation. These compounds harm reptile respiratory systems over time. Regular upkeep includes monitoring humidity levels to guarantee a healthy environment.
Upcycling Ideas for Budget-Friendly Builds
Furniture repurposing transforms old bookcases and cabinets into reptile homes.
Material sourcing from thrift stores achieves significant cost reduction while minimizing waste.
These DIY upcycle projects create unique enclosure plans that rival expensive commercial options.
| Item | Conversion Cost |
|---|---|
| Bookcase | $15-25 |
| Entertainment Center | $30-50 |
| Dresser | $20-35 |
Creative designs emerge when you see potential in discarded furniture, turning yesterday’s trash into tomorrow’s reptile tank ideas.
Frequently Asked Questions (FAQs)
What reptile species require special construction considerations?
Aquatic species like turtles need waterproof sealants and drainage systems. Chameleons require specialized mesh ventilation. Burrowing reptiles need deeper substrates and reinforced flooring to prevent escape attempts.
How much should DIY enclosures cost?
DIY enclosures typically cost $50-200, depending on size and materials.
You’ll save money by upcycling furniture or using plywood instead of melamine.
Basic supplies like silicone sealant and hardware add minimal expense.
What common mistakes ruin reptile cage builds?
You’ll ruin your build by using pine or cedar materials.
Skipping proper ventilation, choosing glass that loses heat quickly, forgetting to seal edges.
And not planning for your reptile’s adult size.
Which power tools are absolutely necessary?
You’ll need a drill for ventilation holes, jigsaw for cutting panels, and sander for smooth edges. These three tools handle most reptile enclosure construction tasks effectively.
How long does building take from start?
Building takes 4-12 hours depending on complexity. A simple plywood snake enclosure might take one weekend afternoon, while custom entertainment center conversions need multiple sessions spread across several days.
Conclusion
Success isn’t just about following reptile cage design plans – it’s about creating a lifelong home your pet deserves.
You’ve learned essential materials, proper sizing, and construction techniques that’ll save hundreds compared to store-bought options.
Remember to plan for your reptile’s adult size and specific habitat needs from day one.
With proper ventilation, secure latches, and quality sealants, your DIY enclosure will provide years of safe, comfortable living space.
- https://www.evolutionreptiles.co.uk/blog/vivarium-lock-how-to-fit/
- https://www.blackboxcages.com
- https://www.recoilreptiles.com/product-page/reptile-cage-lock
- https://showmereptileshow.com/resources/creating-an-escape-proof-reptile-room
- https://www.ottoenvironmental.com/preventing-animal-escapes-with-proper-enclosures/

