This site is supported by our readers. We may earn a commission, at no cost to you, if you purchase through links.

A tropical snake rarely struggles because of one obvious mistake. Trouble usually starts with a setup that looks lush but traps stale air, holds too much water, or leaves the animal without the space and temperature range it needs to regulate itself.
That’s why snake enclosure setup for tropical species demands more than a glass box, damp moss, and a heat source clipped overhead.
Every layer matters, from drainage and substrate depth to perch height, probe placement, and ventilation.
Get those details right, and you create a habitat that facilitates shedding, feeding, movement, and health instead of working against them.
Table Of Contents
- Key Takeaways
- Choose The Right Enclosure Size
- Build a Humidity-Friendly Base
- Create Safe Heat and Light
- Add Hides, Branches, and Plants
- Set Up a Bioactive Cleanup Crew
- Cycle and Maintain The Enclosure
- Top 5 Tropical Setup Essentials
- Frequently Asked Questions (FAQs)
- What is included in a snake tank setup guide?
- What is a snake enclosure?
- How long should a snake enclosure be?
- How do I choose the right snake enclosure size?
- How to set up a bioactive snake enclosure?
- What not to put in a snake enclosure?
- How to properly set up a snake enclosure?
- What should be in a snake enclosure?
- What is the best way to prevent mites?
- How often should tropical snakes be fed?
- Conclusion
Key Takeaways
- A good tropical snake enclosure starts with the basics done right: size it for the snake’s adult length, make it escape-proof, and provide usable floor space or climbing height based on whether the species is terrestrial or arboreal.
- Stable humidity depends on a layered base with drainage, a mesh barrier, moisture-retentive substrate, and leaf litter, because wet but stagnant conditions cause more problems than they solve.
- Heat, light, and airflow must work together through a clear warm-to-cool gradient, thermostat-controlled heat sources, proper probe placement, and steady day-night lighting, so the snake can regulate itself safely.
- The enclosure stays healthy only if you add secure hides, stable branches or plants, cycle the system before use, and keep up with routine checks for humidity, waste, mold, waterlogging, and early signs of illness.
Choose The Right Enclosure Size

Getting the enclosure size right sets the tone for everything that follows, from movement and security to heat and humidity control.
A good starting point is this guide to snake habitat size requirements, which helps prevent crowding before you focus on secure setup.
Your snake’s adult size, body type, and habits should guide the choice from the start.
Here’s what to look at as you compare the main enclosure options.
Match Enclosure Length to Adult Snake Size
Although young snakes look small, choose enclosure size by adult length. Use a clear Length Ratio: the adult snake enclosure should match or exceed the snake’s full body length for Straight Line Resting and Full Extension Space.
That sets minimum dimensions; recommended dimensions add Snake Stretching Room, Coil Clearance, and practical snake turning space considerations without forcing curling or stress.
Following the dimension ratio guidelines ensures the enclosure will accommodate growth.
Plan Floor Space for Terrestrial Tropical Snakes
Once length is right, terrestrial tropical snakes need usable floor area, not wasted height. Use Lateral Space Ratio and Footprint Shape Optimization to set enclosure size:
- Meet minimum dimensions.
- Favor recommended dimensions.
- Preserve Movement Pathways Design.
- Maintain Perimeter Buffer Zone, Floor Flatness Assurance, floor area requirements, and space optimization.
This keeps roaming, burrowing, and turning controlled.
For ideal health, consider selecting appropriate tank size based on species-specific space requirements.
Add Vertical Room for Arboreal Species
Floor area still matters, but arboreal snakes also need vertical space requirements met with Vertical Ladder Systems, Elevated Branch Anchors, and branch climbing opportunities. Add Climbing Enrichment Items, shaded climbing and basking areas, and upper retreats that support natural climbing behavior.
Canopy Moisture Pockets and Layered Airflow Zones help create safe height use, especially during shedding, resting, and thermoregulatory movement.
Compare Glass Vs PVC Enclosures
Once canopy height is planned, choose your enclosure material with care:
- glass terrariums: Visibility Aesthetics.
- PVC vivariums: Weight Portability.
- glass vs PVC heat loss favors PVC for Energy Efficiency.
- PVC offers better Impact Durability.
- Glass needs better Glare Management and balanced ventilation.
Glass shows beautifully, but PVC usually controls tropical heat and humidity with less effort in daily husbandry settings.
Check Doors, Locks, and Escape-proof Seals
Always treat the front opening as a control point: perform Lock Mechanism Inspection, Seal Integrity Test, and Hinge Alignment Check so the Escape Door Latch closes cleanly every time.
Fire-rated Seal Compliance matters in any escapeproof enclosure, regardless of enclosure type, because warped doors undermine security, ventilation and air circulation, enclosure ventilation, and later ventilation optimization for tropical snakes directly.
Balance Ventilation Without Losing Humidity
Because tropical snakes need fresh air without substrate drying, use Moisture Sensitive Vents and Humidity Retention Materials with Airflow Zoning.
Ventilation Sensor Integration helps ventilation optimization, humidity regulation, and humidity management, while Dew Point Control limits condensation.
This is ventilation and humidity control in enclosures done properly: low intake, high exhaust, gentle exchange, safer sheds, and steadier humid resting zones.
Build a Humidity-Friendly Base

The base of a tropical snake enclosure does more work than most keepers expect. If you build it correctly, it helps hold humidity steady, promotes plant growth, and keeps the lower layers from turning sour.
The next steps show you what to add, in order, so the enclosure starts stable and stays that way.
Create a Drainage Layer With Clay Balls
Think of the base as your enclosure’s lungs:
- Clay Ball Sizing matters.
- Follow a Rinsing Procedure for expanded clay pellets.
- Keep Drainage Layer Thickness near 1–2 cm for tropical snakes and bioactive substrate.
- pH Neutrality Benefits protect substrate mixes; Reuse Sterilization keeps the drainage layer airy, lightweight, noncompacting, and reliable under constant moisture for roots.
Separate Layers With Mesh Screen
A mesh screen is the gatekeeper in a layered substrate system in terrariums, keeping the drainage layer separate from substrate mixes while preserving Humidity Gradient Control for your bioactive substrate.
| Mesh Material Choice | Frame Installation Tips | Edge Sealing Techniques |
|---|---|---|
| stainless polymer | rigid support | overlap edges |
| 0.3–1.0mm | removable | no gaps |
| vapor passes | stops mixing | safe clips |
| Maintenance Schedule | monthly rinse | inspect |
Mix Tropical Substrate for Moisture Retention
- Start with a Peat-Free Compost Blend, coconut coir, and sphagnum moss; set your Coconut Coir Ratio for substrate moisture.
- Add a Perlite-Pumice Mix plus Charcoal Granules Inclusion to keep roots aerated.
- Finish with a Moss Mulch Layer; this bioactive substrate mix suits tropical snakes and holds moisture through watering cycles.
Add Leaf Litter for Cover and Microfauna
Leaf litter does more than cover soil; it turns the enclosure floor into living infrastructure.
In your bioactive vivarium, varied Leaf Litter Texture improves Microhabitat Creation, enhances Microfauna Diversity, and feeds the microfauna cleanup crew.
For tropical snakes, leaf litter also adds Camouflage Benefits, steadies surface moisture, and strengthens Nutrient Cycling within the broader substrate composition for plant roots below.
Avoid Unsafe Woods, Dyes, and Fertilizers
After adding litter, keep base material non-toxic.
- Practice Safe wood selection: use sealed maple or birch, plus ghost wood, mopani wood, or cork bark; avoid pine, cedar, and treated lumber.
- Choose Low-VOC paints, Natural dyes, and Eco-friendly sealants only.
- Maintain Fertilizer-free substrate, organic substrate, and clean soil composition.
Moisture makes chemical errors reach your snake more quickly.
Set Proper Substrate Depth for Rooting
Once your materials are safe, build depth with purpose: a 1 to 2 inch drainage layer below 3 to 4 inches of substrate benefits live plants, root zone moisture, and the soil microbiome.
Use Depth Measurement Tools, a Gradual Substrate Slope, Layer Compaction Prevention, Seasonal Depth Adjustment, and steady substrate depth and moisture management to protect plant root interaction during shedding.
Create Safe Heat and Light
Heat and light need to work together, because tropical snakes do best when their enclosure stays warm, stable, and predictable. Your setup should create clear zones, support the day-night cycle, and protect both the snake and the live plants.
The next steps show which equipment to use and where each part should go.
Build a Warm Side and Cool Side

Because tropical snakes self-regulate, build a clear thermal gradient with strict Thermal Barrier Placement, Gradient Ramp Design, and Cool Zone Shade.
- Heat Source Positioning
- Zoned Airflow Management
- Use a heat source, heat lamp, heat mat, or ceramic heat emitter only to hold 28–32 °C warm and 22–26 °C cool, so your snake can thermoregulate calmly.
Choose Heat Mats, Panels, or Emitters

With your temperature gradient established, choose the heat source by species and enclosure design. In a panel vs mat choice, a heat mat suits terrestrial snakes and lower power consumption, while a radiant panel covers perches and humid air.
Ceramic emitter benefits include dark nighttime warmth.
Use a ceramic heat emitter or heat lamp with careful thermostat integration and installation safety.
Control Every Heat Source With Thermostats

Because tropical enclosures drift quickly, run every heater through a smart thermostat with Zoned Temperature Control and Adaptive Heat Prioritization. Use digital temperature monitoring, careful heat lamp placement, Overheat Safety Relays, and an automated climate system to keep temperature regulation stable.
Review Energy Usage Logging monthly, and keep a strict Sensor Calibration Schedule so probes stay trustworthy in daily use.
Use UVB and Full-spectrum Plant Lighting

Because balance matters, use UVB lighting and rainforest LED systems together for tropical snakes and live plants.
- Light Positioning: even coverage.
- UVB Timing: brief, controlled exposure.
- Spectrum Balance: support broad growth.
- Plant Pigment Boost with Burn Prevention: strengthen color without leaf stress.
Keep a steady lighting cycle, and avoid harsh hotspots across basking and planted zones.
Place Probes in Both Temperature Zones

Start with Sensor Placement: secure one probe at the warmest perch and a second in the cool zone. Dual Zone Monitoring confirms the true temperature gradient and temperature range.
After Probe Calibration with a trusted digital thermometer, check the Vertical Gradient for Temperature Mapping in temperature monitoring. Keep probes dry and above the substrate to strengthen temperature and humidity monitoring techniques.
Automate a Consistent Day-night Cycle

Consistency matters more than guesswork in reptile lighting.
- Use a Programmable Light Timer for a 12-hour photoperiod, coordinating UVB lighting, LED, and the temperature gradient.
- Build Gradual Dawn Dusk over 15–30 minutes for Circadian Rhythm Automation.
- Confirm 500–1000 lux by day, under 5 at night with Lux Level Monitoring through smart home integration to protect normal sleep.
Add Hides, Branches, and Plants

Once the heat and humidity are stable, you can start shaping the enclosure so your snake feels secure and uses the space well.
The next choices focus on cover, climbing structure, and plant placement that support normal behavior without crowding the habitat. Use the list below to choose features that fit your species, enclosure size, and daily care routine.
Provide at Least Two Secure Hides
Secure hiding places are nonnegotiable. Provide two commercial hides, one ground level, one elevated, for stress reduction, proper support, and Microclimate Control. Keep entrances facing away from airflow, and size each refuge so your snake fits without squeezing when coiled.
| Hide Placement | Material Selection |
|---|---|
| Warm corner | Dual Entry, Easy Cleaning |
| Humid retreat | Benefits of providing hiding places: enrichment and hides. |
Use Cork Bark, Branches, and Ledges
Think of structure as usable terrain: cork bark gives tropical species’ grip, humid refuge, and environmental enrichment within a snake enclosure.
Choose lightweight, mold-resistant pieces, anchor ledges firmly, and trim branches for angles, because stable climbing surfaces reduce slips and support microclimates.
- Cork bark durability
- Branch safety tips
- Ledge design variations
- Cork bark aesthetics
- Branch trimming techniques guide naturalistic design.
Choose Tropical Snake-safe Live Plants
After cork and branches, add live plants that work as hard as your enclosure materials. For tropical snakes, choose non-toxic plants with humidity-tolerant foliage, especially low-light species and fast-growing climbers.
Prioritize pest-free sourcing, because choosing live plants safely in enclosures means choosing live plants suitable for humid environments and using live plants for humidity regulation without introducing pests or residues.
Create Climbing Paths and Shaded Retreats
Once your live plants are in place, build routes that let the snake move with purpose.
Use careful Material Selection: sanitized branches, cork, rocks, logs, and shelves, spaced for varied grip and supported by strong Anchor Stability.
Path Geometry should link climbing and basking areas beneath a dense Shade Canopy, while Humidity Integration preserves dark, secure hiding places nearby.
Design Microclimates for Shedding and Resting
After climbing routes are set, adjust microclimate control for shedding assistance and rest.
- Moss mat placement, targeted misting, and rough substrate zones support humidity management.
- Maintain a stable temperature gradient; keep the cool retreat drier, around sixty to seventy percent, during resting.
- Use thermal inertia materials to steady warm retreats.
- Practice humidity pocket mapping during checks for natural behavior stimulation.
Arrange Decor for Security and Enrichment
After you establish shedding zones, finish the layout by selecting decorative elements for the enclosure with Secure Anchor Points and Rounded Edge Design. Adding decorations and hiding places should include Non-toxic Decorative Stones, rock decorations, log decorations, and plants with Camouflage Patterns.
Use Modular Enrichment Stations to rotate hiding places while keeping branches immobile and surfaces escape-safe, smooth, and stable.
Set Up a Bioactive Cleanup Crew

A bioactive setup works best when the cleanup crew is chosen with the same care as your substrate and plants. The next steps show you which organisms to add, when to add them, and how to support them once they’re in place.
Get this part right, and the enclosure will stay more stable, cleaner, and easier to manage.
Add Springtails for Mold Control
Springtails are your first line of mold prevention in a tropical bioactive vivarium, because Fungal Competition starts where waste, moisture, and leaf litter meet. Keep them active with steady Moisture Management, a light leaf-litter cap, and small Charcoal Benefits in the substrate.
Practice Population Monitoring for Mite Prevention, and avoid overfeeding the cleanup crew or letting wet pockets stagnate unchecked.
Add Tropical Isopods for Waste Breakdown
Because tropical woodlice work below the surface, your cleanup crew gains reliable waste breakdown without constant intervention. Prioritize Detritivore Species Choice with strong Humidity Tolerance and a fast Population Growth Rate, so Organic Matter Breakdown stays steady in a bioactive vivarium.
These microfauna process feces, shed skin, and leaf litter, strengthening Nutrient Cycling while keeping surface waste from accumulating daily.
Introduce Microfauna After Plants Settle
Once roots take hold, introduce microfauna to your bioactive vivarium with careful Colonization Timing.
- Add springtails first
- Use Isolation Barriers briefly
- Start Population Monitoring
This gives your cleanup crew reliable Mold Food Supply, protects Moisture Balance, and lets tropical woodlice, isopods, and other microfauna spread through leaf litter within days after plants have visibly settled.
Build Shelter Zones With Cork and Litter
When designing a bioactive vivarium for tropical snakes, use Cork Placement Strategy and Territory Zoning Design to anchor dry hides over moist substrate and leaf litter for hiding places, microhabitat creation, Litter Moisture Control, Microclimate Monitoring, and Noise Dampening Benefits.
| Zone | Material | Purpose |
|---|---|---|
| Warm | Cork | security cover |
| Cool | litter | humidity buffer |
Support Healthy Soil Microbes and Fungi
Healthy substrate works like a living filter. In designing a bioactive vivarium for tropical snakes, support soil microbes and microfauna with Compost Tea Application, Fungal Inoculant Use, Carbon Source Integration, and Microbial Food Diversity from leaf litter and compost.
Healthy substrate acts like a living filter, feeding microbes and microfauna that keep a tropical bioactive vivarium balanced
Maintain pH Balance Management near 6.0–7.0, and keep a drainage layer beneath the mix, balancing microbial activity and waste breakdown safely.
Balance Waste Processing With Enclosure Moisture
Too much moisture stalls more than it helps. Your Cleanup crew works best when Misting systems raise humidity briefly, then a Drainage layer and Humidity control restore airflow.
That balance improves Ammonia Absorption, Microbial Decomposition Rate, Condensation Harvesting, Nutrient Uptake Efficiency, and pH Stabilization. In practice, you’re Balancing microbial activity and waste breakdown, not keeping the substrate constantly wet daily.
Cycle and Maintain The Enclosure

Once the build is done, your next job is keeping the enclosure stable, clean, and safe over time.
Before your snake goes in, let the system settle and confirm that humidity, airflow, and drainage are working together.
The next steps show you the routine checks and small adjustments that keep everything on track.
Cycle The Enclosure Before Adding The Snake
Before your snake goes in, focus on Pesticide Off-gassing, Substrate Dust Settling, Residual Chemical Clearance, Temperature Ramp Up, and Enclosure Leak Testing while cycling and stabilizing the bioactive system.
This period starts the nitrogen cycle, helps establish a cleanup crew ecosystem, and improves humidity control by balancing microbial activity and waste breakdown before any animal faces avoidable exposure or instability.
Monitor Humidity With Digital Hygrometers
Once cycling stabilizes, verify humidity control with a digital hygrometer placed at head height, away from water bowls and heat mats. Good Sensor Placement improves humidity monitoring and tracks true humidity levels.
Calibration Frequency every three to six months. Data Logging, Alert Thresholds, Battery Management, and temperature and humidity monitoring techniques to catch drift before conditions slip quietly.
Spot-clean Waste and Prune Plants Weekly
After hygrometer checks, use Waste Extraction Tools for droppings, keep humid habitats tidy, and perform Microfauna Health Checks during Cleaning and spot maintenance routines.
Follow Pruning Frequency Guidelines, Using live plants safely in enclosures, Tool Sanitization Protocol, Cleaning Schedule Tracking, Regular maintenance and monitoring procedures, and a substrate cleaning and replacement schedule each week to protect access, cover, and hygiene.
Prevent Mold, Waterlogging, and Foul Odors
Good plant care means: if damp waste lingers.
- Keep the drainage layer open; pooled water signals failed Leak Detection Methods.
- Use ventilation for Airflow Optimization and Surface Drying Techniques within 48 hours.
- Choose Mold-Resistant Plant Choices and Odor Absorbing Materials like leaf litter.
- Follow a Substrate cleaning and replacement schedule while maintaining proper humidity levels, balancing moisture and mold prevention.
Adjust Misting, Airflow, and Drainage as Needed
Adjust by measurement, not guesswork: short Misting intervals and Fogging cycles lift humidity levels without flooding roots, while misting systems should target bark and plants.
Check Airflow direction, ventilation, air exchange, Drainage inspection, drainage layer, and Water collection removal.
| Misting intervals | Airflow direction | Drainage inspection |
|---|---|---|
| Short | Upward | Drain pooled water |
| Frequent | Balanced | Check mesh layer |
| Targeted | Crossflow | Remove excess runoff |
Watch for Scale Rot and Respiratory Risks
Prioritize Belly Scale Checks and Early Symptom Watch every day. Raised scales, swelling, odor, lethargy, or appetite loss can signal scale rot or developing respiratory infections.
Pair Air Quality Testing, Clean Water Management, and Stress Reduction Practices with strong ventilation, stable humidity levels, and reliable temperature and humidity monitoring techniques. Dry resting surfaces matter because dampness drives growth and illness.
Top 5 Tropical Setup Essentials
If you want a tropical setup that holds moisture, drains well, and stays stable over time, the materials you choose matter from the start. The next five essentials are practical picks that can make your enclosure easier to build and maintain.
Use this list as a clear starting point as you choose the pieces for your snake’s habitat.
1. ZeeDix Organic Leca Terrarium Substrate
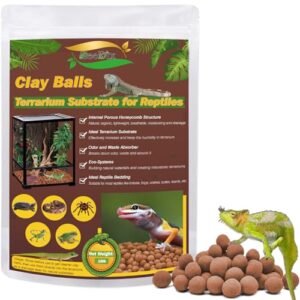
A stable tropical enclosure starts from the bottom up, and ZeeDix Organic Leca gives you a reliable drainage base. These baked clay balls are inert, non-toxic, and porous, so they hold moisture, release it gradually, and limit surface pooling after misting.
That matters because roots, microfauna, and lower substrate layers need airflow, not stagnant water. Rinse the pebbles before use, then build a 2‑to‑3‑inch layer. They’re reusable, durable, and especially useful in planted, humid, bioactive snake setups.
| Best For | Keepers building planted, humid, or bioactive tropical enclosures who need a dependable drainage layer that helps manage moisture without holding stagnant water. |
|---|---|
| Material | Expanded clay |
| Form | Loose clay balls |
| Primary Use | Drainage and substrate base |
| Setup Need | Rinse before use |
| Best For | Humidity control layers |
| Main Caution | Too coarse for tiny species |
| Additional Features |
|
- Porous baked clay balls absorb and release moisture gradually, which helps control humidity and reduce water pooling.
- Non-toxic, odorless, and reusable after rinsing, making them a clean and cost-effective substrate option.
- Works well as a drainage base for terrariums, planted enclosures, hydroponics, and propagation setups.
- The 4 mm–16 mm ball size may be too large for very small animals or setups that need a finer substrate.
- Needs to be rinsed before first use to remove dust from manufacturing.
- Does not provide nutrients or much burrowing support on its own, so many setups will need additional substrate layers.
2. TOOLTRIZ Fiberglass Window Screen Mesh
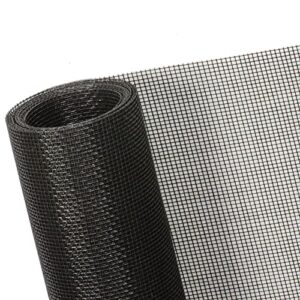
Your drainage layer only works if the barrier above it does its job. TOOLTRIZ Fiberglass Window Screen Mesh forms a clean divider between clay balls and substrate, so soil stays in place while excess water still drains downward.
The fiberglass weave is washable, noncorrosive, easy to trim, and flexible enough to fit most enclosures without fraying.
In practice, that means fewer clogged layers, less mess during maintenance, and a more reliable humid base for roots, microbes, and your snake overall.
| Best For | Keepers who want an affordable, easy-to-trim mesh barrier for terrarium drainage layers, screen repairs, or other simple DIY enclosure projects. |
|---|---|
| Material | Fiberglass mesh |
| Form | Mesh screen panel |
| Primary Use | Ventilation and insect blocking |
| Setup Need | Trim to fit |
| Best For | Screened enclosure airflow |
| Main Caution | Creases from folded shipping |
| Additional Features |
|
- Easy to cut and fit, which makes it simple to use as a divider between drainage media and substrate.
- Lets water drain while helping keep soil in place, so the enclosure stays cleaner and easier to maintain.
- Washable, sun-tolerant fiberglass offers solid durability for low-cost DIY use.
- Folded packaging can leave creases that may take time and stretching to flatten out.
- Fixed 48 in × 118 in size may require trimming and may not suit every frame or enclosure without adjustment.
- Fiberglass is flexible but not as rigid or impact-resistant as aluminum screening.
3. Josh Frogs Tropical Bioactive Substrate

Want a substrate that does more than fill the floor? Josh’s Frogs Tropical BioBedding gives your enclosure a planted, moisture-retentive base that nourishes roots, fungi, and cleanup crews in one layer.
It arrives dry, so rehydrate it with dechlorinated water before use, and add a false bottom if you run automatic misting.
In most tropical snake setups, it helps maintain humidity, holds shape well, and reduces full substrate changes, though larger enclosures often need more than one 10‑quart bag deep.
| Best For | Keepers building tropical bioactive terrariums who want a natural-looking, moisture-retentive substrate that supports live plants and cleanup crews while reducing full substrate changes over time. |
|---|---|
| Material | Bioactive substrate |
| Form | Loose substrate mix |
| Primary Use | Bioactive bedding and planting |
| Setup Need | Re-moisten before use |
| Best For | Planted tropical habitats |
| Main Caution | Arrives very dry |
| Additional Features |
|
- Supports bioactive setups by helping springtails, isopods, and other microfauna recycle waste and keep the enclosure cleaner
- Holds moisture well while still draining properly, making it a strong base for live plants and humidity-loving species
- Creates a natural tropical look and a softer, safer surface that can encourage more natural behaviors
- Arrives completely dry and needs to be rehydrated with dechlorinated water before use
- A single 10-quart bag may not provide enough depth for larger enclosures, so you may need to buy more than one
- Can require extra mixing or amendments, and shifting from digging cleanup crews may unevenly disturb the surface over time
4. XYZReptiles Live Oak Leaf Litter Terrarium Bedding
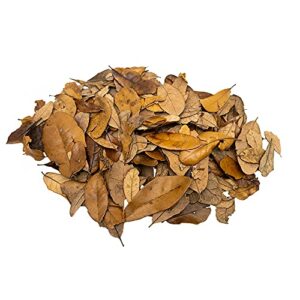
Think of oak leaf litter as the enclosure’s protective topcoat, not decoration alone. XYZReptiles Live Oak Leaf Litter gives your tropical setup a natural forest-floor layer that traps humidity, shelters shy snakes, and feeds microfauna as it breaks down.
The oak leaves are marketed as pesticide- and herbicide-free, heat-treated, and chemically free, which matters in closed systems.
Spread it evenly over the substrate and replace it as it decomposes. Check for sharp edges before use, especially with delicate species present.
| Best For | Keepers building naturalistic or bioactive enclosures for reptiles, amphibians, and invertebrates that benefit from extra humidity, cover, and a leaf layer that supports microfauna. |
|---|---|
| Material | Oak leaf litter |
| Form | Loose dried leaves |
| Primary Use | Top cover and humidity support |
| Setup Need | Rinse or boil |
| Best For | Natural cover and shelter |
| Main Caution | May need sterilizing |
| Additional Features |
|
- Pesticide- and herbicide-free oak leaves add a more natural, enclosure-safe forest-floor look.
- Helps hold moisture and humidity while giving animals extra cover and hiding spots.
- Breaks down over time to feed springtails, isopods, and other microfauna in bioactive setups.
- Some pieces can have hard or sharp edges, so sorting before use is a smart idea for delicate species.
- The leaves may release tannins, which can discolor water unless they are rinsed or soaked first.
- The bag is lightweight and relatively small, so larger enclosures may need more than one.
5. Josh Frogs Isopods and Springtails
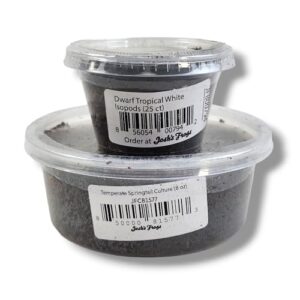
Once leaf litter is in place, Josh’s Frogs dwarf tropical white isopods and springtails give that forest floor a working clean-up crew. The isopods break down feces and larger debris, while springtails graze on mold and fine organic waste, helping keep the substrate biologically active.
This bundle includes live cultures, starter substrate, and care guidance, which shortens setup time.
Still, inspect shipments promptly because customer reports mention low counts, dry cultures, and occasional die-offs during transit in warm weather windows.
| Best For | Keepers building or refreshing bioactive terrariums who want an easy starter clean-up crew for amphibian or small reptile setups. |
|---|---|
| Material | Live microfauna |
| Form | Live culture containers |
| Primary Use | Waste breakdown and mold control |
| Setup Need | Acclimate after arrival |
| Best For | Establishing clean-up crews |
| Main Caution | Possible live-arrival issues |
| Additional Features |
|
- Helps keep bioactive enclosures cleaner by breaking down waste, leftover debris, and mold.
- Includes live isopods, springtails, starter substrate, and care guidance, so setup is quicker.
- Can support long-term terrarium health while also providing occasional live prey for small insect-eaters.
- Multiple customer reports mention low counts, dead-on-arrival insects, or cultures drying out in transit.
- The price feels high given the mixed feedback on live-arrival quality and consistency.
- Refunds are not clearly guaranteed, so problems may depend on customer-service follow-up.
Frequently Asked Questions (FAQs)
What is included in a snake tank setup guide?
A good snake tank setup guide covers enclosure size, secure hides, safe substrate, drainage, heating, lighting, humidity control, ventilation, climbing and cover, cleanup crew options, and monitoring, so your snake can thermoregulate, shed, and rest.
What is a snake enclosure?
If you’ve heard the theory that snake can thrive in any box, set that aside.
A snake enclosure is a habitat that controls heat, humidity, shelter, and safety while allowing movement and natural behavior properly.
How long should a snake enclosure be?
Make the enclosure at least as long as your snake, and ideally 1 to 5 times its length.
Arboreal species need more room, often 5 times body length, so they can climb, stretch, and thermoregulate.
How do I choose the right snake enclosure size?
Think of enclosure as your snake’s shoe size: it should fit an adult, not today.
Choose one at least as long as the adult snake, half as wide, with extra height for climbers and hides.
How to set up a bioactive snake enclosure?
Start with a drainage layer and mesh barrier, then add moist bioactive substrate, leaf litter, live plants, and springtails with isopods.
Cycle the enclosure for several weeks, then maintain heat, humidity, ventilation, and spot-cleaning carefully.
What not to put in a snake enclosure?
Avoid bleach, ammonia, aerosols, essential oils, pesticides, treated soils, scented bedding, heat rocks, unregulated heaters, compacting sand, dyed gravel, rotting wood, sponges, and fragranced cleaners;
they can cause burns, poisoning, irritation, mold, impaction, and disease.
How to properly set up a snake enclosure?
Choose an escape-proof enclosure sized for the adult snake, then add deep, breathable substrate with drainage, two hides, stable branches, and safe plants.
Maintain a warm-to-cool gradient, controlled humidity, thermostat-regulated heat, UVB, and consistent lighting.
What should be in a snake enclosure?
Your snake enclosure should include secure hides on both ends, a moisture-safe substrate with drainage, fresh water, stable heat and humidity gradients, UVB lighting, climbing branches or cork bark, live plants, and bioactive cleanup insects.
What is the best way to prevent mites?
Like shutting off a faucet, keep humidity below 50 percent, wash bedding hot at 130 F, dry on high heat, vacuum fabrics often, fix leaks, and inspect new plants or decor before bringing them indoors.
How often should tropical snakes be fed?
Most tropical snakes eat every 5 to 7 days as hatchlings, 7 to 10 days as juveniles, and 10 to 14 days as adults, then you fine-tune frequency based on size, body condition, and appetite.
Conclusion
With your tropical snake’s home now carefully crafted, imagine a lush oasis where every detail harmonizes to nurture its well-being. By following this step-by-step guide to the perfect snake enclosure setup for tropical species, you’ve indeed created a thriving habitat, but also a proof of your dedication.
Your snake will flourish in this carefully designed environment, and you’ll enjoy the rewarding experience of watching it thrive in its new home, healthy and free.
- https://reptifiles.com/
- https://www.flickr.com/photos/12156081/3005539570
- https://www.reptilecentre.com/blogs/reptile-blog/5-ways-to-increase-humidity-for-reptiles
- https://ariumology.com/2025/12/21/paludarium-climate-control-the-real-science-of-airflow-misting/
- https://www.buraqpets.com/blogs/fish/how-to-maintain-proper-temperature-and-humidity-in-a-reptile-enclosure