This site is supported by our readers. We may earn a commission, at no cost to you, if you purchase through links.
A poorly designed terrarium can stress your snake, trigger respiratory infections, and leave you troubleshooting problems every week. The right setup does the opposite—it keeps your animal healthy, simplifies maintenance, and gives you a front-row seat to natural behaviors you’d never see in a generic glass box.
Building one from scratch isn’t as intimidating as it sounds. You don’t need carpentry skills or a massive budget. What you do need is a clear plan that matches your snake’s biology, not just the latest trend on social media.
Whether you’re housing a ball python, a corn snake, or an arboreal species, smart design starts with understanding how temperature, humidity, and space work together. Get those elements dialed in, and the rest falls into place.
Table Of Contents
- Key Takeaways
- Planning Your Snake Terrarium Design
- Choosing Durable Materials and Equipment
- Creating a Functional Enclosure Layout
- Establishing Proper Heating and Lighting
- Managing Humidity and Ventilation
- Designing Naturalistic and Bioactive Setups
- Building, Maintaining, and Upgrading Your Terrarium
- Frequently Asked Questions (FAQs)
- Conclusion
Key Takeaways
- Your terrarium’s core success hinges on matching three biological fundamentals to your snake’s species: appropriate temperature gradients (typically 75–95°F depending on origin), precise humidity levels (30–95% based on native habitat), and enclosure dimensions that equal your snake’s adult length with at least half that in width.
- Material selection directly impacts long-term health and maintenance costs—PVC frames resist corrosion in humid setups while wood provides superior insulation for arid species, and choosing non-toxic substrates like aspen or coconut husk over pine, cedar, or calcium sand prevents respiratory damage and gastrointestinal blockages.
- Proper heating requires thermostat-controlled sources with probes placed at actual contact surfaces rather than ambient air, while UVB lighting positioned 25–45 cm above basking zones supports calcium metabolism and natural behavior when run 10–14 hours daily with annual bulb replacement.
- Bioactive setups with drainage layers, cleanup crews of isopods and springtails, and live plants create self-regulating ecosystems that reduce maintenance frequency while providing enrichment, though front-opening doors and removable trays cut routine cleaning time by 30–50% regardless of setup type.
Planning Your Snake Terrarium Design
Planning your snake terrarium starts with understanding what your specific snake needs to thrive. You’ll want to think about the right size, the natural habitat you’re trying to recreate, and any quirks your species brings to the table.
Let’s break down the key decisions you’ll face before you start building.
Determining Ideal Enclosure Size
How do you pick the right dimensions for your snake terrarium? Start with your snake’s adult length—your enclosure should match it in length and offer at least half that measurement in width. For a 4-foot corn snake, aim for 48 inches long by 24 inches wide. Remember to keep in mind the minimum enclosure size for your snake.
Don’t forget vertical space for climbers and enrichment needs like hides and branches.
Assessing Species-Specific Needs
Once you’ve settled on size, you need to match your terrarium to your snake’s biology. Thermal gradients matter—corn snakes thrive with basking zones near 90°F and cool sides around 75–80°F, while ball pythons need 90–95°F warm hides. Humidity levels vary too: scrubland species like corn snakes handle 30–70%, but rainforest boas require 70–95%.
Lighting needs, microhabitat zoning, and seasonal adjustments all depend on species-specific behavior and environmental enrichment goals. Remember that broad spectrum lighting can benefit most species.
Replicating Natural Habitats
Once you’ve nailed thermal gradients and humidity, it’s time to match habitat design to your snake’s wild origins. Field studies show reptiles in structurally complex environments display broader natural behaviors—increased exploration, climbing, and refuge use.
Field studies confirm that structurally complex snake habitats unlock broader natural behaviors like exploration, climbing, and refuge use
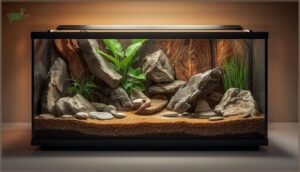
Incorporate varied substrates, rocks, and plants that mirror your species’ native microhabitats. This environmental enrichment fosters bioactive ecosystems and naturalistic outcomes, encouraging the full range of behaviors evolution hardwired into your animal.
Choosing Durable Materials and Equipment
The materials you choose will make or break your terrarium’s longevity and your snake’s safety. Cheap or toxic components can fail over time, creating health risks and costly repairs.
Here’s what to look for when selecting frames, panels, substrates, and hardware that’ll stand the test of time.
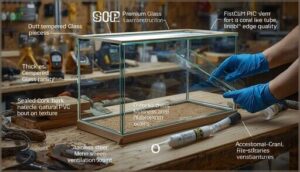
Selecting Sturdy Wood or PVC Frames
Your choice between wood and PVC frames shapes every aspect of your terrarium’s performance. Each material brings distinct advantages you’ll want to weigh carefully:
- Wood insulation holds heat naturally (R-value 1.1 vs. PVC’s 0.4), cutting energy costs for arid species
- PVC durability resists corrosion and mold in humid setups, lasting decades with minimal maintenance
- Cost comparison favors pine at under $2 per board foot, while PVC sheets run around $100
- Weight factors make PVC easier to move and stack, weighing half of comparable wood builds
Deciding Between Glass and Thermoplastic Panels
When you’re comparing viewing panels, thermoplastic options like acrylic and PVC offer sharper display quality and roughly 10–17 times greater impact resistance than glass. They weigh about half as much, retain humidity better through gasketed seams, and hold heat up to 20% longer—cutting your energy costs.
Glass provides high clarity but demands thicker panels for strength, increasing weight and thermal loss while making cleaning mineral deposits more labor-intensive.
Choosing Safe Substrates and Sealants
Beyond panels and frames, substrate material and sealants directly impact your snake’s respiratory and digestive health. A 2024 husbandry review flagged calcium sand, ground walnut shell, and bark chips for gastrointestinal blockage risk, while cedar and pine release toxic aromatic hydrocarbons.
Choose safe substrate options:
- Aspen shavings for low-humidity species (1–2 USD per pound)
- Coconut husk for tropical snakes requiring sustained moisture
- Bioactive mixes with topsoil, coir, and moss for self-cleaning setups
Seal wood surfaces with aquarium-safe silicone sealant, which cures non-toxic in 24–48 hours and prevents rot in high-humidity builds.
Selecting Secure Latches and Hardware
Without secure latches, your snake terrarium becomes an open invitation for escape—surveys show 4.3% of UK keepers reported escapes within twelve months. Choose stainless steel cam locks for corrosion resistance in humid enclosures, and confirm that your latching systems leave zero gaps at corners where snakes investigate first.
| Hardware Type | Best Use |
|---|---|
| Stainless steel cam locks | High-humidity tropical setups |
| Keyed sliding-door locks | Front-opening enclosures |
| Compression cam locks | Rack systems with vibration |
| Tubular cam locks | Maximum security for large snakes |
| Wire door locks | Quick-access sliding glass doors |
Creating a Functional Enclosure Layout
A well-designed layout makes your terrarium work better for both you and your snake. The right setup balances your pet’s natural behaviors with your need to maintain the space efficiently.
Here’s how to arrange hiding spots, water features, and basking zones so everything functions as it should.
Designing Hiding Spots and Climbing Structures
Your snake’s hiding spots should allow it to touch two or more walls when coiled, with heights around 1.5× to 2× the snake’s thickness for security.
For climbing structures, branch diameters between 13–39% of mid-body diameter work best, while arboreal species need vertical heights of 3 to 6 feet or more.
Sturdy, anchored materials prevent falls and support natural behavior, directly improving welfare.
Incorporating Water Bowls and Basking Areas
You’ll need a water bowl that holds at least 1–2 liters for smaller snakes and up to 19 liters for larger species, allowing them to soak when dehydrated or shedding.
Place your basking platform—made from slate, ceramic tile, or treated wood—near the heat source to create a temperature gradient of 75°F on the cool side and 90–95°F at the basking area, supporting natural thermoregulation and hydration behavior.
Ensuring Easy Access for Cleaning
Front-opening doors cut your spot-cleaning time by 30–50% compared to top lids, letting you remove waste without triggering predator-like stress in your snake.
Three features simplify maintenance:
- Slide-out trays isolate feces within an 8–10 inch zone, preserving hides during weekly disinfections.
- PVC panels resist 70%+ humidity and wipe clean with soap, requiring only quarterly resealing.
- Ventilation grilles stabilize airflow, supporting bioactive setups that need spot cleans every 1–3 months.
Establishing Proper Heating and Lighting
Getting temperature and light right isn’t just a detail—it’s the foundation of your snake’s daily comfort and long-term health. Without proper heating zones and a consistent light cycle, even the best-designed terrarium can leave your snake stressed or struggling.
Let’s break down how to install the right heat sources, create effective temperature gradients, and add lighting that encourages natural behavior.
Installing Heat Sources With Thermostats
Because your heating system forms the foundation of snake health, installing heat sources with thermostats isn’t optional—it’s essential. A thermostat prevents burns and fire risks by limiting maximum surface temperatures, while proper probe placement at the basking surface ensures accurate temperature control.
Here’s how different heat sources pair with thermostat types:
| Heat Source Type | Compatible Thermostat | Typical Wattage Range | Key Safety Note |
|---|---|---|---|
| Heat mats & tape | On/off (non-proportional) | 8–40 watts | Place probe where snake contacts surface |
| Ceramic emitters | Proportional dimming | 60–150 watts | Mount outside enclosure when possible |
| Deep heat projectors | Proportional dimming | 40–80 watts | Use ceramic socket fixtures |
| Overhead heat lamps | Proportional or pulse | 50–100 watts | Install physical guard to prevent contact |
Position your thermostat probe inside the warm hide or directly on the heated surface—not floating in air—because that’s where your snake actually experiences heat. Secure probes with tape or clips so displacement doesn’t trigger dangerous overheating. Check electrical loads carefully; don’t daisy-chain multiple high-wattage devices on one outlet or thermostat. Verify actual surface temperatures daily with an infrared temperature gun, comparing readings to your thermostat setpoint. This monitoring practice catches malfunctions before they harm your animal, giving you real control over environmental conditions.
Creating Temperature Gradients
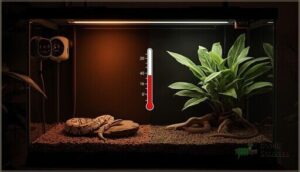
Once your thermostats are working, you’ll create a temperature gradient by positioning heat sources at one end—establishing a warm spot near 32°C and a cool zone around 24–27°C.
This spatial layout lets your snake thermoregulate naturally, supporting digestion and immune function.
Gradient measurement matters: use multiple thermometers to confirm stability, because physiological impacts emerge when zones drift beyond species needs.
Adding UVB and Daylight Lighting
Beyond temperature, you’ll need UVB lighting and full-spectrum daylight to support natural behavior and calcium metabolism. Mount T5 high-output tubes 25–45 cm above basking areas to achieve appropriate UVB intensity for your species needs—corn snakes generally need UVI around 0.6–1.4, while kingsnakes may require 1.1–3.0.
- Run UVB lamps 10–14 hours daily to mimic natural photoperiod programming and entrainment
- Select 10–14% UVB tubes for diurnal species; lower outputs suit nocturnal or crepuscular snakes
- Combine UVB fixtures with 5,800–6,500 K daylight integration lamps for visual function
- Position heat lamp and reptile lighting to create gradients, leaving shaded refuges available
- Replace UVB bulbs annually, as output declines before visible dimming occurs
Mounting distance matters—mesh screens reduce intensity by 30–50%, so adjust accordingly. Proper reptile habitat lighting enhances growth, basking behavior, and overall welfare in your snake habitat.
Managing Humidity and Ventilation
Getting the air quality and moisture right can make or break your snake’s health. Too much humidity leads to respiratory infections, while too little causes shedding problems and dehydration.
Here’s how you can dial in the perfect balance for your terrarium.
Selecting Water Features for Humidity
Your water bowl doubles as both a drinking station and a humidity tool. Larger bowls evaporate more water, raising humidity—species needing 55–75% often require bowls big enough for full-body soaking. Moving water features and misting systems push humidity even higher, ideal for tropical snakes. Just watch for health risks: oversaturated substrate invites respiratory trouble, while foggers with humidity control prevent dangerous swings.
| Feature Type | Best For |
|---|---|
| Large static bowl | General humidity; species needing 50–75% |
| Waterfall or moving water | Tropical setups; raising ambient levels |
| Automated fogger/mister | Precise humidity control; shedding cycles |
Installing Ventilation Panels or Fans
With proper ventilation placement, you’ll prevent stagnant air without crashing humidity levels. Position low ventilation holes on the cool end for intake and high vents on the warm side for exhaust—cross-flow works best.
Standard 4-foot terrariums need two to three 5×3-inch vents; 6×2×2 enclosures often use six 4-inch rounds.
For active airflow, install low-voltage fan types like 80mm computer fans with mesh guards for escape prevention.
Monitoring and Adjusting Environmental Levels
Once you’ve built your ventilation, tracking temperature gradients and humidity levels becomes your daily priority. Digital thermometers and hygrometers with sensor accuracy of ±1 °F let you verify each zone—many keepers miss that 48% skip humidity checks entirely. Smart automation systems now offer data logging, remote alerts, and gradient maintenance tools that catch swings before your snake shows stress.
- Place probes at substrate level in cool and warm zones for accurate gradient verification
- Check readings every morning to spot heating failures or humidity drift early
- Set remote alerts on wireless monitors so you’re notified of dangerous temperature spikes
- Log trends weekly to adjust misting schedules, ventilation, or timer settings as seasons change
- Calibrate hygrometers monthly against a salt‑test reference to maintain long‑term reliability
Designing Naturalistic and Bioactive Setups
Naturalistic and bioactive terrariums bring your snake’s wild habitat right into the enclosure, creating a self-sustaining environment that looks stunning and promotes long-term health. These setups require more planning up front, but they reduce maintenance over time while giving your snake physical and mental enrichment.
Here’s how to build a thriving bioactive system from the ground up.
Choosing Compatible Live Plants
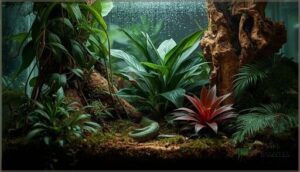
Live plants transform your snake-friendly terrarium into a thriving vivarium design that mirrors a natural habitat. Consider plant toxicity first—Pothos, Snake Plants, and Bromeliads are safe choices with humidity compatibility for tropical species.
These selections provide enrichment benefits through hiding spots while requiring minimal growth maintenance. Match habitat selection to your snake’s environment: ferns for humid setups, succulents for arid terrarium landscape design.
Creating Drainage and Substrate Layers
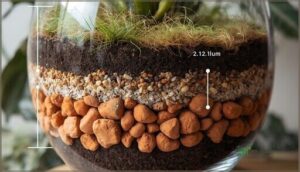
A well-designed drainage layer acts as your bioactive vivarium’s foundation, preventing root rot and balancing water retention. Install 2.5 inches of lightweight expanded clay aggregate or coarse gravel, then add mesh separation.
Top with a substrate mix of organic soil, coconut coir, and sphagnum moss—keeping the total profile around 4–5 inches. This ecosystem design ensures proper moisture performance without oversaturation.
Introducing Cleanup Crews for Bioactivity
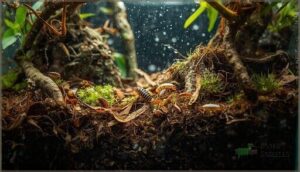
A thriving cleanup crew turns your bioactive vivarium into a self-regulating ecosystem. Start with 20–50 isopods plus one springtail culture for a standard 36×18×18 terrarium, matching humidity needs to your snake’s requirements.
- Isopod Selection: Choose Porcellionides pruinosus for 40–60% humidity setups
- Springtail Cultures: Seed separately to guarantee population establishment
- Population Control: Monitor densities to prevent overcrowding stress
- Feeding Protocols: Offer leaf litter twice weekly for decomposition
- Species Compatibility: Avoid mixing tropical and temperate cleanup crew species
Building, Maintaining, and Upgrading Your Terrarium
Building your terrarium is just the beginning—you’ll need a clear plan for construction, ongoing care, and future adjustments as your snake grows.
Regular maintenance keeps the habitat safe and functional, while proactive troubleshooting prevents small issues from becoming serious problems.
Let’s walk through the practical steps for building, maintaining, and upgrading your enclosure over time.
Step-by-Step Construction Tips
Building a snake enclosure starts with frame assembly. Fasten 12–19 mm PVC or plywood panels using corrosion-resistant screws spaced 15–20 cm apart to prevent racking. During panel installation, pre-drill pilot holes at 70–80% of screw diameter to avoid cracks.
Route wiring through pre-cut channels before sealing gaps with reptile-safe silicone. Then, mount hardware like radiant heat panels before final wall attachment.
Regular Cleaning and Health Monitoring
Once construction wraps up, maintenance becomes your top priority. Daily spot cleaning removes waste and prevents bacteria from taking hold.
Check parameter tracking logs for temperature and humidity drift, then disinfect surfaces weekly with reptile-safe solutions.
Monitor your snake’s appetite, shed cycles, and feces to catch health concerns early—consistent observation beats reactive fixes every time.
Troubleshooting Common Issues
Even careful maintenance can’t prevent every hiccup. When you notice Shedding Problems—retained eye caps or patchy skin—boost humidity by 10–15 percent and add a moist hide.
Appetite Loss often signals incorrect temperatures; verify your gradient sits between 75°F and 90°F.
Respiratory Issues like wheezing point to poor ventilation or cold spots, so adjust airflow and recheck your thermostat immediately.
Scaling or Renovating for Growing Snakes
Snakes double or triple in size during their first year, so growth monitoring makes a big difference. When your snake’s length reaches the combined length plus width of your current enclosure, the upgrade timeline begins.
Adult corn snakes hit 4–6 feet and demand a 4×2×2-foot footprint minimum.
Renovation costs for custom bioactive setups exceed $1,000, yet plywood builds stay near $400–$450. Size requirements evolve as your animal matures.
Frequently Asked Questions (FAQs)
Can multiple snakes share one terrarium safely?
Throwing two strangers into a small room rarely ends well. Most snakes can’t share one terrarium safely—cohabitation increases disease risks, escape risks, and stress.
Species-specific needs, tank size, and constant monitoring become critical challenges.
How do you move a terrarium once built?
Moving your snake terrarium safely requires careful disassembly and secure packaging with bubble wrap. Transport your animal separately in a ventilated container.
Post-move, inspect the enclosure to ensure its integrity before reintroducing substrate and heating elements.
What are the best budget-friendly material alternatives?
You’ll save serious cash by sourcing secondhand tanks from online marketplaces, opting for pine plywood instead of pricey PVC, and mixing DIY substrates like bulk topsoil with coconut fiber—your snake won’t know the difference.
How often should you replace UVB bulbs?
You’ll want to replace most UVB bulbs every six to twelve months, even when they still glow. UV output declines before visible light dims, and testing with a Solarmeter confirms when replacement is needed.
Do glass or acrylic panels insulate better?
Acrylic panels insulate substantially better than glass. With thermal conductivity around 19 W/m·K versus glass at 80 W/m·K, acrylic retains heat more efficiently—critical for maintaining stable enclosure temperature and humidity levels.
Conclusion
The difference between a thriving snake and a stressed one often comes down to a few inches of space, a degree of heat, or a percentage point of humidity. When your snake terrarium design plans address those details from the start, you’re not just building an enclosure—you’re engineering stability.
Measure twice, build once, and you’ll spend less time fixing problems and more time watching your animal behave exactly as nature intended.
- https://www.familyreptiles.com/post/what-size-tank-or-enclosure-does-my-reptile-need-as-it-grows
- https://www.reddit.com/r/reptiles/comments/11irmg6/tank_size_for_corn_snake/
- https://reptifiles.com/corn-snake-care-guide/corn-snake-temperatures-humidity/
- https://pubmed.ncbi.nlm.nih.gov/40693519/
- https://vcahospitals.com/know-your-pet/reptiles---proper-lighting

