This site is supported by our readers. We may earn a commission, at no cost to you, if you purchase through links.
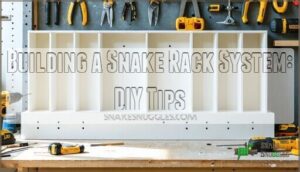
You’ll want to choose durable, fire-resistant materials and design a functional system with proper ventilation and temperature regulation.
Repurposing old bookshelves or using PVC sheets can be cost-effective options.
As you start building a snake rack system, remember to prioritize escape-proofing and precise measurements to guarantee your snakes’ safety and comfort, and that’s just the beginning of creating a thriving environment for your slithery friends.
Table Of Contents
- Key Takeaways
- Building a Cheap Snake Rack
- Choosing The Right Materials
- Designing a Functional Snake Rack
- DIY Snake Rack Ideas
- Setting Up a Snake Breeding Rack
- Snake Rack Considerations
- Setting Up a Snake Enclosure
- Snake Breeding Considerations
- Tips for a Successful Snake Rack
- Frequently Asked Questions (FAQs)
- How many snake racks can I build?
- How to make a DIY snake rack?
- How much does a DIY snake rack cost?
- How to build a snake enclosure?
- What is a snake rack made of?
- Can you make a snake rack using melamine and PVC?
- Is it worth building a DIY snake rack?
- What makes a good snake rack?
- How big is a DIY snake enclosure?
- How should you store snakes in a snake rack?
- Conclusion
Key Takeaways
- You’ll want to choose durable materials and design a functional system with proper ventilation and temperature regulation to guarantee your snakes’ safety and comfort.
- Repurposing old bookshelves or using PVC sheets can be cost-effective options for building a snake rack, and you can customize them to fit your snakes’ specific needs.
- When setting up a snake enclosure, you’ll need to add heating elements and lighting, create a suitable environment, and maintain temperature and humidity levels to keep your snakes healthy and happy.
- You should regularly clean and maintain the rack, monitor temperature and humidity levels, and provide a safe environment for your snakes, including proper ventilation, lighting, and substrate to reduce stress and aggression.
Building a Cheap Snake Rack
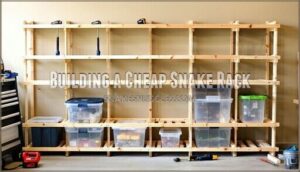
You’re looking to build a cheap snake rack, and you can start by considering DIY construction methods, such as repurposing old bookshelves or using PVC sheets.
Build a cheap snake rack with DIY methods like repurposing bookshelves or using PVC sheets for a cost-effective solution
By building your own snake rack, you can create a cost-effective and customizable enclosure that meets your snake’s specific needs.
DIY Snake Rack Construction
You’re building a DIY snake rack. Consider these steps:
- Plan your rack
- Source materials
- Assemble
- Add ventilation.
Many builders source rack construction supplies online.
This guarantees rack mobility and proper ventilation methods for your snake rack construction, making your DIY snake rack building experience successful.
Repurposing Old Bookshelves
You’re upcycling an old bookshelf into a snake rack.
Guarantee Bookshelf Stability with these steps:
- Add ventilation holes
- Line with contact paper
- Secure with deck screws, allowing for Aesthetic Customization within Size Constraints.
Consider PVC enclosures for heat retention.
Using PVC Sheets for a Budget-Friendly Option
You’re looking for a budget-friendly option for your snake rack system.
Consider PVC sheets for their durability and ease of customization. They offer a cost-effective alternative to other materials, making them ideal for a DIY snake rack.
PVC sheets provide robust construction and lasting durability, perfect for an affordable snake housing solution.
Choosing The Right Materials
You’re building a snake rack system, and choosing the right materials is essential for your pet’s safety and comfort.
You’ll want to select durable, fire-resistant materials that fit your budget, such as PVC sheets or melamine, which can be found at home improvement stores.
Durable and Fire-Resistant Materials
Now that you’ve got your cheap snake rack built, let’s make sure it’s safe. Choosing the right materials for snake rack is key for snake rack safety. You want something with material durability and fire resistance.
Think about these materials for snake rack:
- Metal offers superior durability and heat conductivity.
- PVC can be coated with fire-resistant paint for enhanced fire safety.
- Expanded PVC provides rigidity.
Heat-resistant materials are a must for keeping your scaly friends safe. For enhanced safety, consider using specialized PVC options. Consider structural integrity and long-term costs for your snake rack system.
Affordable Options for a DIY Snake Rack
You’re considering affordable options for a DIY snake rack.
Repurposed materials can be cost-effective.
| Material | Cost |
|---|---|
| PVC Sheets | Low |
| Plastic Bins | Low |
| Wire Mesh | Low |
| Discount Tubs | Cheap |
They offer budget ventilation and cheap heating solutions for your DIY snake rack, providing a cost-effective way to manage your DIY project.
Sourcing Materials From Home Improvement Stores
You’ll find everything you need at local home improvement stores, with high material availability.
Explore stores for sturdy snake rack materials, ensuring a safe and durable DIY snake rack.
Compare pricing and brand options, and consider tool rentals or delivery services for your PVC snake rack or melamine particle board project, using Sterilite containers for a cost-effective snake rack system.
Designing a Functional Snake Rack
You’re designing a functional snake rack, and this is vital for ventilation and temperature regulation to guarantee your snakes’ health and comfort.
By creating a sturdy, escape-proof structure with adjustable shelves, you can provide a safe and comfortable environment for multiple snakes, while also saving space and reducing costs, which is crucial for a functional setup.
Considerations for Ventilation and Temperature Regulation
You design a snake rack system with proper ventilation and temperature regulation in mind.
- Provide airflow through drilled holes
- Monitor humidity levels
- Use heat tape or mats
- Incorporate thermostats for precise control, balancing species needs and heat placement for a thriving environment, ensuring the system maintains optimal conditions with proper ventilation.
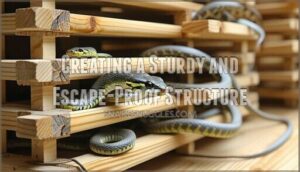
Creating a Sturdy and Escape-Proof Structure
Building a snake rack system requires attention to Secure Joints and Durable Materials.
Use Proper Dimensions to prevent escape.
| Material | Dimension | Stability |
|---|---|---|
| Wood | 2×4 | High |
| Metal | 1×2 | Medium |
| Plastic | 1×1 | Low |
Ensure Stable Stacking for Escape Prevention, prioritizing snake rack safety and dimensions.
Regular inspection of enclosures can help identify potential weak spots.
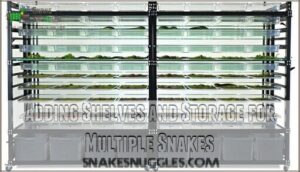
Adding Shelves and Storage for Multiple Snakes
Now that you’ve created a sturdy structure, organize shelves to fit various snake sizes, using adjustable shelf spacing to match tub sizes, ensuring snake compatibility and rack stability in your snake rack system.
With secure accessory storage and level configuration for ideal snake rack construction and design, the system should provide a safe and organized environment for the snakes, emphasizing the importance of rack stability.
DIY Snake Rack Ideas
You’re looking to build a snake rack system that’s both functional and cost-effective, and you’re considering various DIY ideas.
By exploring different materials and designs, you can create a custom snake rack that meets your specific needs and provides a safe environment for your snakes.
Upcycling Old Furniture for a Unique Snake Rack
You’re upcycling old furniture into a unique snake rack, transforming it into a cozy home for reptiles.
This DIY approach offers a cost-effective, eco-friendly solution with proper safety modifications and aesthetic integration, analyzing costs and furniture selection for the perfect snake enclosure.
Using Plastic Bins and Aquarium Tanks as a Base
You’re looking for a cost-effective base for your snake rack system.
Consider plastic bins or aquarium tanks, which offer flexibility and safety.
Check a snake tank size chart to confirm the perfect fit for your pet’s species and size.
Customize bins for ventilation and security, making them a great choice for novice and experienced snake keepers alike, providing a secure snake enclosure with ease of cleaning and material safety.
Creating a Snake Rack From Wire Mesh and PVC Pipes
As you consider alternatives to aquarium tanks, creating a snake rack from wire mesh and PVC pipes offers flexibility and security.
- Mesh Ventilation is key
- PVC Strength is vital
- Cost Analysis is necessary
- Assembly Techniques matter
- Safety Concerns are paramount.
This DIY snake rack building process requires careful planning, ensuring a well-ventilated enclosure for healthy snakes.
Proper planning should also include selecting cabinet materials for the rack.
Setting Up a Snake Breeding Rack
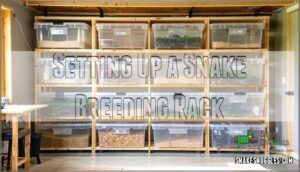
You’re setting up a snake breeding rack, and it’s vital to take into account the specific needs of your snakes.
You’ll need to assemble the rack and snake bins, install heat tape and ventilation holes, and add substrate, hide boxes, and water bowls to create a suitable environment.
Assembling The Rack and Snake Bins
Assemble your snake rack with securely stacked, well-ventilated bins, ensuring stability and Bin Security.
Choose Sterilite containers or snake tubs for ideal Ventilation Setup.
Focus on Rack Stability during assembly, and add substrate for comfort, mastering snake rack assembly techniques for a safe habitat.
Installing Heat Tape and Ventilation Holes
You’re installing heat tape and ventilation holes. Key considerations include:
- Heat Tape Types
- Ventilation Placement
- Temperature Gradients
- Humidity Control
- Safety Precautions
for a safe snake rack ventilation system with proper temperature control and reptile heating using heat cable.
Different types of reptile heat tape are available for purchase.
Adding Substrate, Hide Boxes, and Water Bowls
You’re nearing the finish line with your snake rack. Now, choose a suitable substrate, like aspen shavings.
Add hide boxes, considering size and material. Place water bowls strategically, facilitating easy access.
One key consideration is optimal breeding conditions to facilitate successful mating.
Refer to the substrate type table for guidance:
to create a happy, healthy snake habitat in your snake rack using Sterilite containers and following optimal breeding conditions for a successful outcome with your snake rack.
Snake Rack Considerations
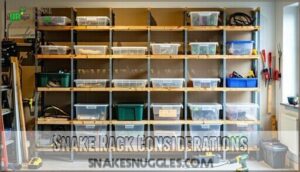
You’re building a snake rack system, and it’s time to examine the specifics of your setup.
You’ll need to think about choosing the right size for your snake, ensuring precise measurements and cuts, and customizing the rack to meet your snake’s unique needs.
Choosing The Right Size for Your Snake
When building a snake rack, you’ll want to determine the right size for your snake.
- Snake Length
- Enclosure Volume
- Species Needs
consider your snake’s growth rate and adult size to guarantee the snake rack dimensions fit.
Ensuring Precise Measurements and Cuts
You’ll need accurate tools for precise measurements and cuts to minimize material waste.
Use a tape measure and saw to guarantee joint precision, considering snake rack dimensions and measurements.
This step is critical in the snake rack building process, requiring careful attention to detail and safety measures.
Customizing The Rack for Your Snake’s Needs
You’re almost done.
Now, customize your snake rack with:
- Species Specificity
- Habitat Enrichment
- Size Adjustments
to guarantee a perfect fit, considering thermal gradients and security features for your pet’s comfort and safety.
Setting Up a Snake Enclosure
You’re now setting up a snake enclosure, which requires careful consideration of your snake’s needs.
You’ll need to add heating elements and lighting, create a suitable environment, and maintain temperature and humidity levels to keep your snake healthy and happy.
Adding Heating Elements and Lighting
As you set up your snake enclosure, consider the heating elements and lighting. You’ll want to choose the right UVB bulb and plan for nighttime lighting if needed.
Here are some key points to keep in mind:
- Heat Tape installation requires a thermostat for safe temperature control
- Lighting Options include low-profile lights and LED lights
- Thermostat Control is vital for maintaining a temperature gradient
- Gradient Creation involves placing heat sources to achieve ideal temperatures
- Safety Measures include using electrical tape to insulate wire connections.
Make certain your snake rack heating and lighting are properly set up for a happy, healthy snake.
Creating a Suitable Environment for Your Snake
Creating a suitable environment for your snake involves choosing the right enclosure size and substrate.
Guarantee humidity control with aspen or coconut husk and provide hiding spots for security.
Consider enrichment options and a temperature gradient in your snake rack.
This enhances snake care, fostering a safe habitat.
You’re designing a snake enclosure that meets your pet’s needs, focusing on humidity control, substrate choice, and hiding spots for a comfortable snake rack.
Maintaining Temperature and Humidity Levels
You’re setting up your snake enclosure, now it’s time to focus on temperature and humidity.
To maintain a healthy environment, consider these tips:
- Use heating pads for warmth
- Control humidity with misting or a humidifier
- Guarantee ventilation to prevent mold
- Monitor temperatures daily for ideal reptile care, using thermostat control to achieve the perfect temperature gradient and snake rack humidity control.
Snake Breeding Considerations
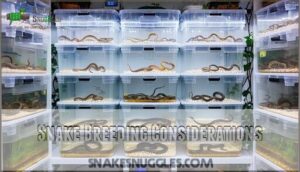
You’re building a snake rack system, and now you need to evaluate the specific needs of breeding snakes.
You’ll want to guarantee proper care, involve a veterinarian in planning protocols, and establish quarantine protocols to keep your snakes healthy and thriving.
Ensuring Proper Care for Breeding Snakes
You’re breeding snakes, focusing on genetic health, incubation methods, and neonate care.
| Breeding Cycles | Nutritional Needs | Snake Husbandry |
|---|---|---|
| Plan carefully | Research diets | Monitor health |
| Track cycles | Provide variety | Maintain reptile rack |
| Promote genetic diversity | Supplement when needed | Clean snake rack system |
Involving a Veterinarian in Planning Protocols
You’ll get expert advice on breeding protocols and disease prevention from a reptile veterinarian, ensuring snake welfare and health in your snake rack.
This guarantees each snake’s health, making animal husbandry more efficient with professional guidance on preventative care and species needs.
Quarantine Protocols for Breeding Snakes
When breeding snakes, you’ll want to establish a quarantine protocol.
Consider:
- Initial Isolation
- Parasite Prevention
- Disease Screening
- Mite Control to protect your snake rack system, ensuring a healthy environment for breeding snakes, and preventing disease spread within your snake rack.
A key step involves strict hygiene measures to protect your snakes, which is crucial for disease prevention and maintaining a healthy environment.
Tips for a Successful Snake Rack
You’re building a snake rack system, and now it’s time to focus on making it successful.
By following a few key tips, you can create a safe and healthy environment for your snakes, and guarantee your DIY project is a success.
Regularly Cleaning and Maintaining The Rack
You maintain a clean snake rack by following a schedule.
| Task | Frequency |
|---|---|
| Cleaning | Weekly |
| Sanitation | Bi-weekly |
| Pest Control | Monthly |
| Ventilation | Weekly |
Use disinfecting solutions for hygiene and prevent mold.
Monitoring Temperature and Humidity Levels
As you focus on temperature control, remember that Digital Thermometers and Humidity Control are vital.
- Monitor temperature gradients
- Place hygrometers correctly
- Make seasonal adjustments
- Use a thermostat
Check temperature monitoring systems to confirm your snake rack’s temperature is ideal, promoting a healthy environment with proper temperature control.
Providing a Safe and Healthy Environment for Your Snakes
You create a safe space for your snakes with proper ventilation, lighting, and substrate.
| Snake Wellbeing | Hygiene Practices | Enrichment Options |
|---|---|---|
| Reduce Stress | Clean Enclosures | Provide Hiding |
| Guarantee Safety | Establish Routine | Offer Variety |
| Regulate Temperature | Maintain Hygiene | Promote Exploration |
Frequently Asked Questions (FAQs)
How many snake racks can I build?
You can build multiple snake racks, depending on materials and space, with each rack customizable to fit specific snake species and tank sizes, allowing for flexibility and expansion.
How to make a DIY snake rack?
You’ll assemble a DIY snake rack using melamine boards, Sterilite tubs, and heating elements, ensuring proper ventilation and temperature control for your pet snakes’ comfort and safety.
How much does a DIY snake rack cost?
You’ll spend around $95-$175 on a DIY snake rack, depending on materials and tools, which can save you up to 1/3 of the cost of a pre-made one.
How to build a snake enclosure?
What’s holding you back? You’ll need materials like PVC sheets, melamine, and Sterilite tubs to construct a secure, well-ventilated snake enclosure, following a step-by-step guide or video tutorial carefully.
What is a snake rack made of?
You’ll typically make a snake rack from materials like melamine, PVC sheets, or repurposed furniture, ensuring durability and safety for your pet snakes.
Can you make a snake rack using melamine and PVC?
You can build a snake rack using melamine and PVC, which are durable, affordable, and fire-resistant materials, perfect for creating a safe and comfortable habitat for your pet snakes.
Is it worth building a DIY snake rack?
Like a puzzle, you’ll find building a DIY snake rack is worth it, saving up to 1/3 of the cost compared to buying pre-made, and customized to your needs.
What makes a good snake rack?
You’ll want a sturdy, escape-proof structure with proper ventilation, temperature regulation, and customizable shelves to guarantee your snakes’ safety and comfort, making a good snake rack.
How big is a DIY snake enclosure?
Imagine your snake’s dream home – you’ll create a DIY enclosure, often 10×20 inches, using ½ inch PVC, perfect for ball pythons, with customization options to fit your pet’s needs.
How should you store snakes in a snake rack?
You should store snakes in separate, escape-proof units with proper ventilation, temperature regulation, and hiding places to reduce stress and aggression, ensuring a safe and healthy environment.
Conclusion
Building a snake rack system is like constructing a puzzle, you’re the architect.
You’ll design a safe and functional space, prioritizing your snakes’ needs.
By following these DIY tips, you’ll create a thriving environment, and master the art of building a snake rack system, ensuring your slithery friends stay happy and healthy.

