This site is supported by our readers. We may earn a commission, at no cost to you, if you purchase through links.

A single female corn snake can lay 30 eggs in one clutch, and every one of them depends on decisions you make months earlier. Skip the brumation cycle or misjudge your female’s weight, and you’ll end up with infertile eggs or a snake that reabsorbs her clutch entirely. Breeders who get this right aren’t lucky, they’re methodical.
Once your clutch is laid, expect hatchlings in 55 to 75 days at 28 to 30°C, and since these snakes can live 15 to 20 years in captivity, our corn snake species facts will help you plan for the long haul.
That’s the real difference between hobbyists who breed corn snakes once and give up, and those who do it year after year. This corn snake breeding setup guide walks through the exact enclosure specs, temperature drops, and incubation numbers that separate a stalled project from a healthy hatch. Get the setup right first, and pairing your snakes becomes the easy part.
Table Of Contents
- Key Takeaways
- Choose Healthy Corn Snake Breeders
- Set Up Separate Breeding Enclosures
- Condition and Pair Corn Snakes
- Prepare Egg-Laying and Incubation Setups
- Set Up Corn Snake Hatchling Care
- Frequently Asked Questions (FAQs)
- What cage size is recommended for breeding pairs?
- Should breeding stock be quarantined before introduction?
- Can siblings or close relatives be safely bred?
- How often should females be bred per season?
- What are the best record-keeping practices for breeders?
- How long do corn snakes live in captivity?
- Can two male corn snakes be housed together?
- What morphs should beginners avoid pairing together?
- How often should breeding corn snakes be handled?
- What causes infertile or slug eggs in clutches?
- Conclusion
Key Takeaways
- Successful breeding starts months before pairing, with confirmed sex, healthy weight (400+ grams), and a proper brumation cycle, since skipping these steps often leads to infertile or reabsorbed eggs
- Each breeder needs its own dialed-in enclosure with a thermal gradient (88-90°F basking, 75°F cool side), 40-60% humidity, and backup power for thermostats to avoid disaster
- Conditioning your snakes through gradual photoperiod shifts, safe cooling (60-65°F for 60-90 days), and careful rewarming is what actually triggers successful mating
- Once eggs are laid, stable incubation conditions (78-82°F, 85-90% humidity) matter more than chasing perfect numbers, and hatchlings need their own simplified setup with individual housing and strict sanitation
Choose Healthy Corn Snake Breeders
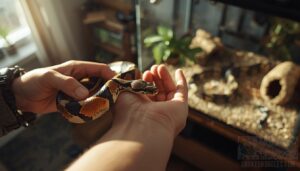
Every successful clutch starts long before any lay box or incubator comes into play. You’ll need breeders that are sexed correctly, healthy, and genetically sound before pairing them up. Here’s what to check before you commit to a breeding pair.
For a deeper breakdown of age, weight, and behavioral cues to look for, this ball python breeding and care guide walks through what makes a pair truly ready.
Confirm Sex With a Professional
Before pairing anyone up, nail down actual sex. Visual sexing misses up to 30% of the time, so get professional probing (95%+ accuracy) or DNA testing from shed ($15-$20, 24-48 hour turnaround). Popping works too, but for breeding stock, combine methods.
A palm-sized dry shed is all most services need. Proper shed handling matters too, since correct shed sample preparation keeps DNA viable for months at room temperature.
Assess Age, Weight, and Health
Sex confirmed, now check the animal itself. Breeders need at least two years and 400+ grams before pairing.
Run a Body Condition Score (aim for 3 on the 1–5 scale), verify weight against growth milestones, and check for sunken eyes or wrinkled skin.
Schedule a veterinary checkup and quarantine any new snake 60–90 days before introduction.
Review Genetics and Morph Pairings
Health checks done, now look at what’s under the hood.
Know each snake’s alleles (amel, anery, hypo) before pairing. Recessive morphs need two copies to show; co-dominant traits mix into intermediate patterns. Predict outcomes with a Punnett square, weigh genetic diversity against morph goals, and match temperaments too. Good pairings aren’t guesswork.
Before committing to a pairing, studying carpet python pattern variations and their genetic backgrounds can help you spot morph-linked health risks before they become a problem.
Start a Breeding Log
Punnett squares only matter if you can prove the pairing happened. Start a breeding log the day you plan your first pairing, tracking pair identification, mating behavior, and gravid status.
Log incubation monitoring, clutch labeling, and hatchling survival rate too. Keep initials, timestamps, and a backup copy. Sloppy records ruin lineage tracking fast.
Set Up Separate Breeding Enclosures
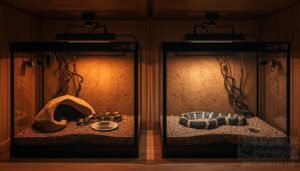
Before your pair ever meets, each snake needs its own space, built and dialed in ahead of time. Think of it as constructing two separate fortresses, not just one bigger tank. Here’s exactly what each enclosure needs to have ready.
Adult Enclosure Size Requirements
Give each breeding adult its own 40 gallon enclosure minimum, roughly 36" x 18" x 16", with length outweighing height in importance. Floor space matters more than climbing room, though 12-18 inches of vertical space adds enrichment. Keep length-to-width around 2:1.
Juveniles outgrow 20-gallon tanks within a year, so plan that upgrade before your breeding pair even meets.
Warm and Cool Temperature Zones
A thermal gradient is your snake’s fortress wall against stress.
Beyond temperature, replicating natural nesting conditions matters just as much, which is why our guide to breeding gopher snakes successfully covers the humidity levels your eggs need to thrive.
Run the basking end at 88-90°F (31-32°C surface), tapering to a 75°F cool side. Cover roughly a third of the floor with your heat mat, thermostat-controlled always. Drop nighttime temps into the low 70s.
Place heat sources overhead or beneath, shielded, never touching scales directly.
Humidity, Ventilation, and Hydration
Once temperature’s dialed in, humidity becomes your next battleground. Keep it between 40-60%, spiking to 70% during shedding.
- Mist once or twice daily
- Check with a digital hygrometer
- Keep a moist hide with damp sphagnum moss
Balance airflow with cross-ventilation to stop condensation. Water stays available always, even through brumation.
Hides, Substrate, and Enrichment
Think of the enclosure floor as a fortress foundation. Layer aspen shavings or cypress mulch 2-3 inches deep for burrowing.
Place two hides, warm and cool sides, sized for a full curl. Add a moist hide with sphagnum moss for shedding support.
Rotate branches, cork bark, and bark chunks every few weeks. Novelty reduces stress and encourages natural climbing behavior.
Thermostats, Probes, and Backup Power
A power outage at 2 a.m. can undo months of breeding prep, so redundancy matters.
A single power outage at 2 a.m. can undo months of careful breeding preparation
Use a digital thermostat with calibration checks against a handheld thermometer, keeping probes within 0.5°F accuracy. Place probes at snake level near basking spots, away from heat tape or ceramic emitters.
Pair undertank pads with backup batteries and app alarms, since a two-degree drift signals trouble fast.
Condition and Pair Corn Snakes
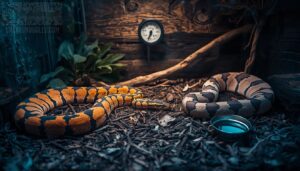
With enclosures ready, it’s time to get your snakes physically prepared to breed. Conditioning takes your corn snakes through a deliberate cycle of feeding, cooling, and rewarming that mimics their natural seasons. Here’s how to walk through each stage, from that first pre-cooling meal to the moment you introduce your pair.
Before diving into conditioning, double-check that your animals meet the physical and developmental signs that corn snakes are ready to breed — rushing an unprepared snake through the cooling cycle can do more harm than good.
Optimize Pre-Breeding Nutrition
A well-fed breeder is a fertile breeder. Keep your rodent diet consistent, prey sized at 10-15% body weight, on a steady feeding schedule.
Balance calcium-phosphorus at 1.5:1, add vitamin D3 if UV’s limited, and track body condition monthly.
Strong calcium reserves now mean healthy eggs later, so don’t skip this step before pairing.
Adjust Seasonal Photoperiod
Nutrition sets the stage, but light cues tell your snakes it’s time. Shift their light cycle gradually over 6-8 weeks, adding minutes daily until you hit a full 12-hour day/night cycle. Use timers for dawn-dusk simulation and consistent day length adjustment.
Skip abrupt swings. Gradual seasonal light cues synchronize hormones without stressing your breeders.
Cool Snakes Safely
Light cues set the clock, but cooling brumation is what flips the switch. Drop temps gradually over 1-2 weeks: 75F cool side, low 70s daytime, 65F night temperature, until you settle at 6065F cooling for 60-90 days.
Keep a safe cooling environment: solid hide, fresh water, minimal handling. Check weekly, watching weight and hydration.
Rewarm and Resume Feeding
Once brumation ends, raise temps gradually over 1-2 weeks back to normal gradients. Wait 7-10 days before offering food, letting metabolism catch up.
Rewarm prey to 95-104°F using warm water, never a microwave. Start small with pinkies or fuzzies.
Readiness signs: clear eyes, tongue flicking, active basking. Feed every 10-14 days from now on.
Supervise Pairing and Mating
Once feeding resumes, introduce the male into the female’s enclosure, never the reverse, and watch for tongue flicking and chin rubbing. Document mating attempts with time and duration.
| Behavior | Action |
|---|---|
| Courtship, calm contact | Continue supervision |
| Chasing, biting | Separate within 24 hours |
| Successful lock | Log, then remove male |
Prepare Egg-Laying and Incubation Setups
Once mating’s confirmed, your focus shifts from the pair to the female alone. She’ll give you clear signals over the coming weeks, and you’ll need to respond with the right setup at each stage. Here’s what that setup looks like, from lay box to incubator.
Monitor The Gravid Female
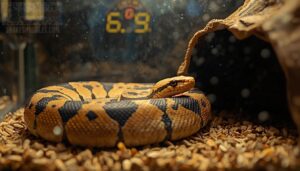
A gravid corn snake tells you everything through her body, if you know where to look.
Track these weekly:
- Weight gain (10-20%)
- Belly shape shifts
- Breathing changes
- Eye dulling
Watch activity drop, hides get used more, and keep humidity at 50-60%. Skip handling. She’s building eggs, not looking for a workout.
Provide a Humid Lay Box

Once she’s showing nesting behavior, drop in a covered egg-laying box filled with moist vermiculite or sphagnum, 4-6 inches deep. Keep humidity at 70-90%, damp but never dripping. Add shallow furrows for egg placement, and check moisture daily with a hygrometer.
Consistent humidity control prevents rot before eggs ever reach the incubator.
Prepare The Incubator Early
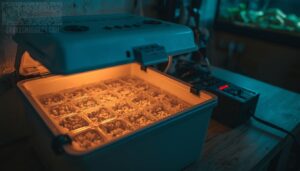
Before eggs ever touch vermiculite, get your incubator squared away, cleaned and disinfected 48 hours out, then run a probe calibration check within half a degree Celsius. Fill 6-quart containers and test airflow paths for cold pockets.
Run a backup power test now, not after a storm knocks out your grid.
Set Incubation Temperature and Humidity
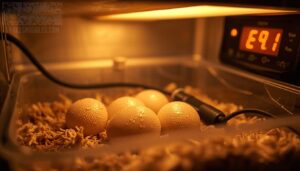
Dial in 78–82°F steady, with humidity holding at 85–90%. Place probes at egg height, calibrate against a known standard first, and avoid swings over 1°F daily. Position your hygrometer away from direct heat for accurate readings.
Stability beats flawlessness here: a consistent gradient protects developing embryos far better than chasing ‘ideal’ numbers minute by minute.
Transfer and Monitor Eggs

Once the clutch is fully laid, glove up and lift each egg with a soft silicone spatula, widest end up, spacing them in the incubator tray without rotating.
Keep humidity near 90% initially, settling to 80-84°F incubation temps.
Once your clutch is established, following ethical ball python morph breeding practices helps you keep records organized, disclose genetics honestly, and protect your reputation with buyers.
Log clutch date and pair. Check daily for mold, candle occasionally, and weigh weekly, tracking hatch rates over 55-70 days.
Set Up Corn Snake Hatchling Care
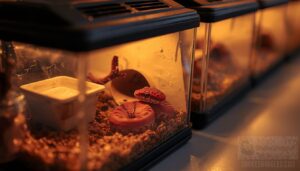
Hatching is just the starting line, not the finish. Those tiny snakes need their own setup, built smaller and simpler than what worked for the adults. Here’s what you’ll need to get their first home right.
Prepare Individual Hatchling Enclosures
Fresh hatchlings need their own space, no exceptions. House hatchlings individually in 6-quart containers or 12–20 inch tubs with 1–2 inches of paper bedding.
- Clear walls for monitoring
- Two hides, opposite sides
- Shallow water dish access
- 1.25–2.0 sq ft floor space
Skip fancy substrate here; paper bedding keeps things clean and simple for neonate housing.
Maintain Safe Temperature Gradients
With paper bedding sorted, turn to warmth. Place an undertank heating pad beneath one side only, controlled by a calibrated thermostat, to build a 78–85°F gradient. Skip ceramic heat emitters for tiny neonates; they run hotter than needed.
Let nighttime temps drop naturally into the low 70s. Keep a backup heat source ready, and check probe readings daily.
Monitor First Shed
Once probes read steady, watch for the shed. It arrives within 1 to 14 days, signaled by cloudy eyes and dulling skin starting at the tail.
Bump humidity to 60-70% and mist lightly beforehand. Skip handling entirely during this window.
Retained eye caps after shedding mean a vet visit, not a wait-and-see approach.
Begin Feeding and Recordkeeping
Once eye caps clear, offer the first pinky within 3-5 days. Feed once daily, same window each time, and log date, prey size, and refusals.
Track weight weekly on a digital scale. Note hydration and stool consistency. Build these habits now, your recordkeeping logs become invaluable later.
Prevent Illness Through Sanitation
Weight logs mean nothing if illness sweeps the rack. Wash hands between tubs, always.
- Disinfect surfaces with chlorhexidine or F10SC
- Spot-clean waste daily to prevent cross contamination
- Use clean running water for bowls, watch for mites
Sanitize weekly. Quarantine sick hatchlings immediately, before parasites spread through your whole clutch.
Frequently Asked Questions (FAQs)
What cage size is recommended for breeding pairs?
Give your pair a 36x18x12 enclosure minimum, though 48x18x12 works better for proven breeders. Prioritize floor space, 5 to 3 square feet per pair, over height for comfortable courtship room.
Should breeding stock be quarantined before introduction?
Think of it as a probationary stay before full citizenship in your collection. Quarantine new arrivals 30 days minimum, covering disease incubation windows, with daily health checks, dedicated supplies, and vet screening for mites and respiratory issues before any pairing begins.
Can siblings or close relatives be safely bred?
No. Sibling pairings concentrate recessive genes, raising defects, stillbirths, and inbreeding depression. Skip close relatives entirely, track lineage carefully, and prioritize genetic diversity through outcrossing to protect fertility and long-term colony health.
How often should females be bred per season?
Pacing pairings protects your females: one clutch per season is ideal, two is safe with solid conditioning, but three overtaxes her body, so respect that 2-3 month post-litter rest interval before rebreeding.
What are the best record-keeping practices for breeders?
Log each snake’s ID, genetic lineage tracking, and mating dates. Keep health logs, offspring documentation, and contract management together. Spreadsheets or breeding apps beat paper notebooks, building a searchable breeding history you’ll actually use.
How long do corn snakes live in captivity?
With steady diet, habitat quality, and veterinary care, corn snakes usually reach 15 to 20 years, sometimes stretching to 25- Consistent health monitoring and stable temperatures keep mature snakes thriving well beyond typical breeding frequency demands.
Can two male corn snakes be housed together?
Avoid it if you can. Males compete over hides, basking spots, and territory, which raises territorial aggression risks and injury odds. Separate housing prevents fights and lets you monitor stress and appetite without guesswork during breeding season prep.
What morphs should beginners avoid pairing together?
Stack two heavy morphs and you’re gambling with a weak litter, like breeding two runts hoping for a champion. Skip pairings that raise genetic load, demand niche incubation, or carry poorly documented inheritance patterns risking unstable offspring traits.
How often should breeding corn snakes be handled?
Handle pairs just 2 to 3 times weekly, sessions of 5 to 10 minutes, checking for calm breeding behavior. Skip egg-laying days. Watch tongue flicking or hissing, sure signs of stress needing an immediate return to the enclosure.
What causes infertile or slug eggs in clutches?
No yolk, no joke: slug eggs trace back to poor fertilization, calcium shortfalls weakening shells, breeder age, nutritional deficiencies, or genetic incompatibility between paired morphs, each undermining oviduct health and viable hatch rates.
Conclusion
Think of that first clutch like planting a garden bed in early spring: the soil prep matters more than the seeds. Breeders who rush pairing without dialing in temperature drops and incubation numbers end up with soft, dented eggs and disappointment.
A solid corn snake breeding setup guide isn’t about luck, it’s about discipline in the details. Get the groundwork right, and hatchlings will follow, season after season.