
This site is supported by our readers. We may earn a commission, at no cost to you, if you purchase through links.

Your snake doesn’t need a $60 store-bought cave. A plastic tub, a length of PVC, or a cardboard box can do the job, and you can build any of them today!
Hides matter because they keep your snake calm, secure, and healthy. The key is a snug fit. Measure from snout to vent, multiply by 0.11, and you’ve got your snake’s body width. Interior height should run 1.5 to 2 times that number.
These diy snake cave alternatives cost little and take minutes. Each one uses safe, sanded materials that won’t splinter or collapse. Grab a few supplies and pick your first build.
Table Of Contents
Key Takeaways
- Size the hide to your snake by multiplying its snout-to-vent length by 0.11 for body width, then making the interior height 1.5 to 2 times that, so your snake touches the walls and ceiling when coiled.
- Sand every cut edge until it’s smooth and avoid splinters, staples, tape, or wobbly walls, because snakes rub against everything and rough spots make a hide unsafe.
- You can build a hide from a plastic tub, PVC pipe, cardboard, or coated foam, and each one adapts to a humid hide with damp sphagnum moss and minimal ventilation.
- Give your snake at least two hides, one on the warm side and one on the cool side, and keep them dark, clean, and checked often, replacing cardboard every 2 to 4 weeks and inspecting plastic monthly for cracks.
Choose Safe Materials and Snug Hide Sizes
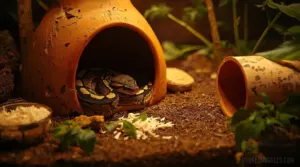
A great DIY snake hide starts with two simple choices: the right materials and the right size! Below, you’ll find two quick points that show you how to get both right, so your build feels safe and secure from the first night.
For budget-friendly builds that use sturdy, snake-safe materials, these DIY snake hide ideas offer plenty of inspiration for sizing and finishing your cave.
Once you’ve got them down, you’ll be able to build with confidence and shape a hide that fits your snake just the way you want.
Fit Your Snake’s Coiled Body
Measurements decide whether a DIY reptile hide feels secure or exposed. Measure your snake from snout to vent, skipping the tail. Multiply that number by 0.11 to find body width. Then make the interior height 1.5 to 2 times that width. Your snake should touch the walls and ceiling while coiled. That snug fit is surprisingly easy to get right!
A hide feels safe when your coiled snake touches both walls and ceiling, so size it to their body, not your guess
To size the floor and entrance too, a species-specific hide calculator applies fit ratios that give you recommended floor length, floor width, and entrance opening.
Avoid Sharp Edges and Unstable Materials
Once the size is right, check the build. A snug hide only works if it’s safe to rub against, and snakes rub against everything.
Run your fingers along every edge. If it feels rough to you, it’s unsafe for your snake. Look for these:
- Sharp cut lines on plastic
- Splinters on wood
- Staples or tape in cardboard
- Wobbly walls that could collapse
Turn Plastic Containers Into Snake Hides
Plastic containers are one of the easiest and cheapest ways to give your snake a safe place to hide! You probably have a few in your kitchen right now. Here are two simple container builds you can make today.
If you’re also looking for ideas that are safe and simple enough for kids to help with, these snake hides for kids with pet snakes are worth a look.
Build a Simple Dry Hide
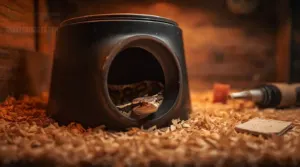
Worried a cheap tub won’t look right? Your snake won’t mind! A plastic container makes a sturdy, affordable DIY reptile hide.
Follow these steps:
| Step | Action | Tip |
|---|---|---|
| Clean | Wash, dry | Remove residue |
| Cut | Melt entrance | Use soldering iron |
| Sand | Smooth edges | Check twice |
| Place | Flat surface | Stay stable |
Make the hole slightly wider than your snake’s body. Snug fit wins!
A well-sized entrance also helps the hide hold in moisture, and these snake hydration tips cover how to keep humidity high inside without raising it elsewhere.
Adapt Containers Into Humid Hides
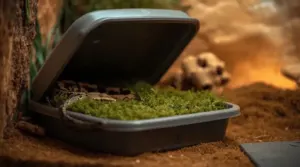
Your dry hide is already halfway to a humid hide! Just swap a few things.
Fill the tub about halfway with damp sphagnum moss. It should feel damp but not drip when squeezed. Keep ventilation tiny: one small hole in the lid.
- Pick an opaque tub with smooth walls.
- Sand every cut edge.
- Place it on the warm end.
- Check the moss every 2-3 days.
Make Removable Snake Caves From PVC
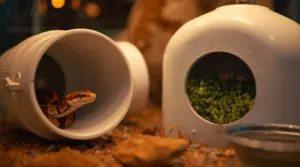
A length of PVC pipe makes one of the easiest snake hides you can build, and it’s cheap, too! Start with a diameter that’s about 1.5 to 2 times your snake’s coiled body. A 2-inch pipe suits most juvenile ball pythons and corn snakes, while adult boas need 4 inches.
Cut the pipe to two or three times your snake’s length. Then sand every cut edge with 220+ grit sandpaper until it’s smooth.
For a removable design, use threaded caps or slip-fit caps with rubber O-rings. Neodymium magnets can hold the cave to the enclosure wall without any permanent changes.
Want a humid hide? Drill 1/4-inch ventilation holes near the top and line the inside with damp sphagnum moss held by mesh.
Let any cement cure 24 to 48 hours, rinse with a 1:10 vinegar solution, and check monthly for cracks.
Use Cardboard Boxes as Temporary Hides
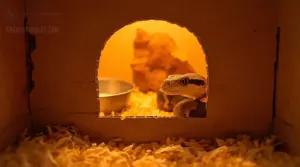
A cardboard box is one of the easiest ways to give your snake a secure spot, and it costs almost nothing! Think of it as a short-term fix, perfect for quarantine or when your snake is settling into a new enclosure.
Pick unprinted, double-wall cardboard so the ink and the box hold up. Skip anything waxed or treated.
Here’s how to build it:
- Size the interior so your snake can coil with a snug fit.
- Cut a smooth entrance, then sand every edge.
- Poke 3 to 5 small holes, about 3mm wide, in the sides.
- Remove all tape, staples, and labels.
Keep it dry, since damp cardboard breaks down fast. Replace it within two to four weeks, or right away if it turns soggy or moldy.
Build Foam Caves With Habitat-Safe Coatings
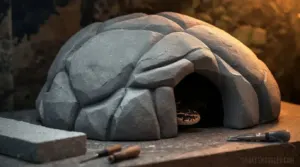
Picture a smooth gray boulder tucked in the corner of your snake’s enclosure, with a dark doorway just wide enough for a coiled body. You can make that with foam insulation board and a little patience!
Cut the board into layers and stack them into a dome. Glue the pieces with aquarium safe silicone, then carve the doorway to fit your snake’s girth. Rough up the surface with a wire brush, press in coco fiber or sand, and you’ve got real rock texture.
Now add habitat-safe coatings. Brush on thin layers of grout, then seal everything tightly. Minwax fast-drying polyurethane works well, but let it cure fully, 24 to 72 hours, before your snake moves in. Spray foam works too.
Position, Clean, and Replace DIY Snake Hides
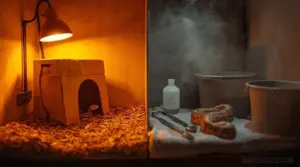
Think upkeep sounds like a chore? It’s not! A few quick habits keep every DIY snake hide safe, and they cost almost nothing.
Place one hide on the warm side and one on the cool side. Keep them away from heat sources and water bowls, and face the openings toward a wall or corner.
Here’s what a well-kept setup gives you:
- A snake that feels truly safe.
- Calm, steady behavior at feeding time.
- Fewer worries about mold or bacteria.
- Pride in a habitat you built yourself.
- Confidence that you’re in control.
Spot clean daily with tongs. Replace cardboard every 2-4 weeks, and check plastic monthly for cracks. Soak in hot, disinfectant water before scrubbing. Rinse well and air dry completely.
Frequently Asked Questions (FAQs)
How many hides does one snake need?
Two is the minimum number of hides your snake needs! Put one on the warm side and one on the cool side.
Three is better, especially for ball pythons, which also want a humid hide.
Can I use terracotta pots as snake hides?
Wondering if clay is safe? Yes! Unglazed terracotta pots make great snake hide options, as long as you sand every cut edge smooth. Pick a snug size so your snake touches the roof and walls.
How can I disinfect a DIY hide after illness?
Think of it as a deep reset! Scrub off all grime first. Then soak the hide in diluted chlorhexidine or F10SC, keeping it visibly wet for 5-10 minutes. Rinse well, then air-dry fully.
Are cork bark rounds a good alternative?
A tree sheds its bark and keeps living, and that’s the gift here. Yes, cork bark rounds are a great pick! They’re safe for snakes, resist mold, and give you a snug, natural hide.
Do snakes prefer dark or lighter hides?
Snakes will pick darkness every time! Their eyes favor low-light vision, so bright light feels harsh.
Give your snake a dark resting space with opaque walls, and it’ll feel secure, relaxed, and ready to thrive.
Conclusion
Picture your snake sliding into a dark, snug hide, body coiled, sides touching the walls, eyes half closed. That’s the calm you’re building.
These diy snake cave alternatives prove care doesn’t need a big budget. A tub, a pipe, a box, or a foam shell can do the job. Keep the fit snug and secure, sand every edge, and clean often. Pick one build tonight, set it in place, and watch your snake settle in.