This site is supported by our readers. We may earn a commission, at no cost to you, if you purchase through links.
A snake can survive weeks without food, but poor air quality starts working against it within days. Stale enclosures trap carbon dioxide, push humidity past safe levels, and create the damp conditions mold needs to take hold—all while your snake sits quietly, showing no obvious signs of distress until the damage is done.
Most keepers focus on temperature and feeding schedules, but ventilation holes in a snake terrarium often determine whether the environment stays healthy or slowly becomes a hazard. Getting the placement, size, and installation right makes the difference.
Table Of Contents
- Key Takeaways
- Why Ventilation Holes Matter
- Choose Passive or Active Ventilation
- Plan Hole Size and Placement
- Install Escape-Proof Vent Holes
- Monitor and Adjust Airflow
- Frequently Asked Questions (FAQs)
- How to ventilate a snake enclosure?
- How to make a ventilation hole?
- How much ventilation for snake enclosure?
- Do snakes need air holes?
- Where should the vent be in a reptile enclosure?
- How to ventilate a snake tank?
- Can I drill ventilation holes in an acrylic terrarium?
- Do desert snakes need fewer ventilation holes?
- Will ventilation holes let feeder insects escape?
- Should I cover holes during winter months?
- Conclusion
Key Takeaways
- Placing intake vents low and exhaust vents high on opposite walls creates natural airflow that prevents CO2 buildup, excess humidity, and mold before they become a problem.
- Vent holes should stay between 9–12 mm in diameter and be covered with fine mesh so air moves freely without giving your snake a way out.
- Drilling slowly with the right bit, smoothing every edge, and locking mesh in place with mechanical clips—not adhesive—are what separate a safe install from a dangerous one.
- A digital hygrometer and dual-zone thermometer tell you whether your ventilation is actually working, so you can adjust before your snake shows signs of stress.
Why Ventilation Holes Matter

Good ventilation isn’t optional — it’s the difference between a thriving snake and a sick one. Stale air, trapped moisture, and uneven temperatures can all sneak up on you fast.
Understanding exactly how air moves through your setup — and what happens when it doesn’t — is covered well in this guide on snake enclosure air circulation.
Here’s why getting those vent holes right matters from the start.
Preventing Stale Air Buildup
Without proper air circulation, your snake’s terrarium quickly becomes a pocket of stale, carbon dioxide-rich air. Ventilation holes drive consistent air turnover, clearing out CO2 before it builds up.
Think of vent flow mapping as your game plan — strategic vent placement prevents stagnant air issues from developing in dead corners. obstruction prevention checks keep passive air channels open and working.
Reducing Excess Humidity and Condensation
Stale air isn’t your only concern — excess moisture is just as problematic. When humidity climbs past your snake’s target range, condensation forms on walls and glass.
Good vent holes and smart vent placement help pull that damp air out.
Pair them with moisture-resistant panels, glossy interior finishes, sealed seam construction, elevated substrate drainage, and silica gel desiccants to keep humidity levels and moisture control dialed in.
Implementing continuous mechanical ventilation can keep humidity below 60%.
Lowering Mold and Fungal Growth Risk
Damp air left sitting in corners doesn’t stay harmless for long. Without proper airflow, humidity regulation fails, and fungal growth follows fast.
Use mold-resistant substrates that dry quickly — surface drying speed matters more than most keepers realize.
Clean vent openings regularly, seal vent leaks around hardware, and clear out organic water traps like soggy hides to stop mold before it starts.
Supporting Healthy Snake Breathing
Your snake’s respiratory health depends directly on fresh air moving through the enclosure. Vent holes drive airflow that manages irritant dilution strategies naturally — waste gases and ammonia-like odors get replaced before they concentrate.
Fresh vent holes replace waste gases and ammonia before they concentrate, protecting your snake’s respiratory health
Think of it as passive oxygen level optimization without any extra equipment.
Poor air quality monitoring often reveals the culprit is simply weak airflow through undersized or too-few vents.
Maintaining Stable Temperature Gradients
Ventilation holes do more than move air — they protect your temperature gradient design. Without balanced air flow, warm air pools at the top and cool zones collapse.
Place your heat source on one side, use thermostat calibration to lock in targets, and let thermal mass materials like slate tiles hold heat overnight. Temperature sensor mapping across both zones catches drift before your snake ever notices.
Choose Passive or Active Ventilation
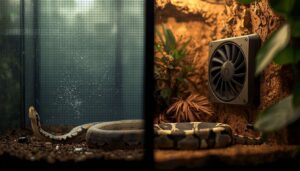
Once you’ve decided to add ventilation, your next choice is how to make the air actually move. The right system depends on your enclosure size, your snake’s needs, and how hands-on you want to be.
Here are the main options to evaluate.
Passive Ventilation With Screened Holes
Screened holes are the simplest way to keep air moving without plugging anything in. For passive ventilation to actually work, get these five things right:
- Mesh Material Choice — use corrosion-resistant screens that won’t rust or sag
- Hole Spacing Guidelines — space drill holes 20–30 cm apart across acrylic panels
- Edge Beveling Technique — smooth every edge after drilling to protect your snake
- Escape-proof fit — fine screen vents with 0.5–1.0 mm openings block any head
- Screen Cleaning Frequency — clear dust buildup every one to three months
Active Ventilation With Small Fans
When passive screens aren’t enough, small fans give your active ventilation system real control.
Mount brushless DC fans near your drill holes using secure fan mounting techniques, then dial in airflow with PWM speed control so air moves quietly without stressing your snake.
Power supply options include 5–12V DC adapters or battery backup for portability.
Keep the system escapeproof and noise-managed for steady, reliable air flow.
When Large Enclosures Need Extra Airflow
Big enclosures play by different rules — passive screens simply can’t push air through every corner.
Thermal Stratification creates dead zones where stagnant air pockets form, so you’ll need Adaptive Fan Control and Airflow Modeling to balance pressure across the space.
Focus on:
- Smart vent placement on opposite acrylic walls
- Drill holes that support Zonal Pressure Balancing
- Escapeproof mesh creating Humidity Buffer Zones throughout
Energy Use and Maintenance Considerations
Small fans don’t have to drain your wallet. Keep Fan Power Optimization in mind — terrarium fans under 5 watts handle energy-efficient ventilation without running up your bill.
Pair them with Energy Star Timers to limit runtime to peak hours only. Low-Watt Sensors track conditions using under 1 watt.
Log air changes per hour, practice Air Leak Sealing around seams, and do monthly ventilation maintenance checks for reliable ventilation troubleshooting.
Avoiding Stagnant Corners Inside The Terrarium
Corners are where airflow goes to die. Even with solid crossventilation and vent placement on opposite sides for ideal flow, square terrariums trap still air in the back edges.
Fix this with smart corner airflow design — place humidity sensors there first, then use decorative layout tricks like shifting hides toward the center.
Substrate drainage zones and small fan positioning handle the rest.
Plan Hole Size and Placement
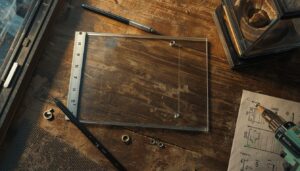
Getting the hole size and placement right makes everything else easier. Too large, and you’ve got an escape risk; too small, and the airflow stalls.
Here’s what to nail down before you pick up a drill.
Recommended Vent Hole Diameter for Snakes
Vent hole size matters more than most keepers expect. snake head clearance, keep your diameter safety margin between 9 mm and 12 mm — wide enough for airflow, narrow enough for escape prevention.
Species size scaling applies here too: smaller snakes need tighter passage width.
Cover every hole with fly wire mesh to hit the ideal flow ratio without giving your snake a way out.
Using Multiple Small Holes Safely
Once you’ve nailed vent sizing, think about your overall vent pattern design. Spacing holes at least two diameters apart keeps acrylic panels strong and helps prevent escape.
Staggered rows beat a single straight line every time. Follow basic hole spacing rules: keep holes away from corners and seams.
Use fly wire or stainless steel mesh material choice for durability, and always apply edge safety treatment after drilling.
Low Intake Vents for Cool Air
Low intake vents belong near the bottom of the cool side. This vent positioning height creates an airflow gradient control that pulls fresh air in low and pushes warm air out high.
Recessed low intakes with shelf-integrated vents act as draft buffer zones, slowing airflow before it reaches your snake. Smart vent placement keeps temperatures stable without surprising cold gusts hitting your snake directly.
High Exhaust Vents for Warm Air
Warm air rises — that’s just physics working in your favor. Position high exhaust vents near the top of the warm side to enhance the stack effect optimization and heat-driven draft. Ventilation holes sized 6–12 mm let warm air escape without cooling the zone too fast.
- exhaust placement height above your snake’s resting level to avoid direct drafts
- mesh pore size fine enough to block mites and debris
- Pair with thermostat integration to prevent the warm side from overheating
- Good airflow through ventilation design principles starts with vent placement on opposite sides for best flow
Opposite-wall Placement for Cross-ventilation
Place intake and exhaust vents on opposite walls to create a true wall-to-wall air path across the enclosure. This pressure differential pulls fresh air through without dead zones.
Keep an obstacle-free corridor clear of bulky decor so airflow moves cleanly.
A vertical separation of 15–30 cm between openings improves velocity.
Smart crossventilation and screen vent placement strategies make ventilation design work passively — no fans needed.
Warm-side Versus Cool-side Vent Strategy
Think of your terrarium as having two jobs: one side heats, the other cools.
Your cool side manages air intake low on the wall, while the warm side exhausts hot air near the top — that’s thermal buoyancy effects doing the work passively.
This vent placement on opposite sides for ideal flow drives pressure differential management naturally, keeping airflow path optimization simple, humidity stable, and your snake safely inside.
Avoiding Holes Near Weak Corners or Seams
Corners crack first — every builder learns this the hard way. Keep holes at least 1.5 times the panel thickness away from any seam or joint.
- Apply Seam Tape Application before drilling to catch micro-cracks
- Follow Drill Distance Guidelines: shift holes 2–3 cm from corners
- Use a Stress Distribution Grid pattern to spread load evenly
Finish with Edge Deburring Technique to eliminate sharp points.
Install Escape-Proof Vent Holes
Once you know where your vents go, it’s time to actually put them in — and do it right. Getting the installation wrong is where most escapes happen, so each step here matters.
Here’s what to work through, from marking your first hole to making sure nothing can push through.
Marking Vent Locations Before Drilling
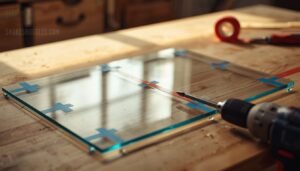
Before you drill a single hole, map everything out. Use non-staining tape to mark your side vents and run a clear acrylic template across opposite walls for alignment verification.
A center punch creates a clean dimple so your bit stays put. Wrap a piece of tape around the bit itself as a depth indicator marking — simple, effective, no guesswork.
Drilling Acrylic Without Cracking

Acrylic cracks when you rush it — full stop. Backed Drilling is your first move: clamp the panel to a flat surface with a scrap piece of acrylic beneath the hole site.
- Carbide Bit Selection: Use carbide-tipped or high-speed drill bits made for acrylic or polycarbonate — never wood bits.
- Pilot Hole Strategy: Start small, then widen gradually to reduce stress.
- Coolant Application: A few drops of water keeps heat from melting the edges.
Finish with light sanding for clean Edge Finishing.
Cutting Ventilation Holes in Wood or Melamine
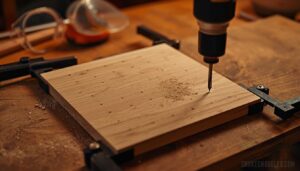
Wood and melamine are more forgiving than acrylic, but they still punish careless work.
Before anything, Pattern Layout Planning saves you from misplaced holes — map your vent placement on opposite sides for ideal flow.
Use a high speed drill with a sharp Forstner bit or router for clean cuts.
Backer Board Use prevents blowout on exit holes.
Score melamine first for Edge Preparation Tips, and keep your Dust Extraction Setup running throughout.
Adding Mesh Screens or Pre-made Vents

Once your holes are drilled — whether in melamine or acrylic panels — covering them correctly is what keeps your snake inside. Mesh Material Selection matters here: stainless steel screen vents hold up best in humid setups, while fly wire works for drier species.
Pre‑made vents with built‑in frames simplify Vent Frame Compatibility. Louvered Vent Adjustment lets you fine‑tune airflow seasonally.
Securing Vents Without Unsafe Adhesives
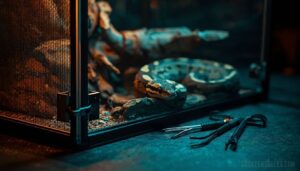
Skip the glue — it’s a trap. Adhesive tape can snag scales or leave sticky residue inside the enclosure.
Instead, use Mechanical Lock Frames that clamp around the vent edge, or Tension Clip Mounts held by spring pressure alone. Magnetic Vent Clips grip metal frames evenly, while Friction Gasket Seals and Hidden Pocket Mounts keep everything flush, secure, and snake-proof without a drop of adhesive.
Checking That Snakes Cannot Push Through
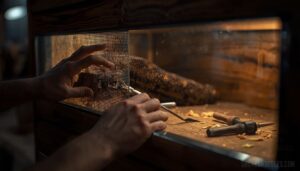
Once your vents are locked in place, give them a real stress test. Press firmly along every edge — if there’s any give, tighten it down.
Mesh integrity testing means checking for sagging or loose seams that a determined snake can exploit.
Run edge reinforcement inspection along each cutout and confirm vent frame durability by checking for flex.
Seal gap verification catches hidden openings before your snake does.
Smoothing Sharp Edges After Drilling

Sharp edges left after drilling can cut your snake’s scales or yours. Put on cut-resistant gloves first.
Use a fine round file to deburr each hole, then work through a grit progression sequence — 120-grit down to 320 — for a smooth finish.
A chamfer edge technique with a countersink removes any remaining sharpness.
Run a gloved finger around every hole to confirm it’s clean.
Monitor and Adjust Airflow

Once your vents are in place, the real work begins — watching how your enclosure actually performs.
Humidity and temperature can shift more than you’d expect, and small changes make a big difference for your snake.
Here’s what to track and how to respond when something’s off.
Tracking Humidity With Digital Hygrometers
A digital hygrometer is your first line of defense against humidity swings.
Mount it at mid-height using smart placement strategies — away from water bowls and heat sources.
Enable data logging to spot trends before problems develop, and set alert thresholds for your species’ ventilation requirement.
Sensor calibration keeps readings accurate, and solid battery management ensures your reptile habitat humidity monitor never goes dark.
Checking Temperatures on Warm and Cool Sides
Once your humidity readings are stable, turn your attention to temperature.
Use dual zone monitoring with a digital thermometer — one probe on the warm side at snake head height, another on the cool side near the floor. Probe placement matters: keep sensors two inches from glass and vents to avoid skewed readings.
Calibration frequency prevents sensor drift detection failures. Aim for a 10–15°F temperature gradient, and cross-check air vs surface temps with an infrared gun.
Signs of Poor Terrarium Ventilation
Your enclosure will tell you when airflow isn’t working — you just need to know what to look for. Watch for these red flags:
- Foggy glass that lingers all day, sticky substrate that won’t dry, or a musty odor after cleaning
- Mold patches on decor, yellowing plants, or climbing humidity levels despite open vents
- Wheezing snakes or labored breathing during normal activity
Poor air flow doesn’t just cause mold — it stresses your snake’s respiratory system directly.
Fixing Condensation or Musty Smells
Condensation and musty smells mean your ventilation system isn’t keeping up.
Fix it fast with these surface drying techniques and odor absorbing materials:
| Problem | Solution |
|---|---|
| Foggy glass | Improve air flow and wipe surfaces daily |
| Musty odor | Add activated charcoal as a humidity buffer solution |
Switch to mold-resistant substrates and apply ventilation timing strategies — run fans 20 minutes after misting to stabilize humidity levels and prevent mold.
Adjusting Vents for Tropical Species
Tropical snakes need air flow that feels like a rainforest, not a fan pointed at them.
Keep humidity levels between 65 and 80 percent using adjustable vent slats and mesh size optimization — fine 2 to 3 mm screens balance airflow rate calibration with escape prevention.
Seasonal humidity tweaks as conditions shift, and use crossventilation and screen vent placement strategies for thermal zone balancing.
Adjusting Vents for Drier Species
Desert and dry-adapted species need a different approach. Dry Airflow Balancing starts with more lower intake vents and fewer upper exhausts to slow moisture loss.
Use Vent Spacing Optimization by distributing small 5–9 mm holes evenly, preventing stagnant pockets.
Substrate Moisture Management, Negative Pressure Adjustment, and Seasonal Vent Tuning help you fine-tune conditions without stressing your snake.
Cleaning and Inspecting Vent Hardware Regularly
Once your dry-species setup is dialed in, don’t let dust and debris quietly undo your work. Regular cleaning keeps your ventilation system honest.
- Wipe vent covers during Vent Dust Removal — both sides, every few weeks
- Run Mesh Screen Cleaning with a soft brush to protect airflow balance
- Do Seal Integrity Checks for cracks or moisture staining
- Confirm Airflow Balance Testing after each clean, then log it as Maintenance Log Updates
Frequently Asked Questions (FAQs)
How to ventilate a snake enclosure?
Good ventilation moves fresh air in and stale air out.
Place intake vents low, exhaust vents high, and on opposite sides for ideal flow to maintain healthy carbon dioxide levels and stable temperatures.
How to make a ventilation hole?
Mark your spots, gather your tools, and put on your safety goggles before you start. Tool preparation matters.
Choose the right drill bit size, cut slowly, sand the edges, and mount your vent frame securely.
How much ventilation for snake enclosure?
For most snakes, aim for 3–5 air changes per hour.
Match your ventilation rate and fan sizing to enclosure volume and species airflow needs — desert species need less air exchange than tropical ones.
Do snakes need air holes?
Yes, absolutely. Without proper air flow, CO2 Accumulation builds fast, threatening Respiratory Health. Poor ventilation triggers snake stress signs like lethargy and refusal to eat — clear Behavioral Indicators something’s wrong.
Where should the vent be in a reptile enclosure?
Place intake vents low, near substrate level, and exhaust vents high, above the heat source.
Use vent placement on opposite sides for ideal flow — crossventilation and screen vent placement strategies work best.
How to ventilate a snake tank?
Think of your snake tank like a living, breathing room — air needs to move in and out. Intake vents low, exhaust vents high, opposite walls apart. That’s the whole strategy.
Can I drill ventilation holes in an acrylic terrarium?
You can drill ventilation holes in acrylic panels safely using Acrylic Drill Bits, proper Safety Gear Requirements, and slow feed pressure to prevent cracking — making secure, escape-proof venting fully achievable.
Do desert snakes need fewer ventilation holes?
Desert snakes don’t need fewer holes — they need smarter ones. Aim for 2–5% vent density to nail the Airflow Balance and hit Humidity Thresholds of 20–40% without sacrificing Heat Retention.
Will ventilation holes let feeder insects escape?
Only if the holes are too large. Using fine screen sizing and proper vent gap calibration keeps feeder insects inside. A tight mesh is your best feeder containment strategy.
Should I cover holes during winter months?
Don’t cover the holes completely. Winter’s cooler outside air can raise humidity fast, but blocking vents risks stale air and mold. Keep them open and monitor daily.
Conclusion
The smallest details in a terrarium often carry the heaviest consequences. A few well-placed ventilation holes in your snake terrarium can quietly do more for your snake’s health than any supplement or specialty substrate ever will.
Mark carefully, drill cleanly, screen every opening, and monitor what the numbers tell you.
Your snake won’t thank you—but a stable humidity reading, clean air, and years of healthy sheds will make the work speak for itself.