This site is supported by our readers. We may earn a commission, at no cost to you, if you purchase through links.

A two-degree swing sounds trivial until you realize it can stall digestion in a hatchling ball python or send a baby leopard gecko into thermal stress within hours. Hatchlings can’t regulate body heat the way adults can, and their small size means enclosure temperatures shift fast when the heat source is wrong for the setup. That’s why choosing the right under tank heaters for hatchlings matters more than most keepers assume.
You need a heater sized to your enclosure, paired with a thermostat you trust, and installed in a way that keeps moisture and hotspots out of the equation. Get the wattage, placement, and probe positioning right, and you’ll build a warm side your hatchling can actually rely on.
Table Of Contents
- Key Takeaways
- 8 Best Under Tank Heaters for Hatchlings
- 1. VIVOSUN Seedling Heat Mat Thermostat Combo
- 2. Zoo Med Reptitherm Undertank Heater 6×8
- 3. iPower 8×12 Inch Reptile Heat Pad
- 4. Zilla Heat Mat Terrarium Heater
- 5. Fluker’s Premium Heat Mat Mini 4×5
- 6. Tikaton Reptile Heat Pad Adjustable Under Tank
- 7. Aiicioo Reptile Heat Mat Thermostat Combo
- 8. Aiicioo Reptile Heating Pad 8 Watt
- How to Choose The Right Heater Size
- Why Every Heat Mat Needs a Thermostat
- Safe Installation for Hatchling Enclosures
- Optimize Heat Transfer and Gradients
- Frequently Asked Questions (FAQs)
- Conclusion
Key Takeaways
- A heat mat without a thermostat is just a burn risk waiting to happen, so always pair the two and verify temperatures with a separate probe rather than trusting built-in dials alone.
- Match wattage and coverage to your tank size and species, since hatchlings can’t regulate their own body heat and small enclosures shift temperature fast when the setup is wrong.
- Installation matters as much as the heater itself: mount externally on clean glass, elevate the tank for airflow, and route cords through a GFCI outlet with a drip loop to keep moisture away from the plug.
- Build a real thermal gradient by covering roughly a third to half the floor with warm substrate while keeping the rest cooler, letting your hatchling move between zones to self-regulate and digest properly.
8 Best Under Tank Heaters for Hatchlings
Choosing the right heat mat comes down to matching wattage, coverage, and control features to your hatchling’s specific needs, not just grabbing whatever’s cheapest on the shelf.
For apartment setups especially, this guide to choosing reptile heat mats for small spaces breaks down thermostat pairing and safe wattage ranges room by room.
Some setups call for a simple, no-frills mat, while others benefit from a built-in thermostat that takes the guesswork out of temperature control.
Here’s a breakdown of eight options worth your consideration, each suited to different tank sizes, species, and experience levels.
1. VIVOSUN Seedling Heat Mat Thermostat Combo
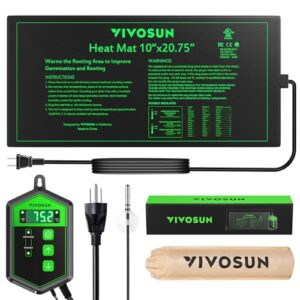
Though marketed for seedlings, this VIVOSUN combo works well for hatchlings needing precise, adjustable warmth. The digital thermostat with external probe monitors actual surface temperature rather than relying on preset output, giving you real control over conditions inside the enclosure.
At 20 watts, it stays energy-efficient for smaller tanks. Just know that displayed settings can run a few degrees cooler than actual mat temperature, so verify readings independently before trusting your hatchling’s warm side to the dial alone.
| Best For | reptile and amphibian keepers who want precise, adjustable bottom heat for hatchling enclosures rather than a one-size-fits-all warming mat. |
|---|---|
| Power | 20W |
| Weight | 16 oz |
| Mounting Type | Adhesive/placement |
| Temperature Control | Digital thermostat included |
| Primary Use | Germination/reptiles |
| Waterproof Rating | IP67 |
| Additional Features |
|
- External probe thermostat allows real-time monitoring and control of actual surface temperature, not just preset output
- Energy-efficient at just 20 watts, making it suitable for smaller tanks and enclosures
- IP67 waterproof rating with double insulation and durable PVC construction adds a layer of safety and durability
- Displayed thermostat settings can run several degrees cooler than the actual mat temperature, so independent verification is needed
- Temperature accuracy may vary between units, with some users noting inconsistent readings
- Despite the waterproof rating, it’s meant for indoor use only and isn’t designed for submersion or outdoor exposure
2. Zoo Med Reptitherm Undertank Heater 6×8
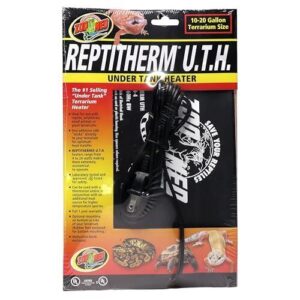
If you want fewer variables to manage than a thermostat combo, the Zoo Med Reptitherm 6×8 earns its reputation as the industry standard for good reason. This fixed-output mat covers 6×8 inches, sized correctly for small to medium hatchling enclosures without swallowing the entire tank floor.
Zoo Med builds these with UL/cUL approval, so you’re getting certified electrical safety rather than guesswork. Pair it with your own thermostat, and you’ve got a setup reptile keepers have trusted for decades.
| Best For | Reptile keepers with small to medium hatchling enclosures who want a simple, fixed-output belly heat source to pair with their own thermostat. |
|---|---|
| Power | 8W |
| Weight | 0.44 lbs |
| Mounting Type | Adhesive backing |
| Temperature Control | External thermostat needed |
| Primary Use | Reptile heating |
| Waterproof Rating | Not specified |
| Additional Features |
|
- Fits 10-20 gallon terrariums perfectly with its 6×8 inch heating area sized for hatchling and juvenile setups
- Low 8-watt power draw delivers consistent, steady heat without running up your electric bill
- Built to last, with many owners reporting over two years of reliable use
- Adhesive backing can struggle to stay stuck to glass, so you may need extra tape or clips to secure it
- Surface temps can climb to 120°F quickly, which is a burn risk if you’re not using it with a thermostat
- Some units heat unevenly and may not consistently hit the set temperature even with a regulator in place
3. iPower 8×12 Inch Reptile Heat Pad
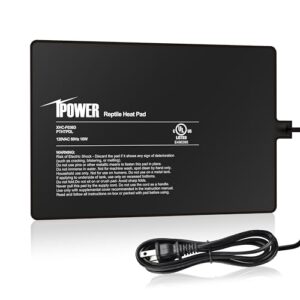
Larger clutches or bigger enclosures call for more coverage, which is where the iPower 8×12 pad steps in. Its PTC heating film distributes warmth evenly across the full 8×12 surface, avoiding the cold spots that plague cheaper mats.
Running at just 16 watts, it stays waterproof enough for humid tropical setups. The 3M adhesive bonds securely to glass, though you’ll still need a separate thermostat since this pad has no built-in temperature control.
| Best For | Reptile and amphibian owners with larger terrariums or multiple animals who need even, wall-to-wall heat coverage. |
|---|---|
| Power | 16W |
| Weight | 12.6 oz |
| Mounting Type | 3M adhesive |
| Temperature Control | External thermostat needed |
| Primary Use | Reptile heating |
| Waterproof Rating | Waterproof/moisture-resistant |
| Additional Features |
|
- Even 8×12 inch coverage eliminates cold spots common in smaller mats
- Waterproof, moisture-resistant build holds up well in humid tropical setups
- Strong 3M adhesive keeps it securely mounted to glass surfaces
- No built-in thermostat, so you’ll need to buy one separately for precise control
- Adhesive can loosen over time, especially if repositioned
- Requires proper ventilation underneath to avoid heat buildup and fire risk
4. Zilla Heat Mat Terrarium Heater
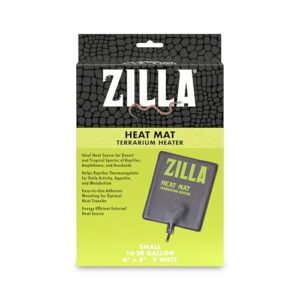
If coverage isn’t your main concern, the Zilla Heat Mat is built around a different strength: carbon fiber heating elements that emit uniform infrared warmth instead of relying on standard resistive coils.
Even with this gentler heat, pairing the mat with a reliable controller matters, since how a thermostat and heat mat work together determines whether your setup stays safe or overheats.
You’ll appreciate how straightforward installation is, since the adhesive backing sticks directly to your glass exterior for reliable contact. Zilla designed this one with beginners in mind, offering multiple wattages so you can match output to your hatchling’s enclosure size without guesswork.
| Best For | This heat mat is best for owners of ball pythons, leopard geckos, tortoises, or insect colonies housed in 10-20 gallon enclosures who want gentle, even warmth without hot spots. |
|---|---|
| Power | 8W |
| Weight | 8 oz |
| Mounting Type | Adhesive backing |
| Temperature Control | External thermostat needed |
| Primary Use | Reptile heating |
| Waterproof Rating | Not specified |
| Additional Features |
|
- Carbon fiber heating element delivers uniform infrared heat with no hot spots
- Energy-efficient at just 8 watts, keeping operating costs low
- Simple adhesive backing makes mounting to the terrarium base quick and secure
- Adhesive can weaken over time, particularly with sustained heat exposure
- Needs an external thermostat for precise temperature control with sensitive species
- May not provide enough heat for larger enclosures without adding extra units
5. Fluker’s Premium Heat Mat Mini 4×5
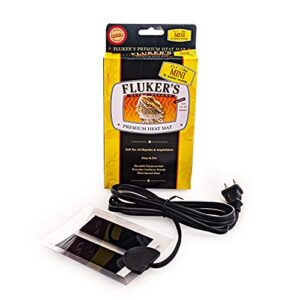
For a nursery tank barely bigger than a shoebox, the Fluker’s Premium Heat Mat Mini earns its keep at just 4×5 inches. It holds a steady 100°F surface, mounted under or beside the glass, so tiny corn snake or leopard gecko hatchlings get consistent belly warmth without a bulky footprint.
Keep substrate thin when mounting underneath, since anything thick blunts heat transfer. Some owners note inconsistent output over time, so pair it with a thermostat and check performance regularly.
| Best For | Owners of small terrariums or nursery tanks housing hatchling reptiles, amphibians, or hermit crabs who need gentle, consistent supplemental heat in a compact footprint. |
|---|---|
| Power | Not specified |
| Weight | 5.2 oz |
| Mounting Type | Under/side mount |
| Temperature Control | Fixed 100°F |
| Primary Use | Reptile heating |
| Waterproof Rating | Not specified |
| Additional Features |
|
- Maintains a steady 100°F for reliable, consistent warmth
- Compact 4×5 inch size fits small enclosures without crowding
- Flexible mounting options (under or side of tank) suit different setups
- Needs a thin substrate layer when mounted underneath, limiting flexibility
- Not ideal for enclosures with thick or heavy substrate unless side-mounted
- Some users report inconsistent heating or early failure over time
6. Tikaton Reptile Heat Pad Adjustable Under Tank
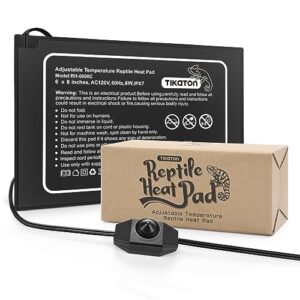
When manual control fits your routine better than a fixed thermostat setting, the Tikaton pad’s dial lets you dial heat up or down right from the cord, no guesswork included.
Its 6×8 inch surface suits 10-20 gallon hatchling tanks, and the soft PVC surface folds slightly for tricky placements. Power it on before applying the 3M tape, since a warmed pad adheres far more securely to glass than a cold one, preventing the peeling that plagues rushed installs.
| Best For | Reptile, amphibian, and arachnid owners who want adjustable, hands-on temperature control for small to mid-sized glass terrariums housing desert or tropical species. |
|---|---|
| Power | 8/16/24W |
| Weight | 7 oz |
| Mounting Type | 3M tape adhesive |
| Temperature Control | Adjustable dial |
| Primary Use | Reptile heating |
| Waterproof Rating | IPX67 |
| Additional Features |
|
- Adjustable dial lets you fine-tune heat levels instead of relying on a fixed thermostat setting
- Flexible PVC construction with an IPX67 waterproof rating holds up well in humid tropical setups
- Energy-efficient 8W nichrome heating element delivers steady, consistent warmth for digestion and activity
- Adhesive can fail if the pad isn’t pre-heated before applying the 3M tape, risking peeling
- Not strong enough on its own to heat large enclosures like 55-gallon tanks without extra heat sources
- Limited to glass terrariums only — not safe for use on wood, plastic, or acrylic enclosures
7. Aiicioo Reptile Heat Mat Thermostat Combo
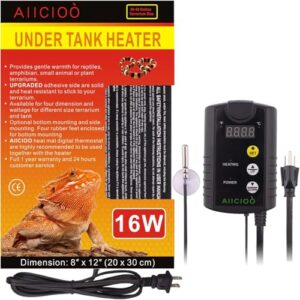
Pairing a heat mat with a built-in digital thermostat, the Aiicioo combo takes the guesswork out of hatchling heating. You set your target temperature once, and the readout holds it steady, cycling power on and off instead of running continuously like uncontrolled mats do.
The 6×8 to 8×12 inch mat options cover most hatchling tanks, while the included probe monitors ambient temperature near the warm zone. That feedback loop matters when ambient room conditions shift, since fixed-output heaters can’t adjust on their own.
| Best For | Reptile, amphibian, and invertebrate keepers who want steady, hands-off warmth for hatchling enclosures without babysitting the temperature all day. |
|---|---|
| Power | 16W |
| Weight | Not specified |
| Mounting Type | Adhesive, rubber feet |
| Temperature Control | Digital thermostat included |
| Primary Use | Reptile heating |
| Waterproof Rating | Not specified |
| Additional Features |
|
- Digital thermostat cycles power automatically, holding a set temperature instead of running full-blast nonstop
- Strong adhesive stays put on glass surfaces without melting or peeling over time
- Simple 3-button interface lets you switch between Fahrenheit and Celsius and dial in your target easily
- Adhesive bond is permanent once applied, so glass placement has to be right the first time
- Not suitable for plastic, acrylic, or water-filled tanks, which limits setup flexibility
- May not put out enough heat for larger enclosures or rooms that run cold
8. Aiicioo Reptile Heating Pad 8 Watt
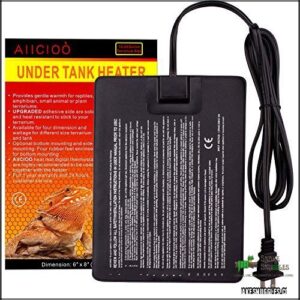
At just 8 watts, this pad suits quarantine bins or small hatchling tanks rather than large enclosures. Self-regulating output holds surface temps between 104°F and 122°F, though thick glass or dense substrate can blunt that warmth considerably.
Rubber feet promote airflow underneath, and the nichrome element distributes heat evenly across its 10.8 x 4.9 inch surface. Skip the thermometer purchase, though, since none comes included, and watch for cord-edge peeling reported by some users over extended use.
| Best For | This heating pad is best for owners of small hatchling tanks, quarantine bins, or 10-20 gallon terrariums housing ball pythons, leopard geckos, or hermit crabs who need a low-wattage supplemental heat source. |
|---|---|
| Power | 8W |
| Weight | 6.4 oz |
| Mounting Type | Rubber feet |
| Temperature Control | No control included |
| Primary Use | Reptile heating |
| Waterproof Rating | Not specified |
| Additional Features |
|
- Self-regulating heat output maintains a steady 104°F to 122°F surface temperature
- Rubber feet allow for bottom mounting, promoting airflow and better heat dissipation
- Compact and lightweight design fits easily under smaller tanks or ceramic tiles for seedling germination
- No adjustable temperature control or included thermometer for precise monitoring
- May struggle to generate enough heat through thick glass or dense substrate
- Some users report adhesion issues, including peeling at the cord edges over time
How to Choose The Right Heater Size
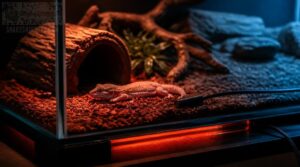
Picking the right heater isn’t about grabbing whatever fits your budget, it’s about matching wattage and coverage to your specific setup. Get the size wrong, and you’re either scorching your hatchling’s belly or leaving the enclosure too cold to matter. Here’s what actually determines the right fit for your tank.
Tank Floor Coverage
How much floor should your heater actually cover? Aim for at least half the tank floor, extending under one warm hide for real belly heat simulation. Partial coverage builds defined warm zones, while full coverage smooths the temperature gradient.
Thin substrate over undersized mats invites edge overheating, so match mat sizing to floor space and monitor gradients with a thermometer.
Enclosure Size and Wattage
Bigger tanks demand more watts, period. A 10-gallon hatchling setup needs just 6-14 watts, while 18×18-inch enclosures require higher wattage or multiple mats for even heat distribution.
- Undersized wattage creates cold hides
- Oversized mats risk hotspots
- Correct enclosure size and wattage pairing stabilizes the thermal gradient
Substrate thickness impact matters too: deeper bedding insulates heat, so match your mat sizing accordingly.
Hatchling Species Requirements
Species drive your sizing decisions more than tank dimensions ever will. Leopard gecko needs call for 88-92°F warm sides, while ball python warmth targets a snug 86-90°F hide zone. Corn snake temps run cooler at 80-85°F, favoring low-wattage mats. Bearded dragon hatchlings demand higher basking heat near a stone slab. Tropical species care, like crested geckos, often skips heat mats entirely.
This matters beyond comfort, since research shows reptile incubation temperature effects can shape hatchling size, sex ratios, and locomotor performance long before they ever reach your tank.
Heating Capacity
Once species targets are set, sizing comes down to math. Thermal mass calculation matters here: glass, substrate, and air all resist temperature change, so a heater must overcome that mass, not just the thermostat’s number. Watts per gallon guidelines help, but ambient room impact shifts everything. A cool basement tank needs more heating capacity than one in a warm bedroom.
Energy Efficiency
Running costs matter as much as raw wattage. A thermostat controlled heater cycles on only when needed, cutting power draw substantially compared to constant-run mats.
Pair that with reflective insulation on your lid, uniform substrate optimization to avoid overcompensating hotspots, and timed operation cycles matching hatchling activity. Choosing Energy Star components rounds out an efficient, cost-conscious setup without sacrificing warmth.
Why Every Heat Mat Needs a Thermostat
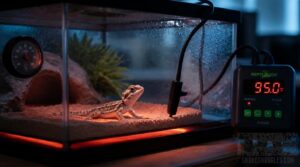
A heat mat without a thermostat is just guessing, and your hatchling’s safety shouldn’t depend on luck. Uncontrolled heat can climb fast, especially once room temperatures rise, turning a helpful tool into a real hazard. Here’s what you need to know before you plug anything in.
A heat mat without a thermostat isn’t heating, it’s gambling with your hatchling’s safety
Preventing Dangerous Temperature Spikes
A heat mat without a thermostat is a temperature spike waiting to happen. Fail-safe monitoring matters: connect the probe directly to the mat, verify readings within 2°F of actual substrate temp, and use a two-stage cutoff for rapid temp response.
Keep probes away from drafts, and inspect substrate weekly, since compaction alters heat transfer and invites glass tank overheating.
Digital Versus PWM Thermostats
Which controller suits your setup, digital or PWM? Digital thermostats switch power fully on or off, holding accuracy near 1°F, while PWM units modulate duty cycles for smoother stability and reduced overshoot. PWM efficiency often trims wattage in radiant setups.
Many digital models add smart home connection for remote temperature monitoring, so your Under Tank Heater stays supervised even when you’re away.
Proper Probe Placement
Where you put the probe matters as much as the thermostat itself. Rest it directly on the warm side, at substrate level, away from edges where false highs occur.
For cold rooms, this under-tank heater wattage guide helps match output to enclosure size.
If you’re still sorting out which sensor fits your setup, this beginner’s guide to digital thermometers breaks down probe placement and calibration basics in plain terms.
Check proximity to the warm hide for accurate basking data. Avoid burying it past an inch deep, since dampened readings undercut real temperature monitoring and invite hidden hot spots.
Automatic Safety Shut-Off
Beyond temperature control, your thermostat’s real job is knowing when to stop. Quality units pair thermal cut-off switches with dual sensor verification, cross-checking readings before cutting power near 105°F.
Look for a fail-safe default state (off if the sensor fails) plus power surge protection and an IP65 enclosure rating, since moisture and voltage spikes cause most reptile burn prevention failures.
Thermostats Versus Rheostats
A rheostat isn’t a thermostat, and confusing the two puts hatchlings at risk. Rheostats simply dial down voltage, offering no active temperature regulation or feedback loop.
Thermostats use probe-based sensing to cycle power automatically, maintaining precise, stable warmth for reptile thermoregulation. For hatchling care heating where margins are thin, thermostat compatibility with dual sensors isn’t optional, it’s essential.
Safe Installation for Hatchling Enclosures
Picking the right heater is only half the job, since even the best mat can create problems if it’s installed wrong.
For renters especially, choosing a reusable, nonadhesive option like the ones covered in this guide to apartment-friendly under tank heaters can save you from a security deposit headache down the road.
Placement, adhesion, airflow, and cord safety all matter just as much as wattage, especially in a small hatchling enclosure where there’s little room for error.
Here’s what safe, proper installation actually looks like.
External Bottom Placement
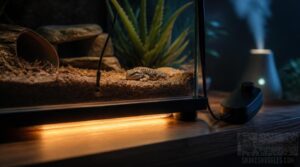
Mounting your heater beneath the tank, rather than inside it, is the safest route for hatchling care heating. External bottom placement transfers warmth upward through the substrate, keeping hatchlings away from exposed elements entirely.
For real heat transfer efficiency, the mat needs full, flat contact with a solid surface. A thermostat remains essential here, since unregulated mats risk dangerous temperature runaway.
Glass Cleaning and Adhesion
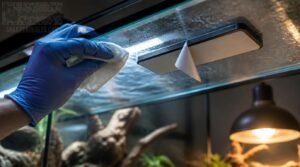
A dusty glass tank ruins adhesion before you even start. Glass surface prep means wiping the mounting area with isopropyl alcohol, then using a lint-free cloth so no fibers weaken the bond. Skip cleaners with residue.
Stable room humidity during application protects adhesive bonding strength, since the 3M backing on quality under tank heaters needs firm, consistent contact to perform for years.
Tank Elevation and Airflow
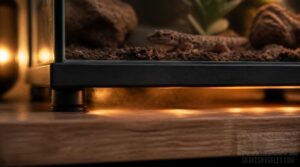
Once your heat mat bonds to the glass tank, don’t set it flush on a shelf. Base elevation of 1 to 2 centimeters lets air circulate beneath the heater, preventing moisture pooling and stagnant hot zones.
Use evenly spaced, nonconductive feet so the enclosure sits level. This airflow pattern helps gentle convection, keeping your gradient stable and predictable across the tank floor.
Cord and Moisture Safety
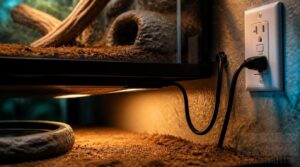
Airflow keeps your setup dry, but cords still need their own protection plan.
Route power cords away from water dishes and substrate, using a drip loop so moisture travels away from the plug instead of toward it.
Always run your Under Tank Heater and thermostat through a GFCI outlet, and inspect cords regularly for cracking or wear.
Side Mounting Alternatives
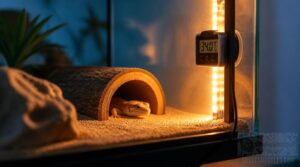
Bottom placement isn’t your only option. Side mounting works well when floor space runs tight, using a mounting strip along the wall for lateral temperature control. This creates edge heat distribution rather than belly heat, so:
- Pair it with thin substrate
- Keep warm hides against the heated wall
- Add a monitored thermostat, always
Optimize Heat Transfer and Gradients
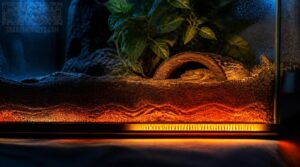
Getting a heat mat installed correctly is only half the job, since the substrate, hide placement, and airflow around it determine whether your hatchling actually feels that warmth. A tank that runs hot on paper can still leave cool corners or scorching patches if the setup underneath isn’t working with the heater instead of against it.
Here’s what to check to make sure heat moves the way it should, from the glass all the way to your hatchling’s belly.
Choosing Compatible Substrates
Not all bedding suits a heat mat. Choose substrates with strong heat conductivity like coconut fiber, avoiding fine particles that trap warmth unevenly.
Confirm non-toxic materials free of pesticides, and balance moisture retention so humidity stays stable without waterlogging.
For burrowing hatchlings, coarse, shallow substrate helps natural digging while maintaining the thermal gradient your species requires.
Creating Warm and Cool Zones
Picture your hatchling’s tank split into two honest halves: a warm zone covering roughly a third to half the floor, and a cool end at least a few degrees lower. That gradient lets your hatchling self-regulate, moving toward heat for proper digestion or retreating when it’s had enough.
Stable temperatures matter more than perfect numbers, since fluctuating zones stress even hardy species.
Monitoring Warm Hide Temperatures
Where you place your probe determines whether readings mean anything at all. Set it under the warm hide, farthest from the mat’s edge, at least an inch off the heating surface, targeting 28-32°C. Check weekly for grime, calibrate quarterly, and log daily highs and lows.
Since different probe types behave differently in humid enclosures, it’s worth understanding how reptile thermometers work in snake enclosures before trusting a single reading.
- Alert if temps exceed setpoint by 2°C for five minutes
Protecting Burrowing Hatchlings
Burrowing species bring complexity Under Tank Heaters must respect. Keep substrate moisture control consistent, since dry tunnels collapse and trap hatchlings mid-emergence.
Position hides over the warm zone but away from direct mat edges, and check burrow entrances daily. Fine, deep substrate resists tunnel collapse and distributes heat evenly, supporting safer, more natural emergence behavior in young burrowing reptiles.
Preventing Hotspots and Burns
A hot glass floor can burn a hatchling before you even notice a problem, which is why thermal barrier placement matters as much as the heater itself.
Inspect mat surfaces weekly, verify even substrate heat transfer, and confirm probe positioning accuracy at the warmest point.
- Add a non-slip liner
- Improve airflow underneath
- Check for wiring wear
When budget allows, thermal imaging catches hidden hotspots standard thermometers miss entirely.
Frequently Asked Questions (FAQs)
Can hatchlings be harmed by heat mats?
Yes, unregulated mats can exceed safe surface temperatures, causing burns on delicate ventral skin. Keep contact points between 90 and 93°F, use a thermostat, and check gradients regularly with a probe for safe heat transfer.
How long should a heat mat stay on?
Keep on time to 4 to 6 hours daily, split into sessions rather than continuous heat. Pair this with a thermostat and regular monitoring, ensuring the warm zone never exceeds 90°F while allowing proper cool-down periods between cycles.
Do heat mats work without a thermostat?
Technically, they’ll warm an enclosure, but without thermostat necessity built into your setup, you’re gambling with unregulated heat regulation. Electrical hazards and overheating risks climb fast, so pairing any mat with a proportional thermostat isn’t optional, it’s essential.
Can multiple hatchlings share one heat mat?
Multiple hatchlings can share one mat if you maintain precise thermostat control and appropriate spacing. Keep species compatible, position the probe in the warm zone, and monitor daily to prevent hotspots or overheating across the group.
How often should heat mats be replaced?
Warming up to retirement isn’t a bad pun, it’s reality: replace every 24 to 36 months, sooner if cracks, fraying, or uneven heating appear, since thermal cycling wears adhesive backing and shortens overall heater lifespan.
Conclusion
A hatchling ball python and a baby leopard gecko rarely share a keeper, yet both depend on the same principle: steady, controlled warmth. That coincidence isn’t accidental. It’s biology.
The right under tank heaters for hatchlings succeed or fail based on wattage, thermostat control, and probe placement, not brand names. Get those fundamentals right, and your hatchling gets a warm side it can trust every single day. Master the setup once, and it holds for years.