This site is supported by our readers. We may earn a commission, at no cost to you, if you purchase through links.
That greenish-brown stain spreading across your snake’s liner isn’t just unsightly. It’s bacteria multiplying in warm, humid conditions, the kind reptile enclosures practically breed by design.
Most owners wipe the surface and call it clean, but waste soaks into fabric fibers and hides in seams where a quick swipe never reaches. Skip a proper deep clean and you risk skin infections, respiratory issues, or a snake that refuses to settle into a dirty space.
Knowing how to clean a substrate liner the right way protects your snake’s health and saves you from replacing liners every few months. The steps below walk you through securing your snake, breaking down waste, and getting that liner disinfected without damaging the material or cutting corners on safety.
Table Of Contents
- Key Takeaways
- How Do You Clean a Substrate Liner?
- Gather Safe Liner Cleaning Supplies
- Secure Your Snake Before Cleaning
- Remove and Inspect The Liner
- Remove Waste Before Washing
- Wash The Substrate Liner Thoroughly
- Disinfect The Liner Safely
- Rinse and Dry The Liner
- Reinstall or Replace The Liner
- Maintain a Cleaner Substrate Liner
- Frequently Asked Questions (FAQs)
- How do I clean my substrate?
- Where should you not touch a bearded dragon?
- How to clean a dirty pond liner?
- How often should sand substrate be fully replaced?
- Can baking soda replace bleach for disinfecting liners?
- Is it safe to use scented candles nearby during drying?
- What temperature should reptiles be held at during cleaning?
- How long should sand soak in bleach solution?
- Conclusion
Key Takeaways
- Clean your snake’s liner in the right order—remove, scrub both sides, disinfect, rinse, then air-dry—since skipping a step can leave bacteria behind and risk your snake’s health.
- Secure your snake in a warm, escape-proof container and keep handling under five minutes so cleaning stays stress-free for both of you.
- Stick to reptile-safe products, using vinegar water for grime and a dedicated reptile-safe disinfectant for germs, and never mix cleaning chemicals like bleach and ammonia together. For a step-by-step routine, these safe ways to clean a snake’s water bowl show how to scrub away residue without leaving harmful traces behind.
- Spot-clean waste within an hour and deep-clean the liner every two to four weeks to stop bacteria and odor from building up between full cleanings.
How Do You Clean a Substrate Liner?
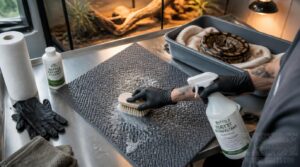
Cleaning a substrate liner isn’t complicated, but it does follow a specific order that matters. Skip a step, and you risk leaving bacteria behind or damaging the material itself. Here’s the process broken down, along with why manufacturer instructions deserve a second look before you start.
If you’re unsure whether it’s time for a full swap versus a quick wipe-down, this guide on how often to change your snake’s substrate can help you figure out the right timing.
Remove, Wash, Disinfect, Dry
Four steps get your terrarium liner clean and safe: remove liner carefully, scrub both sides with a soft brush, disinfect safely using a reptile-safe disinfectant, then rinse thoroughly and air dry completely. Skip a step, and you risk reintroducing bacteria to your reptile substrate.
This sequence mirrors the six stages of cleaning recommended for effective sanitation more broadly.
Some owners finish with oven baking for extra substrate sterilization, though liners usually just need full drying before reinstallation.
Follow Manufacturer Cleaning Instructions
Baking works for sand, but reptile carpet is a different animal. Always check Manufacturer Specifications before cleaning, since some liners can’t handle heat or bleach.
- Confirm Tool Approvals before scrubbing
- Match Dilution Ratios exactly as listed
- Respect stated Contact Times for disinfectants
Compliance Guidelines protect both the material and your snake, keeping reptile-safe cleaning and substrate sterilization consistent every terrarium maintenance cycle.
Gather Safe Liner Cleaning Supplies
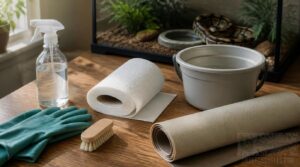
Before you touch that liner, line up the right supplies, and you’ll save yourself time and hassle. Every item on this list does a job, from lifting waste to killing off hidden germs. Here’s exactly what you need to grab before cleaning day begins.
Disposable Gloves
Before you touch a soiled liner, put on disposable gloves, since bacteria and mites hide in waste. Nitrile gloves resist punctures best and stay latex-free. Check sizing for a snug fit, then dispose of gloves immediately after use.
| Glove Type | Best For | Reusable? |
|---|---|---|
| Nitrile | Chemical tasks | No |
| Latex | Sensitive handling | No |
| Vinyl | Quick jobs | No |
Soft Brush or Sponge
With gloves on, grab a soft brush or sponge for the terrarium liner itself. Choose nylon bristles or a soft-textured sponge, since bristle density affects cleaning speed without scratching material. Use gentle pressure to lift grime safely.
Rinse tools after each session, since a clean brush routine protects reptile habitat hygiene and keeps substrate reuse safe.
White Vinegar and Water
Mix equal parts white vinegar and water for a natural cleaning alternative that cuts through grime without harsh fumes. Acetic acid, making up 4 to 7 percent of vinegar, breaks down organic residue on your terrarium liner. This vinegar-water solution suits most sealed surfaces well, but always check safe surface compatibility first. Wipe thoroughly before moving to disinfecting.
Reptile-safe Disinfectant
Since vinegar experiences grime but not pathogens, grab a reptile-safe disinfectant labeled for terrariums.
- Benzalkonium chloride
- Hydrogen peroxide cleaners
- F10 SC Veterinary Disinfectant
- PHMB formulas
- 70% alcohol solutions
Follow safe dilution practices exactly, respect contact time, and rinse residue thoroughly. Proper substrate pathogen kill protects reptile health without toxic buildup in the enclosure.
Clean Towels
Once you’ve rinsed the liner, dry it with clean towels or cloths, and pick the right fabric for the job.
Cotton offers strong absorbency, while microfiber dries fast thanks to its polyester-polyamide combination. Bamboo towels add natural antibacterial properties, and a flour sack towel or paper towel works for quick blotting.
Keep rubber gloves and safety goggles and safety goggles on until drying finishes.
Secure Your Snake Before Cleaning
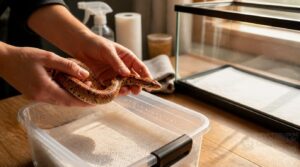
Before you touch a single supply, get your snake somewhere safe. A stressed snake on the loose turns a simple cleaning job into a chase around the room. Here’s what you need to set up before the liner ever comes out.
Use an Escape-proof Container
A loose snake during cleaning turns a simple chore into a house-wide hunt.
Use a secure transport container with a locking lid, not a cardboard box or open bin. Look for an escape-resistant housing with a dual spring latch and reinforced hinges, tested for reptiles up to 6 feet long.
This lockable reptile carrier keeps your snake contained and calm.
Provide Proper Holding Temperatures
A cold snake is a stressed snake, so don’t skip the heat setup.
Warm your holding container with a heating pad and thermostat controller, creating a gradient of 75-92°F depending on species. Add a small heat lamp if the room runs cool. Use a digital probe to check both ends every 5-10 minutes, and tuck a hide box into each side for security.
Keep Cleaning Time Brief
Speed matters here. Limit handling to under five minutes so your snake stays calm in its holding container.
- Set a timer before you start
- Prep supplies beforehand
- Remove waste quickly
- Minimize handling
- Dry the terrarium liner fast
Rapid drying and reptile-safe cleaning keep stress low. Segment your weekly maintenance routine into brief bursts if needed.
Wash Hands After Handling
Once your snake is secured, wash your hands with soap for at least 20 seconds, covering knuckles, nails, and between fingers before rinsing.
| Step | Action | Why It Matters |
|---|---|---|
| 1 | Lather soap | Loosens germs |
| 2 | Scrub 20 sec | Full coverage |
| 3 | Rinse well | Removes residue |
| 4 | Dry completely | Prevents transfer |
Dry hands fully, this stops germs from spreading to food or surfaces.
Remove and Inspect The Liner
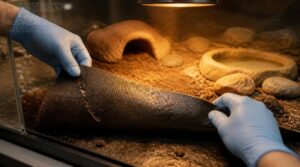
With your snake safely tucked away, it’s time to turn your attention to the liner itself. Pulling it out the right way protects both the enclosure and whatever mess is sitting on top of it. Here’s what to focus on as you lift, inspect, and size up the cleaning job ahead.
Lift Liner Carefully
Before you touch the terrarium liner, clear the area around your reptile enclosure so nothing snags mid-lift.
Grip the edge at a shallow angle, hands underneath, elbows tucked. Stand shoulder-width apart, body close, and lift smoothly. Stop if you feel resistance, regrip with dry hands, and never yank the liner from under hides.
Contain Loose Waste
Once the liner clears the tank, waste needs a home fast. Grab a leak-proof bin with a locking lid, line it with a garbage bag, and scoop debris in with tongs.
- Seal the lid tight to block odors
- Keep the bin upright on a flat surface
- Wash hands after handling waste
This step keeps enclosure sanitation on track before inspection begins.
Check Tears and Fraying
With waste contained, inspect the liner itself. Run your fingers along every edge for fraying severity, checking corner stress points first since they wear fastest.
| Check | What to Look For |
|---|---|
| Edge Wear Assessment | Loose threads, fiber breaks |
| Tear Length Measurement | Damage from edge inward |
Tears under 1 cm may patch; larger ones mean substrate replacement is overdue.
Examine Stains and Odors
Before washing, hold the liner up to natural light and check corners first, since waste accumulation zones hide there. Fresh stains look dark brown or greenish; dried ones bond deeper into fibers.
Give it a sniff test too. Musty smells signal trapped humidity, while sulfurous odors point to decayed organic matter needing full substrate replacement soon.
Remove Waste Before Washing
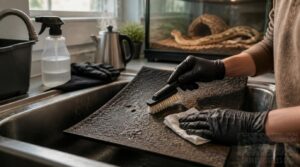
Before you soak the liner in anything, get the loose mess off it first. Skipping this step just means more grime floating in your wash water later. Here’s how to clear away waste the right way before it touches soap or disinfectant.
Shake Debris Into Trash
Loose grit and shed skin come off fastest with a good shake. Hold the terrarium liner over a garbage bag lined trash can, brace it on a stable surface, and use one firm wrist motion to dislodge debris.
Stand to the side to dodge backspray, then sweep leftover grit toward the bag with a soft brush before moving to the next cleaning step.
Scrape Dried Waste Gently
Once the shake-off is done, some grime holds on tight. Grab a soft plastic spatula and hold it at a shallow angle, then scrape dried waste with small, gentle motions. Skip extra pressure and let debris crumble away naturally.
Wear gloves throughout, clean the scraper between passes, and sweep loosened bits straight into your waste container before they recontaminate the terrarium liner.
Avoid Abrasive Cleaning Tools
Steel wool and stiff-bristled brushes seem tough enough for grime, but they scratch a terrarium liner’s surface, creating grooves where bacteria hide. Stick with gentle brush techniques instead, soft bristles or a non-abrasive sponge, using light circular motions.
Cotton towels work as safe cloth materials for wiping down edges. Keep gloves on throughout for reptile-safe cleaning and lasting terrarium hygiene.
Pre-rinse Stubborn Residue
Some stains just won’t budge with a quick wipe. Identify the residue type first: organic soils lift with warm water, mineral scale needs a vinegar soak.
- Run a warm water pre rinse, 30-45°C
- Use gentle scrubbing with a soft brush
- Avoid abrasive pads on the liner
- Rinse toward soiled zones last
- Inspect liner surface before washing
Skip the sand sifter here, save it for substrate only.
Wash The Substrate Liner Thoroughly
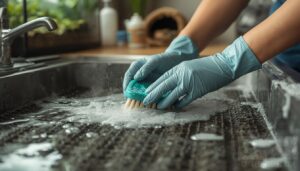
Once the loose debris is gone, it’s time to get the liner truly clean. A thorough wash breaks down the grime that scraping alone can’t touch, and it sets up disinfecting for success. Here’s how to scrub it the right way.
Scrub Both Liner Sides
Grime hides on both sides of a liner, so scrub each one. Use a circular brushing motion with gentle pressure, then flip and scrub the underside for embedded waste. Rinse the brush between sides.
| Side | Motion | Focus |
|---|---|---|
| Top | Circular | Surface debris |
| Bottom | Circular | Embedded waste |
| Both | Rinse brush | Cross-contamination |
Clean Edges and Corners
Corners trap the most grime, so give them extra attention. Work a soft brush into each seam with gentle, circular motions, since abrasive tools fray stitching and damage reptile-safe coatings.
Rinse edges thoroughly, checking for discoloration that signals residue buildup. After corner drying, press seams to confirm no moisture pockets remain before reassembling the terrarium.
Use Warm Water
Once seams are dry, fill your bucket with warm water between 40 and 50°C. This range melts fatty deposits without harming most liners, speeding up deep cleaning.
- Loosens dried debris faster
- Dissolves oils better than cold water
- Boosts deodorizing power with mild cleaners
- Protects fibers from heat damage
- Cuts overall scrubbing time
Avoid Scented Dish Soaps
Skip scented dish soap. Fragrances mask oils without breaking them down, and residue can irritate your snake’s skin.
| Soap Type | Skin Safety | Environmental Impact |
|---|---|---|
| Fragrance free | Hypoallergenic | Biodegradable |
| Scented | Higher irritation risk | More additives |
Look for Safer Choice certification and simple ingredient lists. These reptile-safe options protect both terrarium liner and sand cleaning routines.
Repeat for Remaining Residue
One wash rarely finishes the job. Run your fingers over the liner, and if you still feel sticky or dull patches, repeat a targeted area scrubbing with fresh water and soap.
This repeat rinse process counts as your residue inspection protocol. Keep going until a clean towel wipes away with no color or odor, confirming odor-free verification for your terrarium liner care.
Disinfect The Liner Safely
Washing gets rid of grime, but it won’t kill the bacteria hiding in the fabric. Disinfecting is what actually makes the liner safe to put back in your snake’s home. Here’s what you need to know to do it right.
Choose Reptile-safe Disinfectants
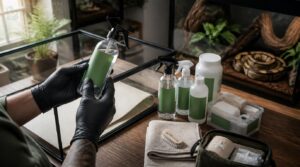
Not every disinfectant belongs near your snake. Pick a reptile-safe disinfectant free of ammonia and phenols, since these compounds irritate a snake’s respiratory system. Look for products labeled specifically for reptile use or veterinary-grade options with reptile safety data.
Non-toxic disinfectant options exist for a reason: your snake can’t tell you when fumes bother it, so choose wisely before you clean.
Dilute Products as Directed
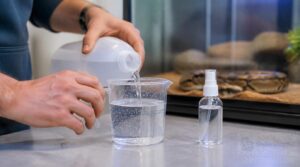
Grab the label before you grab the bottle. Read it closely, since dilution ratio accuracy matters for your reptile-safe cleaner to work without harming your snake.
Use a dedicated measuring cup, fill water first, then add cleaner. Mix only what you’ll use during this habitat deep clean, and check solution freshness before applying it to protect substrate longevity.
Follow Required Contact Time
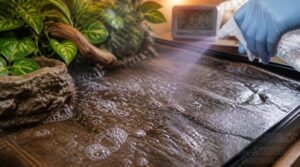
Patience matters here. Your reptile-safe cleaner needs full contact time on every surface, not a quick wipe. Check the label for exact minutes, and don’t rinse early.
If the liner dries out mid-treatment, reapply the bleach solution. A dry surface cuts disinfecting power short, so keep it wet for the entire habitat deep clean.
Never Mix Cleaning Chemicals
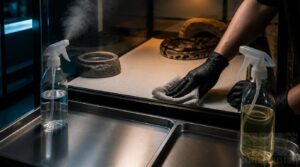
Mixing cleaners can turn your reptile enclosure into a gas chamber. Never combine bleach with ammonia, vinegar, or hydrogen peroxide, since these pairings release toxic fumes that harm you and your snake.
Quat-based cleaners plus bleach cause the same danger. Stick to one reptile-safe product per bleach solution session, and always rinse the substrate bed before switching chemicals.
Avoid Ammonia and Phenols
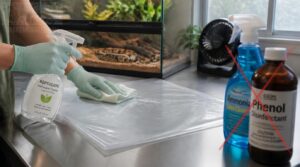
Ammonia and phenols don’t belong anywhere near your snake’s enclosure. Ammonia releases sharp-smelling fumes that irritate eyes and airways, and it forms toxic chloramine gas when mixed with bleach.
Stick to a reptile-safe disinfectant instead:
- Skip ammonia-based glass cleaners
- Avoid phenol disinfectants like Lysol
- Never use undiluted acids
- Ventilate the room while cleaning
- Rinse thoroughly to prevent residue
Rinse and Dry The Liner
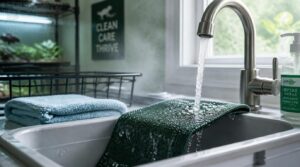
Disinfecting kills the germs, but bleach left behind can hurt your snake just as much as the waste did. Rinsing and drying properly closes out the process and gets the liner ready for its next job. Here’s what you need to check off before that liner goes anywhere near the enclosure.
Remove All Chemical Residue
Leftover disinfectant is just as risky as the mess you started with. Wipe the liner with a damp cloth, then run a fingertip test, a slick or soapy feel means chemicals remain. Rinse again with warm water. Check material compatibility, since some liners trap residue in seams. Confirm no film, smell, or discoloration before proceeding.
Rinse Until Odor-free
A clean-smelling liner tells you the chemicals are gone. Rinse under warm water, working every seam and corner, then smell-test once dry. Musty or sour notes mean residue remains, so repeat the rinse.
Don’t rush this step; short rinses leave odor compounds behind. Longer, careful rinsing beats a quick pass every time.
Air-dry Completely
Once rinsing’s done, lay the liner flat and let it air-dry completely before it goes back in the tank. Set it somewhere with good airflow, ideally 68-77°F, since humidity above 60% slows things down fast.
- Use a fan for gentle airflow
- Check edges and folds for dampness
- Let sit several hours to overnight
- Skip heat sources entirely
- Store dry in a dust-free spot
Prevent Moisture and Mold
A damp liner invites trouble fast, so keep terrarium humidity control in mind even during drying. Check your enclosure’s ambient moisture with a hygrometer, aiming for 30-50%.
| Risk Factor | Prevention Step |
|---|---|
| Poor ventilation | Use fans, open doors nearby |
| Hidden leaks | Inspect plumbing and enclosure seams |
Mold thrives on trapped moisture, so never rush storage.
Avoid Unapproved Heat Treatments
Once your liner is odor-free, resist the urge to speed things up with a hot oven. Unapproved heat treatments risk toxic fume release and weakened material fibers above 200°F. Skip unsafe oven use entirely.
- Air-dry only, no oven shortcuts
- Keep away from heating lamps
- Store flat before substrate layering resumes
Reinstall or Replace The Liner
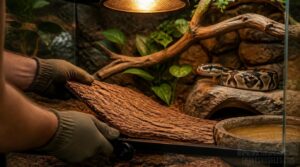
Once the liner dries completely, your work isn’t quite finished yet. Getting it back into the enclosure the right way matters just as much as the cleaning itself. Here’s what to check and do before your snake moves back in.
Confirm Liner is Undamaged
Before that liner goes back in, give it one last look. Check for tears, inspect seams, and feel for soft spots along the edges. Verify flat lay so it won’t curl or trap waste underneath.
This undamaged inspection matters most before any bioactive setup or reptile shedding removal routine begins again.
Clean Enclosure Surfaces First
Before that liner goes back in, give the empty enclosure its own once-over. Wipe walls and floors with warm water and a reptile-safe cleaner, using a microfiber cloth to lift grime without scratching surfaces.
Rinse thoroughly, then towel dry. Spot-check corners for leftover residue or odor before proceeding.
Position Liner Without Gaps
Once the enclosure is dry, lay the liner from one corner to its opposite, keeping it taut with no folds. Align liner edges to each side, press corners flush, and smooth the surface with gloved hands to remove air pockets.
Check seam alignment carefully; gaps larger than 2 cm invite substrate disturbance and undermine habitat stability.
Restore Hides and Furnishings
A worn hide isn’t trash yet. Brush off dust first, then apply a breathable conditioner made for reptile use.
For tears, match natural patches to the original grain direction and texture, securing them with reversible adhesive and stitching that mimics the original pattern.
Test products on a hidden spot before full use.
Replace Permanently Stained Liners
Some stains never lift, no matter how many rounds of scrubbing you give them. When that happens, stop treating it and start shopping for stain-resistant materials like silicone or rubberized liners, which hold up far better than porous fabric.
Check liner compatibility with your enclosure’s temperature range, then install with clean hands over a fully dried substrate bed for proper adhesion.
Maintain a Cleaner Substrate Liner
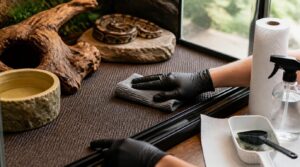
Cleaning the liner once solves today’s problem, but your snake’s enclosure needs ongoing attention to stay healthy. A few simple habits keep waste and odor from building up between deep cleans. Here’s what a solid maintenance routine looks like.
Spot-clean Waste Promptly
Waste sitting in the tank for hours breeds bacteria fast, cutting growth by up to 90% if you act within that first hour.
Act within the first hour, and you can cut bacteria growth in soiled waste by up to 90 percent
- Remove droppings with gloves within 30 minutes
- Wipe the spot, folding away from center
- Neutralize odor after removal, not before
- Log the date and waste type
Prompt spot cleaning keeps your liner fresher between deep cleans and protects your snake’s health.
Deep-clean Every Few Weeks
Spot-cleaning controls daily waste, but grime still hides in seams and corners. Set a deep-clean every two to four weeks, scrubbing, disinfecting, and rinsing the whole liner with a reptile-safe cleaner.
Inspect for wear or fraying while you work, and log the date afterward. A steady maintenance schedule cuts habitat disruption and keeps buildup from creeping past your spot-clean routine.
Keep a Spare Liner
Two hours in a holding container gets tight if a deep-clean runs long, and that’s where a spare liner earns its keep.
- Store it clean and dry, labeled by size
- Rotate it into use periodically
- Confirm it tolerates the same reptilesafe cleaning products
- Swap it in for instant substrate vacuuming and waste removal
Build replacement into your maintenance schedule so aging liners never catch you off guard.
Monitor Odors and Buildup
A spare liner won’t help if you’re not tracking what causes the smell in the first place.
Check waste accumulation zones and liner seams for residue buildup weekly. Humidity speeds odor development, so warm, damp corners need closer attention.
| Signal | Likely Cause | Action |
|---|---|---|
| Ammonia smell | Urine breakdown | Deep-clean now |
| Musty odor | Moisture pocket | Dry and vacuum |
| Dark stains | Waste residue | Pre-rinse liner |
Watch Your Snake’s Health
A clean liner means little if you’re not watching the snake living on it. Check skin clarity, breathing, and body condition weekly.
- Skin should glide smoothly, never tenting
- Eyes stay clear outside shedding
- Spine palpable but not sharp
- Shedding completes fully, not patchy
- Appetite and feeding stay consistent
Frequently Asked Questions (FAQs)
How do I clean my substrate?
Start by lifting the liner for a quick inspection, then sift loose sand and shake debris into the trash. Scrub with vinegar water, rinse warm, apply a reptile-safe disinfectant, and air-dry fully before reinstalling.
Where should you not touch a bearded dragon?
Avoid the head, beard, and eye area, all rich in nerve endings and sensory organs. During shedding, skip the tail tip and toes, where constriction rings can cut circulation. These spots trigger defensive, predator-like responses when handled.
How to clean a dirty pond liner?
A pond liner is your habitat’s second skin, so treat it that way. Drain water with a siphon method into a bucket, scrub gently with a vinegar water solution and soft cloths, rinse thoroughly, then check seals before refilling with conditioner-treated water.
How often should sand substrate be fully replaced?
Plan on a full sand replacement every 12 to 18 months, or sooner if odor buildup, compacted layers, or reduced substrate depth show up. Bioactive setups with a healthy cleanup crew can stretch that window to 18-24 months.
Can baking soda replace bleach for disinfecting liners?
No, baking soda can’t replace bleach. It cleans soil but lacks the required contact time to disinfect. Stick with a diluted bleach water solution or reptile-safe cleaner, then rinse thoroughly to remove residue.
Is it safe to use scented candles nearby during drying?
Keep scented candles away from your drying area. VOCs and soot can settle on the liner and irritate your snake’s respiratory system. Choose fragrance-free alternatives, run a fan for airflow, and open windows for proper drying area ventilation.
What temperature should reptiles be held at during cleaning?
Think of the holding container as a stopover, not a shelter. Match your snake’s species-specific range, with a warm end and cool side for a real thermal gradient, mirroring its basking zone.
How long should sand soak in bleach solution?
Give your sand a proper soak of 5 to 10 minutes in diluted disinfectant, never longer than This contact time inactivates surface contaminants without damaging grain texture, so submerge fully, then rinse until the chlorine smell disappears completely.
Conclusion
A clean liner is a quiet promise, one your snake reads through its belly long before you notice anything wrong.
Learning how to clean a substrate liner isn’t a chore you rush through once and forget about. It’s a rhythm: strip, scrub, disinfect, dry, repeat. Skip a step, and bacteria find their way back faster than you’d expect. Stick with it, though, and you’ll build a healthier enclosure and a calmer snake that trusts the ground beneath it.