This site is supported by our readers. We may earn a commission, at no cost to you, if you purchase through links.

Your hatchling snake will spend 99% of its first year inside a terrarium—not outside exploring your living room or basking on your shoulder. That single enclosure becomes its entire world: feeding station, bedroom, climate-controlled refuge, and security blanket rolled into one 12×18-inch footprint.
Get the setup wrong, and you’re inviting respiratory infections, feeding refusals, and stress-related health crashes that can derail a hatchling’s development in under two weeks.
The good news? Snake terrariums for hatchlings don’t require exotic equipment or a wildlife biologist’s expertise. You need five core components, a 10-gallon tank, and a systematic approach to temperature gradients and humidity control. Master those fundamentals, and you’ll create an environment where your hatchling thrives instead of merely survives.
Table Of Contents
Key Takeaways
- Your hatchling snake spends 99% of its first year inside a single terrarium that functions as its complete environment, making proper setup critical to prevent respiratory infections, feeding refusals, and stress-related health crashes within two weeks.
- Essential terrarium components include a 10-20 gallon enclosure with precise temperature gradients (83-89°F warm side, 75-79°F cool side), humidity control at 40-60% (70% during shedding), secure escape-proof lids, and appropriate substrate that retains moisture without promoting mold.
- Bioactive setups using isopods, springtails, and oak leaf litter create self-sustaining ecosystems that automatically process waste and regulate humidity while reducing your maintenance workload by 40% compared to traditional substrates.
- Weekly monitoring of temperature gradients, humidity levels, substrate condition, and your snake’s behavior—combined with proper feeding schedules of prey 10-20% of body weight 1-2 times weekly—prevents most hatchling health problems before they escalate.
Best Snake Terrariums for Hatchlings
You can’t build a thriving hatchling setup without the right foundation pieces. The products below aren’t complete terrariums—they’re the essential substrates, barriers, and microbial boosters that transform a glass box into a stable environment.
Each one meets a specific need, from humidity retention to escape prevention.
1. Zilla Reptile Terrarium Bedding Mix
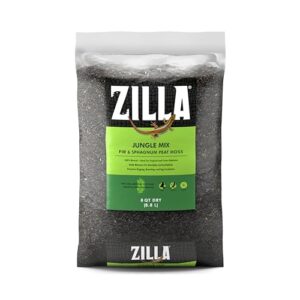
Zilla Reptile Terrarium Bedding Mix delivers exactly what your hatchlings need: moisture retention without mold. This 100% organic blend of Douglas fir bark and sphagnum peat moss holds humidity at stable levels while encouraging natural digging behaviors essential for stress reduction. You’ll appreciate the soft texture—no abrasive particles scraping delicate ventral scales.
The 8-quart bag covers most hatchling snake terrariums adequately, and the earthy scent signals a naturalistic environment. Yes, rinse it first to remove clay dust.
This bioactive substrate works perfectly for corn snake and ball python hatchlings when you’re building eco-friendly setups with proper humidity control and terrarium design integrity.
| Best For | Keepers of tropical reptiles and amphibians who need reliable humidity control without constant mold battles in their hatchling snake or gecko enclosures. |
|---|---|
| Material | Moss, Wood Shavings |
| Weight | 5.8 Pounds |
| Primary Use | Substrate for reptiles |
| Natural/Organic | 100% organic blend |
| Maintenance | Regular replacement needed |
| Color | Brown |
| Additional Features |
|
- Holds moisture consistently without turning moldy within the first day, keeping humidity stable for sensitive hatchlings
- Soft organic texture prevents abrasions on delicate scales and encourages natural digging and nesting behaviors
- Works well in bioactive setups and is easy to spot-clean between full substrate changes
- Contains clay dust that requires rinsing before use, adding an extra prep step
- Some bags include wood splinters that could potentially irritate or injure small reptiles
- Needs replacement every 2–4 weeks to maintain hygiene, which can add up in cost over time
2. Zoo Med Terrarium Mesh Screen
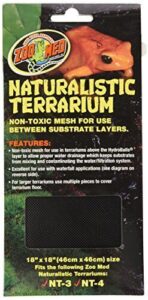
Once your substrate is in place, you need ventilation that actually works. Zoo Med Terrarium Mesh Screen retrofits standard terrariums with stainless steel or aluminum mesh that boosts airflow without compromising humidity control.
The fine weave prevents snake escapes—even crafty hatchlings can’t squeeze through. You’ll maintain proper temperature gradients while reducing mold risk in bioactive substrate setups.
Install it flush against your terrarium frame, checking for gaps weekly. Clean the mesh monthly to remove dust buildup that restricts ventilation systems and creates stagnant pockets where respiratory issues breed.
| Best For | Reptile keepers who need reliable ventilation in hatchling or small snake enclosures without sacrificing security or humidity control. |
|---|---|
| Material | Plastic |
| Weight | 0.04 Kilograms |
| Primary Use | Drainage layer separator |
| Natural/Organic | Nontoxic mesh |
| Maintenance | Durable, easy to cut |
| Color | Black |
| Additional Features |
|
- Fine stainless steel or aluminum mesh prevents even the smallest hatchlings from escaping while maximizing airflow to reduce mold and stagnant air
- Durable construction resists corrosion in humid terrarium environments and maintains structural integrity with regular use
- Improves temperature gradient stability by enabling efficient air circulation above basking areas without creating drafts
- Requires precise sizing and installation to avoid gaps that could allow escapes or compromise containment
- Needs monthly cleaning to prevent dust and substrate debris from restricting ventilation performance
- May require minor trimming or frame adjustments depending on your specific terrarium model and year
3. NOW Foods Brewers Yeast Powder
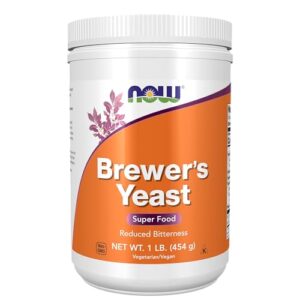
Beyond ventilation, your bioactive substrate needs fuel—that’s where NOW Foods Brewers Yeast Powder enters your terrarium setup. This debittered powder delivers B-complex vitamins and protein that feed microorganisms maintaining bioactive substrate balance in snake terrariums.
Sprinkle a pinch per square foot of substrate monthly to support isopod nutrition and springtail populations. The yeast nutrition boosts decomposer activity without disrupting reptile digestion or vitamin balance.
Store it sealed in cool, dry conditions. Overdoing dietary additives risks digestive upset, so follow supplement safety guidelines—less is more for snake health.
| Best For | Keepers looking to support their bioactive substrate’s cleanup crew with an affordable, nutrient-rich supplement that feeds isopods and springtails without compromising reptile health. |
|---|---|
| Material | Powder |
| Weight | 1 Pound |
| Primary Use | Nutritional supplement |
| Natural/Organic | Natural yeast product |
| Maintenance | Store up to 12 months |
| Color | Not specified |
| Additional Features |
|
- Provides B-complex vitamins and protein that fuel decomposer populations like isopods and springtails in bioactive setups
- Debittered formula reduces the harsh taste, making it easier to incorporate into terrarium maintenance routines
- GMP-certified quality from a trusted brand ensures consistent nutrient content and safety for bioactive environments
- Overuse can lead to digestive upset in reptiles if the powder contacts feeding areas or prey items
- Limited species-specific research on reptile exposure means dosing requires careful monitoring and restraint
- Strong smell and residual taste may still be noticeable even after debittering, which could affect substrate odor if overapplied
4. Live Oak Leaf Litter Substrate
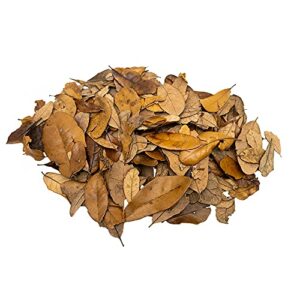
Once you’ve fed your microfauna, give them shelter with Live Oak Leaf Litter Substrate. This naturalistic terrarium setup creates hiding spots for isopods and springtails while maintaining humidity control in your bioactive ecosystem.
Spread it 1–2 inches deep across approximately 1.5 square feet to support microfauna without compromising sanitation in snake terrariums. Choose well-aged, mold-free oak substrate to protect hatchling respiratory health.
The leaf litter benefits extend beyond aesthetics—it traps moisture, feeds detritivores, and breaks down into nutrients. Remove waste immediately to prevent ammonia buildup in your bioactive substrate.
| Best For | Keepers running bioactive setups who want a natural substrate that feeds cleanup crews and maintains humidity for hatchling snakes or small reptiles. |
|---|---|
| Material | Oak |
| Weight | 0.15 Kilograms |
| Primary Use | Natural decor/shelter |
| Natural/Organic | Chemical-free oak leaves |
| Maintenance | Breaks down over time |
| Color | Natural oak |
| Additional Features |
|
- Supports springtails and isopods while creating natural hiding spots for hatchlings
- Breaks down slowly to add nutrients without constant replacement
- Maintains humidity naturally, which helps both microfauna and young snakes
- Some bags arrive with mostly small fragments instead of full leaves
- Can be pricey for what you get, especially if you need to cover larger enclosures
- Needs regular spot-cleaning to prevent ammonia buildup from waste
5. Bugzy Bugs Isopod Food Blend
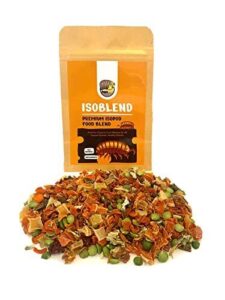
Your cleanup crew won’t thrive on waste alone. Feed your isopods Bugzy Bugs Isopod Food Blend 1–2 tablespoons twice weekly to keep your bioactive substrate functioning. This eco-friendly feeding solution contains split peas, carrots, and collard greens—complete isopod nutrition that nourishes terrarium microfauna without chemical additives.
Remove uneaten portions within 48 hours to prevent mold in humid snake terrariums. Store the blend in an airtight container for up to 12 months. Healthy isopods mean sustainable substrates and better bioactive ecosystems for your hatchlings.
| Best For | Keepers running bioactive snake terrariums who need a complete nutrition source to maintain healthy isopod cleanup crews. |
|---|---|
| Material | Dry blend |
| Weight | 0.05 Kilograms |
| Primary Use | Isopod food |
| Natural/Organic | Premium organic food |
| Maintenance | Remove uneaten food |
| Color | Not specified |
| Additional Features |
|
- Complete meal with vitamins and minerals from whole vegetables like split peas, carrots, and sweet potato—supports breeding and growth at all life stages
- Long shelf life of 12 months when stored in an airtight container, making it economical for long-term use
- Easy feeding schedule at just 1-2 tablespoons twice weekly, with clear guidance to remove uneaten food and prevent mold
- Requires active monitoring and removal of uneaten portions within 48 hours to prevent mold growth in humid environments
- May not be the top food choice for all isopod species, so you might need to supplement with other options
- Must be stored properly in dry, airtight conditions or the blend can lose freshness and effectiveness
Essential Terrarium Setup for Hatchling Snakes
Your hatchling’s first home sets the foundation for years of healthy growth. Getting the enclosure right from day one prevents stress, illness, and the frustration of costly do-overs.
Here’s what you need to build a secure, thriving setup that keeps your snake safe and simplifies your daily care routine.
Choosing The Right Tank Size and Dimensions

Your hatchling’s first home isn’t about going big—it’s about getting the proportions right. Start with a 10–20 gallon enclosure featuring a footprint around 12×18 inches. Measure your snake from head to tail, then choose terrarium dimensions that allow proper temperature gradients: 83–89°F warm side, 75–79°F cool side. This precise enclosure volume facilitates humidity control while preventing your hatchling from feeling exposed or overwhelmed.
When designing the terrarium, consider the importance of clear structure and writing research papers to guarantee a well-organized and informative setup guide.
Selecting Secure Lids and Escape-proofing

Escape prevention starts with the lid—and most hatchling losses trace back to gaps you can’t see. Check for openings wider than 0.5 cm around edges, cable pass-throughs, and ventilation grilles. Install dual latches or snap locks to secure every access point. Weekly seal integrity checks catch warping or degraded gaskets before your snake does. Proper locking mechanisms aren’t optional—they’re non-negotiable insurance against 3 a.m. panic searches.
Following strict technical writing guidelines is essential for effective communication in herpetology.
Substrate Options for Hatchlings

Your substrate choice sets the foundation for everything—respiratory health, feeding confidence, and long-term thriving. Paper-based bedding delivers absorbency with zero dust, ideal for new hatchlings. Coconut fiber retains humidity but demands careful moisture control to prevent mold.
Bioactive mixes with isopods and springtails create self-cleaning ecosystems when paired with oak leaf litter.
Avoid cedar or pine—those aromatic oils destroy delicate respiratory systems without warning.
Creating Temperature and Humidity Gradients

Thermoregulation isn’t optional—it’s survival. Your hatchling demands precision thermal zoning and humidity control to thrive, not just survive.
To achieve this, follow these steps:
- Position heat sources at one end to establish stable temperature gradients with cooler retreat zones opposite.
- Install digital thermometers at floor-level and 5–10 cm above substrate in both hot and cool zones for accurate temperature mapping.
- Use moisture-retentive substrate in humid zones paired with drier material opposite for microclimate management.
- Deploy humidistats to automate misting cycles and prevent condensation buildup that breeds pathogens.
- Record continuous readings over 72 hours minimum for gradient monitoring and terrarium setup refinement.
Balance insulation with ventilation to lock in humidity gradients without sacrificing air exchange. Temperature and humidity management demands vigilance—your snake’s life depends on it.
Ventilation and Cross-vent Design

Stale air kills faster than most beginners realize. Your terrarium setup demands cross ventilation—openings on opposite sides create continuous air exchange without fans or gusts.
Balance humidity control with gentle air exchange. Your snake breathes what you design.
| Ventilation Element | Implementation |
|---|---|
| Screened panels | Position at opposite ends for airflow management |
| Vent placement | Align with room air currents, avoid basking zones |
| Draft control | Use baffles to preserve temperature gradients |
| Inspection schedule | Weekly checks verify unblocked ventilation systems |
Maintaining a Healthy Hatchling Environment

Your hatchling’s terrarium isn’t a set-it-and-forget-it project. Once you’ve built the right environment, your real work begins with consistent monitoring and quick adjustments when problems arise.
Here’s how to keep your baby snake thriving through daily observation and proactive maintenance.
Weekly Inspections and Cleaning Routines
Consistently assess snake health and enclosure security each week—lid fit, door latches, screen gaps—to stop escapes before they happen.
Check substrate for moisture imbalances, mold, or foul odors, replacing contaminated sections immediately. Wipe down hard surfaces with reptile-safe cleaners, ensuring complete drying. Verify ventilation checks are functioning properly.
Document any anomalies—lethargy, shedding issues—and adjust your snake care and maintenance protocols or contact your vet.
Monitoring Temperature and Humidity
Your snake’s life depends on getting temperature control and humidity levels right. Place digital sensors at both the basking zone (88–92°F) and cool end (78–82°F) to confirm proper gradient design.
Check humidity control daily—40–60% normally, up to 70% during pre-shed. Cross-check readings with infrared thermometers.
Environmental monitoring catches problems before they threaten snake health in your terrarium setup.
Managing Feeding Schedules and Prey Size
Once temperature and humidity control are dialed in, turn your attention to feeding strategies and prey selection. Feed hatchlings 1–2 times weekly with prey that’s 10–20% of body weight—roughly the width of your snake’s midbody.
Track weekly weight changes to monitor growth and adjust prey size after each shed. Proper nutrient balance maintains snake health without triggering regurgitation in your reptile care routine.
Supporting Proper Shedding and Hydration
Healthy feeding routines lay the groundwork—now focus on shed cycle management to keep your hatchling’s skin hydration on point. Proper humidity control and temperature gradients prevent dehydration and stuck shed that plague inexperienced keepers.
Support clean sheds with these four tactics:
- Maintain 60–70% humidity during shed windows using a digital hygrometer and bioactive substrate moisture.
- Provide a shallow water dish for natural drinking and soaking access.
- Create an 85–90°F basking zone paired with a 78–82°F cool retreat in your snake terrariums.
- Mist substrates lightly 24–48 hours before visible eye clouding to boost reptile health outcomes.
Troubleshooting Common Hatchling Issues
What triggers those sudden feeding refusals or labored breathing in your hatchling? Environmental stress—poor humidity control, incorrect thermal zones, or excessive handling—drives most reptile health emergencies in snake terrariums.
Watch for respiratory issues like wheezing, shedding problems from dry air, or behavioral changes signaling discomfort.
Quick diagnostics prevent escalation: adjust parameters immediately, minimize snake behavior and handling disruptions, and seek veterinary health alerts when symptoms persist beyond 48 hours.
Bioactive Substrates and Eco-Friendly Choices

Bioactive terrariums replicate your hatchling’s natural ecosystem while reducing your maintenance workload. These setups use live organisms to break down waste and regulate humidity, creating a self-sustaining environment that benefits both you and your snake.
Here’s what you need to build and maintain a thriving bioactive system.
Benefits of Bioactive Setups for Hatchlings
Bioactive substrate and ecosystems cut your maintenance burden while fostering hatchling health through natural habitats that process waste automatically. Here’s what proper terrarium setup delivers:
- Microbe balance and isopods break down feces, stabilizing eco systems without daily spot-cleaning
- Springtails control mold and excess moisture in your terrarium maintenance routine
- Natural substrates create humidity microclimates suited for delicate hatchling physiology
- Bioactive benefits include improved shedding cycles and activity levels when managed correctly
- Oak leaf litter promotes foraging behaviors while bioactive terrarium design fosters self-regulation
This approach mimics natural environments your snake would encounter in the wild.
Safe Introduction of Isopods and Springtails
Before introducing microfauna to your bioactive substrate and ecosystems, acclimate isopods and springtails separately for three to five days. Start with conservative populations—a few isopods and several hundred springtails per 10 gallons guarantee microfauna balance without stressing hatchlings.
| Parameter | Isopod Acclimation | Springtail Introduction |
|---|---|---|
| Population Density | 3-5 per 10 gallons | 200-300 per 10 gallons |
| Observation Period | Monitor 2 weeks | Check mold control daily |
| Safety Protocol | Remove deceased promptly | Maintain slight dampness |
Monitor hatchling safety closely during initial terrarium setup. Remove any deceased microfauna immediately to prevent ammonia buildup and maintain humidity control.
Using Oak Leaf Litter and Natural Decor
Oak leaf litter transforms your snake terrarium into a naturalistic microhabitat that maintains microfauna balance while encouraging instinctive behaviors. This eco-friendly option delivers decor safety when properly prepared:
- Source pesticide-free, well-dried leaves to eliminate toxin exposure during substrate contact
- Inspect edges for sharp points that could injure delicate hatchling scales
- Turn litter every 10-14 days to prevent mold affecting humidity control
- Arrange leaves loosely to avoid entrapment zones in your reptile care setup
Maintaining Substrate Health and Balance
Your substrate thrives when you balance moisture retention with drainage—aim for dampness that clumps without dripping. Turn substrate every 10 days to refresh oxygen flow.
Test microfauna balance weekly by observing isopod activity near waste sites. Spot-clean daily to prevent ammonia buildup that disrupts humidity control.
Monitor temperature gradients and adjust misting frequency based on your hatchling’s shedding cycles for ideal reptile care.
Environmental Sustainability in Terrarium Care
Choose Eco Friendly Materials like recycled glass and FSC-certified wood to minimize your Environmental Impact. Energy-efficient heating with thermostats slashes electricity use—track consumption through monthly audits for transparent Sustainable Practices.
Bioactive terrarium design and setup reduces waste when isopods recycle organic matter, cutting cleaning frequency by 40%. Your BioactiveReady enclosure incorporates Renewable Resources through compostable substrates and Green Technologies like LED lighting, making Reptile Habitat Design genuinely sustainable.
Frequently Asked Questions (FAQs)
What hides work best for nervous hatchlings?
You think any hide will do? Wrong. Nervous hatchlings need opaque, fully-enclosed refuges at both warm and cool zones—snug entryways prevent escape attempts while naturalistic materials like cork bark reduce startle responses and support sensory comfort.
Can hatchlings share enclosures with tank mates?
No. House each hatchling separately—social housing invites feeding competition, cannibalism, and disease transmission. Tank mate risks far outweigh coexistence strategies.
Solitary reptile housing ensures proper terrarium design and minimizes hatchling stress.
How often should hatchlings be handled initially?
Treat your new hatchling like fine china for the first week—wait 24 to 48 hours, then limit gentle touch to 2–3 brief sessions weekly, supporting proper snake acclimation and minimizing handling stress throughout initial interaction.
Which water bowl depth prevents drowning risks?
A shallow dish no deeper than 1 to 5 centimeters prevents hatchling drowning. Use wide, low-edged bowls that let your snake lift its head easily, ensuring quick exit and reducing submersion risks.
Do hatchlings need UVB lighting supplements?
Most hatchling snakes don’t need UVB lighting—corn snakes and king snakes thrive on heat and visible light alone.
For UVB-dependent species, use low-intensity Reptile UVB100 bulbs at proper distances, supporting calcium metabolism without overheating risks.
Conclusion
Think of your hatchling’s first successful shed—that complete, translucent skin tube—as your report card. It signals you’ve nailed the humidity, temperature, and hydration balance inside those snake terrariums for hatchlings.
Every component you’ve installed—substrate depth, thermal gradient, hide placement—either aids that biological achievement or undermines it. Your snake can’t adjust the thermostat or add a water bowl. You’re the environmental engineer.
Build it right once, and watch your hatchling thrive for the next fifteen years.
- https://usark.org/
- https://onlinepubs.trb.org/onlinepubs/nchrp/cd-22/manual/v1appendixb.pdf
- https://academichelpexpress.blog/2024/08/please-use-the-bulleted-points-and-the-rubric-below-to-guide-your-work-your-pa/
- https://www.writingclearscience.com.au/category/writing-guides/writing-research-papers/page/2/
- https://www.sciencedirect.com/science/article/pii/S0749208123000268