This site is supported by our readers. We may earn a commission, at no cost to you, if you purchase through links.

You can create effective hides using plastic containers, PVC pipes, ceramic planters, or even repurposed household items like old tupperware.
Simply cut an appropriately sized entrance hole—about 1.5 times your snake’s widest point works well, and sand rough edges smooth and add natural touches like moss or cork bark for texture.
The key is ensuring your snake feels secure while maintaining easy cleaning access, from simple cardboard starter hides to elaborate foam rock creations, there’s a project for every skill level and budget that’ll keep your serpent happy.
Table Of Contents
- Key Takeaways
- DIY Snake Hide Materials
- Building Snake Hide Boxes
- Customizing Hide Boxes
- Safety and Placement
- Budget-Friendly Options
- Frequently Asked Questions (FAQs)
- How do you hide a snake in a cardboard box?
- How to make a giant snake hide?
- How do you make a snake hide for a pet snake?
- How long does it take to make a snake hide?
- Are polymer clay hides safe for reptiles?
- How to seal DIY snake hides effectively?
- What are the best tools for shaping hides?
- Can tile pointing be used for snake hides?
- How to add natural features to hide boxes?
- How often should hide boxes be cleaned?
- Conclusion
Key Takeaways
- You’ll save serious money by using household items like plastic containers, PVC pipes, and cardboard boxes instead of buying expensive commercial hides and accessories
- You can create professional-looking hides with basic tools like an exacto knife, expanding foam, and aquarium-safe sealant – no advanced skills required
- Your snake’s safety depends on choosing non-toxic materials, proper ventilation with small holes, and sizing the entrance about 1.5 times your snake’s widest point
- You’ll need two hides per enclosure – one on the warm side and one on the cool side – to let your snake regulate its body temperature naturally
DIY Snake Hide Materials
You’ll need the right materials to build effective snake hides that keep your reptile comfortable and secure.
Start with basic supplies like plastic containers, PVC pipes, or even cardboard boxes, then add foam insulation and natural elements to create realistic-looking shelters your snake will actually use.
Cardboard and Paper-Based Materials
Cardboard might seem flimsy, but it’s surprisingly useful for temporary snake hide boxes and prototypes.
You’ll want cardboard durability that withstands humidity, so choose thick, corrugated pieces.
Paper mache techniques work great for creating custom shapes, while safe inks guarantee your reptile hide won’t harm your pet.
These biodegradable hides offer eco-friendly options, and different paper textures add visual interest to your homemade snake hide creation.
Proper ventilation is key to preventing mold growth.
Plastic Containers and PVC Pipes
Plastic containers offer versatility that cardboard can’t match for your snake hide projects.
Plastic beats cardboard every time for durability and versatility in snake hide construction.
You’ll find endless options at dollar stores, where Container Safety matters most for your reptile’s health.
- Yogurt containers and takeout boxes work perfectly for smaller snakes, just verify they’re thoroughly cleaned
- Large planters create spacious hides – cut entrance holes and add Drainage Holes for proper airflow
- PVC Shapes like pipes form excellent tunnel hides when you cap one end and saw in half
- Storage bins accommodate larger species, with Container Size matching your snake’s body width plus 50%
Always check that plastic containers are BPA-free and food-safe.
PVC pipes need smooth edges after cutting, and Pipe Insulation around sharp areas prevents injury.
Many owners utilize pre-made pipe hides for convenience.
Your reptile enclosure deserves materials that’ll last through regular cleaning cycles.
Spray Foam and Insulation Materials
Great Stuff expanding foam transforms ordinary reptile enclosures into naturalistic masterpieces.
You’ll need foam safety gear since fumes can irritate. Choose expanding foam designed for insulation types like gaps and cracks.
Apply sealant after the foam cures completely. DIY insulation projects require proper ventilation and protective equipment.
This versatile material creates realistic rock formations and textured surfaces for your snake hide boxes, making it a great tool for DIY projects.
Natural Materials for Realistic Hides
Mother Nature provides the ultimate building materials for your DIY reptile hide projects.
Natural rock hides offer authentic textures, while real wood pieces create rustic snake enclosure appeal.
Cork bark caves provide lightweight, moisture-resistant options for your reptile habitat.
Coconut shell hides add tropical flair to any DIY reptile enclosure.
Moss-lined shelters complete the natural look, making your reptile hide blend seamlessly into bioactive setups.
Adhesives and Sealants
Bonding your reptile hide materials requires the right adhesives for long-lasting results.
Safe sealants like aquarium-grade silicone work perfectly for waterproofing hides without harming your snake.
For specialized products, consider reptile-safe sealant options.
Non-toxic adhesives such as reptile-safe epoxy handle heavy-duty jobs when sealing edges or attaching foam sections.
Always cure adhesives completely before introducing your snake to prevent chemical exposure in their habitat.
Tools for Cutting and Shaping
Once you’ve secured your materials and adhesives, having the right tools makes all the difference in creating professional-looking hides.
Sharp cutting tools and proper measuring equipment turn basic materials like styrofoam and PVC into perfectly sized snake sanctuaries.
- Knife types – Exacto knife for precision cuts, utility knife for thick materials
- Saw selection – Fine-tooth saw for PVC pipes, hacksaw for tough plastic containers
- Drill bits – Various sizes for ventilation holes and entrance openings
- Sanding tools – Sandpaper and files for smooth edges and shaping foam
- Measuring tools – Ruler and pencil for accurate sizing and entrance placement
Consider using specialized reptile habitat tools for superior results.
Building Snake Hide Boxes
Now you’ll create your first snake hide box using simple techniques that transform everyday containers into perfect reptile shelters.
Start with basic materials like plastic planters or PVC pipes, then add expanding foam and natural textures to build hides that look like they came straight from your snake’s wild habitat.
This process allows you to build shelters that mimic the natural environment, providing your snake with a comfortable and secure place to hide.
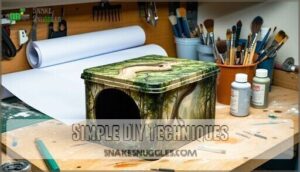
Simple DIY Techniques
Starting with basic materials from your local store, you’ll master Easy Cutting plastic containers with simple tools.
Basic Shaping involves smoothing rough edges, while Simple Assembly means connecting pieces with strong adhesives.
Quick Painting adds color before Vinyl Application creates realistic textures.
These DIY snake hide boxes use straightforward reptile hide tutorial steps, making reptile hide building accessible for any snake hide steps project through simple reptile hide DIY methods.
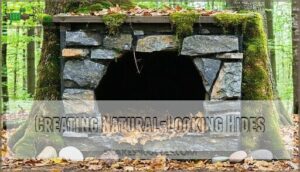
Creating Natural-Looking Hides
Once you’ve mastered basic hide construction, you can transform ordinary containers into stunning snake shelters that rival nature itself.
Creating natural-looking hides involves layering materials to achieve realistic textures and natural camouflage. Your snake will appreciate burrow simulation that matches their wild instincts.
Transform basic hides with these natural techniques:
- Mix sand with paint for authentic cave aesthetics and rough stone textures
- Layer coconut fiber and moss for forest floor blending materials that feel organic
- Add bark pieces and twigs to create convincing DIY snake habitat enrichment
Rock-Like Hides Using Expanding Foam
Expanding foam transforms ordinary containers into realistic rock formations for your diy snake habitat.
Transform boring plastic containers into stunning snake sanctuaries with just spray foam and creativity.
You’ll create convincing stone textures that blend seamlessly with natural décor.
Here’s your step-by-step approach:
| Foam Application | Texture Techniques | Sealing Methods |
|---|---|---|
| Spray in thin layers | Press with crumpled foil | Apply polyurethane sealer |
| Build up gradually | Use stiff brush strokes | Let cure 24 hours |
| Shape while tacky | Create crevices with knife | Sand smooth edges |
| Allow expansion time | Add depth with spatula | Check for gaps |
| Trim excess carefully | Blend uneven areas | Reapply if needed |
Safety Precautions matter most – work in ventilated areas and wear gloves.
Once sealed, Painting Foam completes your snake shelter transformation into convincing reptile shelter that enhances snake enrichment through natural snake habitat ideas.
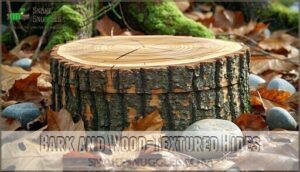
Bark and Wood-Textured Hides
Building wood-textured snake accessories doesn’t require actual Wood Sourcing from the forest. You can achieve stunning Bark Textures using simple materials that create Natural Aesthetics without compromising safety.
Safe Woods like cork bark provide inspiration for your DIY Barking projects, transforming basic reptile supplies into premium reptile shelter options. Proper ventilation is also very important.
Here’s your step-by-step approach:
- Apply textured paint – Mix sand with acrylic paint to create rough bark surfaces on plastic containers
- Use cork bark sheets – Glue cork pieces onto hide boxes for authentic wood grain patterns
- Create grooves with tools – Drag combs or forks through wet paint for realistic tree bark lines
- Layer brown paint shades – Build depth with multiple brown tones for convincing wood appearance
These techniques turn ordinary reptile habitat enrichment into snake enrichment masterpieces that’ll fool both you and your snake.
Moss and Plant-Covered Hides
You’ll love moss species like sheet moss and pillow moss for covering your snake accessories.
These plants create stunning natural aesthetics while maintaining proper humidity levels.
Choose plants with shallow root systems that won’t damage your reptile supplies.
The living moss transforms basic snake care items into beautiful reptile habitat enrichment pieces that look like forest floor treasures.
Customizing Hide Boxes
You can transform a basic hide box into something that perfectly matches your snake’s needs and your enclosure’s look.
Adding species-specific features, climbing elements, and natural decorations turns simple containers into functional artwork that both you and your snake will love, creating a space that is both aesthetically pleasing and functional.
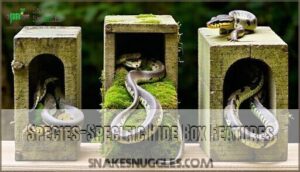
Species-Specific Hide Box Features
Different snake species demand unique hide features based on their natural behaviors and physical needs.
Ball pythons thrive with snug 13x9x3-inch hides that touch multiple body points, while smaller species need proportionally sized retreats around 5.5x3x1.5 inches.
Burrowing species prefer deeper, enclosed designs with moss-lined interiors for humidity control.
Arboreal species require vertically accessible hides with secure mounting systems for elevated placement.
Providing proper hides is essential, as it helps reduce stress and supports effective thermoregulation through features like effective thermoregulation, which is crucial for the snakes’ well-being, ensuring a reduction in stress and promoting overall health by offering the right environment for physical needs.
Incorporating Climbing Elements
Many arboreal snakes thrive when you add climbing elements to their hide boxes, transforming basic shelters into multi-level reptile habitat ideas.
These vertical space additions create secure fixtures that mimic natural environments while maximizing your enclosure’s footprint.
- Branch Integration: Attach sturdy wooden branches or PVC pipes to hide entrances, creating natural pathways that lead directly to the shelter
- Rock Ledges: Build stepped platforms using foam and paint techniques, allowing snakes to bask on elevated surfaces before retreating into their hide
- Hammock Design: Install flexible mesh or fabric platforms between hide walls, providing suspended resting spots that arboreal species love for thermoregulation
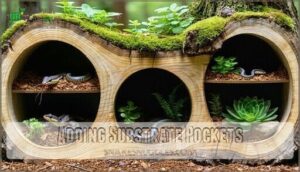
Adding Substrate Pockets
Beyond climbing structures, substrate pockets transform your hide into a mini ecosystem.
These shallow depressions hold snake bedding while creating naturalistic microhabitats your reptile will love exploring.
| Feature | Shallow Pockets (1-2 inches) | Deep Pockets (3-4 inches) |
|---|---|---|
| Substrate Retention | Light bedding, moss patches | Heavy substrates, cypress mulch |
| Pocket Depth | Easy cleaning access | Better burrowing opportunities |
| Drainage Solutions | Simple drainage holes | Layered drainage system |
| Rooted Plants | Small succulents, air plants | Medium plants with root systems |
When cleaning pockets, you’ll find that shallow designs work best for most reptile care routines.
Consider your reptile habitat ideas carefully – pocket placement affects both aesthetics and function in your DIY projects.
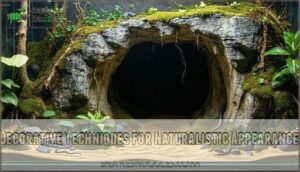
Decorative Techniques for Naturalistic Appearance
Transform your plain hide box into a realistic naturalistic cave that’ll make your snake feel at home in the wild.
Start with vinyl application for smooth base coverage, then add texture using gesso painting techniques. Remember to keep in mind safe and non-toxic materials.
- Moss lining around entrance holes softens edges and adds forest floor authenticity
- Layered paint techniques with browns and grays create convincing rock surfaces
- Strategic foam placement builds realistic cave formations and crevices
- Natural substrate integration blends your hide seamlessly with snake bedding
Integrating Hides With Existing Enclosure Decor
Match your new hide with existing enclosure elements through vinyl wrapping and paint matching techniques.
Choose colors that blend seamlessly with your current substrate and background. Create themed hides that complement your naturallooking hide setup, whether it’s desert, forest, or tropical.
Use reptile bedding around the base for natural integration. Strategic placement guarantees your snake habitat maintains visual flow while providing essential security for your pet.
Safety and Placement
When you build snake hides, safety comes first—choose non-toxic materials and make certain proper ventilation to keep your snake healthy.
Smart placement creates the right temperature zones while giving your snake the privacy it needs to feel secure.
Non-Toxic Materials for Snake Hides
Your snake’s safety starts with choosing the right materials for their reptile hide. Safe plastics like food-grade polypropylene won’t leach harmful chemicals into your snake habitat. Non-toxic paints and aquarium-safe sealers protect your DIY reptile project from dangerous fumes.
When designing your DIY hide, consider the importance of reptile hiding places for your snake’s well-being.
- Food-safe containers repurposed from your kitchen make perfect starter hides
- Natural substrates like cork bark create realistic textures without toxic resins
- Wood treatments using water-based sealers cure odorless for reptile enclosure safety
Proper Ventilation in Snake Hide Boxes
Airflow importance can’t be overstated when designing your plastic container hide.
Drill small holes around the sides, not the top where water might enter. This ventilation method prevents humidity control issues that lead to mold prevention problems.
Your hide material needs breathing room – stagnant air creates bacterial growth. Space holes every two inches for ideal reptile hide design.
Good reptile hide instructions always emphasize airflow over aesthetics in reptile enclosure customization and snake enclosure design. Proper airflow helps prevent respiratory health issues, which is crucial for maintaining the health of your reptiles, especially in terms of respiratory health.
Optimal Hide Locations in Snake Enclosures
Your snake’s comfort depends on hide placement within the reptile enclosure.
Position one plastic container hide on the warm side and another on the cool side to support proper thermal gradient needs.
Place hides away from direct light exposure to maintain your snake’s security perception.
In smaller enclosure sizes, make certain hides don’t block airflow while maintaining appropriate humidity levels throughout the animal habitat.
Creating Temperature Gradients With Hide Placement
You’ll create the perfect thermal setup by placing one hide near your heat source and another at the cool end.
This simple hide location strategy lets your snake choose between warm (34°C) and cool (22°C) zones for thermal regulation.
Digital thermometers inside both hides help monitor temperatures, ensuring your snake behavior stays natural and healthy.
Balancing Privacy and Accessibility in Hides
Proper positioning makes your snake feel secure while letting you check on their well-being.
Your hide’s entrance should face the enclosure’s edge, giving your pet a clear escape route when you approach.
This reduces stress while maintaining secure access for cleaning and health checks.
- Position entrance holes at substrate level for easy snake entry
- Size openings 1.5x your snake’s widest body part for comfort
- Place hide exits toward enclosure corners for maximum privacy
- Keep cleaning access points hidden from the snake’s primary view
- Design removable tops or side panels for stress-free maintenance
Smart DIY projects balance snake behavior needs with your pet care routine, making reptile enclosures work for everyone.
Budget-Friendly Options
You don’t need to spend a fortune to create effective snake hides that’ll keep your reptile happy and secure.
With some creativity and basic household items, you can build professional-quality hides for just a few dollars each.
Repurposing Household Items for Snake Hides
Before you know it, your kitchen cabinets become treasure troves for snake hide construction.
Household item repurposing transforms everyday objects into creative upcycling projects. Empty margarine containers, cereal boxes, and plastic planters work perfectly for reptile habitat improvements.
| Kitchen Items | Bathroom Items | Storage Items |
|---|---|---|
| Margarine tubs | Shampoo bottles | Cardboard boxes |
| Yogurt containers | Soap dispensers | Plastic bins |
| Cereal boxes | Medicine bottles | Shoe boxes |
These DIY reptile enclosures cost nothing while providing essential hiding spots for your snake’s comfort and security.
Low-Cost Materials for Effective Hides
Savvy snake keepers know that cost-effective reptile hide materials don’t break the bank.
You’ll find plenty of handmade reptile accessories using everyday items that create professional-looking results for your DIY reptile care needs.
- Foam Insulation – Great Stuff expanding foam costs under $6 and creates multiple natural textures for reptile hides
- Vinyl Wraps – Peel-and-stick woodgrain patterns transform plain containers into budget decor that matches your room
- Plastic Containers – Large planters and litter boxes become instant DIY reptile hide bases for under $10
- Basic Tools – Exacto knives and paintbrushes under $3 total handle all your cutting and finishing needs
Bulk Material Options for Multiple Hides
When you’re building multiple reptile hides, buying materials in bulk becomes your best friend for stretching those dollars.
Purchase PVC pipes by the bundle, foam blocks in multi-packs, and cardboard sheets by the case to slash per-unit costs.
Wood planks and plastic containers often offer significant savings when bought in quantity, making your DIY reptile hide construction projects much more affordable, with bulk purchases being key to cost-effectiveness.
Upcycling Old Enclosure Items Into Hides
Your old hide boxes don’t need to hit the trash can.
That broken ceramic cave becomes perfect raw material for creative reuse projects. Sand down rough edges, add expanding foam for texture, and you’ve got eco friendly hides with character.
Transform cracked water bowls into cozy retreats by cutting entrance holes and adding moss lining. These repurposed materials often work better than store-bought options for DIY reptile enclosure ideas.
DIY Hide Box Kits Vs. Individual Materials
Making smart choices between DIY hide box kits and individual materials affects your ball python habitat budget.
Kit Comparison shows pre-made options cost more but save time, while sourcing materials individually offers better DIY Savings and Customization Options.
- DIY hide box kits provide convenience but limit Hide Box Designs creativity
- Individual materials reduce Material Costs by 40-60% for reptile hide construction
- Custom approach allows unlimited design flexibility for your DIY animal enclosure
Frequently Asked Questions (FAQs)
How do you hide a snake in a cardboard box?
Like a magician’s disappearing act, you’ll create the perfect hideaway.
Cut an entrance hole slightly larger than your snake’s widest part.
Line the opening with soft moss or paper towel to prevent scrapes, ensuring it’s snug and dark inside.
How to make a giant snake hide?
You’ll need large containers like storage tubs or planters for oversized snakes. Cut an entrance hole, line with soft moss, and secure any rough edges for your giant serpent’s comfort.
How do you make a snake hide for a pet snake?
You’ll need a large container like a planter, litter box, or PVC pipe.
Cut an entrance hole, line it with moss for comfort, and secure it inside your snake’s enclosure for safety.
How long does it take to make a snake hide?
Don’t think you’ll need hours of work—creating a snake hide takes just 15-30 minutes depending on your chosen method and materials, from simple PVC cuts to decorated foam creations.
Are polymer clay hides safe for reptiles?
Polymer clay hides are generally safe once properly cured, but they require proper sealing to prevent any threat to the health or life of your snake.
You’ll need to make certain of complete baking and waterproof sealing.
How to seal DIY snake hides effectively?
Think of sealing as building a fortress around your hide box – you’re creating an impenetrable barrier.
Use aquarium-safe silicone sealant or food-grade polyurethane to coat all surfaces, ensuring no harmful chemicals leach out, which is crucial for creating a safe and impenetrable environment.
What are the best tools for shaping hides?
You’ll need an Exacto knife for precise cuts, heat gun for warming plastic, and sandpaper for smoothing rough edges.
These tools help create perfectly shaped entrances and comfortable surfaces for your reptile’s hideout.
Can tile pointing be used for snake hides?
Back in ye olden days, tile pointing wasn’t snake-friendly, but modern versions can work.
You’ll need food-safe, non-toxic pointing compounds that won’t crumble or release harmful chemicals when your slithery friend explores their new hideout.
This includes ensuring the compounds are non-toxic to maintain a safe environment.
How to add natural features to hide boxes?
You’ll transform basic hide boxes into natural-looking shelters by using spray foam, silicone, and paint to create textured surfaces.
Add sand for rocky textures, moss for softness, and coconut fiber for earthy appeal that mimics wild environments.
How often should hide boxes be cleaned?
Clean your snake’s hide boxes every 2-4 weeks, or immediately after any soiling.
You’ll want to remove substrate, wash with reptile-safe cleaner, rinse thoroughly, and let dry completely before returning it.
Conclusion
Crafting perfect DIY snake hide boxes is like giving your serpent friend their dream home—comfortable, secure, and customized just for them.
You’ve now got the blueprint to transform everyday materials into professional-quality hides that rival expensive store-bought options.
Whether you’re building simple cardboard starter boxes or elaborate foam rock formations, remember that your snake’s comfort comes first.
With these techniques, you’ll create hides that keep your reptile happy while saving money and expressing your creativity.
- https://www.reddit.com/r/snakes/comments/12mlb4b/people_that_have_turned_random_boxes_into_snake/
- https://www.facebook.com/groups/DIYReptileEnclosures/posts/27737291492582772/
- https://community.morphmarket.com/t/diy-hides-for-bp/28823
- https://www.youtube.com/watch?v=f4_vBsrI8hw
- https://www.pinterest.com/ideas/reptile-hide-box-plans/905786734120/

