This site is supported by our readers. We may earn a commission, at no cost to you, if you purchase through links.

A king cobra needs 3.5 meters of floor space just to feel settled. A sidewinder python won’t thrive without vertical climbing room. Get either one wrong, and you’re not just building a box, you’re building a source of chronic stress for an animal that can’t tell you what’s wrong.
Custom snake habitats give you control that off-the-shelf enclosures simply can’t match. You choose the thermal gradient, the ventilation rate, the material specs, the hide placement. Every decision maps directly to your snake’s behavioral needs.
This guide walks you through each step, from species planning to substrate depth, with the precision your build deserves.
Table Of Contents
- Key Takeaways
- Plan Your Custom Snake Habitat
- Choose Safe Enclosure Materials
- Build Ventilation, Doors, and Structural Features
- Install Heating and Humidity Controls
- Add Substrate, Decor, and Water
- Frequently Asked Questions (FAQs)
- Did custom reptile habitats go out of business?
- How do I make a snake habitat?
- How much do snake enclosures cost?
- Where can I find custom-built snake enclosures?
- Can you build your own snake enclosure?
- How to create a snake habitat?
- What is the best habitat for a snake?
- What not to put in a snake enclosure?
- How do I clean a custom snake habitat?
- What lighting options work best for snakes?
- Conclusion
Key Takeaways
- Every enclosure decision — floor space, thermal gradient, ventilation angle, hide placement — must be driven by your specific snake’s size and natural behavior, not generic guidelines.
- PVC and polycarbonate outperform wood for custom builds because they resist moisture, clean easily, and hold up under the humidity levels most snakes actually need.
- A properly engineered thermal gradient (warm end near 38°C, cool end around 26°C) paired with tested airflow of 0.5–1 air changes per hour is what keeps a snake thriving rather than just surviving.
- Material safety is non-negotiable: cedar, pine, VOC-heavy plastics, and unthermostated heat mats are among the most common sources of preventable reptile health problems.
Plan Your Custom Snake Habitat
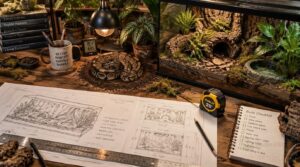
Before you build anything, planning around your snake’s needs is what separates a functional habitat from an excellent one. Your choices will come down to two key factors: species-specific size and behavior, and whether you go the DIY route or invest in a custom-built solution. Here’s what to keep in mind for each.
Thinking through enrichment options and enclosure layouts ahead of time pays off — this guide to snake environment creation walks through how to align your setup choices with your snake’s instincts and daily routines.
Species, Size, and Behavior
Before you design your snake enclosure, know your species inside out.
- Sidewinder pythons reach 2.5–3.5 m, needing vertical climbing space
- Ball pythons stay compact at 0.9–1.5 m but demand secure, stress-free hides
- King cobras require 3–3.5 m of territorial floor area
- Corn snakes need a basking heat gradient with cooler retreat zones
Size and behavior shape every reptile habitat requirement.
DIY Versus Custom-built
With your species fully mapped, decide how you’ll build your reptile habitat.
| Factor | DIY | Custom-built |
|---|---|---|
| Timeline | 1-2 weeks | 4-8 weeks |
| Cost | Tools and scavenged parts | CNC cuts and finishes |
| Quality | Personal testing only | Formal warranty included |
DIY snake enclosures let you custom build your own on your budget. Custom reptile enclosures back that with verified load testing and a warranty.
For inspiration on making your build both functional and visually striking, explore these creative snake vivarium design ideas that work equally well for DIY and custom setups.
Choose Safe Enclosure Materials
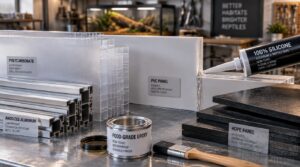
Once you’ve nailed your plan, material choices make or break the build. PVC enclosures are a top pick: lightweight, moisture-resistant, and far easier to clean than wood.
For panel materials, polycarbonate holds up beautifully against impact and humidity. Avoid acrylic where temperature swings are frequent because it cracks under pressure. When you custom build your own reptile habitat, pair anodized aluminum framing with silicone sealants for a tight, corrosion-resistant shell. Habitat ventilation and moisture control both depend on getting your base materials right.
Here’s what to prioritize:
- Use food-grade epoxy coatings on interior surfaces to block water penetration
- Choose reptile-safe sealants that cure fully before your snake moves in
- Apply UV-stable coatings on HDPE panels to prevent crazing over time
Build Ventilation, Doors, and Structural Features
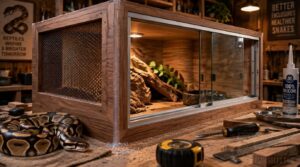
Getting the structural details right is what separates a habitat that just works from one that truly thrives. Ventilation, door design, and sealed joints each play a direct role in your snake’s comfort and your long-term peace of mind. Here’s what to nail down before you finalize your build.
Vent Placement
Think of ventilation like a river: direction always matters. Your snake cage needs intake vents near substrate level on one end so heat and humidity don’t build up there. Place side vents on the opposite end for genuine cross-ventilation. In a custom built reptile cage, angling vents slightly downward meets reptile habitat requirements by directing airflow along your thermal gradient.
Mesh Sizing
Although every snake keeper has unique goals, mesh sizing shapes your Custom Built Vivarium’s success more than you’d expect. Hatchlings need apertures ≤ 0.25 cm to prevent dangerous tail entanglement.
For hatchling-specific guidance on mesh sizing and enclosure setup, this corn snake care and vivarium sizing guide walks you through matching every growth stage to the right dimensions.
For arboreal setups, your reptile habitat requirements call for ≤ 0.5 cm. A well-planned Custom Reptile Vivarium uses 14–16 gauge welded mesh, ensuring solid terrarium design integrity and lasting security.
Door Design
Since your snake’s safety starts at the door, door design in your reptile enclosure can’t be rushed. A vertical center latch keeps Snake Cages locked under thermal pressure.
- Magnetic catches secure multiple frame points
- Flush-mounted frames eliminate base gaps
- Silicone gaskets maintain humidity without CO2 buildup
- Over-travel stops prevent frame shear
Custom Reptile Cages built this way take reptile husbandry to the next level.
Hinge Support
A builder once mounted a large ball python door with one screw per hinge. Within weeks, it sagged badly and stressed the entire frame.
| Hinge Type | Screws Per Hinge | Load Rating |
|---|---|---|
| Steel butt hinge | 3 | Medium-high |
| Stainless piano hinge | 4 | High |
| Nylon pivot hinge | 2 | Low |
Use at least three screws per hinge on every Snake Cages door. Reptile habitat requirements demand proper load-sharing in vivarium construction. Corrosion-resistant steel hinges protect your Custom Reptile Cages and reptile enclosure doors under daily stress.
Moisture-Resistant Materials
Your enclosure is a boat: the wrong panel lets moisture win. Custom-built reptile housing demands moisture-resistant materials by design.
- Polypropylene panels limit absorption to 0.8%, keeping vivarium construction stable.
- Impact-modified ABS resists temperature cycling without crazing, meeting reptile habitat requirements.
- Epoxy coatings at 1–2 mils support humidity control on interior surfaces.
- PTFE, fluorinated surfaces repel moisture and cut mold risk.
Joint Sealing
Your seals are the final defense against moisture failure. Run a continuous bead of low-modulus silicone along every joint in your Custom Cages build, using only ASTM-rated, reptile-safe formulas. Surfaces must be clean, dry, and dust-free before you apply. Let it cure 24 to 48 hours before handling. Inspect monthly and reseal any cracked or mold-touched joints within 48 hours.
Install Heating and Humidity Controls
Getting the heat and humidity right is what separates a surviving snake from a thriving one. Two critical systems determine that outcome: your thermal gradient setup and your airflow and humidity testing process. Here’s how to dial in both.
Dialing in heat and humidity is what separates a surviving snake from a thriving one
Create a Thermal Gradient
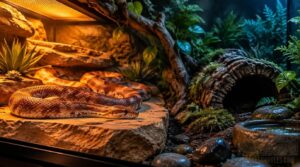
Your snake can’t self-regulate without help. Build a thermal gradient by pairing undertank heating with a heat mat inside a dedicated belly heat recess, then connect both to a precision thermostat that holds your setpoints.
- Hold the warm end near 38°C for basking.
- Keep your cool end around 26°C.
- Target a 10°C differential for true temperature regulation.
Test Airflow and Humidity
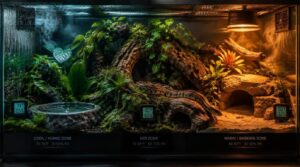
Once your thermal gradient holds, validate the whole system. Run a 72-hour test with heat and water active. Mount sensors 5-10 cm above substrate, logging every 5 minutes.
| Zone | RH Target | Temp |
|---|---|---|
| Cool end | 55-75% | 26°C |
| Mid-zone | 50-70% | 30°C |
| Warm end | 45-65% | 34°C |
| Basking | 40-60% | 38°C |
| Water area | 70-85% | 26°C |
Confirm ventilation delivers 0.5-1 ACH. Fix stagnant pockets right away.
Add Substrate, Decor, and Water

Once your heating is locked in, your reptile habitat is ready for its final and most visible layer: substrate, decor, and water.
Choose loose, well-draining substrate like coconut fiber or cypress mulch. For a Ball Python or similarly sized species, aim for 4–6 inches of depth. Skip cedar and pine; they’re both toxic. Keep humidity between 40–60%, and spot-check for mold weekly.
Place hides at both ends of the habitat and add vertical branches for climbing. Varied textures invite natural exploration and reduce stress.
Set a shallow, non-slip water dish in the center, and replace water every 24–48 hours. Position it away from damp substrate to prevent any mold buildup. Your reptile care equipment works best when you stay consistent.
Frequently Asked Questions (FAQs)
Did custom reptile habitats go out of business?
Custom reptile habitats haven’t gone anywhere. Boutique builders and craftsmen still thrive, offering precise pet enclosure customization for serious keepers like you. The market’s leaner now, but your Habitat setup options remain strong and accessible.
How do I make a snake habitat?
Your reptile habitat setup begins with your snake’s species, size, and behavior. Pick safe enclosure materials, build in a solid thermal gradient between 22 and 32°C, actively manage humidity, and enrich the space with hides.
How much do snake enclosures cost?
What’s your budget? Standard ready-to-assemble enclosures run $150–$ A large reptile habitat or exotic pet enclosure built custom starts near $1,000, often reaching $3,000 with professional installation, premium materials, and integrated heating or humidity systems.
Where can I find custom-built snake enclosures?
You’ll find custombuilt Reptile Enclosures through specialty online retailers, Etsy artisans, and professional vivarium fabricators. Local reptile stores often connect you with in-house carpenters for a HighEnd Reptile Cage suited to your exact species needs.
Can you build your own snake enclosure?
It’s entirely possible. Building DIY reptile cages gives you full control over size, layout, and chosen materials. Just make sure every joint, sealant, and panel meets your snake’s reptile habitat requirements before introducing any animal.
How to create a snake habitat?
Want total control over your snake’s world? Start by defining reptile habitat requirements, then build a reptile cage with thermal regulation built right in. Herpetoculture rewards precision, so plan your custom stand from day one.
What is the best habitat for a snake?
The best snake habitat matches your species’ thermal, humidity, and behavioral needs. Secure enclosure, proper gradient, and enrichment are non-negotiable. Get those right, and your snake genuinely thrives.
What not to put in a snake enclosure?
Roughly 70% of reptile welfare problems stem directly from toxic materials inside the enclosure. Keep cedar and redwood shavings out of your reptile vivarium, along with reclaimed wood, VOC-heavy plastics, and heat mats without thermostats.
How do I clean a custom snake habitat?
Remove your snake first, then sanitize every surface with a reptile-safe disinfectant. Replace substrate weekly, scrub water bowls daily, and allow all surfaces to fully air-dry before reintroducing your snake to its clean reptile cage.
What lighting options work best for snakes?
Lighting makes or breaks your snake’s world. Use full-spectrum bulbs at 5000-6500K with CRI ≥ 80, plus UVB 0-0% just 12-18 inches from the basking spot, and 40-75W incandescent lamps for a proper thermal gradient.
Conclusion
A green tree python owner once rebuilt three store-bought enclosures before finally committing to a custom build that held humidity above 80% without daily misting. That’s the shift custom snake habitats make possible: precision instead of guesswork.
Every material choice, vent angle, and thermal zone you’ve mapped in this guide reflects what your snake actually needs. Build it right the first time, and your enclosure won’t just house your snake. It’ll let it thrive.