This site is supported by our readers. We may earn a commission, at no cost to you, if you purchase through links.
A bearded dragon can lose a fifth of its body weight before an owner notices anything wrong. Reptiles hide illness by instinct, a survival trick that kept sick animals from looking vulnerable in the wild. That same trick now works against them in captivity, masking problems until a checkup catches what your eyes missed.
Knowing what happens during reptile health checkup procedures changes that equation entirely. From the moment you pack the carrier to the final bloodwork panel, each step exists to catch trouble early, when it’s still manageable. What follows walks you through exactly what your vet looks for, why it matters, and how to prepare your scaly companion for a visit that could add years to its life.
Table Of Contents
- Key Takeaways
- How to Prepare for a Reptile Health Checkup
- Safe Reptile Transport, Handling, and Restraint
- Step-by-Step Reptile Physical Examination
- Diagnostic Tests During Reptile Checkups
- After The Checkup: Preventive Reptile Care
- Frequently Asked Questions (FAQs)
- What should be included in a reptile physical exam?
- How much can a bearded dragon vet check up cost?
- How to tell if your reptile is healthy?
- How to make sure your bearded dragon is 100% healthy?
- Do Reptiles need a health check?
- How often should a veterinarian check a pet reptile?
- How do I choose a veterinarian for my reptile?
- What should be considered when performing a reptile surgery?
- How are reptiles restrained for physical examination?
- Why do Reptiles need a veterinarian?
- Conclusion
Key Takeaways
- Reptiles instinctively hide illness as a survival trick, so a pet can lose up to a fifth of its body weight before you notice anything’s wrong, making regular vet checkups essential for catching problems early.
- Preparing thoroughly for a checkup—gathering medical records, diet logs, enclosure conditions, and photos—gives your vet the full picture needed to spot husbandry gaps and health issues fast.
- A proper physical exam moves head to tail, checking eyes, mouth, weight, breathing, hydration, skin, cloaca, and mobility, often paired with diagnostics like fecal tests, bloodwork, radiographs, or ultrasound to catch what’s invisible on the surface.
- Care doesn’t stop at the clinic door—following treatment instructions, tracking weight and appetite weekly, keeping detailed health records, and scheduling visits based on your reptile’s age and species all help prevent problems before they start.
How to Prepare for a Reptile Health Checkup
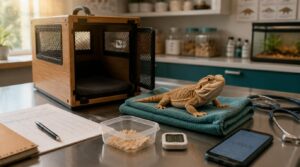
A good checkup starts long before you walk through the clinic door. The more preparation you bring with you, the more your vet can catch, and the faster your reptile gets the right care. Here’s exactly what you’ll want to gather beforehand.
Before your visit, it helps to review this guide to snake health and veterinary care so you know which symptoms and habits are worth mentioning to your vet.
Gather Medical and Treatment Records
Before you even leave the house, pull together every scrap of your reptile’s medical history. Gather medication history and exact treatment dates, prior lab results, and provider notes from past visits.
This paperwork gives your vet a clear husbandry history and treatment records timeline, so any follow-up plan built during today’s veterinary visit reflects the full picture, not guesswork.
Document Diet and Appetite Changes
Once your paperwork’s in order, turn to what’s going in your reptile’s mouth. Log feeding frequency, prey size, and appetite shifts.
Track:
- Meals consumed vs. offered
- Days since last full meal
- Supplement dosing changes
- Behavior during feeding
Patterns here often reveal illness before symptoms do. A thorough dietary history assessment can help detect nutritional problems before they progress to serious clinical disorders.
Record Enclosure Conditions and Equipment
Diet handled, now turn to the enclosure itself. Note enclosure dimensions, substrate type and depth, hide box placement, and water source setup.
Log your temperature gradient (basking spot vs. cool side, plus surface readings), humidity levels by zone, and UV lighting specifications, bulb type, wattage, replacement date. Include equipment specs for thermostats, filters, and heat sources so your vet can spot husbandry gaps fast.
Photograph Habitat and Lighting Setup
Numbers on a page only go so far. A few clear photos of the enclosure let your vet actually see what you’ve described.
Shoot at a consistent angle, roughly 45 degrees from your key light source, and keep exposure steady across shots so shadows stay comparable. A simple diffuser cuts glare on glass or water, making UV fixtures, gradients, and humidity zones easier to read.
Verify Veterinary Credentials and Experience
Not every vet with a DVM has real reptile experience. Confirm board certification in reptile medicine through ARAV’s directory, check NVAP accreditation via USDA APHIS, and ask about caseload, equipment, and continuing education.
Choosing the right veterinarian now saves your reptile from misdiagnosis later, so verify credentials before you ever book that first appointment.
Safe Reptile Transport, Handling, and Restraint
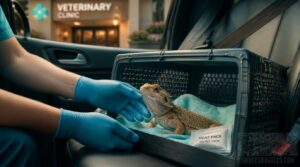
Getting your reptile to the clinic safely takes just as much thought as the exam itself. A stressed or overheated trip can throw off key signs before your vet even says hello. Here’s what you need to know to keep the journey calm, safe, and ready for what’s next.
Choose a Secure Ventilated Carrier
A wobbly box invites a wobbly trip. Pick a Secure Ventilated Carrier with evenly spaced air holes too small for toes or a snout, a locking lid with a secondary clasp, and a non-slip interior. Match the size to your reptile’s body, snug enough to limit thrashing, roomy enough for natural posture. That’s the foundation of Safe Handling before travel even begins.
Before packing up for a trip, check for cloacal swelling or straining, which can signal egg binding symptoms and treatment options that make travel unsafe.
Maintain Safe Travel Temperatures
Cold snaps and hot dashboards both spell trouble. Match the carrier’s climate to your reptile’s usual thermal gradient, using insulation to buffer cold and a shielded heat source, never direct contact, for warmth.
Keep vents open; trapped humidity harms breathing. Check a carrier thermometer before departure and at each stop, adjusting gradually to avoid thermal shock.
Bring Fresh Fecal Samples Safely
A stale sample tells no story. Collect feces directly from your reptile, never scooped from a water dish, into a sterile container with a tight lid.
Refrigerate immediately, ideally at 2 to 8°C, but skip the freezer. Label clearly with owner, species, and time, then transport cold for reliable parasite screening.
Assess Temperament Before Handling
Does your reptile freeze, flee, or fix you with a curious stare? That reaction matters. Watch tongue flicks, posture, and eye tracking before touching anything.
Match expectations to species behavior profiles, since monitors show predatory curiosity while small lizards often bolt. Juveniles run more defensive than adults. Watch for darkened color or rapid breathing, early stress signal identification that tells you to slow down before restraint begins.
Use Species-Appropriate Restraint and Hygiene
No two species tolerate handling the same way, so match your grip to the animal in front of you.
- A snake’s head controlled gently, thumb under the jaw
- An iguana’s body wrapped in a towel, eyes covered
- A dragon’s tail cradled, never squeezed
- Gloved hands washed clean between every patient
Always practice species-appropriate restraint, block vision to reduce stress, and disinfect tools before touching the next reptile.
Step-by-Step Reptile Physical Examination
Once your reptile is safely restrained, the real work begins: a systematic, nose-to-tail exam that catches problems long before they become emergencies. Your vet won’t skip around or guess—every region of the body gets checked in a specific order, for good reason.
Here’s what that process actually looks like, step by step.
Watching for subtle shifts in energy and responsiveness helps owners spot when rest turns into something worth a vet visit, as this guide to identifying lethargy in pet snakes explains.
Head-to-Tail Eyes and Mouth Check
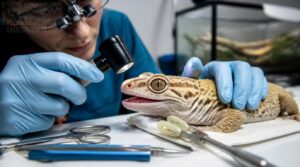
Start at the eyes, checking clarity, discharge, and swelling, since retained spectacles cause real complications in geckos. Use direct or indirect ophthalmoscopy for the fundus and anterior chamber.
Then move to the mouth with a soft speculum. Assess mucous membranes, tongue flicking, and dental grading for fractures or periodontal disease. White oral deposits can signal gout, so document everything methodically.
Weight, Length, and Body Condition
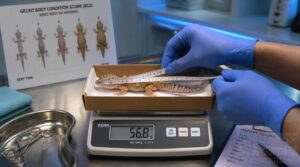
Once the mouth exam wraps up, place your gecko on a calibrated scale in a small, lightweight box, since accurate Weight readings prevent anesthetic overdoses.
Measure Snout-to-Vent Length consistently. Together, these establish Baseline Health Metrics for Body Condition Scoring (1-5 scale) and future Growth Curve Analysis, tracking development over time.
Breathing, Hydration, and Temperature
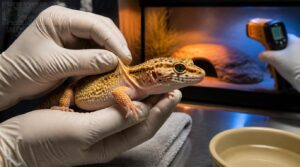
With those baseline metrics logged, watch your gecko’s chest for calm, even ventilation. Open-mouth breathing or wheezing signals trouble.
- Sunken eyes and dull scales
- Tented skin that resists snapping back
- Persistent nasal wetness or crusting
- Lethargy despite proper basking spots
Check temperature gradients across the enclosure and confirm hydration status through skin turgor and soaking behavior before moving on.
Skin, Scales, Cloaca, and Parasites
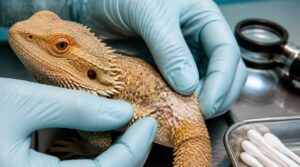
Once hydration checks out, run your fingers gently along the scales, feeling for retained shed or raised bumps. Tiny black specks near the eyes often mean mites.
Check the cloaca for redness, swelling, or discharge, since this doubles as urinary, digestive, and reproductive tract.
Flaky, discolored patches can signal early scale rot.
Palpation, Mobility, and Neurological Response
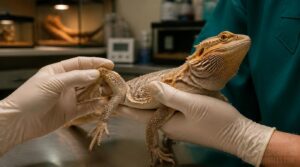
Hands-on assessment tells you what eyes alone can’t. Gently flex each limb, feeling for joint flexibility and resistance, then watch gait analysis during a short walk, dragging feet or uneven steps matter.
Check muscle tension through palpation, comparing sides.
- Weak grip
- Delayed reflex testing response
- Stumbling or tremors
- Trouble righting itself
These signal neurological exam concerns needing follow-up.
Diagnostic Tests During Reptile Checkups
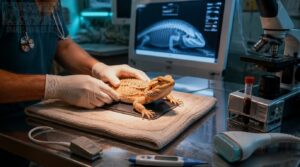
Once the hands-on exam wraps up, your vet still can’t see what’s happening beneath the scales, so diagnostic tools step in to fill those gaps.
Some tests are quick and routine, while others call for specialized imaging or a bit of sedation to get clear answers.
Here’s what you can expect on the diagnostic side of a thorough reptile checkup.
Fecal Microscopy and Parasite Screening
A single stool sample can reveal an entire hidden infection. Fecal parasite screening relies on fresh fecal collection, since delayed samples degrade motile protozoans.
Labs use microscopic concentration methods, then fecal smear preparation for parasite egg detection and protozoan cyst identification.
Because shedding is intermittent, one negative Reptile Fecal Parasite Test doesn’t guarantee a clean bill of health.
Bloodwork and Laboratory Testing
Numbers tell stories eyes can’t see. Blood sample collection via venipuncture checks organ function, infection, and calcium levels invisible on exam.
- Clotted serum for chemistry panels
- Whole blood for cell counts
- Properly labeled, temperature-protected tubes
- Results compared against reference ranges
Quality control protocols and aseptic technique keep specimens reliable, so lab analysis reflects your reptile’s true condition, not collection errors.
Radiographs for Bones and Organs
Bones don’t lie, but they do hide, which is why positioning matters more than most owners realize.
Bones don’t lie, but they do hide—proper positioning is what makes them speak
| View | Shows | Key Use |
|---|---|---|
| Lateral | Spine alignment | Skeletal assessment |
| DV/VD | Limb imaging | Organ evaluation |
| Oblique | Overlap reduction | Chest radiograph clarity |
When plain films can’t answer the question, reptile CT offers cross-sectional clarity, often with light sedation.
Ultrasound for Soft-Tissue Evaluation
Where radiographs stop, veterinary ultrasound picks up. It reveals soft-tissue detail radiographs miss: liver, kidneys, reproductive tract, and follicular staging in females. Doppler checks blood flow; guided biopsy samples masses safely.
Scales and trapped air can create shadowing artifacts, so warmed gel and proper probe selection matter for accurate pathology detection during your reptile’s diagnostic imaging.
CT, MRI, and Sedation Needs
Sometimes a plain radiograph or ultrasound just can’t answer the question, and that’s when CT or MRI enters the picture. CT excels at bone and organ detail; MRI suits soft tissue but demands stillness.
Either way, expect a pre-sedation health check, careful motion control, and monitored anesthesia to keep your reptile safe throughout.
After The Checkup: Preventive Reptile Care
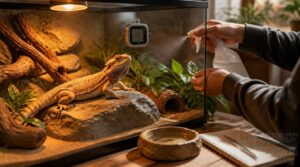
Once the exam wraps up, your work as a keeper is really just getting started. What you do in the days and weeks after the visit shapes your reptile’s health as much as the checkup itself. Here’s what that ongoing care should look like.
Review Husbandry and Nutrition Findings
A good exam doesn’t end when your vet sets the reptile down. Ask for a plain-language rundown of Temperature Gradient Analysis, humidity findings, and substrate fit, then compare notes against dietary protein and calcium-phosphorus results.
| Finding | Action |
|---|---|
| Gradient off | Adjust heat source |
| Ca:P skewed | Revise supplements |
| Substrate risk | Switch material |
Follow Treatment and Recheck Instructions
Once husbandry adjustments are underway, don’t set the discharge papers aside.
Medication schedule compliance matters most: give drugs at the exact intervals prescribed, log every dose, and watch for adverse signs.
Keep recheck appointments, usually 7-14 days out, and never stop antibiotics early.
Missing these steps undoes the exam’s value entirely.
Monitor Weight, Appetite, and Shedding
Between visits, three metrics tell you the most: weight, appetite, and shedding.
Weigh weekly on the same digital scale, same time of day, since body water shifts daily. Note appetite as "eats readily," "picks," or "refuses." Watch shed cycles closely, tight skin around eyes or toes signals trouble. Track hydration through soaking habits and urate output. These baseline metrics catch problems before your next physical examination.
Maintain Long-Term Health Records
Those weight and shedding logs mean nothing scattered across old texts and notebooks. Keep a centralized history, digital or paper, holding every exam, lab result, and medication change in one place.
Back up files so a crashed phone doesn’t erase years of data. Use consistent fields each visit and objective, factual notes. Good health record keeping turns your annual checkup into a clear timeline, not guesswork.
Schedule Species-Appropriate Wellness Visits
Rarely does one schedule fit every species. Juvenile growth monitoring calls for exams every 3-4 months, adults settle into annual veterinary checkups, and seniors need visits every 6-12 months.
- High-risk species: every 6 months
- Breeding animals: quarterly checks
- Bearded dragons/geckos: PCR testing
Match frequency to your reptile’s biology. That’s proactive disease prevention, not guesswork.
Frequently Asked Questions (FAQs)
What should be included in a reptile physical exam?
Eyes checked, mouth opened, nares inspected: a full physical examination covers body condition score, respiratory pattern, hydration, temperature, skin and scales, cloaca, palpation, mobility, and neuro response, alongside careful behavioral observation and accurate snout-to-vent length measurement.
How much can a bearded dragon vet check up cost?
Plan on $50 to $100 for a routine exam, with fecal tests around $35, X-rays $100 to $400, and bloodwork near $ Sick visits or added diagnostics can push totals to $100 to $500+.
How to tell if your reptile is healthy?
Look for clear eyes, normal breathing, and a steady appetite. Healthy skin, regular droppings, and coordinated movement matter too. Sudden behavioral changes often signal trouble before symptoms appear, so track these baseline health metrics consistently between visits.
How to make sure your bearded dragon is 100% healthy?
Is "perfectly healthy" even realistic, or just well-monitored? Combine appetite monitoring, weight tracking, a proper temperature gradient, UV light checks, and routine fecal sample testing. Together, these catch metabolic bone disease and respiratory infection risks before symptoms appear.
Do Reptiles need a health check?
Yes, reptiles need routine checkups. An initial exam after purchase, then annual veterinary checkups, helps with early symptom detection and disease prevention.
Regular wellness exams track nutrition, husbandry, and long-term health, helping your reptile thrive well beyond what symptom-based care alone could catch.
How often should a veterinarian check a pet reptile?
Think of checkups like tune-ups for a quiet engine: easy to skip, costly to ignore.
Annual veterinary checkups suit healthy adults; younger or newly acquired reptiles need visits every six months, and sick animals require prompt, immediate care.
How do I choose a veterinarian for my reptile?
Prioritize a specialist veterinarian holding a DVM with ARAV membership and NVAP accreditation. Confirm species experience, clinic equipment, cost transparency, and communication fit through a quick pre-visit call before booking.
What should be considered when performing a reptile surgery?
Success rarely hinges on one skill alone. It demands stable anesthesia protocols, strict sterile technique, precise temperature management, careful bleeding control, and species-appropriate closure methods, all guided by vigilant reptile postoperative care for safe recovery.
How are reptiles restrained for physical examination?
Restraint follows temperament, not routine. Calm reptiles need gentle handling during examination, while nervous or aggressive ones require towels, clear containers, snake hooks, or gauntlets, always with safe head restraint and careful mucous membrane and scale checks.
Why do Reptiles need a veterinarian?
A calm demeanor doesn’t mean good health. Reptiles mask illness by instinct, so early disease detection depends on trained eyes. General vets often miss species-specific needs, which is why specialized diagnostics and preventive care matter for lasting wellness.
Conclusion
Your dragon won’t thank you for the vet visit, but its scales will tip in your favor. That’s the real payoff of consistent reptile health checkup procedures: catching what silent instincts try to hide.
A carrier, some records, a calm handler, these small efforts build a habit that outlasts any single appointment.
Reptiles can’t tell you they’re hurting. Regular checkups become the language you speak for them, one visit, one steady year at a time.