This site is supported by our readers. We may earn a commission, at no cost to you, if you purchase through links.
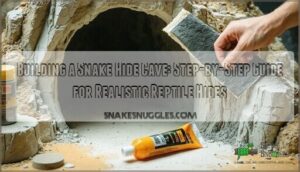
Start with non-toxic materials like expanding foam or smooth plastic and line your surfaces with greaseproof paper so nothing sticks where it shouldn’t.
Sand down any rough edges, fill gaps with universal filler, and get creative with textures—your snake appreciates a hide that feels natural, not like a leftover lunchbox.
Remember, snakes want snug, safe, and dark spaces—just like us on a lazy Saturday.
Of course, the difference is, your cave won’t need Wi-Fi.
Curious about wild designs? Read on.
Table Of Contents
- Key Takeaways
- Choosing Materials
- Initial Construction
- Snake Hide Designs
- Hide Texturing Techniques
- Painting and Finishing
- Safety Considerations
- Hide Box Construction
- DIY Snake Hide Tips
- Planning and Design
- Frequently Asked Questions (FAQs)
- What is the best material for a snake enclosure?
- How long will a snake hide in a house?
- What makes a good snake hide?
- How do you build a snake habitat?
- How to reinforce a hide for aggressive snakes?
- What is the best way to secure hides in enclosures?
- How to add removable doors for easy access?
- Can snake hides double as feeding stations?
- How to make hides appealing for shy snakes?
- Conclusion
Key Takeaways
- Choose non-toxic materials like expanding foam, plywood, and acrylic paints to make sure your snake’s hide is safe and durable.
- Shape the hide to be snug, dark, and natural, sanding all rough edges for comfort and mimicking wild shelters for your snake’s well-being.
- Add texture and details with safe fillers, grout, and plastic foliage, securing everything firmly to prevent mess or injury.
- Maintain easy access and proper ventilation, and clean the hide regularly to keep your pet healthy and stress-free.
Choosing Materials
You’ll need to pick materials that are safe, sturdy, and easy to work with so your snake has a comfortable, secure home.
There’s no shame in being picky here—each material, from expanding foam to universal filler, plays a key role in shaping a hide that’s as functional as it’s realistic.
Expanding Foam Uses
Reaching for expanding foam as your snake hide cave base, you’ll notice that foam expansion rate shapes the project’s size and contours.
Let expanding foam take the lead—its growth decides the curves and character of your snake hide creation.
Mind the curing time impacts—it’s tempting to hurry, but patience pays off.
Watch for density variations and practice safe foam carving, since toxicity concerns do exist.
Consider using reptile-safe foam options for added peace of mind.
Here’s why expanding foam is a go-to:
- Shapes complex forms easily
- Lightweight, yet strong
- Offers insulation and support
- Quick to carve for details
- Adaptable for various snake hide materials
Greaseproof Paper Benefits
When you’re shaping your DIY snake cave, don’t skip the greaseproof paper.
This versatile barrier saves your worktable from expanding foam messes—think of it as an easy-cleanup superhero.
Greaseproof paper prevents foam adhesion, keeping any snake hide project neat.
Plus, it’s cost-effective, doubling up for future snake shelter or reptile hideout builds.
Surface protection really is a game changer!
Sandpaper Smoothing
Once your DIY snake cave is cut to shape, grab your sandpaper and get to work.
Start with a rough grit for big bumps and move to finer grit for that smooth finish quality your reptile hide deserves.
Understanding sandpaper grit options is key to achieving the desired smoothness.
Use gentle, circular sanding techniques, control dust with a damp cloth, and don’t forget basic safety measures—nobody wants gritty fingerprints or a sneeze attack!
Universal Filler Applications
In the context of repairing imperfections in your DIY snake cave, universal filler is your trusty sidekick for both interior smoothing and exterior applications.
Take note of the filler drying time—patience pays off!
Always check that your universal filler is low in filler toxicity, especially when building reptile hide for your snake hide or reptile enclosure, with safety first, scales second!
Initial Construction
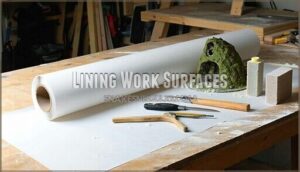
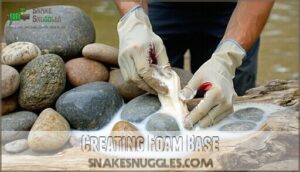
You’ll start building the snake hide by lining your work surface with greaseproof paper and preparing a foam base, which keeps everything clean and manageable.
Once the foam sets—patience required—grab a sharp knife to carve out realistic shapes for your slithery occupant’s new hideout.
Lining Work Surfaces
Before the sawdust flies, grab some greaseproof paper or a paper alternative to protect your workspace.
Surface protection matters more than you’d think—expanding foam, universal filler, and even tile grout love to cling everywhere. Covering your area makes cleanup easy and stops unwanted material adhesion.
Choose a working area big enough for sandpaper, tools, and creativity—your future self will thank you.
To guarantee a safe environment, remember to use non-toxic building materials for your snake’s habitat, and consider the importance of surface protection and a suitable working area.
Creating Foam Base
A great starting point for your snake cave tutorial is applying expanding foam to sketch out the basic form.
Mind the Foam Expansion Rate—less is more, since foam grows fast.
Pick stable base shapes for your reptile cave design, and consider foam density effects.
Try different carving tool options, knowing stability makes sculpting and foam crafting smoother down the line.
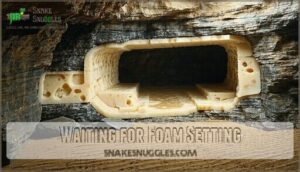
Waiting for Foam Setting
Patience is key when waiting for expanding foam to set—rush it, and you might end up with cracks in your reptile cave.
Let the foam cure—good things creep up on those who wait, just like the perfect snake hide.
Foam Expansion Time varies; it can take up to 24 hours depending on Temperature Influence and Humidity Effects.
To prevent cracking, avoid poking the foam and consider layering foam for bigger snake hide DIY projects or reptile habitat builds.
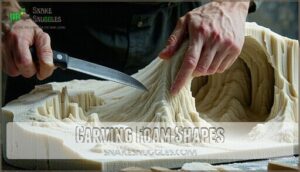
Carving Foam Shapes
Once the expanding foam fully sets, you’re ready to turn a block into a masterpiece.
Start by choosing the right knife—sharp for detail, sturdy for safety.
As you carve, remember:
- Focus on natural edges.
- Prioritize edge smoothing.
- Check for stability.
Foam sculpting and shape complexity give your reptile enclosure DIY that realistic cave look—minus the snakes in your shoes.
Snake Hide Designs
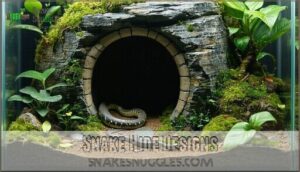
You’ve got a variety of snake hide designs to explore, each crafted for comfort and practicality using materials like balloons, plastic bowls, plywood, and insulated foam.
With the right approach, you can craft a safe, natural-looking shelter that might just convince your snake it’s found a secret spot in the wild.
Balloon Hide Creation
A homemade snake hide starts out with a balloon, some paper mache strips, and a touch of wax coating for strength.
Shape variety is endless—just change how you layer the paper.
Worried about deflation concerns? Let it pop after drying, leaving a sturdy shell.
Hanging hides are easy: poke holes before the paper sets and string it up for your reptile.
Plastic Bowl Hides
If balloons aren’t your style, grab a sturdy plastic bowl for your next DIY snake hide.
Pick an appropriate Bowl Size—big enough for your snake to curl up but not too roomy.
Use safe Cutting Techniques for the entrance and add Drainage Holes.
Painting Options abound, just make sure to use safe paints.
Secure the bowl inside your snake enclosure for solid reptile enrichment.
Plywood Sheet Uses
If you’re craving a solid upgrade for your DIY reptile accessories, Plywood offers hard-to-beat Plywood Durability.
Choose your Plywood Thickness based on your snake’s size, and always sand edges for Plywood Safety in the snake enclosure.
Seal every surface to keep your reptile habitat clean and long-lasting without breaking the bank—Plywood Cost is surprisingly budget-friendly.
- Sand sharp edges for safety
- Pick thickness for stability
- Seal plywood for hygiene
Insulated Foam Molding
When you move from sturdy plywood to insulated foam molds, you’ve got flexibility and creativity at your fingertips.
Choosing the right foam density and shaping methods matters—dense expanding foam or styrofoam works great for stability.
Practice various molding techniques and foam sculpting techniques for natural curves.
Just be sure to check insulation properties and toxicity concerns, so your snake’s hideout stays safe and cozy.
Hide Texturing Techniques
You’ll give your snake’s new hide a lifelike look by mastering texturing techniques, from filling large gaps to applying grout for a rocky finish.
Even if your last craft project ended up glued to the table, these steps will help you create a sturdy, realistic shelter your reptile will love.
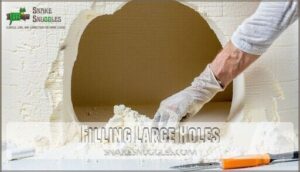
Filling Large Holes
Every so often, you’ll notice holes lurking in your expanding foam or styrofoam cave, waiting to mess with structural integrity or let in drafts.
Fixing these gaps is key:
- Pick a reptile-safe, nontoxic filler for pets.
- Patch cracks or holes, minding hole size impact.
- Respect filler drying time—let it cure completely, which is crucial for maintaining the integrity of your cave.
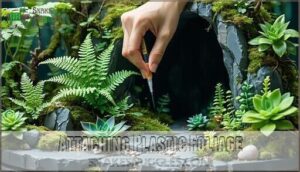
Attaching Plastic Foliage
Plastic foliage brings that natural jungle vibe right into your terrarium decor.
For realistic reptile accessories, choose secure glue types—PVA works, just make sure it’s non-toxic for species safety.
Plan your foliage placement for both style and function.
A key aspect is to balance aesthetics carefully with the snake’s needs.
Check out this quick guide:
—————:
—————:
—————-:
This guide helps you achieve a natural jungle vibe and ensures secure attachment of foliage in your terrarium, making it perfect for reptile accessories and species safety, while also considering aesthetics.
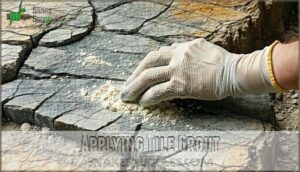
Applying Tile Grout
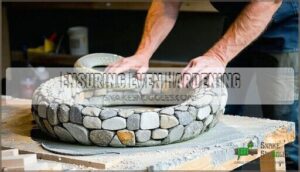
Once your hide’s shaped, it’s time for grout application—don’t skip this step! It’s where texture variety meets true reptile DIY magic.
Apply tile grout smoothly; think of sealing grout as armor for your snake hide. Using reptile safe grout is essential for the animal’s health.
Color choices matter, so experiment a little. Curing time’s the secret sauce, so let patience work.
- Texture variety
- Sealing grout
- Grout application
- Color choices
- Curing time
Ensuring Even Hardening
During grout application or filler drying, you’ll want to rotate your reptile hide or snake cave every few hours.
This rotation frequency guarantees even hardening, especially where temperature impact or humidity levels are uneven.
Think of it as marinating chicken—don’t let one side get soggy!
Consistent turning helps your DIY snake hide dry out smoothly in the snake enclosure.
Painting and Finishing
You’ll bring your snake hide to life by layering paint and carefully finishing each surface for a natural, realistic look.
Make sure every coat is fully dry before handling it—no snake has ever enjoyed a soggy paint job.
Base Coat Application
Patience pays off in reptile habitat DIY.
For a pro-level base coat, grab your chosen acrylic—Acrylic Selection matters.
Apply a dark cement color using these steps:
- Brush evenly across foam or grout mix surfaces.
- Let it seep into crevices for neat weathering effects.
- Respect drying time, so nontoxic materials for pets stay safe.
Solid groundwork beats shortcuts!
Adding Grey Layers
Once your base coat’s dry, it’s time to play with grey layers.
Start with deeper grey, brushing lightly so the darker tones peek through. Use uneven brush strokes—think of old rocks, not perfect walls.
Layering techniques like this give serious color depth. Before adding the next shade, let the paint drying finish for that realistic, weathered look in your DIY snake hide.
Painting Interior Black
A coat of black paint inside your snake hide does wonders.
Black paint benefits include creating strong contrast and depth that simulates natural retreats, which snakes love.
Reptile vision impact is minimal—snakes aren’t fazed by darker shades.
Quick-drying, non-toxic acrylic paints or alternative dark colors do the trick.
Remember, always use reptile-safe materials and check paint drying time for safety.
Achieving Weathered Appearance
Atmosphere transforms your DIY reptile hide cave when you blend painting techniques like Dry Brushing and Layering Shades.
Use acrylic paints for texture detailing and color washing, letting darker tones settle in the cracks.
Finish with a sealing finish for long-term durability, giving your reptile cave that true, weathered appearance—like it’s been around since dinosaurs roamed.
Safety Considerations
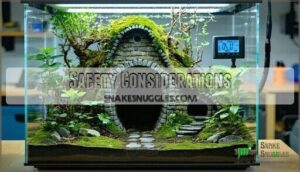
You want your snake cave to look cool, but safety’s got to come first.
By choosing non-toxic materials, checking ventilation, and controlling humidity, you’ll keep your reptile healthy and your mind at ease.
And nobody wants an escape artist snake.
Reptile-Safe Materials
Your snake’s comfort depends on choosing reptile-safe materials for a DIY snake hide.
Stick to:
- Safe sealants and non-toxic paints—give everything plenty of time to cure.
- Approved wood types, like cork or ceramic, and skip pine or cedar.
- Plant safety—avoid anything toxic or sharp.
- Consider smart material sourcing; clean your finds before adding them to the reptile enclosure.
When choosing materials, remember that heat retention matters for your snake’s well-being.
Non-Toxic Sealants
After sorting your reptile-safe materials, picking the right sealant for reptile enclosures is a must.
Always choose nontoxic pet materials, like 100% silicone or water-based polyurethane.
Sealant application needs patience—let it fully cure, sometimes up to 10 days.
Using reptile safe sealants guarantees no harm from chemicals or additives.
This guarantees reptile safety and long-term durability, making your snake hide and all reptile enclosure accessories safe and sturdy for years.
Proper Ventilation
Once you’ve picked a non-toxic sealant, it’s time to talk about airflow design inside your snake hide.
Proper ventilation keeps the air fresh, helps with reptile respiration, and puts the brakes on mold prevention.
Your DIY snake hide needs vents or gaps to help regulate temperature and maintain humidity balance in your snake enclosure—no one likes a stuffy hide.
- Fresh air, healthy snake vibes!
- Stops mold from crashing the party.
- Keeps temperature swings in check, ensuring a healthy environment with proper ventilation.
Humidity Control
With proper airflow sorted, let’s tackle humidity control.
Keep your snake enclosure’s moisture levels steady—aim for 50–70% with a good hygrometer.
Pick substrates like cypress mulch or coconut fiber to hold moisture, and watch for condensation.
Mist as needed, but don’t overdo it, and balance misting frequency and ventilation needs, so your snake hide isn’t turned into a tropical downpour with proper airflow.
Hide Box Construction
When you construct a hide box, you’ll need to focus on choosing sturdy materials and shaping features that resemble your snake’s natural habitats.
Don’t be surprised if your snake checks out your handiwork before you’ve even finished, as curiosity comes standard with these reptiles.
Natural Material Uses
You can upgrade any snake habitat with eco-friendly hides made from natural materials.
Bark hide benefits include light weight and natural antibacterial properties. Moss hide humidity helps your DIY snake hide stay cozy.
Coconut fiber safety means no harsh chemicals, and natural wood durability offers long-lasting cover for your reptiles.
Try these reptilesafe materials for a healthier, happier environment:
- Cork bark
- Moss
- Coconut fiber
- Untreated wood
- Stone detailing
PVC Pipe Designs
In the realm of DIY snake hides, PVC pipe is a reliable, science-backed choice.
Choosing the right pipe diameter is key—big enough for your snake, but not a ballroom. Play with joint types to create maze-like tunnels, and add ventilation holes for fresh air.
PVC snake hide options offer structural integrity and endless snake cave design possibilities.
| Pipe Diameter | Joint Types | Ventilation Holes |
|---|---|---|
| 2-inch | Elbow | Drilled on top |
| 4-inch | T-joint | Side placement |
| 6-inch | Cross | Covered by mesh |
Camouflage Techniques
If you’ve just explored PVC pipe designs, it’s smart to make your hide blend in.
Use these proven camouflage techniques for a rocklike snake hide or reptile cave:
- Match colors and use natural tones for solid Color Matching.
- Add Texture Imitation by gluing sand, bark, or moss.
- Mix materials for Natural Integration, boosting aesthetic appeal and blending.
Ensuring Proper Fit
Once your camouflage masterpiece blends into the habitat, turn your attention to fit.
A snake hide isn’t a one-size-fits-all solution—think of Goldilocks inspecting caves.
Double-check your snake’s size, giving a little extra interior space.
Make sure the hide dimensions allow easy entry and exit.
Prioritize access points for stress-free retreats.
Snakes appreciate DIY snake caves with comfortable fit—roomy, not cramped!
DIY Snake Hide Tips
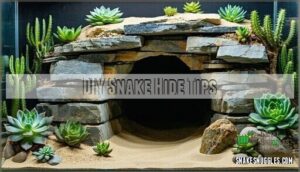
You’ll want to make sure your snake’s hide matches its size, uses non-toxic materials, and is free from sharp edges.
Regular cleaning keeps the hide safe and comfortable, so your reptile stays happy and healthy.
Measuring Snake Size
Sometimes, figuring out the right hide size can feel like tailoring a suit—snakes need comfort and room to grow.
For measuring accuracy, grab a measuring tape and consider both current size and growth stages.
Remember:
- Compare to hide dimensions.
- Allow for species variation.
- Prioritize snake comfort.
- Review size and space requirements.
- Adjust for snake cave upgrades.
Avoiding Sharp Edges
After measuring your snake’s size, focus on making the snake hide safe and snug.
Use Sanding Techniques and Filing Methods to smooth out all rough spots. Edge Rounding with proper Material Choice helps reduce injury risks in your reptile hide.
Here’s a quick look at helpful tactics:
| Task | Tool Needed |
|---|---|
| Edge Rounding | Sandpaper |
| Safety Checks | Fingers/Eyes |
| Filing Methods | Small File |
To ensure a safe environment, perform Safety Checks and consider the Material Choice for your reptile hide, as these factors can significantly impact your snake’s well-being.
Using Non-Toxic Materials
Once you’ve smoothed out sharp edges, turn your attention to what goes inside the DIY snake hide.
Always choose nontoxic, safe materials—your snake’s health depends on it.
Double-check that paints, sealants, and fillers are labeled Safe Sealants or reptile-safe.
Consider ventilation for stress reduction to guarantee a comfortable environment.
Don’t skip testing materials for odors or reactions, as smart material sourcing helps guarantee long-term safety and peace for your pet.
Regular Cleaning
Ever wondered why your snake hide sometimes smells like yesterday’s leftovers?
Frequency matters—clean every week for best results. Toss waste, scrub with safe disinfectants, and keep a sharp eye out for sneaky mold.
Don’t forget water bowl hygiene—a must for healthy snake keeping. Regular cleaning tips and protocols help prevent illness and odor, making you a pro at snake keeping.
Planning and Design
When planning your snake hide cave, you’ll want to match its size and features to the species you’re caring for, so grab a ruler and maybe a few funny looks from your snake.
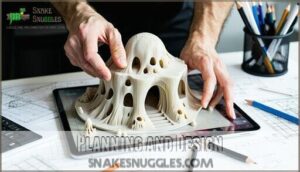
Using simple 3D design software helps you visualize the layout, making sure entrances are accessible and your pet has plenty of room to stretch out, which is a key aspect of creating a comfortable environment for your pet.
Using 3D Design Software
After sorting out your DIY snake hide’s measurements, it’s time to experiment with 3D design software.
Whether you’re sketching in Google SketchUp or tackling advanced 3D Printing, software comparison is key.
Virtual prototyping gives you scale accuracy, letting you spot issues before building.
Complex reptile hide ideas for your vivarium design become surprisingly doable once you see them unfold on-screen with virtual prototyping.
Designing Large Caves
A reptile cave’s magic starts with thoughtful cave dimensions and sturdy structural integrity.
Big snakes need roomy, giant snake hides, while compact species call for snug but safe alcoves.
Shape your snake hide’s entrance design for easy slithering.
Inside, mimic nature—ledges, roughness, and dark corners provide comfort, making your natural snake hide or lizard cave a real home with a natural environment.
Considering Snake Species
You’ve laid out the cave design; now match it to your snake’s species needs.
Consider these big keys when creating a snake enclosure or picking snake enclosure ideas:
- Size Requirements: Larger species need roomy hides; small snakes appreciate snug fits.
- Species Behavior: Arboreal, burrowing, or aquatic?
- Habitat Mimicry: Copy wild shelter types.
- Temperature Needs and Humidity Levels: Support their natural reptile habitat setup.
When handling, remember to keep in mind snake body language to minimize stress.
Ensuring Hide Accessibility
Although you might want your DIY snake hide to look mysterious, ensuring hide accessibility is vital.
Aim for the right entrance size, plenty of interior space, and easy cleaning. Multiple exits help reduce stress, and a stable base keeps everything in place.
Check this table so your snake can slide in and out with ease:
| Feature | Why It Matters |
|---|---|
| Entrance size | Prevents injury |
| Interior space | Supports comfort |
| Multiple exits | Lowers snake stress |
| Easy cleaning | Improves hygiene |
This design should support your snake’s comfort and hygiene, while also being easy to clean and maintain, ultimately reducing snake stress and preventing injury through proper entrance size.
Frequently Asked Questions (FAQs)
What is the best material for a snake enclosure?
Imagine transforming your snake’s home into the Fort Knox of comfort—PVC plastic or sealed, food-safe plastics are best.
They’re a breeze to clean, keep in humidity, and won’t harbor germs.
Your snake’s scales will thank you!
How long will a snake hide in a house?
If a snake gets loose in your house, it can hide for days or even weeks, especially in dark, warm spots.
You’ll need patience and a careful eye since snakes are experts at slip-sliding into tight spaces.
What makes a good snake hide?
Ever wonder what keeps your snake stress-free?
You’ll want a hide that’s dark, snug, moisture-controlled, and has smooth, safe edges.
Mimic nature with non-toxic materials—think cozy, private, and just big enough for a comfy curl-up.
How do you build a snake habitat?
Start by choosing a spacious tank, add a secure lid, and line it with safe substrate.
Mix in hides, branches, and a water dish.
Keep temps steady—your slithery pal loves consistency, not drama!
How to reinforce a hide for aggressive snakes?
You’ll want to add extra support, like thicker walls or sturdy materials such as plywood or reinforced PVC.
Smooth every edge, seal everything tight with non-toxic products, and secure the hide to the enclosure floor—avoid accidental “hide demolition!”
What is the best way to secure hides in enclosures?
Like anchoring a ship before the storm, fixing hides with aquarium-safe silicone or Velcro dots keeps them sturdy.
Make sure surfaces are clean, position securely, and check often to prevent stubborn reptiles from rearranging their décor, ensuring that the hides remain in place and the environment is safe for the reptiles.
How to add removable doors for easy access?
Attach doors with small, strong magnets or sliding tracks for quick removal.
You’ll find it handy during cleaning—just pop them off and back on.
Think of it as giving your snake a secret passageway for easy checks.
Can snake hides double as feeding stations?
You can turn a snake hide into a feeding station, but snakes sometimes associate the hide with safety, not snack time.
To avoid confusion or leftover mess, feed your snake elsewhere and let the hide stay a cozy retreat.
How to make hides appealing for shy snakes?
It’s funny how a dark, cozy spot can work wonders—just like us dodging awkward parties.
You’ll see shy snakes relax when you mimic nature, add moss, tight entrances, and keep their hides away from busy traffic, which is a complete concept that helps them feel secure.
Conclusion
Studies show snakes spend up to 90% of their time in hiding, so building a snake hide cave isn’t just a project—it’s essential for your reptile’s well-being.
By carefully selecting safe materials, refining textures, and ensuring the right fit, you create a habitat that supports natural behaviors.
When you finish your cave, you’ll offer comfort as well as promote a healthier, less stressed snake. Get creative: your snake’s new hide just might become its favorite spot.
- http://ebay.us/VqWnKT?cmpnId=5338273189
- https://www.visionproducts.us/blog/reptile-enclosure-materials/
- https://corkbark.co.uk/blogs/news/how-to-create-the-ultimate-reptile-hideout-with-natural-materials
- https://www.reddit.com/r/snakes/comments/1ew70bd/made_a_hide_for_bioactivenatural_enclosures/
- https://dragonstrand.com/working-with-great-stuff-expandable-foam/

