This site is supported by our readers. We may earn a commission, at no cost to you, if you purchase through links.

Most reptiles don’t generate their own body heat—they borrow it from their environment. That single biological fact changes everything about how you set up their home.
Get the temperature wrong, and your reptile won’t digest food properly, won’t move much, and won’t thrive. Get it right, and you’ll see a completely different animal.
Reptile heat mats for beginners offer a straightforward way to deliver that warmth from below, mimicking the sun-warmed ground reptiles naturally seek out. Picking the right one—correct size, wattage, and thermostat pairing—makes all the difference between a safe setup and a risky one.
Table Of Contents
- Key Takeaways
- Why Beginners Choose Heat Mats
- Heat Mats Vs Heat Lamps
- Match Mat Size to Tank
- Pick The Right Wattage
- Thermostats Every Beginner Needs
- Top 5 Reptile Heat Mats
- Compare Features That Matter
- Install Heat Mats Safely
- Prevent Burns and Overheating
- Build Your Beginner Buying Checklist
- Frequently Asked Questions (FAQs)
- How to choose heating mat size for reptiles?
- Are heat mats worth it for seed starting?
- Do reptile heating pads go in or under the tank?
- Can I leave the heat mat on all the time?
- What temperature should a heat mat be for reptiles?
- Can heat mats be used with aquatic reptiles?
- How long do reptile heat mats typically last?
- Are heat mats safe for baby or juvenile reptiles?
- Can two heat mats run in one enclosure?
- Do heat mats work during winter or cold climates?
- Conclusion
Key Takeaways
- thermostat isn’t optional — without one, your heat mat can hit 140°F and seriously injure your reptile.
- Cover one-third to one-half of the tank floor with your heat mat so your reptile always has a cooler side to retreat to.
- Match wattage to tank size: 4W for 10 gallons, 8W for 20 gallons, 16W for 30–40 gallons, and 24W for 50–60 gallon setups.
- Always mount the heat mat on the exterior bottom of the glass tank — never inside — to prevent direct contact burns.
Why Beginners Choose Heat Mats

Reptiles can’t make their own body heat — they rely on their environment to stay warm and healthy.
That’s why under-tank heating for reptiles is such a game-changer — it mimics the warmth they’d naturally absorb from sun-heated ground.
A heat mat is usually the first tool beginners reach for, and for good reason.
Here’s a look at what makes them work and which reptiles benefit most.
Belly Heat for Ectothermic Reptiles
Unlike warm-blooded pets, your reptile can’t make its own heat — it depends entirely on its environment. That’s the core of being ectothermic. Species-specific belly heat helps them digest food, stay active, and behave normally.
under tank heater delivers exactly that through substrate conductivity effects. Watch for behavioral heat cues like:
- Pressing the belly flat against the warm zone
- Lingering near the heat mat placement spot after feeding
- Moving away when comfortable, toward cooler areas
A thermostat keeps temperature control safe overnight, especially for nighttime thermoregulation.
Improper setup can result in malfunctioning thermostats cause burns.
Creating Warm and Cool Zones
Once your reptile has that belly heat, the next piece is giving it somewhere to escape to. That’s where thermal zoning comes in.
Place your heat mat on one side only — never centered.
Gradient Placement creates a temperature gradient from a warm basking zone to a cooler retreat. Think of it like a studio apartment with a sunny corner and a shady one.
Your reptile picks which it needs.
Why Heat Mats Are Supplemental
A heat mat isn’t meant to carry the whole load. Think of it as a Thermal Spot Targeting tool — it nails one job really well: warming the belly contact zone. Heat Mat Complementarity means it works with overhead heat, not instead of it. That’s your Safety Redundancy Layer in action.
- Raises floor temp by 2–8°C without replacing ambient heating
- Facilitates reptile thermoregulation through direct conductive contact
- Delivers Energy Savings Advantage by targeting one zone only
Best Beginner-friendly Reptile Types
So which reptiles actually benefit most from belly heat?
Leopard geckos top the list — small, calm, and perfectly suited to a simple mat setup. Corn snakes and ball pythons rely heavily on ventral warmth too.
Bearded dragons and crested geckos round out your best beginner options.
Choosing the right reptile heating pad starts with knowing your animal’s natural habits first.
Heat Mats Vs Heat Lamps

Heat mats and heat lamps do two very different jobs inside a reptile enclosure, and knowing which does what can save you a lot of guesswork. pet’s comfort — and safety — depends on getting that balance right.
Here’s how the two compare across four key areas every beginner should understand.
Surface Heat Versus Ambient Heat
Think of your enclosure as having two separate temperature zones. A heat mat works by conduction — it warms whatever touches the floor directly. A heat lamp heats the air through convection, raising your ambient temperature throughout the tank. Understanding this difference is key to thermal gradient management and heat mat safety.
| Factor | Heat Mat | Heat Lamp |
|---|---|---|
| Heat Type | Conduction | Convection |
| Primary Effect | Surface warmth | Air temperature gradient |
| Heat Distribution | Floor-level only | Whole enclosure |
Substrate insulation effect matters too — thick bedding slows heat distribution patterns reaching your reptile.
When to Use Both Together
Some setups need both. Ground-dwelling reptiles, especially snakes, benefit from a heat mat providing floor warmth while a lamp provides broader heat distribution.
Combined Heat Scheduling with Thermostat Coordination keeps Thermal Gradient Balance intact — warm side accessible, cool retreat available.
Control each source separately for Safety Redundancy; one device shouldn’t compensate for the other.
| Factor | Heat Mat | Heat Lamp |
|---|---|---|
| Primary Role | Floor contact warmth | Ambient air temperature |
| Best Use Time | Day and night | Daytime basking |
| Control Method | Thermostat required | Dimmer or thermostat |
Daytime and Nighttime Heating Roles
Your enclosure works in shifts. During the day, a basking lamp manages heat distribution and gives your reptile that bright, radiant warmth it craves.
At night, Nighttime Silent Warmth takes over — the mat runs as Light-Free Night Heat, supporting Thermal Cycle Management without disrupting darkness.
| Time of Day | Heat Source Role |
|---|---|
| Daytime | Lamp drives basking warmth |
| Nighttime | Mat provides silent floor heat |
| Change | Temperature Gradient Shifts gradually |
| All hours | Thermostat maintains temperature regulation |
| Both phases | Mat acts as Daytime Basking Complement |
This split keeps energy efficiency high and your reptile comfortable around the clock.
Which Option Suits Snakes Best
Snakes lean heavily toward belly heat — that’s just how they’re wired. A reptile heating pad under the tank matches their Snake Species Preference perfectly, especially nocturnal species.
Diurnal snakes may need a lamp too. Either way, a thermostat keeps Heat Pad Safety for Reptiles on point.
| Snake Type | Best Heat Source | Thermal Gradient Preference |
|---|---|---|
| Nocturnal ground dwellers | Under tank heater | Warm floor, cool air |
| Diurnal active species | Lamp + heat pad | Full gradient needed |
| Juvenile snakes | Low-wattage heat pad | Gentle, stable warmth |
| Large constrictors | Both sources combined | Wide temperature range |
| Arboreal species | Overhead lamp primary | Elevated warm zones |
Match Mat Size to Tank

Getting the mat size right is one of those things that makes a bigger difference than most beginners expect. A simple rule of thumb — covering one-third to one-half of the tank floor — keeps your reptile comfortable without turning the whole enclosure into an oven.
Here’s how that plays out across common tank sizes.
The One-third to One-half Rule
A solid rule for thermal gradient design is to cover only one-third to one-half of the floor — nothing more. That partial floor coverage keeps a genuine cool zone on the other side, giving your reptile real choices.
Zone proportioning matters because without it, you’ve just built a hot box. Think of it as gradient zone planning: the heat mat ratio controls the environment; your reptile controls itself.
Heat Mat Sizes by Enclosure Footprint
Mat size follows floor size — it’s that simple. A 5W mat (15×14 cm) fits a 30×20 cm enclosure, while a 7W mat (15×28 cm) suits 45×30 cm tanks.
Step up to a 14W under tank heater for 90×45 cm setups, and a 20W heater for 120×45 cm.
reptile heating pad size guide keeps footprint proportion tips and species thermal needs aligned without guesswork.
Glass Terrarium Compatibility
Glass terrariums are the best match for heat mats — and for good reason. Glass Thickness Effect matters here: thin glass heats faster, so Surface Temperature Monitoring becomes non‑negotiable.
For reliable Thermal Gradient Uniformity and Condensation Control, keep these points in mind during heat mat installation:
- Place your under tank heater on a clean, flat glass bottom.
- Monitor Edge Heat Distribution using a thermometer on both sides.
- Apply safety considerations for reptile heating equipment and temperature control from day one.
Problems With Oversized Mats
Bigger isn’t always better with heat mat size. An oversized mat warms too much of the floor, causing Gradient Collapse — your reptile loses its cool-side retreat.
That raises Burn Risk, creates Uneven Heat Distribution, and causes Thermostat Strain when the probe can’t read the whole surface accurately. Power Waste follows too.
| Problem | What Happens |
|---|---|
| Gradient Collapse | No cool zone remains |
| Burn Risk | Hot spots cause contact burns |
| Thermostat Strain | Probe misreads mat temperature |
| Uneven Heat Distribution | Temperature gradient becomes unstable |
| Power Waste | Extra wattage heats unused floor |
Pick The Right Wattage

Wattage isn’t just a number on a box — it’s what determines whether your reptile stays warm or ends up in danger. The right wattage depends on your tank size, your room temperature, and even how thick your substrate is.
Here’s a straightforward breakdown to help you match the right output to your setup.
4W, 8W, 16W, and 24W Options
Four wattage options keep things simple. Each heat mat in this lineup is built around wattage scaling that matches a specific enclosure size, so power consumption stays efficient and heat distribution stays even.
Here’s a quick look at what each offers:
- 4W – compact footprint (18×10 cm), low voltage requirements, ideal for tiny setups
- 8W – steps up to 20×15 cm for modest tanks
- 16W – covers 30×20 cm with stronger temperature control
- 24W – largest at 45×20 cm, best thermostat pairing for safety considerations for reptile heating equipment
- All models – self-regulating design enhances mat longevity
Tank Gallon and Wattage Matching
Wattage per gallon is your clearest starting point. A 4W mat covers a 10-gallon enclosure well, while 8W suits a 20-gallon.
Step up to 16W for 30–40 gallons, and use 24W for 50–60-gallon tanks. This volume-based heating approach keeps your power-to-volume ratio balanced, so enclosure size scaling feels straightforward rather than guesswork — and your animal stays comfortable without overheating risks.
Room Temperature Impact
Your room’s ambient temperature quietly shapes how hard your heat mat works. In winter, room cooling effects force the mat to run longer, sometimes struggling to hold the warm side steady.
That’s where thermostat compensation earns its keep — it adjusts output automatically as seasonal temperature shifts happen.
Without one, energy use fluctuations go unmanaged, and ambient heat influence can push surface temps into unsafe ranges.
Substrate Thickness and Heat Transfer
Substrate thickness quietly decides whether your reptile actually feels the warmth. A thick layer creates thermal resistance, slowing heat transfer before it reaches the surface.
Conductivity match matters too — dense substrates move heat faster than loose, porous ones.
The contact layer between mat and tank must stay tight for even heat spread. Poor contact creates cold spots despite a working heat pad.
Keep substrate under two inches for reliable surface response.
Thermostats Every Beginner Needs

A heat mat without a thermostat is like a stove with no temperature dial — it just runs hot until something goes wrong. For beginners, that’s a real risk, and it’s one of the easiest problems to avoid.
A heat mat without a thermostat just runs hot until something goes wrong
Here’s what you need to know before picking your setup.
Built-in Versus External Thermostats
Think of your thermostat choice as a control dial — basic or precise. Built-in thermostats keep installation complexity low, which makes them great for beginners.
External digital thermostats offer control flexibility and calibration consistency, letting you place the probe exactly where it matters. They’re also smarter redundancy options when your setup grows.
- Built-in: simpler setup, fewer devices
- External: adjustable probe placement, better precision
- Digital thermostat: displays live readings and heating status
- Cost trade-offs: external units cost more but protect your animal better
Safe Temperature Control Basics
Most thermostats let you set a safe ceiling — usually between 40°F and 108°F — so your heat pad never crosses into dangerous territory. A digital thermostat with auto shutoff and redundant safety switches gives you real peace of mind.
Enable thermostat alarm settings to catch temperature spikes early, and consider power surge protection for your whole setup.
Regular calibration frequency checks keep thermal gradient monitoring accurate over time.
Proper Probe Placement
Your temperature probe is doing quiet, important work — so placement actually matters. Push the tip just above the heat mat surface, keeping a small sensor contact gap so it reads air temperature, not the mat itself.
Stable mounting prevents drift between checks. Angle alignment and active area location both affect tip depth accuracy, so secure the probe flat and consistent every time.
Why Thermometers Still Matter
Your thermostat controls the mat, but a digital thermometer tells you what’s actually happening inside the enclosure.
These are four things an independent thermometer check catches that your thermostat alone won’t:
- Surface Temperature Accuracy at the warm zone
- Cool Side Gradient confirmation
- Temperature Drift Detection after room conditions change
- Burn Risk Prevention before your reptile feels it
Heat mat safety depends on both working together.
Top 5 Reptile Heat Mats
Now that you know what to look for, it’s time to put that knowledge to work. These five heat mats stood out for their safety features, size options, and beginner-friendly setups.
Here’s a closer look at each one.
1. Aiicioo 8W Reptile Heating Pad
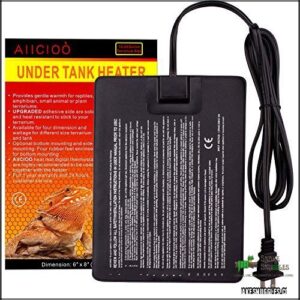
If you’re just starting out, the Aiicioo 8W Reptile Heating Pad is a solid first choice. It runs on 120 volts and covers a 6×8 inch zone — enough for a 10 to 20 gallon tank.
The pad delivers steady warmth between 104°F and 122°F using a nichrome heating element.
You can mount it on the bottom or side, and the included rubber feet keep air circulating underneath.
Just note: it has no built‑in thermostat, so you’ll need to monitor temps separately.
| Best For | Beginners setting up a 10–20 gallon reptile or amphibian enclosure who want a simple, low-cost heat source without complicated installation. |
|---|---|
| Wattage | 8W |
| Voltage | 120V AC |
| Temp Range | 104°F–122°F |
| Tank Compatibility | 10–20 gal |
| Thermostat Included | No |
| Mount Options | Bottom or side |
| Additional Features |
|
- Steady, consistent warmth between 104°F and 122°F with no hot spots
- Flexible mounting — bottom or side — with rubber feet to keep airflow going underneath
- Energy-efficient at just 8W, so it won’t spike your electricity bill
- No built-in thermostat, so you’ll need a separate thermometer to keep temps in check
- Not safe for plastic, acrylic, or water tanks — heat can cause damage
- Adhesive can fail near the power cord, and it may struggle to heat larger or heavily sand-filled tanks
2. Aiicioo Reptile Terrarium Heating Pad
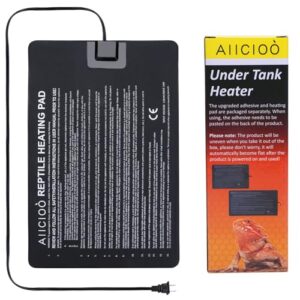
Step up to the 16W version if your tank runs 30 to 40 gallons. The Aiicioo Reptile Terrarium Heating Pad covers a larger 8×12 inch area and pushes surface temps between 104°F and 122°F through a solid-state nichrome element.
At just 1.6 oz, it mounts flat on the exterior glass bottom using adhesive backing, with rubber feet underneath to keep air moving.
Like the 8W model, it has no built-in thermostat — so pairing it with one isn’t optional—it’s smart.
| Best For | Reptile owners with medium-sized 30–40 gallon tanks who need reliable, energy-efficient belly heat for geckos, snakes, or hermit crabs. |
|---|---|
| Wattage | 16W |
| Voltage | 120V AC |
| Temp Range | 104°F–122°F |
| Tank Compatibility | 30–40 gal |
| Thermostat Included | No |
| Mount Options | Bottom or side |
| Additional Features |
|
- Covers a solid 8×12 inch area with steady heat between 104°F and 122°F — no cold spots
- Lightweight and easy to install; just stick it on and go, no tools needed
- Low wattage makes it safe for continuous 24/7 use without running up your electricity bill
- No built-in thermostat, so you’ll need to buy one separately to avoid overheating your pet
- Adhesive edges can start peeling over time and may need occasional re-pressing
- Not safe for plastic, acrylic, or water-filled tanks — glass only
3. BN Link Reptile Heating Pad
Moving down the list, the BN-Link 8×12 heating pad runs at 16W and fits 10 to 20-gallon glass tanks.
It heats up fast, reaching between 104°F and 122°F, and the self-adhesive waterproof backing makes installation straightforward.
Flexible construction means it won’t crack or stiffen over time.
One thing to know: there’s no built-in thermostat. You’ll need to add an external controller to keep temps safe.
The 15-month warranty is a solid bonus for a budget-friendly pick.
| Best For | Reptile and small animal owners with 10–20 gallon glass terrariums who want a simple, affordable heating solution. |
|---|---|
| Wattage | 16W |
| Voltage | 120V AC |
| Temp Range | 104°F–122°F |
| Tank Compatibility | 10–20 gal |
| Thermostat Included | No |
| Mount Options | Bottom only |
| Additional Features |
|
- Heats up fast and holds a steady range of 104°F–122°F
- Self-adhesive waterproof backing makes setup and cleaning easy
- Flexible construction keeps it from cracking or stiffening over time
- No built-in thermostat — you’ll need a separate controller to avoid overheating
- Adhesive can weaken over time and may need reinforcing
- Some users report uneven heat distribution across the pad
4. iPower Reptile Heat Mat
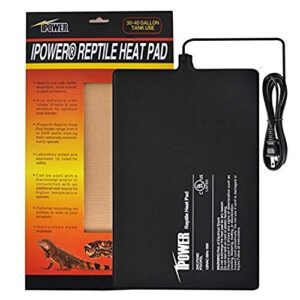
Next up is the iPower Reptile Heat Mat, and it’s a strong contender for any beginner’s setup.
The 8×12 inch, 16W version fits 30 to 40-gallon tanks well and covers roughly one-third of the floor — exactly where you want it.
It uses a PTC heating element with added insulation, so warmth spreads evenly instead of pooling in one spot.
The 3M adhesive backing holds firm, and the 6-foot cord gives you real flexibility with outlet placement.
Just add a thermostat.
| Best For | Beginners setting up a 30–40 gallon reptile or amphibian terrarium who want reliable, even heat without a complicated install. |
|---|---|
| Wattage | 16W |
| Voltage | 120V AC |
| Temp Range | Not specified |
| Tank Compatibility | Not specified |
| Thermostat Included | No |
| Mount Options | Bottom only |
| Additional Features |
|
- PTC element with insulation means heat spreads evenly — no hot spots
- 3M adhesive backing sticks well, and the 6-foot cord makes outlet placement easy
- Works beyond reptile tanks too — great for seed germination or home brewing
- You must use a separate thermostat, or you risk overheating your animals
- Adhesive can weaken over time, especially with repeated temperature changes
- The control switch lacks clear temperature markings, so dialing in the right heat takes guesswork
5. PeSandy 20W Reptile Heating Pad
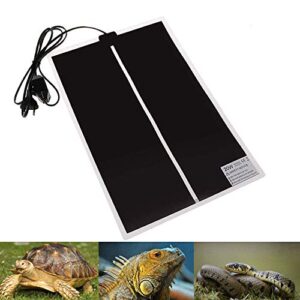
The PeSandy 20W Reptile Heating Pad rounds out this list with a flexible, beginner-friendly design that works across 20 to 60-gallon setups. At 16.93 × 12.87 inches, it offers solid coverage without adhesive backing — so repositioning during setup changes is easy.
The 20W output heats slowly and steadily, which helps avoid sudden temperature spikes. One heads-up: the manual dial lacks clear markings, so pair it with an external thermostat and probe for reliable, safe temperature control.
| Best For | Beginners and budget-conscious reptile owners who need a low-maintenance heat source for tanks between 20 and 60 gallons. |
|---|---|
| Wattage | 20W |
| Voltage | 120V AC |
| Temp Range | Manual dial |
| Tank Compatibility | 20–60 gal |
| Thermostat Included | No |
| Mount Options | Side only |
| Additional Features |
|
- No adhesive backing makes it easy to reposition without leaving residue or damaging your setup.
- Slow, steady heat rise reduces the risk of temperature spikes, which is great for heat-sensitive species.
- Lightweight and thin enough to side-mount without adding bulk to your terrarium.
- The manual dial has no clear markings, so dialing in a precise temperature is more guesswork than science.
- Heat distribution can be uneven across the pad, meaning some spots may run hotter than others.
- Can’t be covered with wood chips, coconut soil, or similar materials, which limits how you can set up your substrate.
Compare Features That Matter

Once you’ve narrowed down your top picks, the real deciding factors come down to build quality and everyday practicality.
Four features in particular will tell you a lot about whether a heat mat will last and stay safe over time. Here’s what to look at before you buy.
Adhesive Strength and Secure Mounting
heat mat that keeps sliding out of place isn’t just annoying — it’s a real safety risk. That’s why adhesive base quality matters more than most beginners expect.
Look for 3M adhesive backing or a comparable acrylic-based system, since these hold their bond through repeated heat cycles.
Clean the tank bottom thoroughly before installation — oils and dust kill adhesion longevity fast. edge reinforcement helps too.
Moisture-resistant Surface Materials
Your reptile’s enclosure gets humid — sometimes very humid — so the mat’s surface needs to handle moisture without breaking down.
Good mats use a waterproof PVC surface or high-density polyethylene plastic, both built with a non-porous structure that resists absorption.
Protective coatings and moisture blocking additives reinforce the core material, while low surface energy and slight rough texture help water bead off cleanly instead of pooling.
Energy Efficiency and Power Use
low-wattage mat doesn’t mean weak heating — it means smarter design. Models using carbon fiber efficiency elements or PTC materials distribute warmth evenly while keeping power consumption low.
Matching wattage selection for heat pads to your tank size drives real energy savings: a 4W pad for a 10-gallon costs pennies daily.
That’s energy efficient design working quietly in your favor.
Durability for Long-term Use
A mat that fails after six months isn’t a bargain — it’s a hassle. Element Longevity depends heavily on material and durability choices like Carbon Fiber Resilience and PTC technology, both rated for thousands of cycles.
Key heat pad durability factors include:
- UV Stabilization prevents surface breakdown under tank lighting
- Adhesive Durability holds firm for 1+ years
- Warranty Periods reach 15 months with brands like BN-Link
- Warranty and Longevity Considerations for Heating Pads favor UL-certified models
- Heat pad maintenance and cleaning stay simple with thick, wipe-clean PVC covers
Install Heat Mats Safely
Installing a heat mat the right way makes a bigger difference than most beginners expect. A few simple steps before you plug anything in can protect both your reptile and your equipment.
Here’s what you need to do to get it right.
Exterior Bottom Placement Only

Always mount your under tank heating pad on the exterior bottom of the terrarium — never inside.
This external mounting benefits your animal directly: glass heat conductivity creates a natural temperature buffer layer between the element and your reptile, so no belly burns.
Heat transfer efficiency stays consistent, and safety isolation keeps wiring away from substrate and curious tongues.
Bottom mounting simply works.
Cleaning and Prepping The Tank Base

Before sticking down your heat pad, take a minute to clean the tank’s exterior bottom thoroughly. Debris removal matters here — even a small grit particle under the adhesive base can create uneven contact.
Wipe the glass dry, check for dust, and make sure surface leveling across the entire area.
A clean, flat surface means your heat pad adhesive bonds fully and heats evenly from day one.
Maintaining Airflow Beneath The Enclosure

Once the glass is prepped, don’t push the enclosure flat against a shelf. Bottom clearance isn’t optional — it’s how heat dissipates safely.
A blocked stand surface traps warmth underneath, throwing off heat distribution across the enclosure. Raised stands or open-frame furniture keep vent path design working naturally.
Good under base care means checking that gap regularly so heat buildup never sneaks up on you.
Prevent Burns and Overheating

Even with the right mat and a solid installation, things can still go wrong if you’re not paying attention to a few key details. Burns and overheating are the most common heat mat problems beginners run into — and most of them are completely avoidable.
Here’s what you need to watch for.
Common Beginner Heat Mat Mistakes
Even experienced keepers slip up sometimes, so don’t feel bad if you’ve made one of these common mistakes when using under‑tank heaters:
- Incorrect mat placement — inside the tank, or fully covered by overly thick substrate that blocks belly heat
- Skipping thermostat calibration, or running the mat without one entirely
- Inadequate air gap beneath the enclosure, or ignoring cable wear on older setups
Heat mat safety considerations start here.
Warning Signs of Unsafe Temperatures
Your reptile can’t tell you it’s too hot — so watch for overheating signs like lethargy, refusing food, or pressing against the cool side constantly.
A thermostat reading above 95°F under the mat is a red flag.
Temperature fluctuations also stress reptiles physically, similar to heatstroke symptoms in humans.
Use temperature monitoring devices daily — your heat pad safety depends on it.
Avoiding Direct Contact Hot Spots
Hot spots form when heat concentrates in one small area — and your reptile can’t always move away in time.
Watch for these heat pad placement issues:
- Thin substrate lowers Substrate Conductivity and lets heat spike
- Poor Ventilation Gap Size traps warmth under the tank
- Oversized mats disrupt your thermal gradient
- Skipping Temperature Sensor Calibration gives false readings
- Uneven Mat Edge Insulation breaks Heat Distribution Uniformity
Use temperature monitoring devices to verify heat distribution across enclosure zones daily.
When to Replace a Faulty Mat
A mat that flickers, runs cold, or swings wildly in temperature isn’t a tuning problem — it’s a sign to replace it.
Watch for Power Failure Indicators like no warmth after an hour, Physical Damage Clues like cracked housing or frayed cords, and Thermal Fluctuation Issues that no thermostat can fix.
Electrical Safety Risks, Age and Wear, and Heat pad durability factors all shorten a mat’s dependable lifespan.
Build Your Beginner Buying Checklist

You’ve covered the hard part — understanding heat, size, and safety.
Now it’s time to pull everything together into a simple checklist that helps you buy with confidence.
Here’s what every beginner should run through before hitting that checkout button.
Match The Mat to Species Needs
Not every reptile runs on the same schedule — or the same temperature.
Leopard Gecko Heat needs to hover around 88–92°F on the warm side, while Corn Snake Heat and Ball Python Heat sit closer to 90°F.
Bearded Dragon Heat leans heavily on overhead lighting, with mats playing a supporting role.
Blue Tongue Skinks need 88–92°F for digestion.
Match species-specific care guidelines before buying anything.
Prioritize Thermostat Compatibility
A heat mat without a thermostat is like a car with no brakes — it’ll run until something goes wrong. Always check the Thermostat Power Rating before buying; your mat’s wattage must stay under the controller’s limit.
Control Mode Matching matters too — on/off thermostats work fine for heat mats.
Secure Thermostat Wiring Safety, place the probe correctly using basic Probe Calibration Tips, and you’ve got reliable temperature control.
Balance Budget With Safety
Safety doesn’t have to cost a fortune. The smartest move is treating your mat, thermostat, and thermometer as one system — Budget Control Units working together, not separate purchases.
Affordable Power Supplies and Energy-efficient Wiring in lower-wattage pads keep energy efficiency high without sacrifice. Safe Low-cost Gear, paired with a reliable thermostat beats an expensive mat running unchecked.
Budget-friendly reptile heating solutions absolutely can be safe ones.
Choose The Best Starter Option
The best starter option pulls everything together: the right size, the right wattage, and thermostat compatibility. Choosing the right reptile heating pad means prioritizing Setup Simplicity and User Experience over flashy extras.
Factor in Long-term Cost, Warranty Coverage, and Brand Reputation — your Reptile Heating Pad Buyers Guide checklist. A reliable, budget-friendly mat with a good thermostat wins every time.
Frequently Asked Questions (FAQs)
How to choose heating mat size for reptiles?
Want to get this right the first time? Match your heat mat to one-third of your terrarium’s floor space, not the whole base, so your reptile can always find its preferred temperature zone.
Are heat mats worth it for seed starting?
Not really — reptile heat mats aren’t designed for seed starting. Dedicated seedling mats offer better temperature uniformity and germination speed.
For reptiles, stick to proper wattage and thermostat control for safe, consistent warmth.
Do reptile heating pads go in or under the tank?
Reptile heating pads go underneath the tank, not inside it. Attaching the undertank heater to the exterior glass bottom ensures proper heat transfer without burning your animal through direct contact.
Can I leave the heat mat on all the time?
Yes, you can leave it on 24/7 — but only with a thermostat.
Without one, the mat can hit 140°F and seriously hurt your snake.
Let the thermostat handle the temperature control automatically.
What temperature should a heat mat be for reptiles?
Most reptiles thrive with a target warm spot between 85–95°F.
Match the species temperature range, use thermostat calibration to stay within the safe upper limit, and maintain a proper gradient ratio for healthy thermal regulation.
Can heat mats be used with aquatic reptiles?
Heat mats work with aquatic reptiles, but placement matters.
Keep the mat outside the enclosure, choose a waterproof model, and always pair it with a thermostat to prevent dangerous hot spots near water.
How long do reptile heat mats typically last?
Most quality mats last 2 to 5 years. Mat Longevity depends heavily on thermostat use, Material Degradation from overheating, and Replacement Timing awareness.
Watch for Failure Warning Signs like uneven heat or discoloration.
Are heat mats safe for baby or juvenile reptiles?
They can be, but only with the right setup.
A temperature thermostat for reptiles is non-negotiable — without one, juvenile burn indicators appear quickly, and young reptiles can’t always move away in time.
Can two heat mats run in one enclosure?
Yes, two heat mats can run in one enclosure — but only with careful Dual Mat Wiring, proper Thermostat Channel Limits, and smart Power Load Management to maintain Heat Gradient Balance and guarantee overheating prevention.
Do heat mats work during winter or cold climates?
Think of a heat mat like a heated blanket — useful, but not enough alone when the house is freezing.
In cold climates, pair it with Cold-Weather Thermostats and strong Room Insulation for stable warmth.
Conclusion
Consider a bearded dragon’s thriving environment, thanks to a well-chosen reptile heat mat for beginners.
This essential tool helps maintain ideal temperatures, ensuring proper digestion and activity.
By selecting the right reptile heat mat for beginners, you’ll create a safe and healthy space for your pet to flourish, making it a key investment for any reptile owner.