This site is supported by our readers. We may earn a commission, at no cost to you, if you purchase through links.
A snake may look clean in the morning yet carry parasites by evening. Snake mites, often seen as pinhead-sized black specks, can crawl roughly 11 inches per minute and gather beneath scales, around the eyes, and near the vent.
Mites can spread quickly between animals and enclosures in your collection. Persistent, unusual soaking, restless movement, pale gums, or fine gray droppings may signal irritation before the infestation becomes severe.
Safe removal follows a deliberate order: confirm pests, isolate your snake, clear hiding places, then treat the snake and enclosure together. That sequence breaks the life cycle without exposing your snake to added risk.
Table Of Contents
- Key Takeaways
- Confirm The Snake Mite Infestation
- Isolate The Snake Immediately
- Strip and Simplify The Enclosure
- Deep-Clean Enclosure and Reusable Supplies
- Choose a Safe Mite Treatment
- Treat Snake and Enclosure Together
- Monitor Recovery and Prevent Reinfestation
- Frequently Asked Questions (FAQs)
- How do I get rid of snake mites?
- How do you treat snake mites without a vet visit?
- Can snake mites kill a snake?
- How long can you keep mites off a snake?
- Why is it important to treat a snake mite infestation early?
- How do you get rid of mite infestation?
- Does Dawn dish soap kill mites on snakes?
- How long does it take to get rid of reptile mites?
- What will eat snake mites?
- What are common snake mite treatment mistakes?
- Conclusion
Key Takeaways
- Confirm live, moving mites rather than debris, then isolate the affected snake immediately and treat every nearby reptile as exposed.
- Remove all substrate and porous decor, use clean paper towels and nonporous hides, and thoroughly clean, disinfect, rinse, and dry the enclosure and equipment.
- Use only veterinarian-approved, species-safe mite treatments as directed, protect the eyes and mouth, and treat the snake and enclosure together.
- Repeat treatment every 7–10 days for several cycles, inspect daily for mites and illness, and seek urgent veterinary care for weakness, pale oral tissues, dehydration, or breathing changes.
Confirm The Snake Mite Infestation
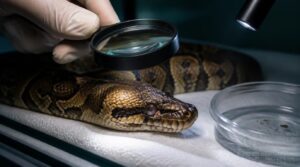
Before you can treat a mite problem, you need to know for certain that mites are what you’re dealing with. A few specific signs will tell you quickly whether your snake is affected and how serious things have gotten. Here’s what to look for.
Watch for unusual soaking, restless rubbing, or poor appetite—common behavioral signs of snake mites that may appear before you see them.
Tiny Black Dots and Movement
The first clue is usually movement. Snake mites (Ophionyssus natricis) look like tiny black dots about the size of a pinhead, and they don’t sit still. Adults can travel up to 11 inches per minute, which means you’ll often see them crawling along enclosure walls or floating in your water bowl. That movement is what separates mites from ordinary dirt.
Beyond movement, mites also leave behind droppings that resemble fine ash-colored dust, which is especially visible on darker-colored snakes.
Eyes, Vent, and Scale Folds
Once you’ve confirmed movement, look for where Ophionyssus natricis concentrates most. These mites favor specific vulnerable spots:
- Around the eye rims, where thin skin offers easy blood access
- The vent area, warm and folded, perfect for mite shelter
- Scale folds under the chin and belly, hidden beneath overlapping scales
- Shed skin, which often traps and reveals mite activity
Soaking and Restless Behavior
Behavior tells you what a physical inspection can miss. A snake spending unusual time soaking is trying to drown mites, and it works temporarily. Check the water for tiny black specks after soaking. Those are drowned mites.
Restlessness is the other signal. Constant pacing or climbing, especially when temperatures are normal, points to mite irritation rather than an environmental issue.
Irritation, Anemia, and Dehydration
Those behavioral clues often signal real physical damage underneath. Snake mites cause:
- Itching and irritation as bites pierce skin repeatedly
- Blood loss draining enough volume to trigger anemia
- Fluid loss worsening dehydration alongside blood drainage
- Pale appearance and lethargy as anemia progresses
- Sunken eyes and reduced elasticity from fluid loss
Nix and similar treatments work to target these effects directly.
Mites Versus Dirt or Debris
Tiny specks in your enclosure don’t automatically mean mites. Substrate particles, dried waste, and shed skin fragments can look strikingly similar.
The key difference is live mite movement. Place suspicious material on water and examine it under 20x magnification. Live mites move across the surface; static debris stays still.
Confirming this distinction before treatment prevents wasted effort and misdiagnosis.
Isolate The Snake Immediately
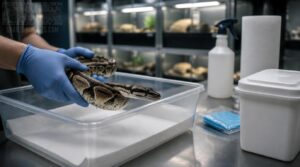
Once you’ve confirmed the infestation, your next move is containment — and it needs to happen right away. Mites spread faster than most keepers expect, and a single misstep can pull your other reptiles into the problem. Here’s what you should do the moment you suspect one of your snakes is affected.
Use a Separate Quarantine Room
The moment you confirm mites, move the snake into a completely separate room, not just a different enclosure. Mites can migrate between nearby setups, so physical distance matters.
Use paper towel substrate and make sure the room has its own ventilation, not shared with your main collection. Keep temperature and humidity stable, and limit entry to essential care only.
Handle Infested Reptiles Last
Your daily care order is one of the most effective yet overlooked biosecurity tools against mite spread.
- Healthy reptiles always come first
- Infested or quarantined animals always last
- Dedicated tools for infested enclosures only
- No shared equipment between setups
- Biosecurity handling order protects your entire collection
This quarantine sequence timing prevents cross-contamination from moving between enclosures, protecting every healthy animal.
Follow this reptile mite treatment schedule every 7–10 days to target newly hatched mites before they reproduce.
Wash Hands and Change Clothes
After handling an infested snake, your hands and clothing become active transfer routes for mites. Scrub with soap and warm running water for at least 20 seconds, working lather across the backs of your hands, between fingers, and under nails. Dry with a clean towel.
After washing up, reviewing safe snake handling techniques for beginners can help you build the calm, consistent routine your snake needs to truly feel secure.
Change clothes before returning to any healthy enclosure, since mites cling to fabric as easily as skin.
Check Every Nearby Reptile
If mites appear on one snake, treat every reptile in that room as already exposed. Inspect each animal carefully:
- Tiny moving dots near the eyes, nostrils, chin folds, and vent area
- Excessive soaking or restless rubbing against enclosure decor
- Mite eggs or larvae in substrate cracks and crevices
- Heat pits and tympanic membranes, which are preferred mite feeding sites
Contact a Reptile Veterinarian
A reptile vet should be your next call once you’ve confirmed exposure. Gather medical records and symptom notes before contacting the clinic, including appetite or shedding changes. Ask whether the staff treat reptiles regularly, and describe your enclosure setup and quarantine steps.
The Association of Reptile and Amphibian Veterinarians offers a Find a Vet tool if you need a specialist.
If your snake is already showing signs of aggression or stress behavior, finding an experienced reptile vet quickly can make a real difference.
Strip and Simplify The Enclosure

Once the snake is safely moved, the enclosure needs your full attention. Mites hide in every corner, so stripping things down to basics isn’t optional — it’s the reset that makes treatment actually work. Here’s exactly how to do it.
Remove and Bag All Substrate
As soon as you confirm an infestation, bag all substrate immediately before mites spread to other surfaces. Don’t leave bags sitting inside the room.
- Scoop substrate into a thick garbage bag
- Double-bag for added security against escape
- Seal tightly with knots or tape
- Remove bags from the building right away
Switch to paper towel substrate to easily spot surviving mites.
Discard Porous Hides and Decor
After bagging substrate, discard porous hides and decor. Branches, bark, lava rock, pumice, and unsealed ceramic contain mite hiding spots where eggs and nymphs survive deep cleaning, enclosure sanitation, and exposure. Seal them in double bags, take them outdoors, and never compost. These porous material risks undermine substrate replacement and invite reinfestation.
| Porous | Non-porous |
|---|---|
| Cork, wood | Plastic |
| Moss, cardboard | Glass |
Move Snake to Temporary Housing
Place your snake in a disinfected plastic tub before cleaning begins. Use a locking, ventilated lid, white paper lining, a clean water bowl, and one washable plastic hide.
- Prepare a separate quiet room.
- Maintain normal heat with a thermostat.
- Keep humidity species-appropriate.
- Carry the tub securely.
- Keep isolation equipment separate.
Install Fresh Paper Towel Substrate
After cleaning, line the dry enclosure with fresh paper towels, flat and gap-free across basking and resting areas. Nonporous paper substrate makes black mites and waste visible during enclosure monitoring.
| Check | Action |
|---|---|
| Placement | Full floor |
| Moisture | Keep dry |
| Hides | Smooth plastic |
Use smooth plastic hides. With gloves, remove, seal, and discard contaminated towels. This helps with biosecurity, natural reptile care, and proper cleaning compatibility.
Keep Heat and Humidity Stable
Use Thermal Regulation Methods and Temperature Monitoring Tools to maintain temperature 70–85°F. Apply Humidity Control Techniques and Moisture Retention Strategies to keep humidity 50–70% without wet paper towels. Good enclosure insulation tips reduce sudden swings.
Check substrate moisture control twice daily during enclosure monitoring. Stable conditions support recovery and make biosecurity measures easier, because stress and damp hiding places can complicate mite control.
Deep-Clean Enclosure and Reusable Supplies
A thorough cleaning removes mites and eggs that can remain after you discard the substrate. Work methodically, because missed crevices and contaminated equipment can restart the infestation. Use the following steps to clean the enclosure, reusable supplies, and nearby surfaces safely.
Scrub Every Surface Thoroughly
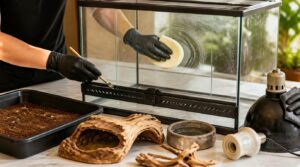
Scrub every surface thoroughly; mites exploit corners and crevices you can barely see. Keep the enclosure empty, then work methodically:
- Glass: hot, soapy water, soft sponge, circular strokes.
- Wood: lightly scrape angles, wipe damp, never soak.
- Fixtures: unplug; wipe heaters, dust lights dry.
Brush vents, seams, cage furniture, and water bowl. Dry decorations completely, and control substrate moisture before reassembly.
Disinfect Bowls, Hides, and Tools
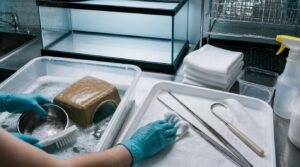
For environmental decontamination, disinfect bowls, nonporous hides, tongs, and hooks only after you scrub all surfaces with soapy water.
| Item | Disinfection protocol |
|---|---|
| Bowls and hides | Soak in diluted bleach for 10 minutes |
| Tools | Wipe thoroughly; disinfect tools weekly |
Rinse thoroughly after the bleach soak time, then dry completely. This helps life cycle interruption during quarantine procedure and chemical acaricide treatment.
Rinse Away Chemical Residue
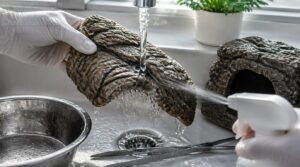
Rinse bowls, hides, and tools under running water, rotating each item so flow reaches seams, corners, and textured surfaces. A tub soak alone can leave loosened bleach, Nix, or spray residue behind.
Avoid soap, detergent, and produce washes. Repeat the rinse once, using distilled water in a spray bottle for narrow crevices, until all chemical film is carried away.
Dry Before Reassembly
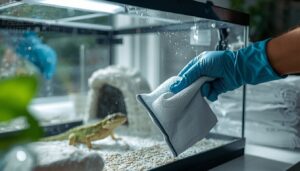
Complete surface dryness is mandatory before reassembly. After rinsing, remove water with towels or a squeegee, including corner and crevices.
Allow air drying time and ventilation before reassembly. Verify substrate dryness before adding paper towels, furnishings, and the water bowl. If insecticide was used, follow label timing. This moisture check matters during 7 days between 3 treatments, particularly after soaking.
Clean Surrounding Shelves and Equipment

Treat nearby surfaces as exposed. Remove unused materials, then use a spray bottle with diluted bleach on shelves, equipment exteriors, corner and crevices. Finish by wiping and drying thoroughly.
For Dusting Hard-to-Reach Surfaces, use dedicated tools, not enclosure supplies. Disinfecting Equipment Surfaces includes tubs used for soaking. Organizing Cleaning Tools prevents transfer. End by Inspecting Shelves Thoroughly before returning the snake.
Choose a Safe Mite Treatment
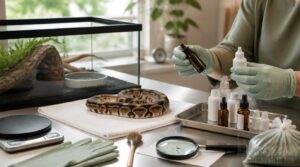
Once the enclosure is clean, choose a treatment that is effective without creating new risks for your snake. Product safety, species sensitivity, and correct application all matter, so don’t rely on a one-size-fits-all remedy. The following options can help you decide what is appropriate for your situation.
Veterinarian-Approved Topical Treatments
When mites are confirmed, ask your reptile veterinarian which topical protocol suits your snake. Selamectin may be applied to the dorsum at 6 mg/kg and provides residual protection. Veterinarian-diluted ivermectin spray can also work, but avoid eyes, mouth, and nostrils.
Betadine soaks support bitten skin, while olive oil removes visible mites. Enzyme sprays may treat the snake and enclosure. Don’t substitute Nix, distilled water, bleach, a spray bottle, or a tub for veterinary dosing guidance.
Permethrin Product Safety Precautions
Permethrin can support ectoparasite control, but only use a veterinarian-approved product exactly as its label directs. Wear gloves, protective clothing, and eye protection, then keep spray away from your snake’s eyes, mouth, nostrils, and water dish.
Prevent environmental release during your disinfection protocol. If exposure occurs, wash skin promptly, remove contaminated clothing, follow label first aid, and call Poison Control at 800-222-1222.
Ivermectin Benefits and Risks
After permethrin precautions, discuss ivermectin with a reptile veterinarian. Ivermectin dosage depends on species, body weight, health, and formulation; never adapt livestock or human products for ectoparasite control.
Ivermectin efficacy for snake mites may help, but it isn’t nontoxic treatment. Ivermectin safety depends on veterinary oversight. Ivermectin side effects include lethargy and neurologic toxicity. Follow Ivermectin warnings during parasitic infestation.
Predatory Mite Biological Control
For a nonchemical option, use biological control with predatory mites. Stratiolaelaps scimitus, formerly Hypoaspis miles, hunts snake-mite eggs, larvae, nymphs, and adults in substrate.
After cleaning, retain fresh substrate and sprinkle the carrier evenly. Keep reptile enclosures humid enough for activity, then monitor weekly. Predatory mites decline after prey disappears, so heavy infestations may require repeat releases.
Avoid Unproven Home Remedies
Skip oils, mouthwash baths, No-Pest strips, or full-strength permethrin: they can loosen scales, miss eggs, poison snakes, or delay care.
Soaks miss head mites and stress patients. Stratiolaelaps scimitus provides biological control after cleaning, within integrated pest management, not alone.
Because snake mites can develop acaricide resistance, your veterinarian should select species-safe treatment promptly for weak, young, or anorectic snakes.
Treat Snake and Enclosure Together
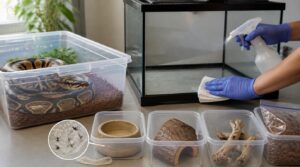
Treating only the snake or only the enclosure leaves part of the mite population behind. Your treatment plan must address every exposed reptile, its housing, and the timing of follow-up applications. Use the following steps to treat both safely and consistently.
Follow Exact Product Directions
Exact label directions protect your snake as much as they kill mites. Read the entire product label, confirm host-specific treatment, and measure concentrates with a calibrated syringe. For Nix, use only the stated dilution, 56 mL per gallon of distilled water.
Apply only to labeled surfaces, observe drying and isolation period requirements, and prevent residue buildup. Repeat precisely on schedule, then monitor for lethargy, twitching, respiratory changes, or skin irritation.
Avoid Eyes, Mouth, and Nostrils
Protect mucous membranes by keeping every topical product away from the eyes, mouth, nostrils, and heat pits. Apply sprays to a glove, tissue, or cotton swab first, then wipe the body only. Never spray the face.
For facial snake mites, use mineral oil on a Q-tip for careful manual removal. Stratiolaelaps scimitus, formerly Hypoaspis miles, provides biological pest control without facial chemical exposure.
Treat All Exposed Reptiles
Treat every reptile sharing the room, airspace, tools, or handling routine as exposed. Snake mites travel easily on hands, clothing, hooks, and enclosure supplies, so treating one visible host invites population rebound.
Treat every exposed reptile, because snake mites hitchhike on hands, clothing, tools, and enclosure supplies
Use a simultaneous treatment protocol for all exposed animals and habitats. Maintain shared equipment hygiene between enclosures. Host-specific treatment remains essential, while Stratiolaelaps scimitus predatory mites, formerly Hypoaspis miles, support broader environmental control.
Repeat Treatments on Schedule
Repeat Treatments on Schedule every 7–10 days, usually for three to four applications. Consistent application timing interrupts the mite life cycle before the rapid mite reproduction rate restores it.
- You’re breaking hidden hatchling cycles.
- You’re protecting every rehousing step.
- You’re improving repeat effectiveness.
- You’re maintaining prophylactic treatment control.
Severe cases may require 5–7-day treatment frequency for 4–6 weeks when needed.
Refresh Paper Towels Frequently
Change plain white paper towels daily, replacing soiled sections after soaking, feeding, or defecation. This prevents poor hygiene and makes tiny black dots and ashlike dust visible.
| When | Action |
|---|---|
| Daily | Inspect, replace towels |
| Wet | Replace immediately |
| Weekly | Full replacement |
| Nix treatment | Reapply solution as directed |
Dry Nix-treated towels fully; reapply solution only as directed. Never place snakes on damp chemicals.
Monitor Recovery and Prevent Reinfestation
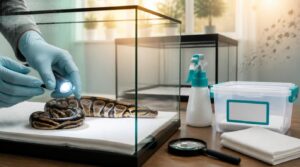
Successful treatment doesn’t end with the last application, because a few surviving mites can restart the cycle within days. You’ll need to monitor your snake closely while keeping its environment and handling routine controlled. Use the following checks to confirm recovery and reduce the risk of reinfestation.
Inspect Chin, Belly, and Vent
Use bright light and a hand lens for each daily inspection. Check the chin crease and throat fold for moving black or dark red dots, white flakes, or debris. Examine belly-scale overlaps and the vent closely, especially after soaking. Wipe these areas with a damp white paper towel.
Persistent rubbing, restlessness, or prolonged soaking warrants veterinary assessment.
Track Mites Between Treatments
After each inspection, update Mite Count Logs rather than relying on memory. Consistent Observation Timing, ideally daily and before scheduled treatment, shows whether snake mite populations are falling.
- Record mites on snake, substrate, or both.
- Use white paper towels for Substrate Contrast.
- Add Humidity Tracking and Behavior Notes.
Keep humidity 50–70% for predatory mites, and compare entries between treatments.
Watch for Veterinary Warning Signs
Your log should show steadily fewer mites. Seek veterinary care promptly for emergency weakness, heavy bleeding, bluish or white oral tissues, or sudden breathing distress.
Contact your reptile veterinarian within 24 hours for cloudy eyes, abnormal color, persistent vomiting or diarrhea, excessive drinking, anorexia in reptiles, or abrupt behavioral changes. These clinical signs can signal anemia, dehydration, secondary infection, or neurologic flags beyond dermatological symptoms.
Quarantine New Reptiles Properly
New arrivals can look healthy while carrying snake mites or hidden disease. House each reptile in a separate room, ideally a separate building, for 1–3 months.
Keep paper towels, one hide, water bowl, feeding tongs, and cleaning tools dedicated to that enclosure. Handle your established collection first, quarantine last, then wash hands and change clothes. Record source, arrival date, weight, feeding, sheds, droppings, lesions, and veterinary findings. Never quarantine in a bioactive terrarium.
Disinfect Secondhand Supplies Before Use
Even clean-looking secondhand equipment can carry mite contamination. Check material compatibility, discard porous wood or cork, then scrub hard surfaces before disinfection.
Follow a Bleach Soak Protocol only at the product-directed dilution, keep surfaces wet for the labeled contact time, rinse thoroughly, and air-dry completely. Never mix bleach with Nix or other chemicals. Store disinfected supplies sealed, dry, and away from wildcaught arrivals; include perimeter treatment when infestations recur.
Frequently Asked Questions (FAQs)
How do I get rid of snake mites?
Like pepper grains crawling across white paper, mites demand host-specific treatment: isolate, soak, use paper towels, clean contamination, control humidity, apply Nix only as directed, repeat for their life cycle, then monitor. Predatory mites can support control.
How do you treat snake mites without a vet visit?
Without a vet, quarantine, soak, and perform enclosure sanitization using paper-towel substrate. Apply diluted Nix permethrin only as labeled, never on snake; consider Stratiolaelaps scimitus predatory mites. Avoid carbaryl dusting and ivermectin alternatives without guidance.
Can snake mites kill a snake?
Yes. Untreated snake mites can kill through severe anemia, dehydration, disease transmission, and escalating reptile stress. Soaking, restlessness, weakness, or aggression need prompt veterinary ectoparasite management, predatory mites, and careful reptile husbandry for recovery safely.
How long can you keep mites off a snake?
Mites can survive up to three weeks off-host; keep them off indefinitely with ectoparasite management: three-week paper-towel substrate after treatment, daily 16–19-day monitoring, 90-day quarantine, disinfected supplies, and Stratiolaelaps scimitus at 50–70% humidity and 70–85°F.
Why is it important to treat a snake mite infestation early?
Early treatment of snake mites limits blood feeding, preventing anemia, minimizing discomfort, and reducing stress before cutaneous parasites cause lethargy. It helps reptile stress reduction, avoiding infection, stopping spread, Stratiolaelaps scimitus control, and lethargy assessment.
How do you get rid of mite infestation?
Prevention is better than cure: Get Rid of Mites Using NIX with veterinarian-directed host-specific treatment, Chemical Safety Measures, Enclosure Deep Cleaning; schedule Mite Treatment Frequency, Biological Control Options, Post-Treatment Monitoring, soaking, shed skin checks, and follow-ups.
Does Dawn dish soap kill mites on snakes?
Blue Dawn dish soap kills snake mites during soaking, but only those present. Use five drops, keep the head dry for 15–20 minutes, repeat weekly through mite life cycle; persistent tiny black dots need Nix.
Once the mites are gone, keep them from coming back by handling healthy snakes first and washing up between cages, as this snake mite prevention guide explains.
How long does it take to get rid of reptile mites?
Expect 2-6 weeks: treat snake mites every 7-14 days as eggs hatch and larvae, nymphs, adults emerge. Refresh substrate, clean repeatedly, monitor; quarantine alone won’t shorten control. Stratiolaelaps scimitus works in 50-70% humidity, 70-85°F conditions.
What will eat snake mites?
Arthropod predators, especially Stratiolaelaps scimitus and Taurrus (Cheyletus eruditus), eat snake mite eggs, larvae, nymphs, and adults. Taurrus reached 94% mortality within 48 hours. These biological-control mites coexist with springtails and isopods, reducing mite populations.
What are common snake mite treatment mistakes?
Like chasing shadows, mistakes let snake mites rebound: using unsafe products, skipping quarantine, leaving substrate, treating only snake, and ignoring rechecks.
Use host-specific treatment with residual efficacy, control fomite transmission, and investigate persistent soaking behavior.
Conclusion
Steady sanitation, scheduled treatment, and strict separation stop a snake mite infestation removal plan from becoming a recurring problem. Keep your snake on clean paper towels, inspect the chin and vent daily, and complete every scheduled treatment, even after visible mites disappear. If weakness, pale oral tissues, retained shed, or ongoing mites persist, seek reptile veterinary care promptly.
Consistency breaks the cycle.
A clean enclosure and careful quarantine protect every animal in your collection today.