This site is supported by our readers. We may earn a commission, at no cost to you, if you purchase through links.

A store-bought tank buys you convenience. It rarely buys you the right fit, and for a snake, fit is survival, not decor. Too small, and your snake can’t stretch out to thermoregulate properly. Too large, with weak seams or gaps around the doors, and you’re chasing humidity swings or patching escape routes for years.
Before you start cutting panels, it helps to match your terrarium size to your snake’s species and adult length, so the enclosure still works as your snake grows.
Building your own solves both problems at once. Knowing how to build a snake terrarium means you control the dimensions, the materials, and the seal quality from day one, no compromises baked in by a factory template.
Grab your measuring tape. Let’s get your snake a home built to last.
Table Of Contents
- Key Takeaways
- Plan Your Snake Terrarium Size and Layout
- Choose Safe Materials, Tools, and Hardware
- How to Build a Snake Terrarium
- Set Up Heat, Humidity, and Enrichment
- Test, Maintain, and Troubleshoot Your Terrarium
- Frequently Asked Questions (FAQs)
- Is it cheaper to buy or build a reptile enclosure?
- What do you need for a snake terrarium?
- What is the best terrarium for snakes?
- Can you put a snake in a terrarium?
- What is the best material for a snake terrarium?
- What do you need to build a snake enclosure?
- How do you make a good snake habitat?
- What is the minimum cage size for a snake?
- What size tank does my snake need?
- How often should I clean the terrarium?
- Conclusion
Key Takeaways
- Size your enclosure for your snake’s full adult length (roughly double it), not its current hatchling size, since undersized tanks stall growth and stress your snake out.
- Choose HDPE over wood, glass, or PVC when you can, since it resists warping, holds up to moisture, and stays durable for 20+ years despite the higher upfront cost.
- Build in a proper thermal gradient (85-95°F basking down to 75-80°F cool zone) and back it with a thermostat, thermal fuse, and emergency heat plan, since inconsistent temps directly threaten your snake’s health.
- Seal every joint with aquarium-grade silicone and secure doors with multipoint locks and tamper-resistant hardware, since even a small gap is all a determined snake needs to escape.
Plan Your Snake Terrarium Size and Layout
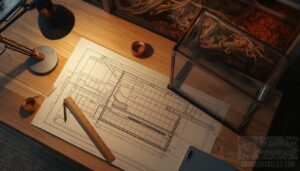
Every successful terrarium starts on paper, not in the workshop. Get the size and layout wrong, and you’ll be rebuilding within a year as your snake outgrows its space. Here’s what to nail down before you cut a single panel.
Measuring your snake’s expected adult length now, rather than guessing later, is the key step this guide to building snake terrariums walks you through first.
Size for Species and Adult Length
A handful of inches decides everything. Buy for the snake it’ll become, not the hatchling in your hands.
Ball pythons top out near 36 inches, kingsnakes reach 6 feet. Juveniles grow fast, hitting half to three-quarters of adult length within a year.
Enclosure length should double adult size, so guesswork now means costly upgrades later.
Plan Terrestrial or Arboreal Space
Now ask what your snake actually does with its day. Climbers need vertical climbing structures reaching full height, smooth bark, sturdy branches. Ground dwellers want horizontal floor space and low hides.
- Arboreal setups: branches, cork rounds, climbing vines
- Terrestrial setups: broad floors, ground-level hides
- Substrate suitability: matched to species moisture needs
- Escape-proof construction: sealed joints, secure lids
Map Warm and Cool Zones
Snakes don’t thermoregulate by guesswork, they move between zones you build for them. Place your heat source under one end, creating a basking area 5-15°F above ambient. Aim for a 12-15°F thermal gradient. Map it with multiple probes at floor, mid-cage, and basking height, then verify with a thermostat before moving your snake in.
This mimics how reptiles in the wild rely on different climate types and characteristics to regulate their body temperature naturally.
House Each Snake Separately
That gradient you just mapped only works for one snake at a time. Two pythons in one tank means fighting over basking spots, mismatched humidity needs, and stress that suppresses appetite.
House them separately: one enclosure, one animal. You’ll control climate precisely, avoid feeding competition, and cut disease transmission risk between individuals, no exceptions, even for "compatible" species.
Compare DIY and Commercial Costs
Money decides a lot here. DIY construction runs $60 to $180 in materials, plus 6 to 20 hours of labor time value. Commercial upfront cost hits $150 to $900.
But maintenance cost parity kicks in fast: both need ongoing upkeep, and commercial warranties (1 to 5 years) offset some risk DIY builds don’t cover.
Choose Safe Materials, Tools, and Hardware
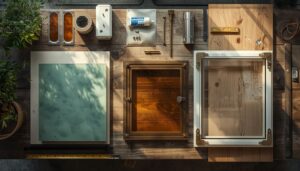
Your enclosure’s size means nothing if the materials behind it can’t hold up. The wrong panel, seal, or latch invites warped wood, escaped snakes, or a humidity crash overnight. Here’s what actually holds up under reptile conditions—and what to grab before you pick up a single tool.
Compare Wood, PVC, and HDPE
Pick the wrong panel material, and you’ll be rebuilding your enclosure within a year.
The right material also keeps humidity stable across both zones, which matters just as much for supporting your snake through a smooth shed as it does for temperature control.
Wood insulates well but warps under humidity without sealing.
PVC resists moisture and bonds easily with silicone, though it’s heavier than the alternative.
HDPE wins on weight handling, thermal stability, and cleanability, resisting stains for 20+ years with zero warping. It costs more, but you won’t replace it.
Select Glass or Acrylic Panels
Viewing panels day one, you’re choosing between two rivals with real tradeoffs.
- Glass: scratch-resistant, heavier, needs sturdier framing
- Acrylic: lighter, impact-resistant, prone to yellowing
- Thickness matters: thin panels flex at corners
- UV stabilizers prevent acrylic discoloration over time
Glass costs less upfront but weighs more than PVC or HDPE panels. Acrylic cuts easier for custom shapes. Choose optical-grade thickness for true color and clean edge finishing.
Use Reptile-Safe Sealants
Every seam you seal is a joint your snake will test. Use 100% silicone labeled aquarium or vivarium safe: nontoxic, moisture-resistant, mold-resistant once cured.
| Type | Cure Time | Fumes |
|---|---|---|
| Neutral cure | 24-48 hrs | Low |
| Acetoxy | 24 hrs | Higher |
Choose aquarium-grade silicone, skip kitchen and bath brands, and let joints cure fully before contact.
Choose Escape-Proof Doors and Latches
A determined snake treats any gap as an invitation.
To a determined snake, every gap is an open invitation to escape
Choose multipoint locking doors engaging three to five points for uniform resistance, paired with reinforced strike plates. Latch placement matters: mount tamper-resistant latches where curious noses can’t reach. Add heavy-duty hinges with non-removable pins, recessed frames to limit gap manipulation, and corrosion-resistant screws throughout for lasting frame integrity.
Gather Essential Building Tools
Show up unprepared and you’ll waste hours mid-build. Grab a cordless drill (18V+), circular saw, jigsaw, and combination square for accurate cuts and 90-degree frames. A tape measure with metric markings keeps layouts precise.
Don’t skip safety gear: glasses, gloves, and a dust mask matter when cutting HDPE or plywood for your enclosure design.
How to Build a Snake Terrarium
You’ve got your materials picked out and your tools laid out on the workbench. Now comes the part where cutting lines and glue lines actually turn into a functional enclosure. Here’s the build process, broken down into five steps you’ll follow in order.
Cut Panels to Size
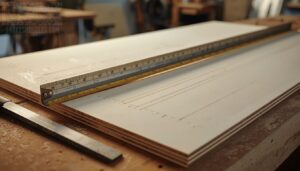
Before you touch a saw, measure twice. Account for kerf compensation (blade width) plus 1/16" sanding tolerance on every panel.
- Label each piece: name and finished dimension
- Deburr edges with a file
- Dry fit before assembly
Whether you’re cutting HDPE, melamine, or glass, precision here prevents crossflow ventilation gaps later.
Assemble The Frame and Base
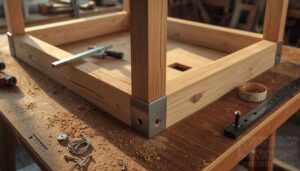
With panels cut and labeled, build the frame first. Use 2×4 HDPE or timber sections, square corners with metal brackets, and check level with feet installed.
Strengthen every joint before adding the base deck. Anchor plywood to frame rails, plan vent gaps now, and keep your drill, clamps, and square within reach for fast, accurate assembly.
Seal Joints Against Moisture
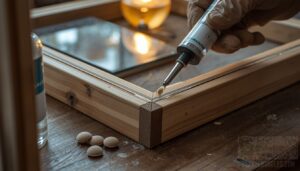
Frame secured, now stop moisture before it starts. Wipe every joint with isopropyl alcohol, then apply aquarium-grade silicone or marine-grade polyurethane, non-toxic and flexible down to minus 50°F.
- Corners pre-filled to avoid air pockets
- Neutral-cure formula for low odor
- Smooth beads, no squeeze-out
- 24-hour initial cure
- Gentle press test before loading substrate
Let joints cure fully before ventilation work begins.
Add Ventilation and Cable Ports
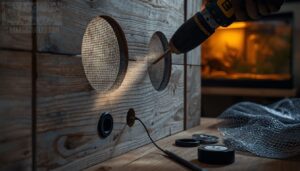
With joints cured, cut ventilation next. Place low intake vents on the cool side, high exhaust vents on the warm side, driving true cross-ventilation. Keep total openings at 2-4% of wall area, guarded with fine aluminum mesh.
Drill cable ports separately, sized for probes only, fitted with rubber grommets for escape-proof, snag-free routing.
Install Doors, Locks, and Fixtures
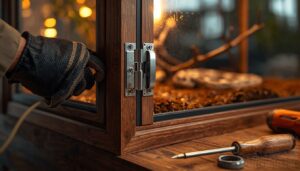
Escape artists deserve heavy-duty hinges: ball bearing types rated for your door’s weight, mounted with tamper-resistant screws into solid framing.
Check door latch alignment against the strike plate, then add overcenter latches for escape-proof seals. Snakes exploit any gap.
Finish with quick-release hardware for cleaning access, positioning cable grommet placement away from hinges. That combination locks down enclosure security completely.
Set Up Heat, Humidity, and Enrichment
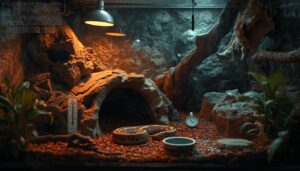
The empty enclosure is just a box until you get its climate right. This is where your snake’s health actually gets decided: temperature, moisture, and a little enrichment to keep it from getting bored. Here’s how to dial in each piece, step by step.
Install Thermostat-Controlled Heat Sources
A thermostat is your terrarium’s brain: it switches heat sources on and off, keeping temps stable and safe.
- Place probes at basking height
- Match wattage to your thermostat
- Install a thermal fuse as backup
Wire everything through a grounded strip, away from water. Calibrate monthly. Skip this, and you’re gambling with your snake’s life.
Set Warm and Cool Zones
Picture two neighborhoods in one enclosure, hot and cool, with your snake commuting between them.
Run a thermal gradient of 85–95°F basking down to 75–80°F cool zone, a 15–20°F spread minimum.
| Zone | Temp Range | Placement |
|---|---|---|
| Basking | 85–95°F | One side, elevated |
| Cool | 75–80°F | Opposite side |
| Shift | Gradient | Center |
Position hides in both zones. Watch behavior: refusal to move signals trouble.
Balance Humidity and Ventilation
Too humid, and mold creeps in. Too dry, and shedding fails.
Match ventilation to your species: ball pythons want 60-80% humidity, corn snakes tolerate 30-70%. Screen tops release moisture fast, so cover 20-30% if readings run low, or open more if condensation collects on glass.
Check your hygrometer weekly. Adjust misting, never ventilation, when leaks or standing water are the real culprit.
Add Substrate, Hides, and Enrichment
A bare enclosure breeds stress. Add 2-4 inches of substrate for burrowing, coco fiber for moisture retention, aspen for easy spot-cleaning.
Place hides at both temperature zones, one warm, one cool, so your snake never sacrifices security for comfort. Add hollow logs and branches ≥1.5 inches thick for climbing.
Pothos or spider plants round out naturalistic, enrichment-rich decor.
Install Species-Appropriate Lighting and UVB
Snakes don’t need sunbathing, but many still need UVB to process calcium properly. Mount UV bulbs 20-35cm above the basking spot, synced with your heat source for a matching gradient.
- Match UV Index to species needs
- Measure output with a UV meter
- Replace bulbs every 6-12 months
Never enclose UVB behind glass, it blocks output entirely.
Test, Maintain, and Troubleshoot Your Terrarium
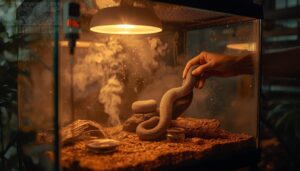
Your terrarium’s built and running, but the job isn’t done yet. A few days of testing and observation now save you weeks of troubleshooting later. Here’s what to check before your snake ever moves in—and how to keep things running smoothly after.
Test Temperatures Before Moving In
Before your snake ever touches substrate, run the enclosure empty for 72 hours.
Verify baseline temps hit 78-82°F ambient, 88-92°F basking, 75-80°F cool side, a proper thermal gradient. Use digital thermometers plus a temperature gun for cross-checks, calibrate against a secondary sensor, and log readings every 15 minutes to confirm thermostat stability.
Check Ventilation, Gaps, and Latches
Temps mean nothing if your snake escapes through a gap. Check every seam, vent, and hinge before move-in day.
Vent placement matters: no gaps wider than 2mm. Confirm escapeproof latches hold under pressure, hinges sit flush, and tamperresistant screws are snug. For ventilated tub setups, verify the lid seals evenly. A secure, well-ventilated enclosure is your first line of defense.
Monitor Climate and Stress Behaviors
Latches don’t mean much if the climate inside keeps drifting. Track temperature and humidity at three points, twice daily, using microclimate logs to catch drift early.
Watch for stress indicators: head rubbing, wall circling, lethargy near feeding time. Pair behavioral observation with thermal checks: aggression during handling often traces back to inconsistent zones. A two-week log reveals patterns single readings miss.
Spot-Clean Daily; Deep-Clean Monthly
A clean logbook means nothing if waste sits in the enclosure. Spot-clean daily: remove feces, uneaten prey, and soiled substrate within 24 hours using enzymatic cleaners.
Wipe bowls and hides for residue daily.
Deep-clean monthly: scrub decor and panels with reptile-safe cleaners, replace substrate fully, and sanitize your tools after every session to stop bacterial buildup before it starts.
Plan for Heating Power Outages
Power fails, and your thermostat goes dark with it. That’s why every setup needs emergency heat sources: propane heaters (vented, CO detector nearby), plus a backup thermostat and charged power bank.
Check temps every 30 minutes with a battery thermometer. Set temperature monitoring alerts, test backup power monthly, and add thermal mass or insulation. If zones drop unsafely, relocate your snake immediately.
Frequently Asked Questions (FAQs)
Is it cheaper to buy or build a reptile enclosure?
For small to mid-sized snakes, buying usually wins on upfront cost. Large enclosures favor cost-effective building with PVC or HDPE, cutting long-term repair costs while giving you full control over ventilation and temperature gradient.
What do you need for a snake terrarium?
Funny how every setup starts the same list: a right-sized tank, thermostat-controlled heat pad, calibrated hygrometer, escape-proof lid, and species-matched substrate.
Get these five right, and everything else, hides, branches, water dishes, falls into place naturally.
What is the best terrarium for snakes?
There’s no single winner. The best setup depends on species: front-opening PVC or HDPE enclosures resist warping, hold humidity, and secure with escape-proof latches, giving you a stable temperature gradient, solid ventilation, and room for hiding spots.
Can you put a snake in a terrarium?
Yes, but "terrarium" isn’t just a glass box: it’s a full habitat setup matching your snake’s size and species needs. Get the enclosure suitability wrong, and you’re risking escape, illness, or stress instead of a safe home.
What is the best material for a snake terrarium?
HDPE wins on durability, moisture resistance, and thermal insulation, resisting warps for 20+ years. Wood with glass panels adds visual clarity but needs sealing. HDPE costs more upfront but cuts long-term maintenance and boosts escape prevention.
What do you need to build a snake enclosure?
Gather a moisture-resistant frame, glass or acrylic panels, substrate like aspen or coconut fiber, a thermostat-controlled heater, secure latches, ventilation mesh, hides, a shallow water bowl, enrichment decor, plus a drill, screws, and reptile-safe silicone.
How do you make a good snake habitat?
A good habitat balances a temperature gradient (warm basking spot to cool zone), correct humidity, moisture-retaining substrate, two placed hides, secure ventilation, and a stable water bowl, all fitted inside a properly sized, escape-proof enclosure.
What is the minimum cage size for a snake?
Picture a four-foot corn snake stuck in a 20-gallon tank: no room to stretch, constant stress. Minimum enclosure length should match body length, width one-third to half that, height enough for movement and a proper temperature gradient.
What size tank does my snake need?
Match tank size to your snake’s adult length, not its current size. Ball pythons and corn snakes need 40-60 gallons; account for width, temperature gradient, and basking area, since cramped enclosures stall growth and raise stress.
How often should I clean the terrarium?
Spot-clean daily, pulling waste within minutes. Deep-clean every 4 to 6 weeks, sanitizing hides and swapping 2 to 4 inches of substrate. Shedding snakelings need spot cleans every 2 days to curb moisture and bacteria buildup.
Conclusion
A herpetoculturist once measured a wild rat snake’s basking log and found it matched what factory tanks rarely offer: room to actually live. That’s the real difference here.
Every panel you cut and every seam you seal while learning how to build a snake terrarium becomes a decision your snake benefits from daily. You’re not assembling a box. You’re engineering a habitat that holds heat, humidity, and safety exactly where they belong.
Trust your work, and let your snake settle in.