This site is supported by our readers. We may earn a commission, at no cost to you, if you purchase through links.

A snake that escapes isn’t just loose. It’s stressed, potentially injured, and a crisis you could have prevented with better planning upfront. Most keepers discover the gaps in their setup only after something goes wrong, which is exactly the wrong time to learn about substrate gaps, flimsy latches, or poorly placed vents.
Solid snake cage design plans account for your species’ adult size, movement patterns, and thermal needs before a single panel gets cut. Get those specs right, and everything else, from material selection to escape-testing, becomes a straightforward build you can trust completely.
Table Of Contents
- Key Takeaways
- Create Species-Specific Snake Cage Design Plans
- Choose Safe Snake Cage Materials and Hardware
- Build, Ventilate, and Seal The Enclosure
- Install Heating, Lighting, and Automated Monitoring
- Escape-Test, Furnish, and Maintain Your Snake Cage
- Frequently Asked Questions (FAQs)
- How to make a homemade snake enclosure?
- What type of wood is best for building snake enclosures?
- What are the recommended dimensions for a snake enclosure?
- What are the legal requirements for snake cages?
- What is a DIY snake cage enclosure?
- How to make a snake cage?
- How to build a snake enclosure?
- What materials do you need for a snake cage?
- Can you use wire mesh in a snake cage?
- How to build a reptile cage?
- Conclusion
Key Takeaways
- Design your enclosure around your snake’s adult size and behavior first—terrestrial species need broad horizontal layouts with deep substrate, while arboreal species need vertical builds with multiple perches.
- Use only nontoxic, corrosion-resistant materials like UV-stabilized acrylic, marine-grade plywood, and stainless steel hardware, with redundant escape-proof latches on every door.
- Cross-ventilation and waterproof sealing are critical execution steps: target 6–12 air changes per hour with balanced vent placement, and seal every joint with aquarium-safe silicone, curing a full 7 days before pressure-testing.
- Automate climate control with independent thermostats, 5–6% UVB on a strict 12h light/dark cycle, and sensor-based monitoring that alerts you to deviations, then escape-test every seam and keep a consistent daily-to-monthly maintenance schedule.
Create Species-Specific Snake Cage Design Plans
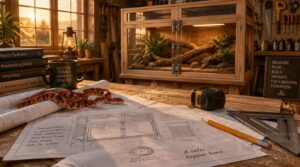
Your snake’s species isn’t a detail—it’s the blueprint. Adult size, movement style, and habitat needs determine every dimension before you cut a single board. Here’s what to nail down first.
Thinking ahead to your snake’s full adult dimensions—not just where it is now—will save you a costly rebuild later, so it’s worth reviewing proper housing for snakes at every growth stage before you finalize any measurements.
Adult Size Requirements
Before you lock in your snake cage design plans, get the adult size right. Most colubrid females need enclosure dimensions at 1.5 to 2 times their stretched body length, often 3 to 6 feet.
Robust-bodied pythons demand extra width and height.
Nail this first, because escapeproof latches and secure sturdy construction only matter if the space actually fits your snake.
Terrestrial Versus Arboreal Layouts
Once you’ve nailed the dimensions, layout type shapes everything else.
Horizontal layouts suit burrowing snakes: broad footprint, 5-10 cm substrate depth, and thermally distinct zones spread across the base. Vertical builds are made for arboreal species.
Climbing snakes need multiple perches at 50-150 cm heights, spaced 15-25 cm apart, with textured surfaces for grip. Match the build to the behavior.
For a deeper look at how enclosure dimensions affect climbing behavior and enrichment planning, snake enclosure size and habitat setup guidelines can help you match your setup to your species’ natural movement patterns.
Access and Furniture Integration
Once your layout’s set, access and furniture placement makes or breaks daily care.
Position your central access door 45 cm above substrate to avoid tail snags. Escape-proof latches with auto-lock handle security.
Corner-mount custom reptile furniture like driftwood with a built-in water channel to cut spills. Keep a 6 cm corridor between perches and substrate so your snake moves freely.
Choose Safe Snake Cage Materials and Hardware
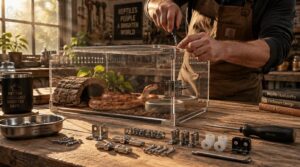
Once your dimensions are set, the materials you pick determine everything. Choose wrong, and you’re dealing with warped panels, rust, and a snake exploiting gaps.
Nontoxic materials are non-negotiable. Go with UV-stabilized acrylic or polycarbonate panels, BPA-free and corrosion-resistant. For substrate, use waterproof-sealed plywood or high-density fiberboard, termite-resistant and solvent-proof.
Your checklist:
- Marine-grade stainless steel hardware only, no plated metals that chip and rust
- Food-contact-grade plastics for surfaces touching water or waste
- Escapeproof latches with tamper-resistant action and redundant fasteners
- Nylon door guides for low-friction, full-door travel
Secure sturdy construction depends on every fastener working together. Structural integrity starts with pre-drilled holes near plastic edges and stainless self-tapping screws at every join. Snake escape prevention isn’t luck; it’s material discipline.
Snake escape prevention isn’t luck; it’s material discipline
Build, Ventilate, and Seal The Enclosure
Now it’s time to put everything together. Building a safe enclosure comes down to four key execution steps, and getting each one right means the difference between a secure habitat and a costly mistake. Here’s exactly what you need to do.
Frame and Panel Assembly

Solid snake cage design plans live or die at the frame. Start with aluminum extrusion for rock-solid joints at every single corner.
Dry-fit everything first, then seat gaskets before final panel seating. Add cross-members every 300-450 mm to kill panel sag. Frame and panel assembly done right keeps your DIY snake cage square, tight, and built for secure sturdy construction.
Doors, Tracks, and Locks

For genuine snake escape prevention, your door system’s the frontline. Bottom-aligned brass tracks with mushroom-head rollers handle enclosure flex without any binding.
On your secure latches, go dual: magnetic latch plus a deadbolt. Hook-and-eye latches suit basic setups, but cam-locks resist prying and give fast 90-degree access. Good enclosure security never compromises enclosure ventilation, so always seal door edges precisely.
Cross-Ventilation Placement
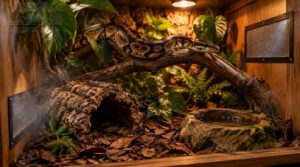
Most snake respiratory infections trace back to stagnant air. That’s why cross-ventilation placement is one of the most critical decisions in your reptile cage design plans.
Target 6-12 air changes per hour for strong enclosure ventilation. Place vents in the lower third for terrestrial species, mid-wall for arboreal. Balanced side intakes with two opposite outlets prevent drafts stressing your snake.
Waterproof Sealing and Curing
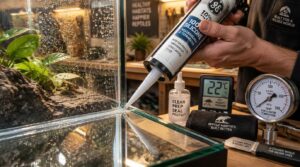
What kills a solid build faster than anything? Moisture. Waterproof sealing every joint with aquarium-safe silicone on each glass panel is non-negotiable.
- Apply nontoxic sealants in one continuous bead with no gaps
- Cure at 18-25°C for the full curing time of 7 days
- Pressure-test at 5-10 psi before adding any furnishings
Don’t skip this step. Leaks mean starting over completely.
Install Heating, Lighting, and Automated Monitoring

Think of your cage’s climate as a living system. Radiant heat panels beneath the substrate deliver surface temps of 28–32°C, while independent thermostats keep each zone within ±2°C of your setpoint. That’s temperature control, no guesswork. For precise placement and zone mapping, this reptile temperature gradient setup and measurement guide walks you through calibrating your panels to hit those target ranges consistently.
Layer your lighting next. Full-spectrum UVB at 5–6% positioned 25–30 cm from the basking surface hits the sweet spot for UV-dependent species. Run a strict 12h light/12h dark cycle, and drop nighttime light below 0.5 lux. Use high-CRI LEDs to render your thermometers accurately.
Now automate it. Sensor technology in automated reptile enclosures logs temp, humidity, and photoperiod every five minutes. Your climate control hub sends mobile alerts if any reading deviates more than 3°C for fifteen minutes. That’s reptile monitoring that never sleeps.
Pair your hub with a dedicated reptile temp humidity monitor to get granular, real-time readings across every zone without gaps.
Escape-Test, Furnish, and Maintain Your Snake Cage
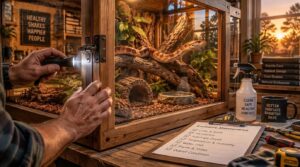
Your build means nothing if it can’t hold. Before you add a single branch, run your escapeproofing check: press firmly along every seam, test each corner, and simulate pawing at gaps. If your animal retreats rather than escapes within 60 seconds, you’ve nailed it.
Now furnish smart. Arboreal species need vertical climbs spaced 2-4 cm apart. Terrestrial setups need floor-to-wall transitions within 1-2 cm tolerances. Use secure latches with double-lock catches on every door panel. Environmental enrichment isn’t optional; it actively reduces stress-driven escape attempts.
Lock in a tight enclosure maintenance schedule. Daily visual checks, weekly sanitation, deep substrate cleaning every month or two. Snake hygiene keeps your animal healthy and your setup reliable. Stay consistent, and stay in control.
Frequently Asked Questions (FAQs)
How to make a homemade snake enclosure?
Picture a fortress your reptile can’t escape. Start with solid reptile cage design plans, cut your panels, drill proper ventilation holes, attach secure latches, and finish with waterproof sealing. Your DIY builds can nail this.
What type of wood is best for building snake enclosures?
Wood choice matters more than most people realize in reptile husbandry. Marine-grade plywood resists humidity and sustained heat cycling without warping, making it far more reliable than high-pressure particleboard inside any typical snake enclosure build.
What are the recommended dimensions for a snake enclosure?
Like a fitted suit, your snake enclosure needs exact proportions: length at 5–2× body length, width 5–75×, height 5–1×. Locking in those precise measurements makes your DIY snake cage truly escape-proof and helps with temperature control.
What are the legal requirements for snake cages?
Ever wondered if your DIY snake cage is actually legal? Germany requires escape-proof enclosure security, secure ventilation, and welfare-compliant furnishings. Keep acquisition records ready, because inspections happen regularly and reptile safety standards must be met.
What is a DIY snake cage enclosure?
Why settle for a basic pet store tank? A DIY snake cage is a custom-built snake enclosure made from nontoxic materials, featuring proper ventilation and secure latches, sized precisely to fit your snake’s exact needs.
Whether you’re building a single enclosure or a stackable setup, these custom snake habitat plans walk you through every build, from budget-friendly designs to naturalistic layouts.
How to make a snake cage?
Sure, grab some wood and call it done. For a real DIY snake cage, measure your snake first, cut panels to size, drill ventilation holes, seal all joints, and use secure latches so nothing escapes.
How to build a snake enclosure?
You don’t need pro carpentry skills for custom vivarium building. Cut and assemble nontoxic materials into your DIY snake cage frame, drill proper ventilation holes on opposite walls, seal every seam, and install secure latches.
What materials do you need for a snake cage?
Gather marine-grade plywood for the frame, tempered glass panels or acrylic for visibility, stainless steel screws, secure latches, hinges, a drill, router, tape measure, and non-toxic silicone sealant for ventilation and seams.
Can you use wire mesh in a snake cage?
Yes, but carefully. Take my friend’s boa: powder-coated mesh sides gave airflow, yet an unsealed edge scraped her scales.
Use stainless steel or powder-coated wire mesh, smooth every joint, pick gaps smaller than the head, add secure latches, and stay escape-proof.
How to build a reptile cage?
Build your reptile enclosure design around PVC or sealed plywood, add cross-ventilation vents high and low, install secure latches, then layer in substrate, thermostated heat, hides, and monitors for true reptile safety.
Conclusion
Take the keeper whose boa pushed past a loose latch at midnight. That single oversight cost a frantic search and a stressed snake.
Your snake cage design plans prevent exactly that. Plan for adult size, seal every seam, test every door. Then stop worrying. When the build is solid, you don’t hope your enclosure holds. You know it does. Build it right once, and enjoy your snake for years.