This site is supported by our readers. We may earn a commission, at no cost to you, if you purchase through links.

A snake that won’t stop rubbing its nose on the glass isn’t being stubborn. It’s stressed, and it’s telling you the enclosure feels wide open and unsafe.
Snakes evolved in burrows, leaf litter, and rock crevices, tight spaces where predators couldn’t reach them. Without that same sense of cover, they stop eating, hide their heads in water bowls, or pace the tank for hours.
Building snake hide boxes fixes this at the root. Get the measurements, materials, and entrance sizing right, and you’ll give your snake a spot that feels like home instead of a hazard.
Table Of Contents
- Key Takeaways
- Plan Safe, Snug Snake Hide Boxes
- Build Plastic or Wooden Hide Boxes
- Build a Paper Mache Snake Hide
- Top 5 Snake Hide Supplies
- Frequently Asked Questions (FAQs)
- How to make a homemade snake hide?
- Do snakes prefer vertical or horizontal enclosures?
- What is the best material to build a snake enclosure?
- How to make a shed box for a snake?
- How often should snake hide boxes be replaced?
- Can multiple snakes share the same hide box?
- How many hide boxes does one snake need?
- Should hide boxes have ventilation holes or openings?
- How often should snake hides be sanitized?
- What signs indicate a snake dislikes its hide?
- Conclusion
Key Takeaways
- Size your snake’s hide to its body, not guesswork—colubrids need 1.5 times their girth, boas want their length plus 6 inches, and pythons do well with about 2/3 of their total length.
- Give your snake two hides, one warm and one cool, placed on opposite ends of the enclosure so it can regulate its temperature without ever leaving cover. Once the hides are in place, you can add climbing branches and fake foliage, and these snake tank decoration ideas show how to do it without crowding the cover your snake relies on. Snug hides matter more than size, so a tight fit that lets your snake press against the walls beats a roomy cave, and these reptile habitat decoration ideas can help you style the rest of the setup. If you’re still choosing hides, these best caves for corn snakes are worth a look for finding a snug, matching pair.
- Skip cedar and pine when building or buying a hide, since their oils irritate a snake’s skin and airways—stick with safer woods like aspen, poplar, or birch.
- Watch for warning signs like constant repositioning, hissing near the entrance, or refusing to settle, since these all mean your snake’s hide doesn’t feel safe yet.
If you’re still figuring out which style works best, browsing hide boxes designed for shy or nervous snakes can help you find options sized and shaped to make even the most anxious snake feel secure.
Plan Safe, Snug Snake Hide Boxes

A good hide box isn’t just a box, it’s your snake’s safe zone. Get the size, entrance, and materials wrong, and your snake will feel exposed instead of secure. Here’s what you need to know before you build or buy one.
Choosing the right hiding boxes that offer security and comfort can make the difference between a snake that thrives and one that stays constantly stressed.
A hide box is your snake’s safe zone—get the size, entrance, or materials wrong, and safety turns into exposure
Measure Your Snake’s Body
Grab a flexible tape and measure snout-to-vent length while your snake relaxes and straightens. Take two readings and average them for accuracy.
Check body girth and weight too. Wrap a string around the midsection, then weigh your snake on a digital scale for tracking growth rate over time.
Measure post-shed, never after a meal, in a quiet space.
For accurate results, consider using the ball of yarn method to accommodate body curvature during measurement ball of yarn method.
Choose Species-Appropriate Dimensions
Once you know your snake’s measurements, dimensions come next. Match the hide to body type: colubrids need 1.5 times their girth in width, boas want length plus 6 inches of clearance, and pythons do well with hides at 2/3 body length. Elongated species fit best in cylindrical hides. Juveniles get 60-70% of adult sizing.
- Colubrids: 1.5x girth width
- Boas: length + 6 inches
- Pythons: 2/3 total length
- Juveniles: 60-70% adult size
- Elongated bodies: cylindrical fit
Size The Entrance Correctly
Body dimensions set the box, but the doorway makes or breaks it. Aim for 1 to 1.25 times body width so your snake glides in naturally. Round or oval openings suit most species best. Smooth all edges to stop scale snagging. Keep the opening snug, not tight, to hold humidity and block drafts from reaching your snake’s resting spot.
Provide Warm and Cool Hides
One doorway isn’t enough. Your snake needs two hides, one warm and one cool, placed on opposite ends of the enclosure for a proper thermal gradient.
The warm side aids digestion; the cool side controls overheating.
- Keep both entrances snug and safe
- Use light, low-retention material for cool hides
- Line with moisture-holding substrate for humidity control
- Position both for easy observation access
Avoid Cedar and Pine
Skip cedar and pine entirely. Both release aromatic oils that irritate a snake’s respiratory system and skin, especially during shedding.
Instead, opt for sealed, moisture-resistant plywood when building your enclosure—this guide to budget-friendly snake habitat construction walks through safe wood choices and proper sealant application.
Pine’s phenols and cedar’s essential oils can trigger allergic reactions too. Choose safer wood alternatives instead: maple, poplar, aspen, birch, or rubberwood. These low-resin hardwoods won’t off-gas or compromise air quality inside the hide.
Build Plastic or Wooden Hide Boxes
Now it’s time to build. You’ve got two solid options: a plastic tub or a wooden box, each with its own tools and steps. Here’s exactly how to put one together, start to finish.
Cut an Opaque Plastic Tub
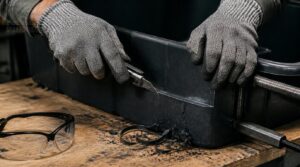
A sixteen-quart opaque tub, cut right, becomes a snug, dark den your snake will love. Pick high density polyethylene, 4-8mm thick.
Gear up: cut-resistant gloves, eye protection, clamps to hold it steady. Mark your line, score with a utility knife, then snap along thin walls. Cool the plastic before handling, rinse away debris, and check the lid still latches tight.
Smooth Every Entrance Edge
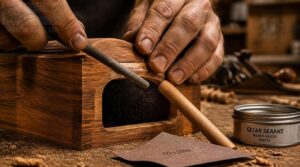
After cutting, rough edges can shred delicate scales. Bevel the rim to 45 degrees with a rounded file, then finish with 400-600 grit sandpaper until burrs disappear.
Run your finger around the opening to check for snags. Add a thin coat of reptile-safe sealant, let it cure, then test by sliding a smooth rod through the entrance.
Assemble Exterior-Grade Plywood
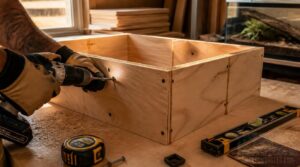
Wood beats plastic for keepers who want a sturdier, more natural-looking hide. Use exterior-grade plywood bonded with phenol formaldehyde adhesive for real moisture resistance.
Fasten panels with corrosion-resistant screws, driving primer beneath each hole to block water at the joint. Leave small expansion gaps between panels. Prep the substrate first: clean, level, and dry surfaces bond better and last longer outdoors.
Seal Wood Against Moisture
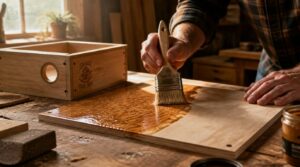
Bare plywood soaks up moisture fast, so seal it before it ever meets humidity. Clean and lightly sand the surface first, then apply a hybrid waterborne-oil sealant with a natural bristle brush.
Thin coats cure in hours; let each dry fully before recoating. Choose a UV-resistant formula if the hide sits near a window or heat lamp, since sunlight breaks down unprotected finishes over time.
Add Humidity-Holding Substrate
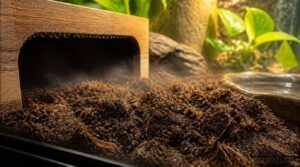
A sealed box still needs the right floor to breathe humidity into your snake’s hide.
Layer coconut fiber or a chunky cypress mix 3 to 4 inches deep for stable Moisture Retention without sogginess. This depth prevents mold while smoothing out the enclosure’s Humidity Stability. Deeper beds hold water longer, easing the daily microclimate around your hide.
Build a Paper Mache Snake Hide
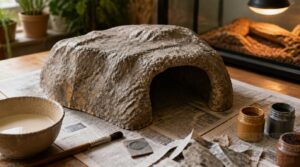
Want a hide that looks like real stone without the weight or cost? Paper mache lets you sculpt a custom rock hide using simple craft materials. Here’s how to build one from start to finish, five steps at a time.
Mold The Tinfoil Base
Grab a bowl and press your foil into it, forming a curved shell that becomes your hide’s shape. This tinfoil molding process builds a lightweight base with fewer air pockets. Cut the door hole now, before taping.
Foil base preparation matters: smooth surfaces reduce sticking later, and firm pressing improves substrate adhesion for the paper mache steps ahead.
Reinforce With Masking Tape
Once your foil shell holds its shape, tape locks it in place. Wipe away dust first, then apply strips in overlapping layers across seams and corners for joint reinforcement.
- Straight, clean entrance edges
- Smooth panel transitions
- Cross-taped corners for strength
- No wrinkles or peeling flaps
Let it set briefly, then remove residue before adding tissue paper.
Apply Tissue Paper Layers
With tape secured, mix white glue and water at a 1:1 ratio. Brush a thin coat onto the shell, then press small tissue strips flat, working out trapped air bubbles as you go.
Let sheets overlap slightly at the edges. Light wrinkling adds texture, but keep it minor to avoid tearing. Dry 6 to 12 hours; a fan speeds things up.
Add Paper Clay Texture
Once the tissue layer dries, apply store-bought paper clay to the top surface only, leaving the interior bare. Skip the DIY route; homemade mixes raise safety concerns.
Now’s your chance to get creative: carve crevasses and cracks, press in rock patterns, or add depth relief for a natural look. Smooth high spots by hand. Air dry 12-24 hours, or bake at 170°F for 30-40 minutes, watching closely.
Paint, Seal, and Cure
Once the clay hardens, hand-paint with acrylic craft paint or use stone-textured spray paint for faster, textured coverage. Let paint dry fully before sealing.
Apply a hybrid polymer sealant to lock out moisture. Cure time depends on film thickness, thicker layers need longer. Let the hide air out 2-3 weeks before use, allowing solvents to fully clear.
Top 5 Snake Hide Supplies
You don’t need a workshop full of tools to build a solid snake hide. A few reliable supplies cover both the plastic tub and paper mache builds from start to finish. Here are five products worth having on hand before you start cutting, taping, or molding.
1. OMEM Reptile Hideout Box
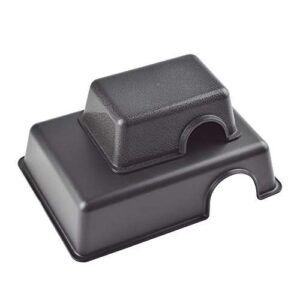
Not every keeper wants to build a hide from scratch, and that’s fine. The OMEM Reptile Hideout Box offers a ready-made option in Small (6.1 x 4.3 x 2.2 inches) and Medium (9.4 x 6.7 x 2.4 inches) sizes. Its textured plastic gives hatchling ball pythons and leopard geckos secure grip, while rounded entrances protect delicate scales.
Double-check measurements before buying, since sizing can run smaller than labeled. For a low-cost, low-effort hide, it’s a solid pick.
| Best For | This hide is best for keepers of smaller reptiles, like hatchling ball pythons, leopard geckos, hognose snakes, and other small lizards or amphibians, who want an affordable, ready-made hiding spot for their terrarium or tub. |
|---|---|
| Material | Plastic |
| Primary Use | Ready-made hide |
| Ease Of Use | Very easy |
| Reusability | Reusable |
| Cleanup | Easy wipe-down |
| Price Tier | Budget |
| Additional Features |
|
- Textured plastic surface gives reptiles secure grip for climbing
- Rectangular shape offers strong privacy and security, making it great for reducing stress or supporting breeding setups
- Non-porous plastic is easy to clean and resists bacteria buildup
- Sizes tend to run smaller than labeled, so double-check dimensions before buying
- Limited interior space isn’t ideal for larger adult snakes or reptiles needing more room to move
- Some buyers have reported receiving the wrong size due to packaging or fulfillment mix-ups
2. Reynolds Aluminum Foil Roll
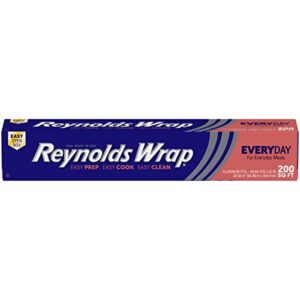
Foil forms the skeleton of your paper mache hide, and Reynolds Wrap’s 200-square-foot roll gives you plenty to work with. You’ll need three lengths, each about 8 feet long, layered side by side and folded into a rough 2′ x 2′ square before molding.
Check the box for shipping damage first. A dented end can snag the sheet and tear it mid-project, leaving you short on usable foil for the hide’s full shape.
| Best For | Home cooks, meal preppers, and crafters who need a durable, versatile foil for cooking, food storage, and DIY projects like paper mache hides. |
|---|---|
| Material | Aluminum Foil |
| Primary Use | Hide frame |
| Ease Of Use | Moderate |
| Reusability | Single-use |
| Cleanup | N/A |
| Price Tier | Budget |
| Additional Features |
|
- Generous 200-square-foot roll provides plenty of foil for large or multiple projects
- Built-in tear edge makes for clean, consistent sheet sizing every time
- Over 70 years of trusted quality and strength backing the brand
- Susceptible to damage if shipped in inadequate packaging, causing box deformation
- Compressed box ends can cause the foil to catch and tear during use
- Reduced effective width after damage may not cover standard pan sizes properly
3. Scotch Home Office Masking Tape
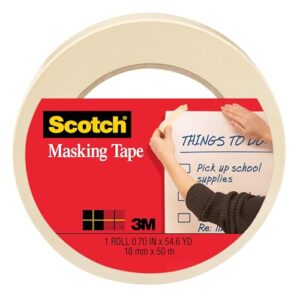
Once the tinfoil frame holds its shape, tape locks it in place. Scotch Home Office Masking Tape works on both the inside and outside of the hide, and it tears cleanly by hand with no scissors needed.
The paper backing grips curves without wrinkling, so it wraps corners and dips smoothly. That matters for pressing in rock-like dents and doorway edges before paper mache goes on.
Apply it within 72 hours of removal (24 hours in sunlight) to avoid sticky residue on your work surface.
| Best For | Home offices, classrooms, and DIY project spaces that need a reliable, easy-tear tape for labeling, mounting, and light craft work like paper mache frames. |
|---|---|
| Material | Paper Backing |
| Primary Use | Frame sealing |
| Ease Of Use | Easy |
| Reusability | Single-use |
| Cleanup | Minimal residue |
| Price Tier | Budget |
| Additional Features |
|
- Tears cleanly by hand with no scissors needed, and writes on well for labeling
- Made with 50% renewable resources and 70% post-consumer waste content
- Removes cleanly within 72 hours without damaging most surfaces
- Not suitable for wallpaper, unpainted wallboard, or ceiling tile
- Can struggle to adhere to wet or non-standard surfaces
- Leaves sticky residue if left on too long, especially past 24 hours in sunlight
4. White Bulk Tissue Paper 15×20
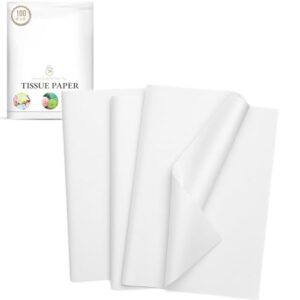
A hundred sheets of white tissue paper, each measuring 15 by 20 inches, cover several full-size hides without running short.
Tear sheets into small strips and dip them in your diluted glue for smooth, wrinkle-free coverage over every curve. At 10.56 ounces per pack, the paper stays lightweight but holds up under wet glue.
Some batches run slightly grey instead of pure white. That won’t affect strength or texture, and paint covers it completely once the hide dries.
| Best For | This tissue paper is best for crafters and gift-wrappers tackling piñatas, pom pom flowers, decoupage projects, or covering large surfaces like hides that need full, tear-free coverage. |
|---|---|
| Material | Tissue Paper |
| Primary Use | Hide covering |
| Ease Of Use | Moderate |
| Reusability | Single-use |
| Cleanup | Paint covers marks |
| Price Tier | Budget |
| Additional Features |
|
- Generous 100-sheet pack easily covers large or multiple projects without running out
- Lightweight yet holds together well when dipped in diluted glue for decoupage work
- Versatile size (15×20 inches) works well for gift wrapping, party decor, and craft projects like pom pom flowers
- Some sheets may run thinner than expected and can tear more easily during use
- Color can appear grey or cream rather than true white, especially in certain lighting
- Not ideal for projects requiring high opacity or a bright, flashy finish
5. Royal Brush Foam Brush Set
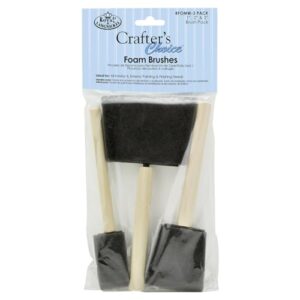
A good foam brush makes or breaks your paper mache layer. This three-pack from Royal Brush gives you disposable, wood-handled brushes built for smooth, even glue coats without heavy brush marks.
Dip, spread, repeat, then toss the brush when you’re done. Stick to acrylic paint and craft glue, since solvents break the foam down fast. Clean gently after each use if you want a second round, but don’t expect these to last through an entire hide build.
| Best For | crafters and hobbyists who need reliable, no-fuss brushes for spreading glue, paint, or stain smoothly over paper mache, wood, or other craft surfaces. |
|---|---|
| Material | Foam |
| Primary Use | Hide painting |
| Ease Of Use | Easy |
| Reusability | Reusable |
| Cleanup | Rinse after use |
| Price Tier | Budget |
| Additional Features |
|
- Comes with three brushes per pack, so you’ve always got a backup on hand
- Wooden handles offer solid grip and control for detailed work
- Slim profile makes it easy to reach tight spots like grilles or corners
- Not built for use with lacquer or shellac, since solvents break down the foam
- Foam can start separating from the handle if you push it too hard or too long
- Durability is limited, so these work best as light-duty or one-time-use tools
Frequently Asked Questions (FAQs)
How to make a homemade snake hide?
Shape a foil base, wrap it in masking tape, then build up tissue paper and glue. Finish with paper clay for texture, then paint with acrylics and seal before curing two to three weeks.
Do snakes prefer vertical or horizontal enclosures?
Neither, really — snakes crave space, not orientation. Ground dwellers want horizontal floor space for stretching and thermoregulation. Climbers like tree pythons need vertical height. Match the layout to your species, not a fixed rule.
What is the best material to build a snake enclosure?
PVC and HDPE plastics win out overall. They resist moisture, hold heat steady, and clean up easily. Melamine wood works too if sealed well, while bare glass loses heat fast and needs more energy to keep warm.
How to make a shed box for a snake?
Think of it as a private sauna. Fill a tub with damp sphagnum moss, cut a snug entrance, and place it on the warm side, giving your snake humid cover of 70–90% right when shedding starts.
How often should snake hide boxes be replaced?
Check monthly for wear. Plastic hides last 3 to 5 years, wood only 6 to 18 months, and cork bark needs swapping every 6 to 12 months. Replace immediately if you spot cracks, mold, or persistent odor.
Can multiple snakes share the same hide box?
Two snakes, one hide, one recipe for trouble. Most snakes are solitary by nature, and cramped shared spaces breed aggression, stress, and blocked thermoregulation. If you must try it, offer extra room and multiple identical hides, then watch closely.
How many hide boxes does one snake need?
Most snakes need at least two hides, one warm and one cool, so they can thermoregulate without leaving cover. Place them at opposite ends of the enclosure. Extra hides help in larger setups but two remains the standard minimum.
If you want hides that actually satisfy those instincts, naturalistic snake hides designed to mimic real shelters tend to encourage more confident, settled behavior than bare plastic boxes.
Should hide boxes have ventilation holes or openings?
Ever wonder why a "safe" hide can still cause stress? Yes, add small strategic vents, sized 2 to 6 square centimeters, near the entrance. They balance airflow with humidity, preventing mold without drying out the space your snake depends on.
How often should snake hides be sanitized?
Spot clean daily, removing waste and soiled bedding. Deep clean hides every 1 to 2 weeks, replace substrate monthly, and disinfect quarterly with reptile-safe products. Clean immediately after any contamination.
What signs indicate a snake dislikes its hide?
A jittery snake that treats its own hide like a haunted house is telling you something. Watch for constant repositioning, tail-tucked defensive coils, hissing near the entrance, or refusal to settle — these all point to a shelter that feels wrong, not safe.
Conclusion
Some keepers assume snakes just need darkness, but shade alone won’t calm a nervous reptile—snug walls matter more than dim light. Building snake hide boxes gets this balance right, pairing tight dimensions with proper ventilation and smooth entrances.
Once the fit feels right, you’ll notice the difference fast: steady feeding, visible basking, calmer handling. A snake that trusts its space stops hiding from you and starts living openly within it. That’s the real measure of a hide done well.