This site is supported by our readers. We may earn a commission, at no cost to you, if you purchase through links.

A snake on bare paper towels survives. It doesn’t thrive. Creating a bioactive terrarium for snakes means building a miniature environment where isopods consume waste, plants stabilize humidity, and the substrate stays naturally balanced without weekly full cleanouts.
Most keepers assume bioactive setups are complicated, fussy, and reserved for experienced hobbyists. The truth is that once the system cycles, it runs cleaner and more consistently than a traditional sterile setup. Your corn snake or ball python gets natural behaviors; you get fewer maintenance headaches.
Every layer, from drainage to enrichment, has a purpose, and you’ll understand exactly why before your snake moves in.
Table Of Contents
- Key Takeaways
- Plan a Species-Appropriate Bioactive Terrarium
- Build The Drainage and Bioactive Substrate Layers
- Add Snake-Safe Plants, Cleanup Crews, Hides, and Climbing Features
- Set Up Heating, Lighting, Humidity, and a Safe Thermal Gradient
- Cycle and Maintain The Bioactive Terrarium
- Frequently Asked Questions (FAQs)
- Are bioactive enclosures good for snakes?
- What is the best type of terrarium for snakes?
- How to make a terrarium for snakes?
- What is a bioactive substrate for snakes?
- How to create a bioactive terrarium for a snake?
- Can snakes have a bioactive enclosure?
- What is the best bioactive substrate for snakes?
- Do bioactive snake enclosures smell?
- How long does it take to establish bioactive balance?
- When should I introduce my snake after setup?
- Conclusion
Key Takeaways
- A bioactive terrarium runs cleaner and more consistently than a sterile setup because isopods and springtails break down waste naturally, cutting your maintenance time by up to 70%.
- Every layer matters: drainage base, activated charcoal, mesh barrier, and bioactive substrate must be stacked in the right order and kept at 60–70% moisture to prevent mold and keep your cleanup crew thriving.
- Match your enclosure to your snake’s native habitat before buying anything — humidity, temperature gradient, and floor space are non-negotiable, and getting them wrong causes chronic stress.
- The system needs 3–4 weeks to cycle before your snake moves in, giving plants time to root and microfauna time to establish the ecological balance that makes the whole setup self-sustaining.
Plan a Species-Appropriate Bioactive Terrarium
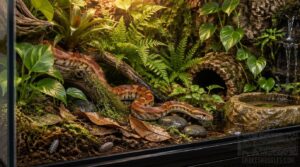
Before you buy a single plant or scoop of substrate, you need to match your setup to your snake’s actual needs. Species, size, and security all factor into which enclosure style works best. Here’s what to think about before you build.
Once you’ve nailed down enclosure size, choosing the right snake substrate is the next decision that directly shapes your snake’s comfort and health.
Match Habitat to Species
Research your snake’s geographic origin before buying a single piece of substrate. A ball python needs high humidity and substrate moisture, while a corn snake thrives in drier conditions. Getting this wrong creates chronic stress.
Think of it as cloning a tiny piece of your snake’s hometown, complete with the right temperature gradient and hiding spots built in.
Size and Secure Enclosure
Once you know your snake’s habitat needs, enclosure size is the next piece. Your snake needs room for thermoregulation, including a full temperature gradient and humidity control.
Size it right:
- Floor area: minimum 1.5× snake length, squared
- Horizontal space: at least 1.5–2× body length for natural crawling
- Vertical height: 1.25× body length for arching
- Secure locking latches, not magnetic closures
Avoid Snake Cohabitation
That perfectly sized enclosure is built for one snake. Cohabitation stress turns a thriving bioactive terrarium into a battleground fast, wrecking the calm your snake needs.
| Co-hab Risk | What Happens |
|---|---|
| Feeding competition | One snake starves |
| Scent overlap | Stress behaviors spike |
| Shared hiding spots | No real rest |
Keep setups solo. Independent temperature gradient zones and clean substrate layering protect snake enrichment.
Pairing these habitat strategies with proven snake wellness routines keeps stress low and your snake thriving long-term.
Build The Drainage and Bioactive Substrate Layers
Once your enclosure is sorted, the substrate layering is where the real work begins. Getting it right separates a thriving bioactive setup from a moldy mess.
Here’s the build order:
- Pour 4-6 cm of expanded clay or pumice as your drainage layer.
- Cap it with 1-3 cm of activated charcoal to block organics and odors.
- Lay a geotextile mesh barrier between drainage and substrate to stop fines from clogging.
- Add your bioactive substrate mix on top, with leaf litter at 5-10% by volume.
Keep substrate depth around 10-15 cm and target substrate moisture at 60-70% field capacity. Check it daily for the first two weeks. That vertical moisture gradient, dry below and damp above, is what keeps mold out and your microfauna working.
A soil moisture meter for terrariums takes the guesswork out of those daily checks, giving you precise readings to keep conditions dialed in.
Add Snake-Safe Plants, Cleanup Crews, Hides, and Climbing Features
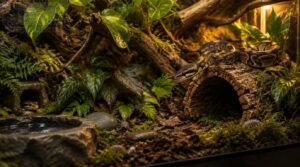
Your drainage layer is set, your substrate is ready, and now the real fun begins. This next phase is where your terrarium goes from a box of dirt to a living, functional habitat. Here’s what you need to add to make it thrive.
Snake-Safe Plant Selection
Plants make or break your bioactive terrarium. Choose snake-safe plants that support a self-sustaining environment; wrong picks stress your snake. Start here: Stocking your enclosure is easier when you browse bioactive terrarium plant kits curated specifically for snake-safe setups.
For deeper plant selection guidance and setup inspiration, bioactive snake enclosure ideas and plant layouts walk you through building a thriving, naturalistic home your snake will actually use.
| Plant | Why It Works |
|---|---|
| Peperomia | Non-toxic, compact |
| Tillandsia | Rootless, no rot |
| Sheet moss | Feeds microfauna |
| Ficus pumila | Trailing groundcover |
| Bromeliad | Vertical coverage |
Verify toxicity with a credible herpetological source before planting. Skip pothos; it’s a known dermal risk.
Cleanup Crew Setup
Springtails and isopods are your cleanup crew, quietly handling waste breakdown before it becomes a problem. Aim for 5-10 adult isopods per 20 liters of substrate.
Springtails tackle surface mold while isopods shred leaf litter deeper in the substrate. Introduce your detritivores before your snake arrives, then watch for dry, earthy-smelling substrate within 7-14 days as a sign they’re thriving.
Starting with a live springtail culture kit gives your cleanup crew a healthy head start before the first leaf litter even hits the substrate.
Secure Hide Placement
Studies show snakes hide up to 90% of daylight hours, making secure hide placement one of the biggest stress reducers you can offer.
Snakes hide up to 90% of daylight hours, so secure hide placement is one of the most powerful stress reducers you can offer
- Match hiding spots to both ends of your thermal gradient
- Set hide floors flush with your substrate depth
- Position hides where humidity control stays consistent
- Use double-fastener lids to prevent displacement
- Size hides 1.5× your snake’s girth
Safe Climbing Features
Textured surfaces like manzanita wood and spiderwood can boost toe grip by 25-40% in smaller snakes. That’s not trivial when your snake is confidently moving through vertical cork bark runs.
Double-anchor every branch, test each climbing structure by pressing downward at multiple heights, and keep all gaps under 1 cm. Hiding spots near climbing features encourage natural exploration without escape risk.
Set Up Heating, Lighting, Humidity, and a Safe Thermal Gradient
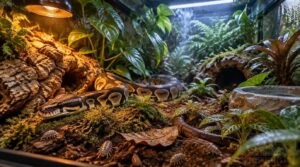
Think of your enclosure as a miniature climate zone. Your snake self-regulates by moving across a thermal gradient, so getting this right isn’t optional.
- Mount ceramic heaters above the warm end to hit a basking hotspot of 34-38°C
- Let the mid-ambient zone settle at 26-30°C naturally across the enclosure
- Run UVB lighting on a 12:12 light/dark schedule to support your snake’s circadian rhythm
- Check humidity daily with a hygrometer, keeping fluctuation under 5%
Skip heat mats in bioactive setups. They’re in direct contact with moist substrate, which risks burns or damage. Ceramic heaters mounted overhead are the safer, more reliable choice. For humidity control, schedule misting in the morning and evening rather than spraying constantly.
Cycle and Maintain The Bioactive Terrarium
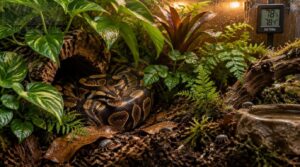
Building a bioactive terrarium is a little like launching a garden — you don’t plant seeds and immediately invite guests over. Before your snake moves in, the system needs time to stabilize, and once it does, consistent upkeep keeps it thriving. Here’s what to focus on at each stage.
Establish Before Adding Your Snake
Your bioactive terrarium needs a running environment before your snake moves in. Give it two to four weeks to stabilize.
During this time, your cleanup crew establishes colonies, substrate moisture levels out, and plants root in. Check that springtails and isopods are actively moving through the soil.
Only then is the enclosure genuinely ready.
Monitor Bioactive System Health
Once your snake’s in, keep checking the system. Your cleanup crew activity reveals a lot, and declining isopod movement signals substrate exhaustion or poor microclimate regulation.
Check these three things weekly:
- Substrate hydration: soil should clump slightly, never drip or crumble.
- Humidity control: log RH and flag swings beyond 15%.
- Ammonia odor: a sharp smell means ecological balance has slipped.
Prevent Mold, Pests, and Disease
Those weekly checks aren’t just record-keeping; they’re your early warning system. Catch a humidity spike above 60% fast, because mold can bloom within 24-72 hours. Boost airflow with adjustable vents and swap the top substrate layer for rapid-drying materials like expanded clay.
Seal enclosure gaps under 1 mm weekly to block mites, and quarantine new animals 8-12 weeks before introduction.
Adjust Conditions Seasonally
Your setup doesn’t need to stay frozen year-round. As daylight shifts, nudge your thermal regulation and humidity control to match.
- Drop basking temps by 3–5°C come autumn
- Extend photoperiod 2 hours across 2–3 weeks in spring
- Boost moisture retention during active and shedding windows
- Add substrate depth for better thermal buffering in winter
- Log temperature monitoring readings against behavioral changes
Frequently Asked Questions (FAQs)
Are bioactive enclosures good for snakes?
Yes, genuinely. A naturalistic setup closely mimics wild conditions, actively aids snake thermoregulation, and reduces stress considerably. Your cleanup crew controls waste naturally, keeping things cleaner between your interventions. It’s a smarter, healthier choice overall.
What is the best type of terrarium for snakes?
Does your snake need a jungle or a desert? A glass enclosure with a locking lid suits most species, offering visibility, humidity control, and enough space for a proper bioactive terrarium with adequate substrate depth.
How to make a terrarium for snakes?
Making a terrarium for snakes means matching their native habitat, building a drainage and bioactive substrate system, adding safe plants and hides, dialing in heat and humidity, then cycling it before your snake moves in.
What is a bioactive substrate for snakes?
Imagine a tiny underground city beneath your snake’s feet. Bioactive substrate layers live microbes and invertebrates into the enclosure floor, naturally breaking down waste through organic matter decomposition and nutrient cycling.
How to create a bioactive terrarium for a snake?
A bioactive terrarium works like a self-sustaining environment. Layer drainage substrate first, then bioactive substrate on top. Add live plants, introduce a cleanup crew of springtails and isopods, then carefully dial in heat and humidity.
Can snakes have a bioactive enclosure?
Snakes absolutely thrive in bioactive terrariums. These setups rely on natural habitat mimicry and a living cleanup crew of isopods and springtails to break down waste, keeping conditions stable and greatly cutting your maintenance load.
What is the best bioactive substrate for snakes?
The prettiest substrate design means nothing to your snake. Coco coir, organic topsoil, and sand blended for bioactive substrate mixing nails moisture retention, helps natural burrowing, and sustains your cleanup crews at ideal substrate depth.
If you’re weighing aspen, cypress mulch, or a full bioactive setup for your milk snake, this guide to substrate materials for naturalistic setups breaks down the trade-offs of each.
Do bioactive snake enclosures smell?
Not if you stay on top of it. A healthy cleanup crew of isopods and springtails breaks down waste before odors develop. Neglect the drainage layer or moisture retention, though, and smells will quickly follow.
How long does it take to establish bioactive balance?
Imagine planting a garden in January and expecting ripe tomatoes by early February. That’s not how bioactive balance works. Give it 4–8 weeks for microorganisms, beneficial fungi, and your whole cleanup crew to fully stabilize.
When should I introduce my snake after setup?
Wait at least 3–4 weeks for terrarium balance before introducing your snake. That gives the cleanup crew time to fully establish, plants to root, and the bioactive cycle to stabilize for a healthier, stress-free environment.
Conclusion
Studies show that bioactive enclosures can reduce maintenance time by up to 70% compared to sterile setups. That’s not a small number. Creating a bioactive terrarium for snakes takes real planning upfront, but the system pays you back every week you don’t spend scrubbing glass.
Your snake gets a richer, more natural life. You get a living display that mostly takes care of itself. Build it right, and the only thing left to do is enjoy it.