This site is supported by our readers. We may earn a commission, at no cost to you, if you purchase through links.

A humidity meter sitting three feet from your bathroom vent will lie to you—consistently, confidently, and expensively. Most people pull one out of the box, set it on a convenient shelf, and trust whatever number appears. Then they wonder why their wood floors are warping despite readings that looked perfectly fine.
The truth is, placement does most of the work. A well-positioned sensor reveals what’s actually happening in your air.
These humidity meter placement tips will show you exactly where each room’s sweet spot is—and why it matters more than the device itself.
Table Of Contents
- Key Takeaways
- Choose The Best Spot
- Follow Height and Clearance Rules
- Avoid Placement Mistakes
- Place Meters by Room
- Keep Readings Accurate
- Top 5 Humidity Meters
- Frequently Asked Questions (FAQs)
- Where should I place my humidity gauge?
- Is humidity level 40 too low for a home?
- How to properly set humidity in a house?
- What humidity level is safe for wooden furniture?
- How does indoor humidity affect sleep quality?
- Do humidity meters work accurately in cold climates?
- Should humidity meters be used with a dehumidifier?
- Conclusion
Key Takeaways
- Placement beats the device itself — a cheap meter in the right spot will outperform an expensive one stuck near a vent, window, or heat source.
- Mount your sensor 4–6 feet off the floor in a lived-in, open area with at least 0.5 m of clearance from walls, drafts, and electronics that run warm.
- Every room has its own moisture personality, so treat each space differently — kitchens and bathrooms need extra distance from steam, while basements need central, elevated positioning away from exterior walls.
- A humidity meter isn’t set-and-forget: stabilize it after moving, clean it monthly, and recalibrate every 6–12 months to keep your readings honest.
Choose The Best Spot

Where you put your humidity meter matters more than most people realize. A bad spot can throw off your readings before you even get started.
Placement really does make or break your setup, which is why checking a solid guide on humidity gauge placement for corn snake enclosures can save you a lot of guesswork.
Here’s what to look for when choosing the right location.
Place The Meter in an Open, Lived-in Area
For the most reliable readings, place your humidity meter in an open, lived-in space where people spend real time. Think living rooms, hallways, or family activity zones — not storage closets.
The best spots share four traits:
- Central location with common area visibility
- Along daily walkways or high traffic flow paths
- At human breathing height, away from windows
- A convenient reading spot free from clutter
Keep It Where Air Moves Naturally
Once you’ve found that lived-in sweet spot, check the airflow. Air circulation matters more than most people realize. Position your humidity sensor along central room circulation paths — doorway airflow and cross-ventilation paths are ideal.
Stack effect utilization works naturally here too; air rises and moves between levels. Avoid tucking the sensor where window breeze exposure or ventilation gets blocked by furniture.
Follow the recommended ventilation rates to keep indoor humidity consistent.
Use a Stable Shelf, Table, or Wall Mount
Good airflow means nothing if your meter shifts every time someone walks by. Stability locks in consistent readings.
- Check your shelf load rating — anchors into studs handle sensors easily
- Use non-conductive surfaces to avoid static interference
- Apply vibration isolation with a non-slip mat on tabletops
- Verify that leveling techniques keep the shelf within 2 mm
Solid mounting hardware makes every reading count.
Avoid Tucked-away Corners and Enclosed Cabinets
Stability matters, but so does air access. Tucking your meter inside a cabinet or corner is a classic placement issue—avoiding stagnant air starts with keeping the sensor fully exposed.
Cabinet exclusion zones and corner bias prevention are not optional; they are basic sensor placement guidelines. Common issues and their solutions include:
| Location Type | Problem | Fix |
|---|---|---|
| Enclosed cabinet | Stagnant air trap | Open shelf instead |
| Tight corner | Corner bias, slow response | Central wall position |
| Behind door | Blocked airflow, skewed readings | Unobstructed sensor placement |
Follow Height and Clearance Rules
Where you mount your humidity meter matters just as much as where in the room you put it. A few simple height and clearance rules make the difference between a reading you can trust and one that’s off by several percentage points.
Here’s what to follow.
Mount Wall Units 4–6 Feet Above The Floor

Wall-mounted sensors work best when the bottom edge sits 4–6 feet above the floor. That’s your breathing zone — the air you actually live in. It keeps readings honest and the display easy to check.
- Aim for 48–72 inches for ideal placement of indoor humidity sensors
- Use bracket selection that bears your unit’s load capacity without flex
- Apply stud anchoring into wall framing for vibration dampening and stability
- Position away from windows to avoid skewed readings
- Mount higher to reduce pet interference and accidental bumps
Keep at Least 0.5 M From Walls, Windows, and Doors

Give your humidity sensor 0.5 m of breathing room from walls, windows, and doors.
Wall heat transfer and window condensation skew readings quickly.
Pairing your sensor with humidity fluctuation alerts and data logging tools helps you catch these distortions before they throw off your whole enclosure reading.
Door drafts push outdoor air straight into the sensor.
That 0.5 m airflow buffer zone is your defense against sensor proximity risks — keeping humidity sensor placement honest and guidelines for accurate hygrometer placement actually working.
Leave Space Around The Sensor for Airflow

Beyond height alone, the space surrounding your sensor matters just as much. Think of it as the Unobstructed Airflow Zone — your sensor needs an Air Gap Margin of several inches on all sides.
Sensor Perimeter Clearance keeps stagnant pockets from forming and ensures air movement reaches the sensor face freely.
Good Surrounding Space Design and a proper Ventilation Buffer Distance are non-negotiables for ideal placement of indoor humidity sensors.
Position Away From Lamps and Direct Sunlight

Light is a sneaky culprit — both lamps and direct sunlight can throw off your humidity sensor placement without you ever noticing. Direct light bias skews readings fast. Here’s what glare zone avoidance looks like in practice:
- Stay 30–60 cm from any lamp base
- Choose shaded wall areas for sunlight shading
- Dodge skylights with shifting sun angles
- Skip spots near decorative or under-cabinet lighting
- Prioritize ambient light balance over convenience
Avoid Placement Mistakes

Even the best humidity meter will give you bad numbers if you put it in the wrong spot.
Placement mistakes are more common than you’d think, and most of them are easy to avoid once you know what to watch for. Here are the key spots to steer clear of.
Keep Meters Away From Vents, Fans, and Drafts
Vents, fans, and open windows are the enemies of stable readings. Vent proximity hazards are real — HVAC stream disruption skews data before you even notice.
Fan-induced turbulence creates constant fluctuation, while draft fluctuation impact compounds quickly near doors or windows.
Keep your meter at least 0.5 m from any ventilation fan or air circuit interference source for clean, reliable data.
Do Not Place Near Sinks, Showers, or Toilets
Water sources are silent saboteurs of accurate readings. Sinks, showers, and toilets create steam inflation, splash exposure, and flush humidity bursts that distort your data fast. These are among the most common placement mistakes people make.
- Keep meters 12+ inches from sinks to avoid corrosion concerns
- Mount away from shower zones to prevent localized moisture distortion
- Avoid toilets — flush humidity bursts skew hourly averages
In bathrooms especially, correct placement of humidity meters means staying well outside wet zones.
Avoid Stoves, Ovens, and Other Heat Sources
Heat is just as misleading as moisture. Stoves, ovens, and radiators create radiant heat zones that inflate temperature readings and throw off your humidity percentage entirely. That’s thermal interference in action.
For correct placement of humidity meters, maintain a heat source buffer of at least three feet from any cooking area exclusion zone. Appliance proximity ruins your data fast.
Keep Clear of Electronics That Create Localized Warmth
Electronics are sneaky offenders. A laptop, router, or charging station runs warm by design — and that localized hotspot skews your readings fast.
Keep your meter away from these three main culprits:
- TVs and gaming consoles with strong TV heat influence
- Power strips under heavy load with notable power strip emissions
- WiFi and Bluetooth routers generating constant router warmth
Avoiding placement mistakes for accurate readings means treating every device as a direct heat source.
Don’t Place Sensors Where They Are Bumped or Moved Often
Physical bumps reset your baseline without warning. Install your meter using fixed mounting brackets on a stable wall or shelf — away from doorways, play areas, and high-traffic zones. A traffic-free zone keeps accidental knocks from shifting your sensor’s position. Apply no-touch labeling nearby to discourage casual handling. Vibration damping mounts also help in spots near appliances.
| Risk Zone | Problem | Fix |
|---|---|---|
| Doorways | Repeated airflow and contact | Mount 5+ ft away |
| Play areas | Kicks and accidental bumps | Use protective enclosures |
| Cleaning paths | Frequent repositioning | Fixed brackets at sensor mounting height |
Place Meters by Room

Every room in your home has its own quirks — different airflow patterns, moisture sources, and temperature swings.
Where you place your meter matters just as much as the meter itself. Here’s what works best, room by room.
Living Room Placement Tips
Your living room is probably the best room to start — it reflects how most of your home actually breathes.
For ideal placement of indoor humidity sensors, follow these three rules:
- Set the meter at sensor mounting height: 4–6 feet, away from doors and windows.
- Use furniture arrangement to your advantage — place it near central seating.
- Consider child safety, pet interference, and cable management when choosing your final spot.
Aesthetic integration matters too: a clean wall mount keeps readings accurate without cluttering your space.
Bedroom Placement Tips
Your bedroom is where sleep quality and air quality go hand in hand.
Mount your meter at nightstand height — or on a wall 4 to 6 feet above the floor — away from doors and drafts.
Avoid window shadowing, radiator distance violations, and floor vibration near baseboards. Light shielding matters too.
Smart bedroom placement means breathing height readings that genuinely reflect your sleeping environment’s air, boosting reading accuracy overnight.
Kitchen Placement Tips
Kitchens are full of hot and cold spots that throw off readings, reducing accuracy quickly. For ideal placement of indoor humidity sensors, mount your humidity sensor on a central wall—away from stoves, steam, and sinks.
Maintain at least one meter away from heat sources to ensure reliable measurements. Aesthetic integration and solid mounting materials are important, but smart kitchen humidity sensor placement outweighs all else.
Bathroom Placement Tips
Bathrooms pose challenges for humidity sensors, making steam shielding essential. Mount your sensor on a tile-friendly mount, ensuring it remains away from direct shower spray.
Optimal placement involves positioning the sensor outside the main steam plume while maintaining visibility within the room. This balance ensures accurate readings without exposure to excessive moisture.
Use waterproof housing to protect the device. Avoid drafts, direct sunlight near windows, and follow standard guidelines for installation. Maintaining humidity below 60% RH effectively prevents mold growth on walls.
Basement Placement Tips
Basements are humidity traps — moisture levels here shift noticeably with seasons, so placement really matters.
Place your humidity sensor in a central, open area, away from sump pumps and exterior walls. This ensures accurate readings unaffected by localized moisture sources.
Opt for low-drift sensors with wireless connectivity and data logging capabilities. These features help track seasonal adjustments early, enabling proactive humidity management.
For optimal performance, position indoor humidity sensors at shelf height. Regularly calibrate sensors every six to twelve months to maintain precision and reliability.
Attic and Crawl Space Placement Tips
Attics and crawl spaces are tough environments — temperature swings are wide, dust settles fast, and insulation interference can throw off readings. For ideal placement of indoor humidity sensors, mount your unit on a central shelf or bracket near natural ventilation pathways, away from insulation and debris.
Follow guidelines for installing humidity sensors in rooms by managing cables and keeping the sensor clear of moisture sources for temperature stability.
Keep Readings Accurate

Good placement gets you started, but it won’t keep your readings accurate forever. Sensors drift, dust builds up, and batteries fade — all things that quietly throw off your numbers over time.
Here’s what you can do to keep your meter working the way it should.
Let The Meter Stabilize After Moving It
Think of your meter as a new employee — it needs time to adjust before it gives you reliable numbers. After moving it, wait at least one hour as part of the stabilization period before trusting any readings.
After moving your humidity meter, wait at least an hour before trusting any readings
During this window, track the following to ensure accuracy:
- Temperature Consistency — Keep room temps within a 5°C range.
- Humidity Buffer Zone — Allow readings to settle within a 10% range.
- Sensor Response Time — Note when accurate humidity readings stop fluctuating.
- Documentation Log — Record start and end times to catch sensor drift early.
Compare Readings in More Than One Location
One reading only tells part of the story. Room-to-room variance is real — your kitchen runs wetter than your bedroom, and vertical stratification means floor-level air reads differently than shelf height.
Cross-location calibration helps you spot microclimate influence from appliances or poor placement. Door/window effects shift baselines fast.
Compare two or three spots before trusting a single number.
Clean The Sensor on a Regular Schedule
Cross-location checks catch placement problems — but dirty sensors cause the same kind of drift. Dust buildup quietly skews your readings over time.
Stay ahead of it with these sensor maintenance basics:
- Monthly Dust Removal using a microfiber cloth keeps the housing clean
- Compressed Air Usage clears vents without bending internal components
- Avoid Liquid Cleaners — a slightly damp cloth is the safe limit
- Cleaning Log Maintenance helps you track drift patterns between sessions
Recalibrate Every 6–12 Months
Cleaning keeps the housing clear — but drift happens inside the sensor too. Even a well-placed, dust-free unit slowly loses accuracy. That’s why calibration matters.
Stick to a calibration schedule every 6–12 months and use reference standards for field verification. Log each session in a calibration log so you can spot drift monitoring patterns early and schedule routine maintenance and calibration confidently.
Replace Old Units When Readings Drift Consistently
Calibration has its limits. If your unit keeps drifting past the manufacturer’s tolerance band even after recalibration, that’s your Replacement Decision Criteria kicking in.
A solid Drift Detection Protocol means logging readings over time and spotting persistent offsets — not random spikes.
Lifecycle Tracking and Retirement Documentation keep sensor reliability tight across your whole setup, so accurate readings don’t quietly slip away from you.
Top 5 Humidity Meters
Once you’ve nailed your placement, having the right meter makes all the difference. Not every device reads accurately or suits every space, so picking one that fits your needs matters.
Here are five solid options worth considering.
1. TempPro TP49 Digital Hygrometer Thermometer
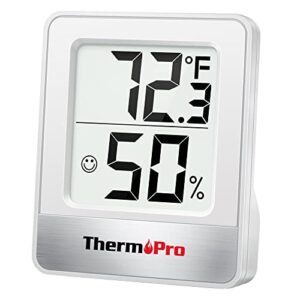
The TempPro TP49 is a solid pick if you want reliable readings without spending much. At $9.49, it measures temperature within ±1°F and humidity within ±2–3% RH — respectable accuracy for the price.
The 10-second refresh rate keeps you current, and the face-icon comfort display (dry, comfort, wet) makes it easy to read at a glance.
Three mounting options — tabletop stand, magnetic back, or hanging hook — give you flexibility in any room.
| Best For | Anyone who wants a quick, no-fuss way to monitor indoor temperature and humidity without spending more than a few bucks. |
|---|---|
| Temp Accuracy | ±1 °F/°C |
| Humidity Accuracy | ±2–3% RH |
| Update Interval | 10 seconds |
| Power Source | Battery |
| Mounting Options | Stand, magnet, hook |
| Comfort Indicator | Dry/Comfort/Wet icon |
| Additional Features |
|
- Accurate enough for everyday use — ±1°F and ±2–3% RH is solid at this price point
- Updates every 10 seconds and the face-icon display makes it genuinely easy to read at a glance
- Three mounting options (stand, magnet, hook) means it works wherever you need it
- Accuracy can slip at humidity extremes (under 20% RH), so it’s not ideal for super dry environments
- Battery life isn’t disclosed, so you won’t know it’s dying until it does
- The TempPro/ThermoPro branding mix-up can make warranty support or reordering a little confusing
2. Govee WiFi Temperature Humidity Sensor
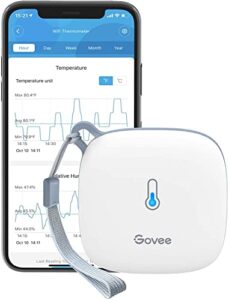
The Govee WiFi Temperature Humidity Sensor excels in remote monitoring, offering Swiss-made sensor precision with ±0.3°C temperature accuracy and ±3% RH humidity accuracy—ideal for home use. Its rapid 2-second refresh rate ensures real-time updates, accessible anywhere via the Govee Home app.
Alerts proactively notify users when conditions deviate from set ranges, enhancing convenience. However, compatibility is limited to 2.4 GHz Wi-Fi networks, requiring router verification before purchase.
The device operates on a long-lasting battery, delivering approximately six months of use per charge. This balance of accuracy, connectivity, and endurance makes it a robust choice for environmental tracking.
| Best For | Anyone who wants to keep a close eye on temperature and humidity from their phone — great for homeowners, renters, greenhouse growers, or anyone managing a wine cellar, basement, or pet habitat remotely. |
|---|---|
| Temp Accuracy | ±0.54 °F |
| Humidity Accuracy | ±3% RH |
| Update Interval | 2 seconds |
| Power Source | 3× AA batteries |
| Mounting Options | Lanyard loop |
| Comfort Indicator | App-based alerts |
| Additional Features |
|
- Swiss-made sensor with solid accuracy (±0.54°F, ±3% RH) and a 2-second refresh rate, so you’re always seeing current conditions
- Connects via Wi-Fi so you can check in from anywhere through the Govee Home app, plus stores up to 2 years of exportable data
- Alerts let you know the moment something goes out of range — handy for catching HVAC issues or humidity spikes before they become real problems
- Only works on 2.4 GHz Wi-Fi — if your router runs 5 GHz only, you’ll need to check compatibility before buying
- Batteries last about six months and need manual replacement; no rechargeable option built in
- Setting up alerts requires Bluetooth, so if you’re purely on Wi-Fi, you’ll need to be physically nearby to configure them
3. AcuRite Indoor Hygrometer and Thermometer
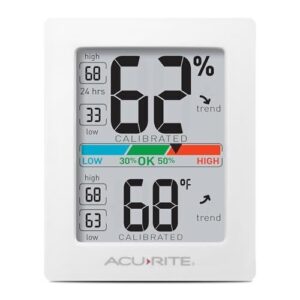
The AcuRite Indoor Hygrometer delivers solid ±2% RH accuracy across the 10–90% range, ensuring reliable humidity monitoring. Its readings refresh every 10 seconds, allowing you to detect humidity fluctuations promptly before they escalate into issues.
The device features a color-coded comfort scale for instant interpretation: blue indicates overly dry conditions, green marks the ideal zone, and red warns of excess moisture.
Three versatile mounting options—including a magnetic backing—enable easy placement on most surfaces, enhancing flexibility in positioning the hygrometer.
A minor trade-off is the absence of a backlight, so avoid installing it in dimly lit areas to ensure visibility.
| Best For | Anyone who needs reliable indoor climate tracking — whether you’re caring for a newborn, storing wine, or keeping a guitar happy. |
|---|---|
| Temp Accuracy | ±0.5 °F |
| Humidity Accuracy | ±2% RH |
| Update Interval | 10 seconds |
| Power Source | 2× AAA batteries |
| Mounting Options | Stand, wall, magnet |
| Comfort Indicator | Color-coded scale |
| Additional Features |
|
- Accurate to ±2% RH (10–90% range), so you’re getting real numbers, not rough guesses
- Refreshes every 10 seconds, which means you catch humidity swings before they become a problem
- Three mounting options including built-in magnets — stick it on the fridge, a shelf, wherever makes sense
- No backlight, so it’s basically useless in a dim room unless you’ve got a light nearby
- Can take up to 40 minutes to stabilize after a big temperature change — not great if you need quick readings
- Battery life is a mystery; no documented runtime, and rechargeable AAAs aren’t officially supported
4. TempPro TP50 Indoor Hygrometer Thermometer
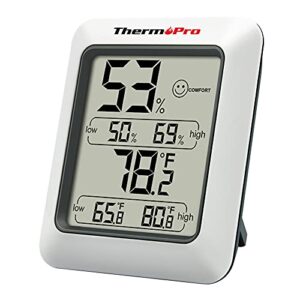
Small but surprisingly capable, the TP50 punches well above its size. It reads humidity from 10% to 99% RH with ±2–3% accuracy and updates every 10 seconds — fast enough to catch moisture spikes before they become problems. Temperature accuracy holds within ±1°F, covering a wide range from -22°F to 140°F.
The DRY/COMFORT/WET wellness indicator provides an instant read without squinting at numbers.
While it lacks a backlight or Bluetooth, the TP50 remains a dependable, no-fuss option for straightforward room monitoring.
| Best For | Anyone who wants a simple, accurate way to keep tabs on indoor humidity — great for bedrooms, offices, humidors, or even a reptile tank. |
|---|---|
| Temp Accuracy | ±1 °F |
| Humidity Accuracy | ±2–3% RH |
| Update Interval | 10 seconds |
| Power Source | 1× AAA battery |
| Mounting Options | Stand, magnet |
| Comfort Indicator | Dry/Comfort/Wet icon |
| Additional Features |
|
- Reads humidity and temperature quickly, refreshing every 10 seconds so you catch changes fast
- The DRY/COMFORT/WET indicator gives you an instant snapshot without reading any numbers
- Tiny and flexible — prop it up on a stand or stick it to a surface with the built-in magnet
- No backlight makes it tough to read in dim rooms or from across the space
- No Bluetooth or app, so there’s no way to check readings remotely
- Clearing the high/low history means pulling the battery out — there’s no reset button
5. U Unni Wireless Indoor Outdoor Thermometer
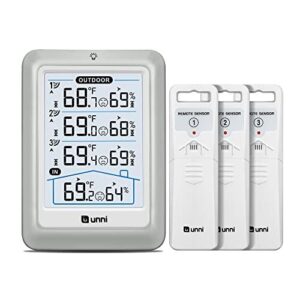
Want one display to show conditions from four different spots at once? That’s exactly what the U Unni delivers. Three remote sensors let you monitor the porch, garage, basement, and main living area without leaving your couch.
These sensors transmit readings every 30 seconds from up to 328 feet away, ensuring real-time updates across all zones. The 4.5-inch backlit LCD offers easy readability from across the room, enhancing user convenience.
The catch: there’s no app or cloud access, and battery drain on the sensors runs faster than average, which may require more frequent battery changes.
| Best For | Anyone who wants to keep tabs on multiple spots around the home — think porch, garage, basement, and living room — all from one screen without any tech fuss. |
|---|---|
| Temp Accuracy | ±1.8 °F |
| Humidity Accuracy | ±5% RH |
| Update Interval | 30 seconds |
| Power Source | USB + AA batteries |
| Mounting Options | Base unit stand |
| Comfort Indicator | Comfort indicator display |
| Additional Features |
|
- Covers up to 328 feet and refreshes every 30 seconds, so your readings are always current
- The 4.5-inch backlit display is easy to read from across the room
- Comes with three remote sensors right out of the box — no extra purchases needed
- No app or cloud access, so you can only check readings from the display itself
- Sensor batteries drain faster than expected, meaning more frequent swaps
- Range drops in homes with thick walls or lots of obstacles between sensors and the base unit
Frequently Asked Questions (FAQs)
Where should I place my humidity gauge?
Place your humidity gauge in an open, regularly occupied area — chest to eye level, away from vents, windows, and heat sources.
Where air moves freely and reflects what you actually breathe.
Is humidity level 40 too low for a home?
No, 40% RH isn’t too low — it’s actually within the ideal 40–60% range for most homes. You’ll breathe easier, protect your furniture, and keep mold at bay.
How to properly set humidity in a house?
Set your home humidity between 40% and 50% RH. Use a humidifier to add moisture when readings drop below 40%, and a dehumidifier when levels climb above 50%.
What humidity level is safe for wooden furniture?
Keep indoor humidity between 40 and 60 percent RH to protect wood furniture. Below 40 percent, wood can crack. Above 60 percent, it may warp or swell.
How does indoor humidity affect sleep quality?
Air that’s too dry scratches at your throat and nasal passages while you sleep. Too damp, and mold or dust mites stir up allergies. Aim for 30–50% RH for uninterrupted rest.
Do humidity meters work accurately in cold climates?
Yes, but cold climates add challenges. Low temps can slow sensor response and cause drift. Choose a meter with temperature compensation and check for frost buildup on the sensor regularly.
Should humidity meters be used with a dehumidifier?
Your dehumidifier has its own built-in sensor, yet it can still miss what’s happening across the room.
A separate humidity meter gives you a reliable second opinion. And that’s exactly why pairing both makes sense.
Conclusion
A homeowner once replaced three hygrometers in a year, convinced each one was defective. The real problem? Every unit sat on a windowsill above a baseboard heater.
One repositioning fixed everything. That’s the quiet power behind these humidity meter placement tips—the right spot transforms a misleading number into a trustworthy reading.
Your air is telling you something. Place your meter where it can actually listen, and you’ll finally hear the full story.