This site is supported by our readers. We may earn a commission, at no cost to you, if you purchase through links.

Basements sit an average of 10°F–15°F colder than the rest of your home—and your reptile’s heat mat doesn’t know that. What works fine in a heated living room can leave your ball python’s warm side 8 degrees short of its 88°F minimum overnight.
Concrete floors pull heat away from enclosures faster than almost any other surface, and cold air pooling near the ground makes the problem worse.
Getting reptile heating mats to perform reliably in basement setups means picking the right wattage, pairing it with a proper thermostat, and understanding how your environment works against you.
Table Of Contents
- Key Takeaways
- Top 10 Reptile Heating Mats
- 1. iPower Reptile Heating Mat
- 2. Aiicioo Reptile Under Tank Heater Thermostat
- 3. Repti Zoo Adjustable Reptile Heat Pad
- 4. iPower Adjustable Reptile Heat Mat
- 5. BN LINK Reptile Under Tank Heat Pad
- 6. Pawfly Reptile Heating Pad
- 7. GlowUp Adjustable Reptile Heat Mat
- 8. Lucky Herp Reptile Heating Pad
- 9. iPower Reptile Under Tank Heater
- 10. BN Link Waterproof Seedling Heat Mat
- Basement Heating Challenges
- Heat Mat Size and Wattage
- Applying The One-third to One-half Coverage Rule
- Choosing Mat Size by Tank Footprint
- Matching Heat Mats to 10–20 Gallon Enclosures
- Matching Heat Mats to 30–40 Gallon Enclosures
- Low-wattage Versus High-wattage Heat Mats
- Why Oversized Mats Can Reduce Cool Zones
- Choosing Larger, Lower-wattage Mats for Even Heat
- Thermostats and Temperature Control
- Why Every Basement Heat Mat Needs a Thermostat
- External Thermostats Versus Built-in Controllers
- On/off Thermostats for Basic Reptile Setups
- Dimming and Pulse-proportional Thermostat Options
- Proper Thermostat Probe Placement Above The Mat
- Preventing Unsafe Temperature Spikes in Cold Rooms
- Using Digital Thermometers to Verify Surface Temperatures
- Safe Basement Installation
- Cleaning Glass Before Applying Adhesive Mats
- Placing The Mat Under One Enclosure End
- Creating an Air Gap Beneath The Terrarium
- Avoiding Seams, Frames, Cords, and Tank Edges
- Keeping Water Bowls Away From Heated Zones
- Preventing Hotspots Under Hides and Bedding
- Inspecting Cords, Plugs, Adhesive, and Mat Surfaces
- Substrate and Species Needs
- How Substrate Depth Affects Heat Transfer
- Keeping Bedding Shallow Over Under-tank Heaters
- Warm-side and Cool-side Gradient Planning
- Snake-friendly Heat Mat Considerations
- Ball Python Basement Heating Requirements
- Corn Snake Warm-side Temperature Planning
- Boa Constrictor Enclosure Heating Considerations
- When Burrowing Reptiles Need Overhead Heat Support
- Frequently Asked Questions (FAQs)
- Where to place a reptile heat mat?
- Can I put a heat mat under reptile carpet?
- How much electricity does a reptile heat mat use?
- How often should basement heat mats be replaced?
- Do heat mats work with bioactive terrarium setups?
- Are heat mats safe during extended owner absences?
- Can multiple tanks share one thermostat in basements?
- Conclusion
Key Takeaways
- Basements run 10–15°F colder than the rest of your home, so your heat mat needs more wattage and an external thermostat—not just whatever worked in the living room.
- Concrete floors actively pull heat away from your enclosure, so always place a foam insulation sheet under the tank to stop that energy from bleeding straight into the slab.
- Your heat mat should cover only one-third to one-half of the tank floor—go bigger, and you wipe out the cool zone your reptile needs to regulate its own body temperature.
- Never trust the thermostat readout alone; press a contact thermometer directly onto the substrate above the mat and verify you’re within ±2°F of your target before your animal moves in.
Top 10 Reptile Heating Mats
Not every heat mat manages a cold basement the same way. These ten options were chosen for their consistent performance, thermostat compatibility, and practical sizing for underground setups.
Whether you’re new to reptile keeping or upgrading an existing setup, understanding snake cage heat source options helps you choose the right wattage and style for your specific space.
Here’s how each one stacks up.
1. iPower Reptile Heating Mat
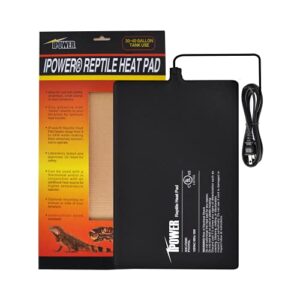
The iPower Reptile Heating Mat earns its spot here because it’s straightforward and dependable. The 8" × 12" PTC element spreads 16 watts evenly across the mat — no hot patches, no cold corners.
Rubber feet are included, so you’ve got the air gap sorted from day one. The 3M adhesive keeps it locked to the glass.
One real caveat: there’s no built-in thermostat. Pair it with an external controller, and you’re set.
| Best For | Reptile and small animal owners who want a reliable, low-cost heat source and don’t mind pairing it with a separate thermostat. |
|---|---|
| Power (Watts) | 16 W |
| Pad Size | 8×12 in |
| Thermostat Included | No |
| Waterproof | No |
| Adhesive Backing | 3M adhesive |
| Safety Certification | None listed |
| Additional Features |
|
- PTC element spreads heat evenly — no hot spots or cold patches across the full 8" × 12" surface
- Comes with rubber feet already, so you get proper airflow without hunting for a workaround
- 3M adhesive backing holds firm to glass and keeps setup simple
- No built-in thermostat, so you’ll need an external controller to avoid overheating
- Adhesive can fail on textured or certain plastic surfaces over time
- Can’t be placed directly on a table or floor — improper mounting is a real fire risk
2. Aiicioo Reptile Under Tank Heater Thermostat
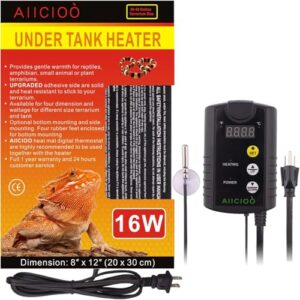
If you’d rather skip the extra purchase, the Aiicioo steps in with a built-in digital thermostat right out of the box.
The 8" × 12" pad runs at 16 watts and controls temperatures between 68°F and 108°F — enough range for most common species.
The upgraded adhesive holds firm on glass, and rubber feet handle your air gap.
Fair warning: it’s a simple on/off controller, so expect swings of 10°F–15°F in a cold basement.
| Best For | Reptile owners who want an all-in-one heating pad without buying a separate thermostat. |
|---|---|
| Power (Watts) | 16 W |
| Pad Size | 8×12 in |
| Thermostat Included | Yes |
| Waterproof | No |
| Adhesive Backing | Upgraded adhesive |
| Safety Certification | None listed |
| Additional Features |
|
- Built-in digital thermostat means one less thing to buy or set up
- Upgraded adhesive stays put on glass tanks without peeling or sliding
- Flexible mounting options — bottom or side — with rubber feet for a proper air gap
- On/off controller can swing 10°F–15°F, which gets noticeable in cooler rooms
- Adhesive bonds hard to glass, so moving it later is a hassle
- Pad may struggle to hit higher temps if your room runs cold or the probe isn’t placed well
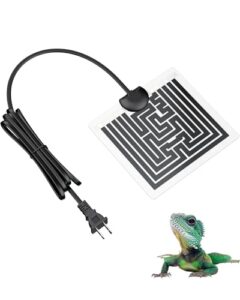
3. Repti Zoo Adjustable Reptile Heat Pad
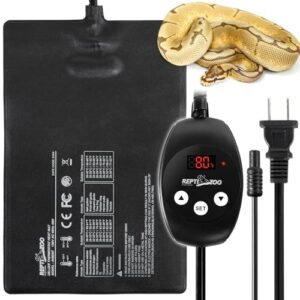
Want tighter control than a simple on/off switch? The Repti Zoo Adjustable Reptile Heat Pad gives you exactly that.
Its carbon-fiber element heats evenly across the full 8" × 12" surface, and the built-in thermostat adjusts from 68°F to 122°F — a range that covers nearly every common species. At 24 watts, it manages cold basement conditions better than lower-wattage pads.
One heads-up: some units overshoot by up to 10°F, so keep a digital thermometer inside the enclosure to verify actual temperatures.
| Best For | Reptile owners and hobbyists who want precise temperature control for species like bearded dragons, leopard geckos, or snakes — and anyone using gentle heat for fermentation or seed germination. |
|---|---|
| Power (Watts) | 24 W |
| Pad Size | 8×12 in |
| Thermostat Included | Yes |
| Waterproof | Yes |
| Adhesive Backing | 3M adhesive |
| Safety Certification | None listed |
| Additional Features |
|
- Wide 68°F–122°F thermostat range covers nearly every common reptile species
- Carbon-fiber heating element warms the full surface evenly and handles cooler rooms better than low-wattage pads
- Waterproof PVC surface is easy to clean and safe in humid or misty terrariums
- Some units overshoot the set temperature by up to 10°F, so a separate digital thermometer is a must
- Adhesive backing can lose grip over time and partially peel away from the glass
- Struggles to hit higher target temps in cold ambient rooms, which may not be enough for baby reptiles on its own
4. iPower Adjustable Reptile Heat Mat
Step down to 8 watts and you lose the brute-force wattage — but you gain something more useful in a compact setup: control without complexity.
The iPower Adjustable Reptile Heat Mat covers a 6" × 8" footprint, making it the right call for 10–20 gallon enclosures. Its PTC element spreads heat evenly, and the built-in controller knob spans 68–104°F. The 3M adhesive holds firm, even on basement glass. Pair it with an external thermostat — the built-in knob isn’t precise enough on its own.
| Best For | Hobbyists keeping small reptiles, amphibians, or insects in 5-qt to 12-qt enclosures who want simple, affordable warmth without a complicated setup. |
|---|---|
| Power (Watts) | 8 W |
| Pad Size | 6×8 in |
| Thermostat Included | No |
| Waterproof | No |
| Adhesive Backing | 3M adhesive |
| Safety Certification | None listed |
| Additional Features |
|
- PTC element spreads heat evenly across the full 6" × 8" pad — no hot spots to worry about
- Built-in controller knob and included LCD thermometer mean fewer accessories to buy separately
- Low 8W draw is safe for continuous use and won’t spike your electricity bill
- No built-in thermostat, so you’ll need an external controller for precise, reliable temperature regulation
- Strong 3M adhesive is great until you need to move it — repositioning is a pain and leaves residue
- 8W just isn’t enough for larger tanks or cold rooms without supplemental heating
5. BN LINK Reptile Under Tank Heat Pad
The BN LINK stands out for one simple reason: reliability at a fair price.
This 6" × 8" pad pulls 8 watts and sits just 0.11" thin — barely noticeable under your tank.
It reaches 104–122°F quickly, and the waterproof polymer coating means cleaning day won’t stress you out.
The adhesive backing grips glass well, even in cool basement conditions.
Just don’t skip the external thermostat. Without one, that temperature ceiling can climb fast enough to burn your animal.
| Best For | Reptile and amphibian owners with 10–20 gallon tanks who want a reliable, low-cost heat source that’s easy to install and maintain. |
|---|---|
| Power (Watts) | 8 W |
| Pad Size | 6×8 in |
| Thermostat Included | No |
| Waterproof | Yes |
| Adhesive Backing | Strong adhesive |
| Safety Certification | None listed |
| Additional Features |
|
- Thin, flexible design sits almost flush under the tank and handles slight curves without peeling
- Waterproof coating makes cleaning hassle-free and adds long-term durability
- Energy-efficient 8W draw keeps electricity costs low without sacrificing consistent warmth
- Requires a separate thermostat — skipping it puts your animal at real risk of burns
- Adhesive isn’t always pre-attached, so stickiness can vary depending on the unit you get
- Only sized for small tanks; bigger enclosures will need multiple pads or a stronger heater
6. Pawfly Reptile Heating Pad
The Pawfly keeps things simple — and sometimes that’s exactly what you need.
No fuss, no complicated setup — just plug it in and use a digital thermometer to check hot spots on your reptile heat mat by pressing it directly onto the substrate above the mat.
Its graphene heating element pushes 5 W evenly across a 6" × 5.5" surface, with a built-in ceiling of 50°C (122°F) so runaway overheating isn’t a concern. The ultra-thin profile slides under small tanks without lifting the enclosure awkwardly. No adhesive backing means repositioning is easy.
That said, pair it with an external thermostat. In a cool basement, "simple" can drift into "unpredictable" fast.
| Best For | Small reptile, amphibian, or arachnid owners who need a simple, affordable supplemental heat source for compact enclosures. |
|---|---|
| Power (Watts) | 5 W |
| Pad Size | 6×5.5 in |
| Thermostat Included | No |
| Waterproof | No |
| Adhesive Backing | None |
| Safety Certification | None listed |
| Additional Features |
|
- Graphene element spreads heat evenly across the pad, so no annoying hot spots under your critter’s tank
- Ultra-thin and non-adhesive, making it easy to reposition or move between setups without a hassle
- Low 5W draw means you can leave it running long-term without worrying about your electric bill
- No built-in thermostat, so without an external one you’re flying blind on temperature control
- Not waterproof at all — one cleaning slip and you’re shopping for a replacement
- Some users report early unit failure after a few months, which is a real concern for anything housing a living animal
7. GlowUp Adjustable Reptile Heat Mat
The GlowUp Adjustable Reptile Heat Mat earns its spot for one key reason: flexibility. Its 15 cm × 28 cm surface covers a solid warm zone, and the adjustable dial lets you fine-tune heat anywhere between 20°C and 40°C — enough range for most common species.
At 7 W per mat, monthly costs stay low.
The removable, damp-proof surface is a genuine advantage in humid setups.
No built-in thermostat, though. In a cool basement, pair it with an external one.
Non-negotiable.
| Best For | Hobbyists keeping snakes, lizards, geckos, turtles, or small insects who want affordable, flexible belly heat without breaking the bank. |
|---|---|
| Power (Watts) | 7 W |
| Pad Size | 15×28 cm |
| Thermostat Included | No |
| Waterproof | No |
| Adhesive Backing | Non-adhesive |
| Safety Certification | None listed |
| Additional Features |
|
- Slow-rise heating element takes about 30 minutes to stabilize, so you’re not risking sudden temperature spikes
- Works under or on the side of the enclosure, giving you real flexibility with tank layouts
- Removable damp-proof surface makes it easy to reposition with no sticky residue left behind
- No built-in thermostat means you’re flying blind on exact temps unless you add an external one
- Not waterproof, so high-moisture or aquatic setups need extra caution
- Can’t have direct animal contact — it has to go under the substrate or enclosure floor, not inside it
8. Lucky Herp Reptile Heating Pad
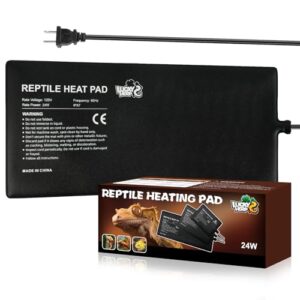
The Lucky Herp Reptile Heating Pad is built for medium setups. At 8 × 18 inches and 24 W, it covers a solid warm zone across 40‑gallon‑range tanks.
The waterproof PVC surface manages humidity well — a real plus in damp basements. Heat‑up time is fast, which matters when basement temps drop overnight.
One honest caveat: the adhesive struggles on glass. Have 3M foil tape ready before you install.
Pair it with an external thermostat. The built‑in dial alone won’t cut it downstairs.
| Best For | Reptile owners running medium-sized tanks (up to 40 gallons) who need reliable belly heat for lizards, snakes, turtles, or amphibians. |
|---|---|
| Power (Watts) | 24 W |
| Pad Size | 8×18 in |
| Thermostat Included | Yes |
| Waterproof | Yes |
| Adhesive Backing | Double-sided adhesive |
| Safety Certification | None listed |
| Additional Features |
|
- Heats up fast and stays consistent, so your animals get stable warmth even when room temps dip overnight
- Waterproof PVC handles humidity without breaking down — great for damp environments
- Low 24W draw keeps energy costs reasonable while still covering a solid warm zone
- Adhesive doesn’t grip glass well; you’ll likely need 3M foil tape to make it stick
- The built-in thermostat can run inaccurate, so pairing it with an external one is pretty much a must
- Single-use adhesive means one bad placement and the whole pad is done
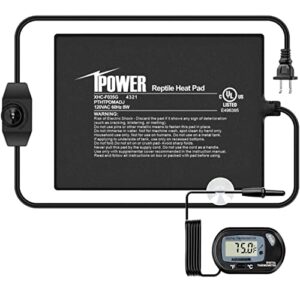
9. iPower Reptile Under Tank Heater

The iPower Reptile Under Tank Heater keeps things simple — and that’s exactly what a basement setup needs. The 8 × 12 inch, 16 W model accommodates 30–40 gallon tanks without drama.
PTC film heats evenly, and the 3M adhesive backing holds firm on clean glass. It’s UL listed and waterproof, so humidity won’t be an issue downstairs.
No built-in thermostat, though — you’ll need an external one. Add rubber feet to create an air gap. Skipping that step is a fire risk.
| Best For | Reptile and amphibian owners who want reliable, even undertank heat for 30–40 gallon setups without spending a lot. |
|---|---|
| Power (Watts) | 16 W |
| Pad Size | 8×12 in |
| Thermostat Included | No |
| Waterproof | Yes |
| Adhesive Backing | 3M-grade adhesive |
| Safety Certification | UL listed |
| Additional Features |
|
- PTC film spreads heat evenly, and the 3M adhesive keeps it locked in place on clean glass
- UL listed and waterproof — handles humidity without issue
- Works with external thermostats for precise temperature control
- No built-in thermostat, so you’ll need to buy one separately to avoid overheating
- The adhesive makes it a one-time install — relocating it later is a real pain
- Must be side-mounted or propped up with rubber feet; skipping this creates a fire hazard
10. BN Link Waterproof Seedling Heat Mat
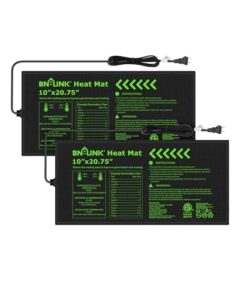
Not designed for reptiles — but it works surprisingly well. The BN Link Waterproof Seedling Heat Mat measures 10 × 20.75 inches and draws 20 W, making it a solid fit for larger basement enclosures.
Its IP67-rated PVC surface manages humidity without complaint, and the far-infrared heating layer distributes warmth evenly across the full footprint.
No built-in thermostat, so pair it with an external one. ETL-listed and backed by a 15-month warranty.
A practical, affordable option when dedicated reptile mats are out of stock.
| Best For | Budget-conscious reptile keepers or gardeners who need a reliable heat mat for larger trays or enclosures and already have an external thermostat on hand. |
|---|---|
| Power (Watts) | 20 W |
| Pad Size | 10×20.75 in |
| Thermostat Included | No |
| Waterproof | Yes |
| Adhesive Backing | None |
| Safety Certification | ETL listed |
| Additional Features |
|
- IP67 waterproof rating makes it easy to wipe down and handles humidity well
- Far-infrared heating spreads warmth evenly across the whole surface
- ETL-listed with a 15-month warranty — solid peace of mind for the price
- No built-in thermostat, so you’ll need to buy one separately to control temps
- Fixed plug orientation can make placement awkward depending on your setup
- Thin vinyl surface may crack over time with heavy use
Basement Heating Challenges

Basements play by their own rules concerning heat. Cold concrete, drafts, and seasonal swings can undermine even a solid mat setup if you don’t account for them.
Here’s what you need to understand before trusting any heater in a below-grade space.
Why Basements Run Cooler Than Upstairs Rooms
Basements stay cold for good reasons.
Soil acting as a ground heat sink pulls warmth away through foundation walls all year. Air stratification keeps cool air pooled at floor level, while insulation gaps let outdoor chill seep in.
Thermal mass influence from concrete stores cold, not heat. Add moisture cooling from basement humidity, and your ambient room temperature can easily run 10–15°F below the main floor.
How Concrete Floors Affect Terrarium Heat Loss
Concrete doesn’t just sit there — it actively pulls heat away from your tank. That’s a thermal mass impact working against you.
High concrete conductivity means under tank heating bleeds straight into the slab through direct contact, spiking energy consumption and flattening your thermal gradient.
A simple fix: insulation layers beneath the enclosure.
Even a thin foam sheet delivers real air gap benefits, cutting edge thermal bridging and protecting substrate insulation where it matters most.
Proper floor heater sizing guidelines prevent overheating and energy waste.
Managing Cold Drafts Near Basement Walls
Cold drafts are just as damaging to your thermal gradient as a concrete floor. Seal rim joists with foam sealant application and handle air leakage detection at outlets and pipe penetrations.
Door sweep installation and window weatherstripping stop creeping cold at entry points.
Perimeter insulation extension along basement walls protects your cool zone, preserves substrate insulation, and keeps your heat mat working efficiently — not fighting the room.
Why Heat Mats Warm Surfaces, Not Air
Heat mats work through Conductive Heat Transfer — they warm whatever they touch. That means Substrate Contact Efficiency drives everything.
Your animal feels the warmth through direct contact, not from heated air.
Air Temperature Decoupling is real: ambient air stays near room temperature.
Thermal Gradient Formation happens at floor level.
Substrate depth and substrate heat conductivity determine how well under tank heating actually reaches your reptile.
When Basement Setups Need Supplemental Heat
When your mat alone isn’t cutting it, add a Secondary Space Heater with Thermostat integration and temperature control to boost ambient temperature across the room. Heat Distribution Fans help even out cold pockets. Smart heat mat installation plus an Air Temperature Boost keeps your animal’s environment safe and stable.
An Insulation Panel Use under the enclosure improves energy efficiency substantially.
Follow a Temperature Monitoring Protocol daily.
Seasonal Temperature Swings in Basement Reptile Rooms
Basements don’t stay still — they drift with the seasons.
Winter Heat Lag means your mat works harder as ambient temperature drops overnight, making Nighttime Temperature Dip a real threat.
Summer brings the opposite: Overheat Risk spikes without Seasonal Thermostat Adjustment.
Insulation Enhancement Techniques and seasonal tuning of thermostat setpoints year‑round. That balance keeps energy efficiency solid and your animal’s gradient locked in.
Heat Mat Size and Wattage

Getting the size and wattage right is what separates a functioning setup from a frustrating one.
Too small, and your animal never gets warm enough — too large, and you lose the cool zone they need to regulate their body temperature.
Here’s how to match the right mat to your tank.
Applying The One-third to One-half Coverage Rule
Think of your tank as a two-room apartment — one warm, one cool. The coverage formula is simple: your heat mat should occupy one-third to one-half of the tank floor.
That partial mat placement creates a natural temperature gradient that your reptile can actually use. Gradient visualization is the goal. Without a defined cool zone, you lose edge heat management and temperature monitoring becomes guesswork.
Choosing Mat Size by Tank Footprint
Start with the tank base, not the volume. Measure length and width, then use that footprint ratio calculation to guide your mat length matching.
A 20-gallon sits on roughly 24″×12″ of glass — your mat should cover 8–12 inches along that length.
Match width-to-length ratio carefully, keep edge placement strategy tight to one end, and your gradient zone allocation manages itself.
Matching Heat Mats to 10–20 Gallon Enclosures
For a 10–20 gallon tank, a 6″×8″ mat at 8W hits the sweet spot. It keeps wattage density low enough to avoid hotspots while still building a usable temperature gradient.
Power consumption estimates run under $1/month.
Adhesive longevity holds best on clean, flat glass.
Always confirm thermostat calibration before your animal moves in — species-specific temperature requirements don’t leave room for guesswork.
Matching Heat Mats to 30–40 Gallon Enclosures
Step up to a 30–40 gallon and the math shifts fast. Heat mat size and wattage considerations matter more here — too small, and your thermal gradient and cool zone management collapses.
- Choose a 16W, 8″×12″ mat for edge heat distribution without overloading
- Budget power consumption at roughly $2–$3/month
- Use thermostat control to lock in temperature gradient tuning
Mat shape selection and tank lid compatibility keep everything balanced.
Low-wattage Versus High-wattage Heat Mats
Wattage is where things get practical.
Low-wattage mats — think 4–8W — cost under $1/month and heat gently, which is great for burrowing species and small enclosures.
High-wattage mats (20–24W) run $4–6/month, but reach target temps faster, a real advantage in cold basements.
Either way, pair with a thermostat.
That’s your real power draw efficiency win.
Why Oversized Mats Can Reduce Cool Zones
Size matters more than most people realize. Too much mat means Heat Diffusion Overreach — warmth spreads wall to wall, flattening your thermal gradient.
Cool Zone Compression kicks in fast; your reptile loses escape routes from the heat. That’s Behavioral Thermoregulation Loss in practice.
Microhabitat Homogenization turns a carefully built enclosure into one monotonous warm slab. Stick to one-third to one-half coverage.
Choosing Larger, Lower-wattage Mats for Even Heat
Bigger mats at lower wattage are your best tool for Gradient Stability. A 16W pad across an 8″×12″ Mat Surface Area delivers Heat Spread Efficiency without scorching one spot. That’s Wattage Optimization working quietly in your favor.
Thermal Uniformity improves, energy efficiency holds steady, and your reptile gets a real thermal gradient — warm on one end, genuinely cool on the other.
Thermostats and Temperature Control

A heat mat without a thermostat is just a liability waiting to happen—especially in a basement where temperatures can swing unexpectedly. The right thermostat keeps your animal’s warm zone locked in, no matter what the room does overnight.
A heat mat without a thermostat is just a liability waiting to happen
Here’s what you need to know before choosing one.
Why Every Basement Heat Mat Needs a Thermostat
Basements don’t forgive temperature mistakes. Without thermostat control, your heat mat runs continuously — no Safety Cut, no breaks, no protection.
That’s a fire safety risk and a real drain on energy consumption.
A thermostat delivers Temperature Stability by cycling power on demand, cutting energy savings up to 30%. It also provides Voltage Protection that prevents thermal runaway — essential heat mat safety for any cold-room setup.
External Thermostats Versus Built-in Controllers
External thermostats win on Probe Placement Flexibility — you position the probe exactly at your reptile’s basking site, not at the mat edge.
They also handle Multi-Zone Management across rack systems and send Remote Alarm Alerts if temps drift.
Built-in controllers are simpler and cheaper upfront, but your Cost-Benefit Analysis changes fast in a basement, where Power Consumption Efficiency and precise thermostat control genuinely matter.
On/off Thermostats for Basic Reptile Setups
On/off thermostats are your go-to for Budget Thermostat Selection when you’re just starting out. Simple On/Off Wiring means less setup headache — power cuts when your heat mat hits the target, then kicks back on when temps drop.
Duty Cycle Management stays automatic. Expect some Temperature Swing Tolerance, so Basic Thermostat Calibration matters.
Verify with a digital thermometer. Reliable, affordable, and energy efficiency-friendly enough for most basic setups.
Dimming and Pulse-proportional Thermostat Options
When precise control matters, step up to a dimming thermostat or pulse-proportional unit.
Dimming models use phase angle control and a PID dimming algorithm to taper power smoothly as temps approach the set point — no jarring on/off swings.
Pulse duration tuning refines delivery in short bursts. Both support dimming curve optimization and power consumption tracking, making them the smarter heat mat thermostat choice for cold basements.
Proper Thermostat Probe Placement Above The Mat
Where you put the probe decides everything. Place it flat against the tank’s inner wall — flat contact surface matters for accurate sensing. Keep the probe centerline position 2–3 inches from the mat’s edge to avoid edge proximity hotspots.
- Align with the warm zone center for thermal gradient verification
- Use a digital thermostat with proper thermostat calibration after placement
- Cross-check with a surface thermometer for reliable temperature monitoring and probe placement accuracy
Preventing Unsafe Temperature Spikes in Cold Rooms
Cold rooms are sneaky. When ambient temps drop fast, your mat works harder — and without proper thermostat calibration, that extra effort becomes a spike. Set alerts for anything 2°C above your target. Insulation board placement behind the enclosure reduces wall heat loss, supporting heat distribution uniformity.
| Risk Factor | Prevention Step |
|---|---|
| Sudden cold drafts | Seal basement door gaps |
| Probe drift | Recalibrate after power outages |
| Thermal runaway prevention | Use pulse-proportional thermostat |
| Temperature logging frequency | Log every 5 minutes initially |
| Fire safety | Inspect cords weekly |
Using Digital Thermometers to Verify Surface Temperatures
thermostat’s readout isn’t the whole story. Use a contact thermometer — not infrared — and press the probe flat against the substrate above the heat mat. Hold it steady for 30 seconds.
You want readings within ±2°C of your target. Log wattage, room temp, and surface temps each session. Consistent logbook practices catch drift before your animal does.
Safe Basement Installation
Getting your heat mat installed correctly makes all the difference between a safe setup and a fire hazard. Basements add a few extra steps you won’t want to skip.
Here’s what to get right before you plug anything in.
Cleaning Glass Before Applying Adhesive Mats

Getting the adhesive to stick starts with proper Surface Preparation — skip it, and your mat shifts or peels within weeks.
Start with Dust Removal using a dry microfiber cloth, then move to IPA Application: wipe the glass underside with 70% isopropyl alcohol until no smudges remain.
Streak-Free Drying with a lint-free cloth follows.
Finish with Residue Inspection under bright light.
Any remaining film means adhesive backing durability suffers.
Placing The Mat Under One Enclosure End

Once the glass is clean, slide the mat under one end of the tank — not the middle. This end side alignment creates a true temperature gradient, giving your reptile a warm side and a cool zone to move between.
Watch edge clearance; the mat shouldn’t extend past the glass edge. Keep hidden spots off the heated end, and mind your bedding depth — thick substrate kills heat transfer fast.
Creating an Air Gap Beneath The Terrarium

Raise your tank 1–2 inches using uniform spacers — spacer uniformity matters here. consistent gap height keeps airflow moving freely beneath tank heating systems, cutting heat loss noticeably.
airflow mesh panels underneath, choose moisture‑resistant materials rated for basement humidity, and a reflective underside helps push heat upward where your thermal gradient actually lives.
Avoiding Seams, Frames, Cords, and Tank Edges

Once that air gap is locked in, shift your attention to the mat’s edges and wiring. Seams, frame lips, and tank edges are where problems hide.
- Keep mat edges 1 inch from glass borders — Adhesive Edge Sealing prevents heat bridging
- Use Cable Clip Routing to manage wire management along the base
- Frame Flush Installation stops crimping at frame corners
- Maintain Air Gap Maintenance and add an Edge Heat Shield where needed
Always use GFCI protection, a surge protector, and follow fire safety and electrical wiring best practices — solid installation and safety guidelines for heat pads keep your setup running safely.
Keeping Water Bowls Away From Heated Zones

Bowl Placement Strategies start with one simple rule: keep water on the cool side, always. Cool-side Hydration prevents heat shock, slows evaporation, and keeps your animal drinking safely.
Use Non-porous Bowl Materials to block bacterial growth, and apply Bowl Stability Solutions — weighted bases or non‑slip mats — to prevent tipping.
For Water Temperature Monitoring, verify cool‑zone temps stay below 82°F weekly.
Preventing Hotspots Under Hides and Bedding

Hides trap heat fast—especially in basements where cold floors push warmth upward unevenly. Your Hide Placement Strategy matters here.
Follow these four steps:
- Use Ventilated Hide Design to let airflow prevent hot spots.
- Apply a Heat Diffuser Layer under thin substrate depth.
- Keep Bedding Material Choice shallow—under 1 cm.
- Add an Insulating Mat Barrier beneath to maintain your thermal gradient.
Inspecting Cords, Plugs, Adhesive, and Mat Surfaces

Check everything once a week—no exceptions.
Run through Cord Damage Signs first: cracked insulation, scorch marks, or frayed wires mean immediate replacement.
Plug Integrity Checks come next; loose prongs cause hotspots.
Press the edges for Adhesive Bond Testing—no lifting allowed.
Then scan for Mat Surface Uniformity using a digital thermometer. Temperature Spot Detection catches uneven zones before they become emergencies.
Substrate and Species Needs

Getting the heat right isn’t just about the mat — it’s also about what’s sitting on top of it and who’s living inside. Substrate depth, species behavior, and thermal gradient all shape how well your setup actually works.
Here’s what to keep in mind for the most common snake and reptile species you’ll find in a basement room.
How Substrate Depth Affects Heat Transfer
Think of your substrate like a sweater between the mat and your reptile. The thicker it is, the less warmth gets through.
Depth heat attenuation is real — each extra inch of bedding drops surface temps by roughly 2–6°C. Thermal conductivity variation matters too: sandy substrates transfer heat faster than loose coconut fiber.
Moisture heat transfer adds another variable, since damp substrate conducts warmth more readily but invites mold.
Keeping Bedding Shallow Over Under-tank Heaters
Shallow wins every time. Keep bedding material selection practical — aim for no more than 1 cm (about 0.4 in) above your under tank heating mat.
Deeper substrate depth and insulation effects stack up fast, killing heat distribution uniformity.
Moisture management matters too: substrate moisture levels in damp setups conduct heat differently than dry ones.
Monitor energy consumption tracking alongside a thermometer to confirm your warm zone is actually warm.
Warm-side and Cool-side Gradient Planning
Your warm side targets 88–92°F; your cool side should sit at 75–82°F.
That 10–15°F spread gives your animal real choice.
Measure gradient length across at least 10–12 inches of enclosure floor for meaningful cool zone management.
Recheck temperature gradient monitoring after any rearrangement.
Species-specific gradient tuning matters — ball pythons and corn snakes both need that full warm-side heat distribution, running end to end.
Snake-friendly Heat Mat Considerations
Snakes care about surface conductivity more than air temp. A ball python needs 88–92°F at floor level; corn snakes are slightly more forgiving, but still rely on consistent Species Thermal Zones.
Match wattage to tank size, keep substrate depth under 1 cm, and use an external thermostat for Temperature Band Tuning.
Good Humidity Management and Edge Overheat Prevention come down to placement — never center the mat.
Ball Python Basement Heating Requirements
Ball pythons are stricter than most snakes about Thermoregulation patterns. They need a solid 88–92°F warm side and a cool side around 76–80°F — and basements make that thermal gradient harder to hold.
Use two 8″×12″ (16 W) mats with an external thermostat, add insulation under mat to fight nighttime temperature drop, and lean on power cycling efficiency with basement humidity control in mind.
Corn Snake Warm-side Temperature Planning
Corn snakes are more forgiving than ball pythons, but that doesn’t mean guesswork is fine.
Your Target Warm Range sits at 85–90°F, with a Basking Spot Temperature of 88–92°F for reliable digestion. Keep your Thermal Zone Ratio at one-third warm coverage.
Use a heat mat with a thermostat, and plan for a Nighttime Gradient Shift down to 80–85°F to maintain Heat Distribution Balance.
Boa Constrictor Enclosure Heating Considerations
Boas run bigger than corn snakes — and their heating needs reflect that.
Your target Thermal Gradient Slope: 80–90°F warm side, with Basking Spot Placement reaching 90–95°F. Cool zones should stay 75–80°F for Thermal gradient and cool zone management.
- Use two 8″×12″ mats for larger enclosures — a Wattage selection guide is essential
- External thermostat vs built‑in controller: always choose external for Thermostat Calibration accuracy
- Keep substrate shallow — Substrate Conductivity drops quickly under thick bedding
- Insulate beneath the tank for a solid Heat Retention Strategy
When Burrowing Reptiles Need Overhead Heat Support
Burrowing species need more than a heat mat can offer. A mat warms substrate, not the air — and that gap matters.
Adding overhead external heat creates a Vertical Thermal Gradient that facilitates Thermoregulation at Burrow Entrance Warmth points.
Radiant Panel Placement high in the enclosure controls Air Temperature Zoning, while your heat mat regulates substrate depth and insulation effects below.
Together, they cover everything.
Frequently Asked Questions (FAQs)
Where to place a reptile heat mat?
Place the mat under one end of the tank — never centered.
This provides proper under tank heating, maintains clearance space for airflow, and keeps cable routing clean without edge proximity issues.
Can I put a heat mat under reptile carpet?
Technically, yes—but it’s not ideal. Reptile carpet acts as a Heat Transfer Barrier, creating Carpet Insulation Effect that causes Temperature Gradient Distortion.
Place the mat under the tank instead for safer, more accurate warmth.
How much electricity does a reptile heat mat use?
A small mat runs 4–8 watts — roughly $70–$00 monthly. Larger 16–24W pads cost $3–$6 per month. Add a thermostat and you’ll cut that kilowatt-hour calculation nearly in half.
How often should basement heat mats be replaced?
Plan on replacing basement heat mats every 2–3 years. Watch for frayed edges, inconsistent warmth, or loose adhesive — those are your clearest wear indicators.
Seasonal checks before winter keep replacements on schedule.
Do heat mats work with bioactive terrarium setups?
Yes, heat mats work well with bioactive setups.
Keep substrate shallow for solid heat mat compatibility, maintain microfauna moisture, and watch for mold prevention — plant root heat stays gentle enough not to stress living layers.
Are heat mats safe during extended owner absences?
Heat mats are safe during extended absences—if set up right. Use UL listed equipment, a thermostat with overheat protection, and Smart Plug Alerts for remote monitoring.
Periodic mat inspection before any trip is non-negotiable.
Can multiple tanks share one thermostat in basements?
Technically, yes — but only if the thermostat’s circuit rating covers the combined wattage. Exceed that limit, and you risk voltage drop, inaccurate temps, and overheating.
One thermostat per two tanks is the safer starting point.
Conclusion
A basement doesn’t forgive guesswork. Cold concrete, pooling air, and overnight temperature drops work against your setup every hour.
But with the right reptile heating mats for basement setups—properly sized, thermostat-controlled, and correctly installed—you can build a thermal environment your reptile actually thrives in. Match the mat to your tank, verify surface temps with a digital thermometer, and check your setup each season.
Your reptile can’t tell you it’s cold. Your thermometer can.