This site is supported by our readers. We may earn a commission, at no cost to you, if you purchase through links.
Most boa constrictors don’t die from disease or poor heating—they die from being fed wrong.
Too large a prey item can cause regurgitation, internal injury, or a stress response that tanks your snake’s immune system. Too small, and you’re stunting growth in a species that can live 25 years.
The difference between a thriving boa and a struggling one often comes down to matching prey size and feeding frequency to where your snake actually is right now—not where it was three months ago.
Getting your boa constrictor feeding schedule and prey size dialed in is the single highest-impact husbandry decision you’ll make.
Table Of Contents
Key Takeaways
- Prey size is the single most critical feeding decision you’ll make — keep every meal at or below 10% of your boa’s current body weight and within 75% of its head width to avoid regurgitation and internal injury.
- Feeding frequency isn’t fixed: neonates eat every 5–7 days, juveniles every 7–10 days, adults every 10–14 days, and mature boas (5+ years) can go up to 90 days without a meal — that’s normal biology, not neglect.
- Your boa’s metabolism is driven by external temperature, so seasonal adjustments matter — feed more frequently in summer when digestion speeds up, and scale back prey size and interval in winter when digestion slows significantly.
- Tracking weight before every meal and logging each feeding outcome isn’t optional busywork — it’s how you catch overfeeding, underfeeding, and health problems before they become serious.
Boa Constrictor Feeding Size Chart
Getting the prey size right is honestly one of the most important things you can do for your boa’s health. Too big, and you’re risking regurgitation or worse — too small, and your snake just isn’t getting enough nutrition. Here’s what you need to know about sizing prey correctly at every stage of your boa’s growth.
A boa constrictor prey size chart takes the guesswork out of feeding decisions as your snake grows.
Prey Girth Rule
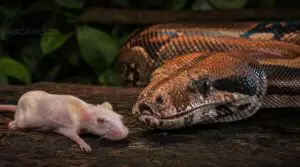
The Prey Girth Rule is your first safety check before every meal. Simply compare the prey’s widest cross-section to your boa’s head width — prey should stay at or below 75% of that measurement. Too wide, and swallowing becomes a struggle; regurgitation follows.
| Boa Stage | Head Width Ratio | Max Prey Girth |
|---|---|---|
| Neonate | 40–60% | ~1 cm |
| Juvenile | 60–75% | 2–3 cm |
| Adult | ≤75% | 4–5 cm |
Research on mammalian predators highlights a prey space speed limit that constrains which prey can be captured, complementing your girth rule.
Trust this visual girth assessment every single time.
Ten Percent Body Weight

Once you’ve checked girth, the next question is weight. The 10% rule is simple: your prey item should weigh no more than 10% of your boa’s current body weight. A 500 g boa gets a 50 g prey item — no guesswork needed.
For a full breakdown by snake size, this guide to choosing the right feeder rodent size for your boa constrictor shows how to match each meal as your snake grows.
| Boa Weight | 10% Meal Size | Example Prey |
|---|---|---|
| 150 g | 15 g | Hopper mouse |
| 300 g | 30 g | Small mouse |
| 600 g | 60 g | Small rat |
| 1,000 g | 100 g | Medium rat |
| 2,000 g | 200 g | Large rat |
Weigh your boa fresh before each meal — not from memory, not from last month’s number. Bodies change, and your prey-to-boa weight ratio should keep pace. If digestion drags or your boa looks thick for days afterward, pull back slightly. That’s your feeding safety margin doing its job.
Mouse to Rat Transitions

Once the 10% rule clicks into place, the next question is when to move from mice to rats. That shift happens around 500–800 g body mass — roughly the one-year mark. Increase prey girth gradually, about one-third larger each step, moving from hopper mice through small mice to a weaned rat.
| Boa Weight | Prey Type | Prey Weight |
|---|---|---|
| 150–300 g | Hopper/small mouse | 15–30 g |
| 500–800 g | Small rat/weaned rat | 50–75 g |
| 900–1,000 g | Medium rat | 90–100 g |
Your prey-to-boa weight ratio stays the guide throughout. If your boa refuses the new size, drop back one step and retry after 7–10 days — refusal is normal, not failure. Watch for a digestive adjustment period of 24–48 extra hours post-meal; that’s your sign the shift is working, not stalling.
Avoid Oversized Prey

Sizing up worked in your favor — but going too big is where things go wrong fast.
There’s a fine line between roomy and wasteful, and ideal boa terrarium sizing guidelines can help you find the sweet spot before you commit to something your snake will stress out in.
Oversized prey risks are real: mouth injuries, regurgitation, and prolonged digestion. The swallow ability test is simple — prey girth shouldn’t exceed your boa’s widest point.
If you’re unsure how to size and prepare a rabbit meal, this guide to feeding rabbits to snakes safely walks through thawing, prey selection, and portion tips.
| Warning Sign | Cause | Action |
|---|---|---|
| Jaw gaping | Prey too wide | Drop one size |
| Regurgitation | Digestive stress | Wait 2 weeks, retry smaller |
| Stalled ingestion | Head too bulky | Switch to slender prey |
Exceeding 15% prey-to-boa weight ratio strains the digestive system and risks organ stress long-term.
Safe Prey Examples

Once you’ve nailed the size rules, choosing the right prey item makes all the difference. Mice, rats, and chicks sourced from reputable breeders keep parasites and pathogens out of the equation.
| Prey Item | Boa Weight Range | Notes |
|---|---|---|
| Hopper mice | 67–155 g | Ideal starter prey |
| Medium mice | 155–222 g | Consistent sizing |
| Small rats | 333–455 g | Transition-ready |
Always go frozen-thawed — safer, cleaner, consistent.
Feeding Schedule by Boa Age

How often your boa eats isn’t one-size-fits-all — it shifts as it grows from a fragile neonate into a heavyweight adult. Age is the biggest factor driving those changes, and getting the intervals right makes a real difference in its long-term health.
feeding frequency breaks down at each life stage.
Neonate Feeding Intervals
Neonates need 5–7 days between meals at minimum — never push a feeding before digestion wraps up. Hatchlings every 5–7 days sound simple, but stress, cool temps, or an oversized prey item can throw that window off fast.
If your baby boa feels unsettled, wait. Regurgitation risk spikes when you rush the schedule.
Juvenile Feeding Intervals
Once your boa hits the juvenile stage — roughly 6 months to 2 years — feeding intervals shift to every 7–10 days, supporting their faster metabolism without overdoing it. Keep prey at 6–10% of body weight per meal.
As they approach 300 grams, stretch meals toward every 10–14 days, giving adequate digestive recovery time between sessions.
Adult Feeding Intervals
By the time your boa hits adulthood — around 2–3 years — meal spacing matters more than ever. Their metabolism slows, digestion takes longer, and overfeeding becomes a real risk.
- Feed adults every 10–14 days, adjusting for body condition
- Always confirm waste has passed before scheduling the next meal
- Reduce frequency if the midbody looks rounded or thick
Post-meal checks are non-negotiable. Watch for normal digestion before resetting your feeding schedule.
Mature Boa Feeding
Mature boas — those 5 years and older — run on a surprisingly slow clock. Summer intervals stretch to 30–37 days, and in winter, some individuals go up to 90 days without eating. That’s not neglect; that’s biology.
Mature boas can go 90 days without eating — that’s not neglect, that’s biology
Dust prey occasionally with calcium plus vitamin D to cover any micronutrient gaps, and always check behavioral signs before offering the next meal.
Growth-Based Adjustments
No feeding schedule is one-size-fits-all — your boa’s growth rate tells you when to adjust. If weight climbs too fast, drop prey size below that 10% body-weight mark.
If your boa looks lean, scale up gradually. Watch the body profile: square and muscular means you’re dialed in.
Seasonal Feeding Schedule Adjustments

Your boa’s feeding schedule doesn’t stay the same year-round — and it shouldn’t. As temperatures shift, so does your snake’s metabolism, and that directly changes how often and how much you should feed. Here’s how to adjust your schedule through every season.
Summer Feeding Frequency
Summer heat works in your favor — warmer temperatures speed up heat metabolism, cutting digestion time to as little as 24–48 hours for smaller meals. That means you can feed adults every 5–7 days without rushing digestion.
Always match prey size to boa weight (8–12%), keep fresh water available, and skip handling for 48 hours post-meal.
Winter Feeding Slowdown
Winter flips the script on everything you just did in summer. As temperatures drop, your boa’s winter digestion slows noticeably — meals that processed in 48 hours now take days longer.
That’s your cue to shift to a biweekly feeding schedule and drop reduced prey size to roughly 5–8% of body weight, keeping weight monitoring consistent to catch any unexpected losses early.
Temperature and Digestion
Here’s the engine behind all of it: your boa is ectothermic, meaning external heat drives digestion.
Even a 2°F temperature dip slows enzyme activity, reduces gut motility, and stretches digestion from two days to nearly a week.
Cold prey or a cool enclosure doesn’t just delay a meal — it genuinely compromises nutrient absorption and strains your boa’s digestive health.
Breeding Cooling Cycles
If that seasonal metabolic slowdown sounds familiar, breeding cooling cycles take it a step further — deliberately. You’re mimicking winter to trigger reproductive readiness.
Cooling usually runs 6–12 weeks, dropping temps into the low 60s °F (15–16 °C), paired with shorter daylight hours.
Before starting, pause feeding and confirm your boa is parasite‑free. Afterward, warm gradually — never rush it.
Preventing Overfeeding
Overfeeding doesn’t happen all at once — it creeps in meal by meal.
The safest defense is treating your boa constrictor feeding chart as non-negotiable: keep the prey-to-boa weight ratio at or below 10%, match feeding frequency to the current season, and use body condition scoring regularly.
If weight climbs, extend the interval first — don’t wait for obvious obesity.
Step-By-Step Feeding Routine

Knowing what to feed your boa is half the battle — the other half is actually doing it right. A solid routine protects your snake from injuries, regurgitation, and unnecessary stress. Here’s exactly how each feeding should go, step by step.
Choose Frozen-Thawed Prey
Frozen-thawed prey is the industry standard for boa keepers — safer, cleaner, and kinder than live rodents. Before anything hits your feeding schedule, check three things:
- No off odors or discolored patches on the prey item
- Packaging is intact with a clear storage date
- Prey has been stored at or below -18 °C
A diet suited to their size only works if the food itself is safe.
Thaw and Warm Safely
Once your prey item is out of the freezer, the thaw process becomes a food safety issue. Refrigerator thawing overnight keeps temperatures at or below 40°F — slow but genuinely the safest method.
After that, warm it to 98–100°F using warm water. That temperature mimics live prey and triggers a natural feeding response. Never serve it cold.
Use Feeding Tweezers
Your hand is the last thing you want a hungry boa focusing on. That’s where soft-tipped feeding tweezers come in — they put 8–15 cm of safe distance between your fingers and those feeding instincts.
- Choose 30 cm stainless steel tweezers for larger enclosures
- Use soft-coated tips to protect the boa’s mouth
- Clean with isopropyl alcohol between sessions
Monitor Post-Meal Heat
After your boa swallows its meal, its body shifts into full digestive mode — and post-meal heat is your signal that things are working. Digestion ramps up blood flow to the gut, generating real internal warmth.
Check that your temperature gradient stays stable: 82–90 °F ambient, basking spot holding at 90–95 °F.
Disruptions here slow metabolism and risk regurgitation.
Remove Uneaten Prey
If your boa walks away from a meal, remove uneaten prey within 12–24 hours. Decomposing rodents foul substrate, spike ammonia levels, and invite bacteria — none of which your boa needs post‑meal.
Use feeding tongs, bag the prey, and log the refusal.
A skipped meal often signals stress or incorrect prey sizing worth reviewing.
Reviewing boa constrictor feeder guidelines for rescue owners can help you pinpoint whether size, type, or handling stress is behind a sudden feeding refusal.
Track Weight and Body Condition
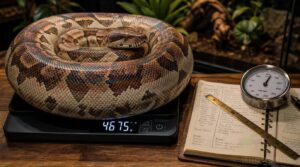
Feeding your boa right is only half the job — knowing whether it’s actually working is the other half. That’s where tracking weight and body condition comes in, and it’s simpler than it sounds. Here’s what to watch and record.
Keep Feeding Records
Think of your feeding log as a health record for your boa — not optional, but essential. Log every meal with the date, prey type, prey weight, and whether the feed was accepted or refused. This simple habit reveals patterns you’d never catch otherwise.
Here’s what every entry should capture:
- Date and prey type — what you offered and when
- Prey weight — to verify you’re staying within the 10% body mass rule
- Feeding outcome — accepted, refused, or regurgitated
- Interval since last meal — so your feeding schedule planning stays consistent
Over weeks, that logbook becomes your boa constrictor feeding chart in real time.
Weigh Before Meals
Your feeding log tells you what happened — the scale tells you what to do next.
Pre-meal weighing gives you the cleanest data possible, since the boa hasn’t eaten yet and digestion won’t skew the number. Tare your container, place your boa, record the weight.
That single figure drives your prey-to-boa weight ratio and keeps every meal decision grounded in fact.
Watch Growth Trends
One number alone won’t tell you much — but a string of numbers will start talking. Plot your boa’s weight over time and patterns emerge fast.
- 5–10% monthly gain is healthy for juveniles
- Plateaus signal a potential issue
- Rapid spikes warn of overfeeding
- Seasonal dips are normal in winter
- 15%+ swings need professional review
Spot Underweight Boas
Numbers trend down — that’s your first clue. But the scale doesn’t catch everything, so read your boa’s body.
An underweight boa loses its square body profile, going angular and sharp instead. The spine becomes more defined, ribs show through the sides, and muscle tone drops noticeably. Tail base padding disappears too, making the taper look abrupt rather than gradual.
Prevent Obese Boas
Obesity sneaks up faster than you’d expect. A boa that looks "healthy and full" one season can cross into overweight territory by the next. The telltale signs are rounded fat deposits along the sides and a body that looks more like a tube than a square. Once you see that, it’s already time to cut back.
Meal size limits are your first line of defense — keep every prey item under 10% of body weight, no exceptions. Skip the jumbo rats and pink rats; their high fat content stresses the digestive system more than a right-sized meal ever would. Pair that with a solid feeding interval cap matched to your boa’s age, and you’re already ahead of most keepers.
Condition index tracking — basically scoring your boa’s body shape at each weigh-in — catches drift before it becomes a problem. Growth rate monitoring does the same. If weight climbs faster than length, that’s a flag worth acting on immediately.
Frequently Asked Questions (FAQs)
Can boas safely fast for several months?
Adult boas can tolerate longer fasts than juveniles, but months-long fasting is only safe if your boa maintains healthy body condition. Watch for weight loss or sunken spines — those are red flags.
How does humidity affect a boas appetite?
Humidity and appetite are directly linked. When enclosure humidity drops below 40%, boas get sluggish and lose interest in food. Keep it at 60–70% to support healthy hunger cues.
Should supplements be added to every meal?
No, don’t supplement every meal. Whole prey already covers most nutritional needs. A light calcium-plus-D3 dusting every few feedings fills micronutrient gaps without risking overdose — more isn’t safer here.
How do stress and illness change feeding behavior?
Stress kills appetite — or spikes it. Illness quietly shuts digestion down. If your boa suddenly refuses meals, stress or sickness may be the real culprit, not pickiness.
Conclusion
The theory that "more food equals faster growth" sounds logical—but in boa keeping, it’s exactly backwards. Overfeeding doesn’t build a stronger snake; it builds a shorter-lived one.
Your boa constrictor feeding schedule by size isn’t just a maintenance task—it’s the foundation your snake’s entire health runs on. Get the prey size right, adjust as your boa grows, and track what’s actually happening.
That consistency, more than anything else, is what a long life looks like.