This site is supported by our readers. We may earn a commission, at no cost to you, if you purchase through links.

Most snake keepers build the enclosure last. They get the animal first, scramble for a temporary setup, and promise themselves they’ll upgrade later. That "later" enclosure often never comes, or arrives half-planned and full of compromises.
Custom snake enclosure design changes that pattern. A purpose-built enclosure gives you control over every variable: floor space, climbing height, heat gradients, substrate depth, and escape security. Generic tanks can’t do that. Off-the-shelf racks won’t either, not for species with specific needs.
Getting the build right from the start saves you from expensive retrofits and, more critically, keeps your animal safe and thriving.
Table Of Contents
- Key Takeaways
- Plan Your Custom Snake Enclosure Design
- Choose Materials and Build The Structure
- Install Ventilation and Climate Controls
- Create a Safe, Enriching Interior
- Test and Maintain The Finished Enclosure
- Frequently Asked Questions (FAQs)
- How do I build my own snake enclosure?
- How much do snake enclosures cost?
- What is the ideal enclosure for a snake?
- What is the best material to make a snake enclosure?
- How to build a custom snake enclosure?
- What tools do you need to build a snake enclosure?
- Who manufactures custom snake cages & enclosures?
- How does snake development affect a custom enclosure?
- What is a snake enclosure?
- How do I create a functional snake enclosure?
- Conclusion
Key Takeaways
- Planning your enclosure around your snake’s adult size — not its current one — is the single most important design decision you’ll make, and skipping it leads to costly rebuilds later.
- Material choice drives everything from humidity control to long-term safety, with PVC being the most reliable all-around option for most species.
- A proper thermal gradient spanning at least 1.5 times your snake’s body length isn’t a nice-to-have — it’s how your snake regulates its own body temperature and stays healthy.
- Even a well-built enclosure needs ongoing adjustment as your snake grows, so design with modular features, spare conduit, and repositionable hides from day one.
Plan Your Custom Snake Enclosure Design
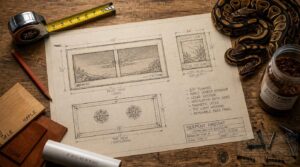
Before you cut a single piece of wood or price out a PVC sheet, you need a clear plan. That plan starts with knowing exactly what your snake needs — not just today, but as it grows into its adult size and habits. Here’s where to begin.
A good starting point is thinking through how to create a natural snake environment that mirrors the conditions your species evolved in, since that context shapes every decision you’ll make.
Identify Species-Specific Habitat Needs
Every snake species has a blueprint built into its biology. A ball python needs humid, ground-level hides, while a green tree python demands elevated perches and high ambient moisture. Get this wrong and stress, poor feeding, and failed sheds follow.
Before you cut a single panel, research your species’ native climate, activity patterns, and preferred microhabitat. That research drives every design decision you’ll make.
Understanding the five habitat requirements — food, water, shelter, space, and their arrangement — helps make sure your enclosure mirrors the conditions your snake needs to thrive.
Calculate Adult Snake Space Requirements
Once you know your snake’s habitat needs, back them with real numbers. Floor area equals half the adult length by one-quarter of it.
- 4 ft snake: minimum 2 ft x 1 ft floor
- That equals 2 sq ft of usable space
- Vertical clearance: at least 60% of body length
- Depth must support full coiling and a thermal gradient
- Add footprint if enrichment demands it
Map Horizontal and Vertical Zones
With your square footage mapped, divide the floor into three horizontal zones: a hide zone, a basking zone, and a foraging corridor. Keep the central path at least 40 cm wide for smooth, unobstructed movement.
Then go vertical. Climbing surfaces should reach 120 cm, aligned with heat sources to build a warm-to-cool gradient your snake can actually use. That’s what separates a functional enclosure from a box with decorations.
Allow Room for Future Growth
Zones give you a floor plan. Now allow room for future growth before you build. Growth planning starts with growth charts and parental size estimation.
Design for enclosure expansion:
- Extend base length by 20 percent without interior redesign
- Install spare conduit for electrical upgrades
- Use modular, repositionable hides
- Pick substrate depth for larger prey
- Reserve 20 percent vertical clearance overhead
Set Budget and Build Priorities
Budgeting before you build separates finished enclosures from abandoned projects.
Knowing what you’ll spend on materials—including the right bioactive snake substrate and bedding options—keeps your build on track from day one.
Set budget and build priorities early: map all costs against species needs and requirements.
The price range across reptile cage pricing tiers runs $150 for basic PVC to $800-plus for glass or hardwood.
Custom reptile cages cost more upfront, but you save money on retrofits.
Reserve 10 percent for contingency.
Choose Materials and Build The Structure
Material choice shapes everything — how well your enclosure holds heat, resists moisture, and holds up over years of use. Each option comes with real trade-offs worth understanding before you start cutting panels or placing orders. Here’s how the most common materials stack up.
Compare PVC, Wood, Glass, Acrylic

The material you choose shapes everything from humidity control to visibility.
- PVC options: affordable, moisture resistant, but lower in clarity and rigidity
- Wood enclosures: warm aesthetic, natural insulation, but warps with humidity
- Glass enclosures: excellent visibility, rigid structure, but heavy and fragile
- Acrylic enclosures: great clarity, lightweight, but costs more
- Reptile cage material durability: acrylic and PVC outlast wood long-term
Select Snake-Safe Building Materials
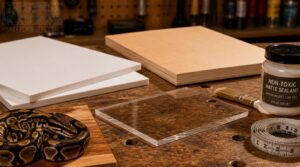
Choosing safe nontoxic materials protects your snake from hidden toxins. PVC or sealed plywood are your two best frame options.
| Material | Key Safety Requirement |
|---|---|
| PVC | Non-porous; no VOC offgassing |
| Sealed plywood | Formaldehyde-free grade only |
| Acrylic | BPA-free, reptile-safe products |
| Paint | Lead-free, non-toxic finish |
Reptile cage material durability matters, but not at your snake’s expense. Always verify all labels carefully before buying.
Assemble Doors, Panels, and Hardware
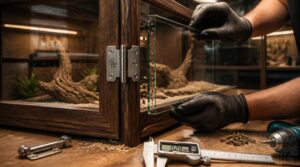
Door and panel fit determines whether your snake stays put. When you assemble doors, panels, and hardware, keep gaps under 2 mm.
- Use corrosion-resistant hinges rated for door weight
- Mount secure latches flush with the door edge
- Fit easy-access panels with predrilled alignment holes
- Align hinges within 0.5 mm for smooth swing
- Use screws long enough to reach structural framing
Waterproof Seams and Interior Surfaces
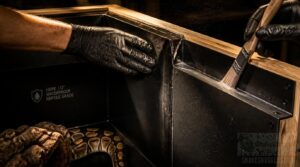
Water finds every gap. Seam tape over stitched joints creates an airtight barrier, blocking moisture before it reaches the framing. For panel edges, liquid seam sealant fills micro-gaps fast and dries uniform.
Food-grade silicone-coated plywood holds up well inside humid builds. High-density polyethylene surfaces resist water absorption entirely. Both support strong moisture control without warping under daily misting.
Apply Non-Toxic Sealants Safely
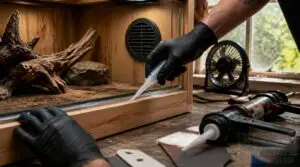
The sealant you pick does more than seal seams. It determines whether your build is safe for a snake to live in. Stick with a reptile-safe silicone formula and check the label for low-VOC claims to prevent offgassing.
Apply in a ventilated space, tool it smooth, and allow a full 48-hour cure before closing up. Rushing this risks fume exposure.
Install Ventilation and Climate Controls
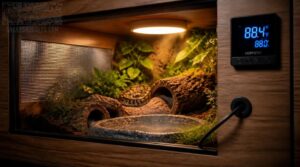
Getting the airflow and heat right isn’t optional — it’s what keeps your snake alive and thriving long-term. A well-ventilated, properly heated enclosure works as a system, with each component supporting the next. Here’s what you need to install to make that system work.
Install Low Intake, High Exhaust Vents
Think of your ventilation system like a chimney: cool air enters low, warm air exits high. Install low intake vents on the lower rear or side panels, then place exhaust vents near the top.
This crossflow design keeps air moving without drafting directly across your snake. Use mesh strips on all openings. Paired vents make airflow management simple and consistent.
Calculate Adequate Ventilation Area
Once your paired vents are placed, calculate whether the open area is actually enough. Your ventilation system needs 1 square inch per cubic foot of enclosure space as a solid baseline.
More snakes mean more required area. Good airflow management through a crossflow design only holds if mesh strips stay clear and total intake area roughly matches your exhaust area.
Position Heating Equipment Safely
With airflow confirmed, heat placement is next. Integrated heating elements like under-tank mats belong on the outside bottom or side of your enclosure. Never inside where your snake can contact them.
Overhead fixtures need at least 12 inches of clearance from combustible material. Use temperature gradient methods, keeping thermostatically regulated sources at one end only, spanning 75-95F across your enclosure.
Create a Stable Temperature Gradient
With your heat equipment secured, focus on the thermal gradient itself. Place thermostatically regulated heat sources at one end, targeting 29 to 32°C in the warm zone. The opposite end should hold between 22 and 26°C. That spread lets your snake self-regulate its body temperature as needed. Make sure the gradient spans at least 1.5 times the snake’s body length.
Add Thermostats and Humidity Monitors
Once your gradient is set, lock it in precisely. Connect your thermostatically regulated heat sources to a pulse or dimming thermostat, then place digital probes at snake eye level, clear of glass edges. A digital hygrometer tracks moisture.
Smart thermostats with monitoring automation let you watch both readings from your phone and catch dangerous shifts before they become a problem.
Create a Safe, Enriching Interior
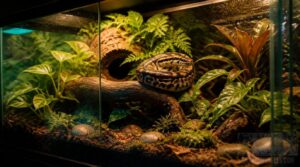
Once the structure and climate systems are solid, the interior is where your enclosure truly comes alive. Getting this part right means thinking about your snake’s physical and psychological needs — not just aesthetics. Here’s what to focus on as you set up the inside:
Add Secure, Species-Appropriate Hides
A snake without a hide isn’t comfortable, it’s stressed. Place hides at both warm and cool ends so your snake can thermoregulate on its own terms.
Size matters: the interior should be snug, roughly 1.5 to 3 times body girth. Use cork bark or sealed resin, never painted wood that chips. Removable tops make monitoring easy without forcing your snake out.
Install Climbing and Burrowing Features
Give arboreal species vertical climbs that rise at least 12 inches above the floor. Mount branches 8 inches from the wall, spaced 6 to 12 inches apart so your snake moves continuously upward.
For burrowers, install hidden tunnel chambers 6 to 12 inches deep. Keep entrance angles smooth to prevent snagging, and position burrows away from heat sources.
Choose Safe, Moisture-Balancing Substrate
The wrong substrate can quietly harm your snake before any other problem shows up. That’s why substrate safety starts with avoiding pine, cedar, and sand.
Coco coir or cypress mulch hold moisture without going soggy and resist mold better than loose organic mixes. Desert species need lighter, faster-draining blends. Spot clean weekly and replace fully every 60 to 90 days.
Evaluate Bioactive Setup Suitability
A bioactive setup isn’t right for every enclosure. Before committing, check these four factors:
- Your enclosure maintains stable humidity control above 60% consistently
- Enclosure ventilation cycles air without over-drying the substrate
- You can perform substrate health verification weekly
- Your species tolerates naturalistic bioactivity without added stress
If all four align, bioactive works. If not, stick with standard substrate cycling.
Fit Escape-Proof Locks and Gaps
Even a calm, well-fed snake will test every edge. Reinforced door catches prevent lifting, while magnetic latches with a secondary lip stop prying. Keep all gaps under 2 millimeters using a rabbeted frame design. Internal bumper seals compress on close. Pressure-fitted hinge pins won’t release without tools. Lock it like you mean it.
Even a calm, well-fed snake will test every edge — so lock it like you mean it
Test and Maintain The Finished Enclosure
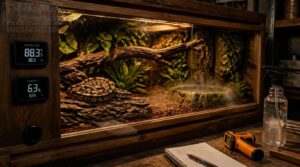
Building the enclosure is only half the job — now you have to make sure it actually works before your snake moves in. A few key checks will tell you whether everything is dialed in or needs adjusting. Run through each step below before you ever open the bag.
Cure Sealants Before Adding Snake
Before your snake moves in, give the sealant time to fully cure. Most reptile-safe sealants and nontoxic finishes need 24 to 72 hours at 70 to 80°F to become safe for contact. Press your finger to each seam. Still tacky? Wait longer.
Proper ventilation placement during this window clears residual VOC offgassing faster. No lingering odor means you’re ready.
Test Temperature and Humidity Ranges
With the sealant cleared, run your heating equipment for 48 hours before placing your snake.
Place two thermometers and two hygrometers at opposite zones. Your basking spot should hold 32 to 35°C; the cool end, 24 to 26°C. Humidity should sit between 40 and 60% for most terrestrial species. A reptile thermometer hygrometer combo pack makes it easy to monitor both readings in each zone without cluttering the enclosure with separate devices.
Log readings daily. Drift beyond 2°C means recalibrate before your snake goes in.
Check Doors, Vents, and Wiring
With temperatures dialed in, turn to the hardware. Check every door for gaps larger than 1/8 inch. Snakes exploit small openings fast. Test secure latches under firm pressure.
Run your fingers along vent screens for loose mesh. For easy access panels, confirm hinges swing freely and wiring sits flush, with no exposed loops a curious snake could snag.
Plan Easy Cleaning Access
Once your hardware checks out, cleaning becomes your next daily reality. Easy-access panels on a modular enclosure let you reach every corner without shifting the whole unit.
Daily spot cleaning takes minutes when interior surfaces are smooth and low-porosity. Removable base trays catch spills fast. Plan weekly disinfection and a monthly deep cleaning schedule from the start.
Adapt Features as Snakes Grow
As your snake grows, your custom reptile cages need to keep up.
Five features to update:
- Expand growth space for adult length and girth
- Raise climbing anchors higher
- Adjust enclosure size requirements to match body size
- Deepen substrate for burrowing
- Tighten adaptive security features on your modular enclosure
Don’t wait for an escape to trigger these changes.
Frequently Asked Questions (FAQs)
How do I build my own snake enclosure?
Start with reptile cage dimensions, then plan ventilation and temperature control, choose safe materials, build secure latches and escape-proof features, add environmental enrichment, and test everything before your snake moves in.
How much do snake enclosures cost?
Basic snake enclosures run $50 to $300. A glass terrarium for small to mid-size snakes commonly costs $100 to $250, while plastic or acrylic entry-level options start closer to $
What is the ideal enclosure for a snake?
Like a home built around its occupant, the ideal snake enclosure fits both your species and budget. It needs proper reptile enclosure dimensions, a reliable temperature gradient, consistent humidity control, and solid escape prevention throughout.
What is the best material to make a snake enclosure?
PVC is best for most snakes: lightweight, waterproof, insulating, and easy to sanitize. Specify adult reptile enclosure dimensions, low-to-high reptile cage ventilation design, lockable accessibility features, modular panels, and reptilesafe products.
How to build a custom snake enclosure?
Think of your Custom Snake Enclosure Build Guide as a living habitat blueprint. Nail reptile cage dimensions, fit secure latches and escape-proof features, dial in temperature gradients from 75-95F, and build in meaningful environmental enrichment.
What tools do you need to build a snake enclosure?
You’ll need a cordless drill, jigsaw, utility knife, spirit level, and tape measure. Add stainless steel screws, bar clamps, a caulking gun, reptile-safe sealants, and a thermometer and hygrometer for climate control.
Who manufactures custom snake cages & enclosures?
Several reputable US builders offer custom built reptile enclosures. Custom Cages runs Hybrid and Majestic lines with an online configurator. Custom Reptile Habitats uses aluminum framing and PVC. Lorex Plastics adds free consultation and shipping.
How does snake development affect a custom enclosure?
A hatchling ball python can triple its snake length in two years. Growth adaptation moves fast, and your enclosure size has to match the adult animal, not just the juvenile you’re starting with right now.
What is a snake enclosure?
A snake enclosure is a purpose-built habitat that replicates your snake’s natural environment inside a secure, contained space. It grips temperature, humidity, and physical layout to support proper snake thermoregulation, natural behaviors, and long-term health.
How do I create a functional snake enclosure?
A functional enclosure goes beyond four walls. Get enclosure size, thermal regulation, humidity control, and secure latches working together, and you’re not just containing a snake. You’re building a habitat it can actually thrive in.
Conclusion
The best enclosure is never truly finished. That’s the paradox of custom snake enclosure design: you build it once, but you spend years refining every detail inside it.
Temperature logs reveal drift. Growth changes space demands. What works at year one rarely works at year three without some adjustment. Build with that in mind from the start. Design for the animal your snake will become, not just the one it’s today.