
This site is supported by our readers. We may earn a commission, at no cost to you, if you purchase through links.
Your ball python just spent three days burrowing into that bargain pine shavings, and now she’s sneezing. Oops. Cedar and pine release phenolic oils that irritate snake airways, and loose sand can cause impaction. Dyed moss isn’t safe either.
Good news: the fix costs less than a pizza. The right terrarium substrate mixes for beginners hold humidity, support burrowing, and keep your snake healthy for months. Whether you keep a tropical species or a desert dweller, a few humble ingredients like coco coir, organic topsoil, and sphagnum do the heavy lifting.
Here’s exactly how to choose, mix, and layer them.
Table Of Contents
Key Takeaways
- Skip cedar, pine, dyed moss, and loose sand, since their oils and impaction risk can harm your snake’s lungs, liver, and gut.
- Match your mix to your snake: tropical species do well with roughly equal parts topsoil and coco coir plus a little sand (or sphagnum for extra moisture), while desert species need a drier 60/40 topsoil-and-sand blend.
- Sphagnum moss, orchid bark, and horticultural charcoal each do a specific job in your mix, holding moisture, keeping air pockets open, and absorbing odors and excess water.
- Keep your substrate healthy by checking humidity daily, spot cleaning, replacing soggy patches fast, and doing full changes every few weeks to months depending on your mix.
Choose Snake-Safe Terrarium Substrate Ingredients
Substrate ingredients decide whether your snake thrives or just survives. We’ve seen beginners grab whatever’s cheapest, and honestly? That’s how respiratory problems start.
If your snake is already wheezing or breathing with its mouth open, this guide on how to treat a snake respiratory infection walks you through the next steps.
Cheap substrate might save a few dollars today, but it can cost your snake its lungs tomorrow
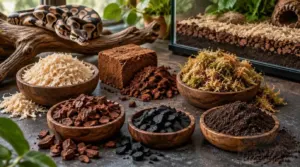
Start with safe basics. Aspen suits dry-habitat snakes, while Coco Coir works for humidity lovers as long as you keep it damp (dusty coir helps nobody). Plain, additive-free organic topsoil works as the base for an ABG Mix.
For moisture control, Sphagnum Moss holds water without going moldy, and Orchid Bark gives structure and air pockets. Horticultural charcoal soaks up odors and excess moisture too. Beyond bedding, a good substrate also helps regulate humidity and temperature inside the enclosure.
Now the hard no list: cedar, pine, dyed moss, and loose sand. Phenolic oils harm lungs and livers, and sand risks impaction. Choosing a clean Terrarium Substrate starts with what you leave out.
DIY Terrarium Substrate Mixes for Beginners
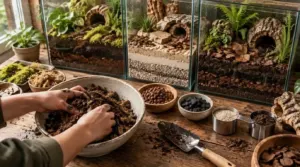
Ready to mix your own substrate (and skip the mystery bags)? Below, you’ll find three beginner-friendly recipes, each matched to a different kind of snake enclosure. Pick the one that fits your setup, and you’re halfway there.
Moisture-Retaining Mixes for Tropical Snakes
Tropical snakes thrive when their enclosure holds steady humidity, and Coco Coir is your easiest route there. Mix 40% organic topsoil, 40% coir, and 20% play sand for a solid starter.
Want more Water Retention? Swap in up to 30% Sphagnum Moss and trim the sand. Hydrate everything first, squeeze it damp, then build your Tropical Soil Layer 2.5 to 4 inches deep for easy burrowing and better Humidity Control.
Drier Mixes for Arid-Species Enclosures
Desert snakes want the opposite of what we just built. Drier Mixes for Arid-Species Enclosures lean on Inorganic Components like sand for Drainage and Aeration.
For arid species, a mix of sand and soil with good airflow keeps moisture from lingering, and this step-by-step snake habitat construction guide shows how to build it right.
For a simple Arid Terrarium Mix, mix 60% organic topsoil with 40% washed play sand. Skip fertilizers and perlite.
Going deeper? Burrowers like hognose snakes and sand boas need 6 to 8 inches. That’s your Desert Terrarium Mix, sorted.
Bioactive ABG Mixes and Microfauna
Now let’s flip back to the damp side. A Bioactive Substrate turns your enclosure into a tiny habitat, and ABG Mix is the classic recipe. Combine tree fern fiber, orchid bark, sphagnum, peat or coir, and charcoal.
Add Isopods and Springtails to eat waste. Microfauna and Microflora thrive here, and Beneficial Fungal Cultures settle in too, keeping your mix fresh.
Top 3 Terrarium Substrate Mixing Components
Ready to stock your shelf with the good stuff? We’ve narrowed it down to three tried-and-true components that earn their spot in almost any mix, whether you’re building for a tropical or a bioactive setup. Here’s what’s worth adding to your cart and why you’ll want each one on hand.
1. Besgrow New Zealand Sphagnum Moss 150g
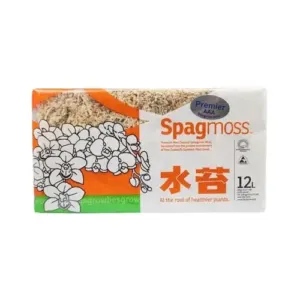
Think of sphagnum moss as the sponge of your substrate mix. Our pick is Besgrow New Zealand Sphagnum Moss, harvested from wetlands on the South Island’s West Coast. It holds up to 20 times its weight in water, so humidity stays steady without a soggy mess.
It comes compressed, so soak it first. Those 150 grams (5 ounces) swell to about 12 liters, and the 150mm strands mix in easily. Fair warning: some buyers expected a bigger bag. We’d call it a very generous sponge.
| Best For | Orchid growers, carnivorous plant keepers, and reptile owners who want a moisture-holding substrate that stays steady without getting soggy. |
|---|---|
| Material Type | Sphagnum moss |
| Water Retention | Holds 20x weight |
| Volume | 12 liters hydrated |
| Weight | 150 grams |
| Primary Use | Orchids, carnivorous plants |
| Natural Origin | New Zealand wetlands |
| Additional Features |
|
- Holds up to 20 times its weight in water, which keeps humidity steady
- Harvested from New Zealand wetlands, with naturally low soluble salts and a relatively sterile structure
- Works for many uses, including orchid potting, terrariums, moss poles, and seed germination
- Customers have given mixed feedback on value for money
- Some buyers say the product is smaller than they expected
- Comes compressed, so it must be loosened and soaked before use
2. Besgrow Orchiata Precision Grade Bark
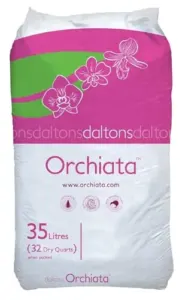
The Besgrow Orchiata Precision Grade Bark is your structure builder. It’s 100% pure New Zealand Pinus radiata bark, chipped to a 3-6mm size that suits snake enclosures without feeling like a gravel pit. Why bother? Orchiata holds water and nutrients on each chip’s surface (AFP 43-50%, WHC 52%), so air paths stay open while moisture lingers.
It’s already processed, so pathogens are gone and helpful microorganisms stay. Skip the soaking. Pour in 35 liters and mix away, no prep needed.
| Best For | Growers raising young orchids and seedlings from flask who want a stable, long-lasting substrate that holds water and nutrients. |
|---|---|
| Material Type | Pinus radiata bark |
| Water Retention | WHC 52% |
| Volume | 35 liters |
| Weight | N/A |
| Primary Use | Young orchids, seedlings |
| Natural Origin | New Zealand pine bark |
| Additional Features |
|
- Precision 3-6mm chips of 100% pure New Zealand Pinus radiata bark, with an AFP of 43-50% and a WHC of 52%
- Holds water and nutrients on the chip surface, giving a stable, long-lasting growing substrate
- Pathogens are eliminated during production while beneficial microorganisms are retained
- The bag is large (about 16" x 10" x 25", 35 liters), so it takes up storage space
- It comes in only one chip size range (3-6mm), which limits flexibility for other plant stages
- The bark must be processed from its raw state to be usable, so it’s a manufactured product
3. Mosser Lee ML0810 Horticultural Charcoal
Imagine this: you’ve built a gorgeous bioactive setup, and two weeks later the bottom layer smells like a swamp. Been there. (Ugh.)
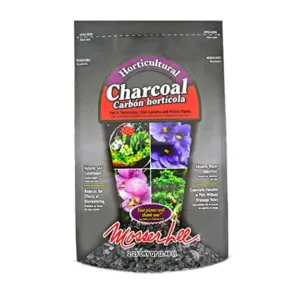
That’s where Mosser Lee ML0810 earns its keep. Made from fruit tree charcoal, it soaks up water and fertilizer, which helps reduce overwatering damage. Line the bottom of drainage-free enclosures with it, or mix it into your substrate for better aeration and drainage. It also cuts root rot risk.
Heads up: pieces run large and vary between bags.
| Best For | Plant owners and terrarium builders who want to line drainage-free pots or mix into potting soil for better drainage and less overwatering trouble, especially with medium to large plants. |
|---|---|
| Material Type | Fruit tree charcoal |
| Water Retention | Maximum absorption |
| Volume | 2.25 dry quarts |
| Weight | 1.4 pounds |
| Primary Use | Soil amendment, drainage layer |
| Natural Origin | Fruit tree charcoal |
| Additional Features |
|
- Made from fruit tree charcoal, it absorbs water and fertilizer well and helps reduce the effects of overwatering.
- Lines the bottom of pots without drainage holes and mixes into potting soil to improve aeration and drainage.
- Helps lower the risk of root rot in container plants.
- Charcoal pieces may be too large for small plants.
- Piece size has been reported as inconsistent from bag to bag.
- In rare cases, foreign objects such as a rusty nail have turned up in the bag.
Prepare, Mix, and Layer Terrarium Substrates
Think of substrate as baking a cake: skip the prep, and the whole thing collapses. So let’s Prepare first. Soak your coco coir brick in stages, about 20 minutes, so it expands without turning to soup. Microwave sphagnum moss for two minutes until steaming, which kills pathogens. Crush charcoal in a bag with a hammer (satisfying, we promise).
Now Mix your Terrarium Substrate in a separate tub, measuring by volume. Try 1 part coir, 2 parts moss, and 1/4 part orchid bark, plus 1/4 part worm castings. Stir until no single clump stands alone.
Substrate Layering comes last. Layer the mixture over your drainage and barrier layers, then press gently with your hand. Slope it back for depth, then mist.
Manage Substrate Moisture, Cleaning, and Replacement
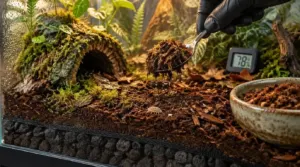
Think of your substrate as a living system, not a floor covering. Neglect it and it turns on you fast.
Start with Water Regulation. Check a hygrometer daily and hunt for soggy patches, especially in coco fiber or cypress mulch. Replace damp sections right away. Good drainage and solid moisture retention should work together, so give humidity a damp-moss hide instead of soaking everything.
Spot clean daily. Pull waste and the substrate around it, then sift burrowers’ beds every few days. Watch for soil compaction too, because packed layers hold water and breed trouble.
Full changes depend on your mix: loose substrates every 3-4 weeks, low-waste adults every 2-3 months. Bioactive setups? Swap only depleted leaf litter and keep your microfauna happy.
Frequently Asked Questions (FAQs)
How often should beginners add springtails to substrate?
Springtails are tiny gardeners you hire once, not weekly. Seed your Bioactive Substrate with 50-100 per square foot, 3-5 weeks before animals arrive.
Microfauna and Microflora self-sustain, keeping natural balance steady in your Closed Terrarium.
Can I reuse old substrate in a new terrarium?
Say your corn snake’s old bin smells musty. Toss that Terrarium Substrate Mix.
Healthy bioactive soil can move intact. Skip washing it; Soil Refreshment, a Drainage Layer, and Organic Matter Decomposition keep Water Retention balanced.
Does terrarium substrate need to be sterilized first?
Baking at 250°F for 30 minutes is the standard fix for outside soil, but clean commercial terrarium substrate like coco coir rarely needs it. Skip sterilizing bioactive setups, though, since you’d wipe out the microbes your habitat stability depends on.
What causes white mold on fresh terrarium substrate?
Fresh substrate is basically a buffet. Wet bark and sphagnum feed fungal growth, and mixing wakes up dormant spores. Poor aeration and soggy lower layers hold humidity, while no springtails yet means nothing’s eating it.
How deep should substrate be for burrowing species?
Burrowing species need substrate deep enough for natural digging, tunneling, and molting, usually 3 to 4 inches minimum. Go deeper for bigger snakes, and add about 20% extra, since settling shrinks your layer over time.
Conclusion
Picture Mochi, a ball python who went from sneezy and sulking to burrowing happily within a week. Her owner swapped the pine shavings for a coco coir, topsoil, and sphagnum mix. Nothing fancy.
That’s the beauty of terrarium substrate mixes for beginners: simple ingredients, big payoff. Mix it right, layer it smart, and keep an eye on moisture. (Your nose is a decent humidity gauge, too.)
Go build your snake a floor worth burrowing in.