This site is supported by our readers. We may earn a commission, at no cost to you, if you purchase through links.

A dehydrated female won’t lay a healthy clutch. It’s that direct. When breeding season ramps up and your snakes are cycling, soaking, and shedding back-to-back, water access stops being a background detail and becomes a frontline health factor.
The wrong dish—too small, too slick, wrong material—gets flipped, fouled, or ignored. Getting snake water dishes for breeding enclosures dialed in is one of the fastest ways to reduce stress on your animals and your maintenance routine at the same time. Size, material, placement, and cleaning protocol all matter here.
Table Of Contents
Key Takeaways
- A breeding female that can’t soak properly won’t lay a healthy clutch, so dish size must match her body — 6–8 inches wide for most adults, no deeper than ¾ inch for hatchlings.
- Glazed ceramic and stainless steel are your best material choices because they don’t harbor bacteria, hold up to weekly disinfecting, and won’t tip when a heavy female pushes through.
- Place dishes near the warm side with a 2–5 cm gap from the heat source, away from dig zones and waste areas, so water stays clean and every snake can reach it without competition.
- During breeding, shedding, and pre-lay periods, change water daily, scrub with hot water (110–120°F), disinfect between clutch cycles, and replace any dish with cracks wider than 0.5mm — no exceptions.
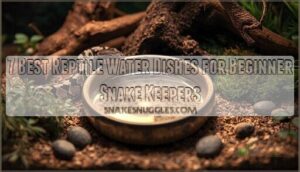
Choose The Right Dish Size

Getting the size right is the first thing that actually matters. Too big, and hatchlings struggle to climb out; too small, and breeding females can’t soak properly.
A dish that fits your breeding female now may need replacing as she grows, so it’s worth checking how size requirements shift across the corn snake breeding timeline before you commit to a setup.
Here’s what to look for at each stage.
Match Bowl Diameter to The Snake’s Body Size and Enclosure Footprint
Start with the girth-diameter ratio: your bowl’s interior should be 50–70% of the snake’s body width. For most adult breeders, that means 6–8 inches.
Factor in footprint percentage too — the dish shouldn’t exceed 10–15% of enclosure floor space.
Species-specific scaling and adjustable bowl sizing keep enclosure zone allocation balanced, leaving room for hides and thermal gradients.
Following determining right enclosure size ensures the dish fits within overall enclosure constraints.
Use Shallower Dishes for Hatchlings and Juveniles
Hatchlings require shallow dishes—no more than ¾ to 1 inch deep. Rim design is critical: low, flat edges allow hatchlings to enter and exit safely without becoming trapped. Color contrast also aids visibility, as lighter dishes clearly define water edges against dark substrates. For seamless substrate integration, ensure the dish sits flush with the enclosure floor.
- Depth guidelines: ¾ inch for hatchlings under 200 g
- Flat base prevents rocking on uneven substrate
- Non-porous surface limits bacterial growth in damp enclosures
Select Deeper Bowls for Soaking During Shed Cycles
Once snakes hit the shed cycle, shallower dishes won’t cut it. Aim for 5 to 7 cm of water depth to allow mid-sized snakes to fully immerse. For larger breeders, ensure an interior depth of at least 150 mm. Depth measurement guidelines are critical here.
Ceramic and stoneware bowls provide thermal retention benefits, helping maintain stable water temperatures. These materials are ideal for creating a consistent soaking environment.
A wide, flat bowl shape minimizes splashing during active soaking, optimizing both functionality and cleanliness.
Add Multiple Dishes in Larger Breeding Enclosures
Larger breeding enclosures need more than one dish. Use staggered bowl placement across the tub to create zonal hydration zones — one near the warm side, one toward the cool end. This provides paired breeders and nesting females with flexible water access without competition.
Modular dish arrays and water dish holder setups work well here. Two redundant water sources are better than one every time.
Pick Stable, Safe Materials

The dish material matters more than most people think when you’re running a breeding setup. Some materials hold up well under weekly sanitizing while others trap bacteria in ways you won’t notice until it’s too late.
Here’s what actually works.
Use Glazed Ceramic for Weight and Easy Sanitation
Glazed ceramic hits every mark for breeding enclosures. The weight keeps your water dish planted — no tipping when a heavy female pushes through.
The non-porous glaze simplifies sanitation: use hot water, a reptile-safe cleaner, and you’re done. It resists waste absorption and eliminates bacterial hiding spots in micro-crevices.
That quick-clean routine pairs perfectly with how often you should change your snake’s water to keep each bowl genuinely fresh and disease-free.
Thermal stability ensures the dish won’t warp under heat or stress.
Regularly inspect for chips and replace any cracked dish immediately to maintain safety and hygiene.
Choose Stainless Steel for Fast Cleaning and Sterilizing
When turnaround speed matters, stainless steel is your best call. It’s non-porous, so bacteria can’t hide — wipe it down and it’s ready again fast.
- Corrosion resistance holds up in humid breeding setups
- Autoclave compatibility means full sterilization between clutch cycles
- Chemical durability tolerates reptile-safe disinfectants without staining
- Minimal biofilm buildup keeps this reusable water dish consistently clean
Thermal stability prevents warping during hot rinses.
Consider Resin or Stoneware for Rack-friendly Durability
Resin and stoneware each earn their place in a rack setup. A resin printed bowl cuts weight substantially — that weight difference matters when you’re handling dozens of tubs.
Impact resistance keeps resin intact after accidental drops. Stoneware manages heat tolerance well and resists scratching.
strong rack system compatibility and cost longevity across multiple breeding cycles.
UV stabilization prevents resin yellowing over time.
Avoid Lightweight Dishes That Tip or Slide Easily
A dish that shifts mid-feeding disrupts your snake and contaminates the water quickly.
Skip thin plastic and focus on base weight optimization. Look for weighted foot design or non-slip pad integration underneath. Durable plastic reptile bowls in HDPE plastic or high density polyethylene work when they include a textured base.
Bowl shape stability matters too — wide, flat bases beat rounded bottoms. Friction enhancing textures grip smooth tub floors.
Prioritize Non-porous Surfaces to Limit Bacteria Buildup
Surface material is your first line of defense against bacterial load monitoring failures in a breeding setup.
- Non-porous durability means no microcrevices for bacteria to hide — glazed ceramic and stainless steel reach 99% surface bacteria reduction within two minutes of disinfectant contact
- HDPE plastic and High Density Polyethylene qualify when seal integrity checks confirm no seepage
- Chemical resistant reptile products handle repeated temperature sterilization limits without degrading
- Surface antimicrobial testing validates your dish choice over time
- Easy to clean reusable water dish options include sealed stoneware and porcelain enamel steel
Place Water Dishes Strategically
Where you put the water dish matters more than most people think. A bad spot leads to contamination, missed hydration, and stressed animals during the most critical phases of breeding.
Here’s how to place dishes so every snake stays hydrated and your setup stays clean.
Position Bowls Near The Warm Side Without Touching Heat Sources

Keep water dish near the warm side — but never touching the heat source. A 2.5 to 5 cm air gap distance protects against heat shock and keeps water temperatures stable between 24 and 28°C.
Use a small platform to control platform height and simplify thermal gradient mapping.
Reusable water dishes for reptiles made from chemical resistant plastic handle this zone well without warping.
Keep Dishes Away From Substrate Dig Areas and Waste Zones

Positioning matters just as much as material. Place your reptile water bowl at least 6 inches from substrate bedding dig zones — this Buffer Zone Clearance stops contamination quickly.
- Mount bowls on Elevated Dish Mount stands
- Add Non-slip Base Pads underneath
- Use Spill Guard Design rims
- Install a Substrate Barrier Lip around dig areas
- Use a water dish holder along perimeter walls
Leave Clear Access for Paired Breeders and Nesting Females

Clear access starts with pathway width. Keep at least two body lengths of open floor between your water dish and any hide box or nest site.
Use crossing corridors that connect basking zones to water without cutting through breeding activity. Visual contact zones and smart barrier placement help nesting females reach water freely.
Substrate clearance keeps those routes unblocked.
Use Corner Placement to Save Floor Space When Needed

Corner placement is one of the easiest space optimization wins in a tight breeding tub. Tucking your water dish into the corner frees the central floor for breeding activity without sacrificing angle accessibility.
- Reduces Clutter along main movement paths
- Contains spills to a smaller, easy-clean zone
- Facilitates Minimalist Layout with Corner Efficiency
- Keeps water reachable from multiple angles
Make Sure Every Snake Can Reach Water Easily

Every snake needs a clear path to water. Check that your water dish sits low enough for smaller individuals to reach without effort — bowl height adjustment matters more than you’d think.
Keep water access pathways free of hides and decor. A V15 dish holder or cup holder keeps your reptile water bowl locked in place across different substrate compatibility levels.
Set Up Breeding-Ready Access

Getting water access right during breeding season takes more than just dropping a bowl in the corner. Your setup needs to work for multiple snakes at once, across different stages of activity.
Here’s what to put in place before breeding begins.
Provide Extra Water Dishes in Large or Divided Enclosures
Large or divided enclosures need zone-based placement — don’t rely on one dish to do all the work. Set up two to four independent access points using adjustable capacity bowls in the 1.5 to 3 liter range.
This enables water consumption tracking across cross-sectional flow paths. In partitioned setups, place at least one dish per section so every snake drinks without competition.
Use Deeper Side Walls to Reduce Splashing and Spills
Deeper side walls make a real difference in high-traffic breeding setups. Water dish depth controls splash reach by absorbing wave energy before it crests the rim — wall angle and rim thickness both matter here.
- Match water bowl depth to activity level
- Prioritize smooth surface finish for cleaning efficiency
- Check reptile water bowl products for sealed rim designs
- Confirm ventilation position doesn’t direct airflow across the dish
Pair Bowls With Hides and Decor Without Crowding The Tub
Tub Layout Planning matters most when you’re balancing a water dish against hides and decor. Place hide boxes for snakes and reptiles along the back wall using Vertical Space Utilization — flat-top hides double as elevated resting spots. Keep Space-Saving Accessories minimal. Decor Balance and Hide Integration keep the tub functional without restricting movement.
| Item | Placement Priority |
|---|---|
| Water dish | Front-center or corner |
| Hide box | Back wall, low-traffic |
| Flat-top hide | Secondary elevation point |
| Decor pieces | Edges only |
| Reptile habitat accessories | Minimal, purpose-driven |
Keep Water Visible but Not in The Highest-traffic Area
Water dish placement is a balance — visible enough to monitor daily but away from the main traffic lane where snakes move most. Use a clear bowl color against the substrate so you spot low water fast. Peripheral shelf placement or a side wall mount keeps the bowl accessible without blocking movement.
- Low profile design fits flat against tub edges
- Visibility markers on the bowl wall show water level at a glance
- Light-colored reptile water bowl products stay visible through windowed tubs or transparent tub options for observation
Cupholder designs prevent water damage by securing the dish at the tub’s edge without sliding into high-traffic zones.
Support Hydration During Breeding Activity, Shedding, and Pre-lay Periods
Breeding, shedding, and pre-lay all spike your snake’s water needs. Change dishes daily during these periods.
Keep water at room temperature — cold water stresses active breeders.
Use electrolyte enriched water for reptiles post-shed or post-lay.
Humidity gradient management and temperature-linked hydration both depend on clean, accessible bowls.
ReptiSafe manages chlorine and ammonia removal in terrariums instantly.
Clean and Replace Bowls Regularly

A dirty water dish can undo everything else you’ve done right. Bacteria, mineral scale, and leftover slime build up faster than you’d think — especially during active breeding seasons.
Here’s how to stay on top of it.
Rinse and Scrub Dishes With Hot Water After Use
Hot water is your first line of defense. Rinse dishes immediately after use — don’t let residue dry and set.
Water at 110°F to 120°F hits the sweet spot for microbial reduction and detergent performance without damaging your easy-to-clean reptile bowls. Scrub with a dedicated brush, then rinse thoroughly. Keep rinse duration under a minute.
Ceramic and stainless steel reptile feeding dish options handle this routine without issue.
Disinfect Between Clutch Cycles With Reptile-safe Cleaners
After hot water scrubbing, disinfection locks in real protection. Chlorhexidine is a solid disinfectant selection — no toxic fumes, no rinse procedure required before your snake returns.
For stronger cycles, F10SC works at a 1:500 dilution ratio, with adequate contact time on your reptile feeding bowl. Use ventilation safety basics with bleach: open windows, wear gloves, rinse fully.
Remove Substrate, Slime, and Mineral Buildup Promptly
Disinfection manages pathogens. But substrate, slime, and scale need their own routine.
- Daily Substrate Sweep — scoop loose particles from around the dish every day
- Slime Film Disruption — scrub bowl surfaces with a soft brush and warm water
- Mineral Scale Removal — rinse with diluted vinegar weekly; use distilled water to reduce buildup
- Water Change Frequency — refresh every 24–48 hours; don’t let water sit stagnant
- Bowl Drying Technique — air dry fully before refilling to stop microbial regrowth
Inspect for Cracks, Chips, and Rough Edges
Once the mineral scale is gone, inspect each bowl before refilling. Run a fingertip along the rim for a tactile edge check — rough spots catch skin fast.
Tilt the dish toward light for a light angle inspection to catch hairline fractures. Visual crack detection matters here: cracks wider than 0.5mm or chips exposing raw edges mean the bowl is done.
Replace Damaged Bowls Before They Affect Hygiene or Safety
A cracked bowl isn’t just cosmetic damage — it’s a bacteria trap. Rough edges from chips can cut scales during drinking.
A cracked reptile bowl is never just cosmetic — it harbors bacteria and sharp edges that cut scales
Once your damage detection check flags anything beyond 0.5mm cracks or exposed raw edges, pull it. Your replacement protocol is simple: swap it before the next feeding.
Durable plastic supplies and easy to clean reptile bowls are affordable enough that delayed replacement isn’t worth the health impact risk.
Frequently Asked Questions (FAQs)
How often should breeding enclosure water be changed?
Change water weekly at minimum. Visible Soiling Triggers mean you act immediately — feces, cloudiness, or floating substrate can’t wait. Prelay Soaking Demands push that to daily.
Do water dishes need lids or covers during breeding?
Lids aren’t required, but they help. They support evaporation control, mold prevention, and lid hygiene benefits.
Clear covers offer observation transparency without disturbing snakes.
Watch heat management — never trap warmth directly over the water.
Should water temperature match the enclosures ambient heat?
Yes. Keep water within 2 to 4 degrees Celsius of ambient surface heat. Thermal shock prevention matters most during shedding and breeding. Check weekly and adjust for seasonal adjustments.
Conclusion
Studies show dehydration is a leading cause of failed clutches in captive snakes—yet it’s one of the most preventable problems in any collection.
Getting your snake water dishes for breeding enclosures right isn’t complicated, but it does demand consistency. Right size. Right material. Clean water. Strategic placement.
When those four things work together, your females stay hydrated through shed cycles, breeding activity, and pre-lay stress.
That’s what separates a productive breeding season from a frustrating one.