This site is supported by our readers. We may earn a commission, at no cost to you, if you purchase through links.

A boa constrictor that won’t eat, hides constantly, or develops respiratory infections isn’t sick—it’s cold. Temperature mismanagement is the most common and preventable cause of health decline in captive boas, yet most keepers focus on humidity or substrate. Meanwhile, their thermal gradient quietly collapses.
Boas are ectotherms: every digestive enzyme, immune response, and metabolic function runs on borrowed heat. Get the gradient wrong, and everything downstream suffers. A properly structured enclosure must maintain specific parameters: 86–90°F on the warm side, 75–80°F on the cool side, and 68–72°F overnight. These numbers are physiological requirements, not suggestions.
Nail these ranges with the right equipment and monitoring protocol, and you’ve solved the single biggest variable in long-term boa health.
Table Of Contents
- Key Takeaways
- Boa Temperature Gradient Targets
- Setting Up Heat Zones
- Choosing Safe Heating Equipment
- Top 3 Gradient Monitoring Tools
- Monitoring and Troubleshooting Temperatures
- Frequently Asked Questions (FAQs)
- How hot should a boa constrictor enclosure be?
- Do Boas need a thermal gradient?
- Do boa constrictors get cold at night?
- How big should a boa enclosure be?
- What is the temperature gradient for a boa constrictor?
- How cold is too cold for a boa constrictor?
- What temperature should a boa cage be?
- How hot is too hot for a boa constrictor?
- How does enclosure size affect gradient stability?
- What humidity levels support healthy shedding cycles?
- Conclusion
Key Takeaways
- Temperature mismanagement — not humidity or substrate — is the leading cause of health decline in captive boas, making a stable 86–90°F warm side and 75–80°F cool side non-negotiable for digestion, immunity, and metabolism.
- Heat sources belong on one side of the enclosure only; centering or spreading them collapses the thermal gradient and eliminates your boa’s ability to self-regulate.
- Monitoring tools like an infrared thermometer and calibrated dual-zone probes aren’t optional extras — they’re how you catch dangerous temperature swings before your snake shows symptoms.
- Heat rocks are genuinely dangerous and should be avoided entirely, as their surface temperature spikes cause burns while ambient readings appear normal, creating invisible hazards your thermostat won’t catch.
Boa Temperature Gradient Targets

Getting your boa’s temperature gradient right isn’t guesswork — it’s the foundation of everything else.
A stable gradient — not just hitting a cold-side number — is what drives digestion, immunity, and behavior, as this dwarf boa constrictor care guide explains well.
Each zone in the enclosure fulfills a specific biological purpose, and the numbers matter more than most keepers realize. Here’s exactly what those targets should look like.
Warm Side Daytime Target: 86–90°F
Your boa’s warm side must hold steady between 86–90°F throughout the day — this is non-negotiable for digestion and metabolism. Thermostat accuracy prevents heat lamp output from spiking past 90°F, where stress sets in fast. Securing your basking spot position and maintaining warm zone stability are foundational steps.
To achieve this:
- Set your thermostat to 88°F as your baseline target
- Verify basking area surface temps with an infrared gun daily
- Keep the heat source on one side only — never centered
- Make seasonal temperature adjustments when ambient room temps shift
Additionally, you can evaluate gradient span to ensure all zones meet species-specific targets.
Cool Side Daytime Target: 75–80°F
The cool zone complements what your warm side starts. Without a 75–80°F retreat, your boa can’t regulate — it just bakes.
Shade Placement, Ventilation Flow, and Substrate Conductivity all shape whether this temperature range holds steady.
Give your snake adequate Coiling Space here, and watch Stress Indicators like restless pacing drop.
Solid thermal gradient zones mean real temperature control.
Safe Nighttime Temperature Drops
Once the gradient is set for the day, night introduces a new challenge. Letting temperatures free-fall overnight isn’t a temperature schedule—it’s a risk. Target around 68–72°F, managed through thermostat sizing matched to your enclosure’s heat loss rate.
Warm side insulation, draft prevention around vents and doors, and night probe consistency keep gradient depth control from collapsing while your boa rests.
Hatchling Basking Temperature Needs
Hatchlings don’t run the same temperature playbook as adults. Their basking temperature needs sit closer to 86–90°F — a tighter margin where surface heat conductivity and basking spot placement both matter.
To ensure optimal conditions:
- Target 86–90°F at the basking surface
- Use flat tile for even heat transfer
- Monitor temperature frequency daily
- Match heat lamp spectrum to overhead positioning
- Watch for early feeding response as confirmation
Ideal 6–10°F Enclosure Gradient
Maintaining a 6–10°F temperature gradient is not guesswork—it is the backbone of your boa’s metabolic health. Balancing hot and cool zones for peak metabolism requires a warm side of 90–95°F and a cool zone of 75–80°F.
| Zone | Target Range |
|---|---|
| Hot zone | 90–95°F |
| Cool zone | 75–80°F |
| Gradient span | 6–10°F |
Gradient stability hinges on factors like enclosure size and substrate thermal buffering. Smaller enclosures (under 4 ft) experience 20% more temperature fluctuations, making size-based planning critical. For insulation, use materials like flagstone or concrete to enhance energy efficiency without overloading heat sources.
Humidity Range Alongside Temperature Control
Temperature control doesn’t work in isolation—humidity is the other half of the equation. Maintain levels between 60% and 80% across the enclosure, monitoring warm-side humidity and cool-zone moisture separately with a calibrated hygrometer.
Poor humidity control is one of the leading triggers for snake skin problems like retained shed and respiratory infections, so getting those levels dialed in protects more than just comfort.
Time misting cycles during daylight hours for proper mist timing coordination. Avoid overnight spikes, as these can cause respiratory infections. Prioritize nighttime humidity balance to mitigate risks.
Strategic humidity sensor placement in both zones provides the full hygrothermal balance picture, ensuring accurate monitoring and adjustments.
Setting Up Heat Zones
Getting the layout right is just as important as hitting the right numbers. Your boa needs a clear thermal map — one side runs hot, the other stays cool, and every element in between fulfills a purpose.
Here’s how to set up each zone correctly.
Place Heat Sources on One Enclosure Side

Side heat alignment isn’t optional — it’s the foundation of a functional thermal gradient. Place every heat source on one enclosure side only. This asymmetric heating drives thermal airflow naturally, pushing warmth across the basking zone while leaving the opposite side untouched.
- Mount heat sources overhead on the warm side, never centered
- Keep heat source orientation aimed downward, not toward walls
- Use tall hides or furnishings to define zone delineation without blocking airflow
- Avoid spreading heat distribution across multiple sides — it collapses the gradient
- Balancing hot and cool zones for ideal metabolism starts with this single placement decision
Create a Shaded Cool Retreat

Your boa’s cool side isn’t just empty space — it’s a functional refuge. Use shade fabric design to block radiant heat on that end, and integrate a cooling fountain placement or water feature integration to maintain humidity while moderating temperature.
Reflective ground cover reduces surface heat, while strong ventilation flow prevents cold spots from stalling the temperature gradient or accelerating heat loss between zones.
Use Basking Surfaces Safely

Your basking area can make or break thermoregulation — get the surface wrong and you’re fighting hotspots all day.
- Material safety: Use inert, non-porous materials only — slate and flagstone won’t trap grime or off-gas under a heat lamp.
- Placement guidelines: Position surfaces so your boa reaches target warmth without contacting the heat source itself.
- Surface temperature checks: Run an infrared gun across multiple points — uneven readings mean cold spots persist.
- Overheating safeguards: Thermostat control prevents sustained surface spikes; if your boa avoids the platform, reduce wattage immediately.
- Structural stability: A wobbly basking platform is a fall risk — it must support full body weight without shifting.
Avoid Bottom-mounted Hotspot Risks

Under-tank heaters and heat mats create hotspots that your boa can’t escape—especially when burrowing. Probe positioning matters: a thermostat probe clipped to the enclosure wall won’t detect substrate surface spikes, risking undetected temperature dangers.
Under-tank heaters create hotspots your boa cannot escape, and a misplaced probe will never warn you
To prevent harm, limit UTH mat coverage to 25–30% of the floor, use substrate insulation to buffer direct contact heat, and verify hotspot detection with a second thermometer placed at ground level for burrow burn prevention.
Position Feeding Areas Away From Heat

Where you place food matters as much as where you place heat. Feed your boa on the cool side — away from the warm zone and heat source entirely — so digestion starts under the right thermal conditions.
- Cool side placement keeps meals out of hot spots
- Thermal dish selection means ceramic bowls that don’t absorb radiant heat
- Substrate heat avoidance and a clear cool retreat prevent post‑meal temperature shift stress
Adjust Layout by Enclosure Size

Enclosure dimensions change everything. A 4-foot setup needs one heat zone, while a 6-foot setup requires two or three distinct thermal zones to prevent cold pockets. Use Multi-Point Probes at both ends and mid-enclosure, and implement Zoned Thermostat Control for even heat distribution.
Scale Vertical Microclimates and Scaled Hiding Spots to match the enclosure’s length. Balancing hot and cool zones for ideal metabolism depends on designing habitat size for stable temperature regulation.
Choosing Safe Heating Equipment

The heating equipment you choose will make or break your gradient setup. Not every option works the same way, and some are genuinely dangerous for your boa.
Here’s what’s actually worth using — and one thing you should avoid entirely.
Halogen and Infrared Heat Lamps
Halogen infrared lamps are among the most effective options for creating defined temperature gradient zones in boa enclosures. Reflector efficiency directs shortwave infrared output precisely onto the warm side, minimizing heat waste. Match wattage selection to enclosure size — 150W suits most setups.
UV filtering glass protects your boa, while proper mounting safety and bulb lifespan of several thousand hours make the Incandescent Halogen Flood Heat Lamp a reliable, practical choice.
Ceramic Heat Emitters
Ceramic heat emitters work differently than halogen lamps — no visible light, just steady far-infrared radiant heat straight to your boa’s basking surface.
Infrared emissivity and glaze composition determine how efficiently each unit converts power into warmth, so radiant efficiency varies by model.
For installation safety and longevity maintenance, always run your ceramic heat emitter through a calibrated thermostat to lock in your temperature gradient.
Radiant Heat Panels
Radiant heat panels are one of the most consistent tools in boa constrictor care. Wall mounting keeps the infrared spectrum focused across the basking zone, locking in your thermal gradient without hotspots. They’re built for energy efficiency and carry solid safety certifications.
Build panel checks into your maintenance routine — inspect brackets and connections monthly. Stable heat means a stable temperature gradient your boa can effectively use.
Deep Heat Projectors
Deep heat projectors punch above their weight in boa constrictor care. Their infrared spectrum reaches deeper into tissue than standard lamps, and penetration depth means your boa actually warms from within. Here’s why they earn a spot in your heat source selection for reptile enclosures:
- Energy efficiency — 50–80W delivers basking warmth comparable to higher-wattage lamps
- Installation compatibility — standard E27 sockets make setup straightforward
- Overheat protection — built-in thermal limits stabilize your temperature gradient
Pair with a proportional thermostat for precise thermostat usage and temperature regulation for snakes.
Thermostat-controlled Under-tank Heaters
Under-tank heaters work well for boas when you maintain thermostat accuracy and limit floor coverage to 25–30%. Wiring protection is critical—moisture exposure kills equipment fast.
Ensure setpoint calibration is precise before introducing your boa, and adhere to a monthly maintenance schedule. When properly installed, these heaters provide steady heat distribution across the substrate while preserving the overall temperature gradient.
Why Heat Rocks Are Unsafe
Heat rocks look simple, but they are one of the most dangerous choices you can make. Surface temperature spikes often exceed safe limits at the contact point while ambient readings look fine—classic measurement blind spots.
Uneven belly heating traps your boa against a hot spot, causing localized burns before you notice. Restricted movement compounds the problem.
Skip them entirely.
Top 3 Gradient Monitoring Tools
Getting the temperature right means nothing if you can’t actually verify it.
These three tools give you accurate, reliable readings across every zone in your boa’s enclosure. Here’s what’s worth having on hand.
1. Simple Deluxe Reptile Heat Lamp Guard

The Simple Deluxe Reptile Heat Lamp Guard is a small purchase that prevents a serious problem. Its heavy-gauge metal mesh cage—5.5 inches wide by 6.7 inches tall—creates a reliable barrier between your boa and a dangerously hot bulb surface. Burns happen fast; this guard doesn’t let them.
It fits standard E26 sockets and accommodates bulbs up to 6.5 inches tall. The spring-loaded lid enables quick bulb swaps, while four pre-drilled screw holes ensure secure installation.
| Best For | Reptile owners who want a simple, no-fuss way to protect their pets from burn injuries caused by heat lamps. |
|---|---|
| Socket Type | E26 standard |
| Material Quality | Heavy-gauge metal mesh |
| Reptile Compatible | Yes |
| Heat Management | Dissipates radiant heat |
| Easy Installation | Four screw mount |
| Safety Feature | Contact burn guard |
| Additional Features |
|
- Big enough to fit larger, high-wattage bulbs—so you’re not stuck hunting for compact alternatives.
- The spring-loaded lid makes bulb swaps genuinely quick, no wrestling required.
- Metal mesh is durable and won’t corrode, so it should hold up for years without needing a replacement.
- The mesh can cut down on radiant heat output a bit, which might mean bumping up to a higher-wattage bulb.
- Bulbs over 6.5 inches tall or 5.3 inches wide won’t fit, so double-check your bulb dimensions first.
- Installation needs a screwdriver and some alignment work, which could be tricky if your existing fixture is tight on space.
2. REPTI ZOO 75W UV Heat Lamp
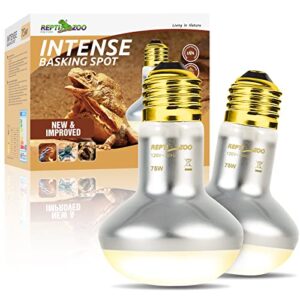
The REPTI ZOO 75W UV Heat Lamp pulls double duty — combining daytime UVA heating and nighttime infrared warmth in a single two-bulb pack. Each 75W E26 bulb operates for up to 3,000 hours, providing a focused basking beam to maintain a warm zone within the 86–90°F target range.
The flat-bottom reflector enhances efficiency by approximately 35% over standard bulbs, concentrating heat and light output. This design ensures optimal performance for smaller enclosures, though the 75W capacity may require supplemental heating in larger setups to sustain a proper thermal gradient.
| Best For | Reptile and small animal owners who need an affordable, easy-to-install basking bulb that handles both heat and UVA in one package. |
|---|---|
| Socket Type | E26 standard |
| Material Quality | Vacuum aluminized reflector |
| Reptile Compatible | Yes |
| Heat Management | Focuses basking heat |
| Easy Installation | Screw-in base |
| Safety Feature | Quality inspection tested |
| Additional Features |
|
- The flat-bottom reflector pushes about 35% more heat and light to the basking spot compared to standard bulbs — solid bang for your buck.
- Fits any standard E26 socket, so no special fixtures or adapters needed.
- Comes with two bulbs per pack, giving you a backup ready to go.
- Some buyers report bulbs burning out within days, so lifespan can be hit or miss.
- At 75W, it may not cut it for larger enclosures or heat-hungry species without extra heating support.
- The 3-month replacement window is pretty tight, and UVA intensity isn’t specified, making it hard to know if it’s enough for UV-dependent animals.
3. Etekcity Infrared Laser Temperature Gun
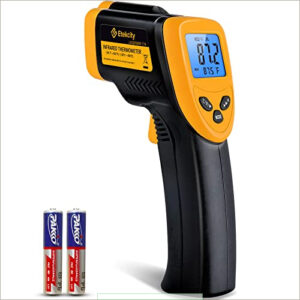
While the REPTI ZOO manages heat delivery, you still need to verify what’s actually happening on that basking surface. That’s where the Etekcity Infrared Laser Temperature Gun earns its place.
Point it at any surface from about 14 inches away and get a reading in under 0.5 seconds — no contact, no disturbing your boa. This non-invasive approach ensures you can monitor temperatures without disrupting your reptile’s environment.
Its 12:1 distance-to-spot ratio and ±2% accuracy provide precise, reliable measurements, allowing you to confirm whether your warm zone consistently maintains the critical 86–90°F target. This precision is essential for creating a safe and stable habitat for your boa.
| Best For | Reptile owners, home cooks, and hobbyists who need fast, accurate surface temperature readings without touching what they’re measuring. |
|---|---|
| Socket Type | Not applicable |
| Material Quality | Durable plastic housing |
| Reptile Compatible | Yes |
| Heat Management | Measures surface heat |
| Easy Installation | Single-button operation |
| Safety Feature | Non-contact measurement |
| Additional Features |
|
- Gives you a reading in under half a second from 14 inches away — no need to reach in or disturb your reptile
- Wide temperature range (–58°F to 842°F) covers everything from freezer checks to grill surfaces
- Adjustable emissivity means it works across different surface types, not just one material
- Only reads surface temps — it won’t tell you what’s happening inside food, water, or substrate
- Accuracy can slip if you’re not at the right distance or haven’t dialed in the emissivity setting
- Highly reflective surfaces may need a few tries before the reading stabilizes
Monitoring and Troubleshooting Temperatures

Getting your temperatures right is only half the job — keeping them right is where things get real. A single faulty probe or unchecked spike can undo weeks of careful setup in hours.
Here’s what you need to monitor, verify, and fix to stay ahead of problems.
Place Probes in Warm and Cool Zones
Probe placement isn’t guesswork — it’s the foundation of a reliable gradient. Position your temperature probe in the warm zone at the snake’s resting height, away from direct radiant flux to avoid false highs. Apply shielding techniques in the cool zone to block heat bleed-through. Follow these temperature sensor placement best practices:
- Warm zone – Place digital probes 6–8 inches above substrate, centered in the basking area for accurate 86–90°F readings.
- Cool zone – Install a probe at floor level, away from water dishes, targeting 75–80°F.
- Mid-zone calibration – A third sensor between zones confirms that your 6–10°F gradient holds steady throughout the day.
- Drift detection – Cross-check fixed probes with a handheld thermometer daily; variance beyond ±2°F signals a placement or equipment problem.
Wireless integration simplifies monitoring — Wi-Fi-enabled sensors automatically log overnight data, capturing temperature dips that might otherwise go unnoticed.
Calibrate Thermostats After Setup
Once probes are placed, thermostat verification is your next move. Set a secondary thermometer at chest height, away from direct heat, and compare readings for 15–30 minutes.
If the gap exceeds 1°F, apply offset calibration through your thermostat’s settings menu — small adjustments of 0.5–1.0°F are usually enough. Log every change in a calibration log and run post-calibration checks across a full day.
Check Basking Surfaces With Infrared Readings
Your infrared thermometer tells a story that probes cannot. Point it at the basking spot after a 15–20 minute stabilization window — adult surfaces should read 88–92°F.
Use an emissivity setting of 0.95 for accurate gradient imaging, and run hotspot mapping across multiple points to catch surface drift monitoring issues early.
Build this into your calibration schedule without exception.
Track Daily Temperature Fluctuations
Daily temperature checks are not optional — they’re how you catch problems before your boa does. Log hourly readings across both zones to map the diurnal pattern; most meaningful temperature fluctuations occur between 10:00 and 18:00.
Real-time monitoring with data logging exposes ambient influence from nearby windows or vents. Consistent sensor placement and variation alerts guarantee your temperature logging reflects actual enclosure conditions, not phantom readings.
Fix Overheating and Underheating Quickly
When temperatures swing out of range, avoid adjusting multiple settings at once — that’s how you lose control of the gradient entirely. Instead, use the wattage step-down method first: reduce heat source intensity incrementally, then reassess. Proportional thermostat tuning and airflow blockage adjustment handle most overheating scenarios.
If readings spike erratically, reposition your probe guard. Rapid gradient recalibration works best when you isolate one variable at a time, ensuring precise control over system responses.
Replace Unreliable Thermostats and Probes
When a thermostat drifts beyond ±2°F, your gradient collapses silently. Don’t wait for both to show stress before acting.
Stick to a firm Probe Replacement Schedule and treat redundant sensors as non-negotiable.
- Run Calibration Protocols every 30 days using a reference thermometer
- Apply thermostat calibration procedures and best practices after any probe swap
- Follow temperature sensor placement best practices — warm zone and cool zone, both covered
- Enable Fail‑Safe Alarms and verify Smart Thermostat Integration manages day/night set points automatically
Frequently Asked Questions (FAQs)
How hot should a boa constrictor enclosure be?
Your boa constrictor needs a hot zone of 86–90°F and a cool side of 75–80°F. Nail that thermal gradient, and digestive efficiency and metabolic impact stay right where they belong.
Do Boas need a thermal gradient?
A thermal gradient isn’t optional for a boa constrictor; it’s the foundation of thermoregulatory behavior, metabolic efficiency, immune support, stress mitigation, and growth promotion.
Without it, thermoregulation fails completely.
Do boa constrictors get cold at night?
Not exactly. A controlled drop to 68–75°F at night is normal and healthy — it benefits digestion cycles and nighttime activity without triggering cold stress, metabolic slowdown, or cold shock.
How big should a boa enclosure be?
Think of enclosure size like breathing room — too tight, and everything suffers. Adults need at least 6×3×3 feet, with vertical clearance and growth scaling built into your upgrade timeline.
What is the temperature gradient for a boa constrictor?
Your boa needs a warm side of 86–90°F and a cool side of 75–80°F. That 6–10°F gradient across thermal zones drives digestion speed, growth rate, and energy usage efficiency.
How cold is too cold for a boa constrictor?
Cold is a slow poison for boas. Drop below 75°F and digestion delay temperature kicks in — immune function drop follows within days. That’s your critical low limit.
What temperature should a boa cage be?
Keep your boa’s cage at 75–80°F on the cool side and 86–90°F on the warm side. That 10–15°F temperature gradient lets your boa thermoregulate on its own terms.
How hot is too hot for a boa constrictor?
Anything above 95°F crosses into dangerous territory. At that point, respiratory distress sets in fast, and neurological damage follows if heat stress isn’t corrected within hours.
How does enclosure size affect gradient stability?
Enclosure dimensions directly shape thermal stability. Smaller setups under 4 ft increase heat loss 7 times faster, while enclosures 6 ft and beyond deliver roughly 40% better gradient stability through improved heat source distribution and thermal mass effect.
What humidity levels support healthy shedding cycles?
Humidity below 35% quietly sabotages the shedding process. Target 60–80% normally, then boost to 70–80% during active sheds.
A humid hide placement assists in microclimate control without risking excess moisture risks from sustained high humidity.
Conclusion
A keeper once watched their boa refuse food for three months—no parasites, no disease, just a collapsed gradient running 10°F below target. After two thermostat adjustments later, the snake fed the following week. This shows how directly temperature drives everything.
The margin between a thriving snake and a declining one is often just a few degrees. Getting the numbers right ensures your boa manages the rest. This boa constrictor enclosure temperature gradient guide exists to emphasize that precision.
- https://reptifiles.com/boa-constrictor-care/boa-constrictor-temperatures/
- https://www.animalsathome.ca/central-american-boa-care/
- http://www.exoticpetvet.com/boa-constrictor-care.html
- https://www.swiftailvet.com/exotic-pet-care-sheets/boa-constrictor
- https://odorpatrol.tumblr.com/boaconstrictorhusbandry