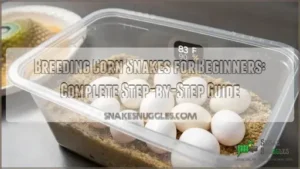
This site is supported by our readers. We may earn a commission, at no cost to you, if you purchase through links.

Drop a corn snake’s nighttime temps into the mid-50s for two months straight, and something clicks in its brain that no amount of warm basking ever triggers: the drive to breed. I learned that lesson the hard way my first season, wondering why my perfectly healthy pair ignored each other completely.
Timing makes or breaks reproduction in these snakes, far more than most keepers realize. A corn snake breeding season guide built on real cooling cycles, precise humidity, and careful pairing turns guesswork into predictable results.
From selecting proven adults to watching that first hatchling pip its shell, every stage rewards patience and precision in equal measure.
Table Of Contents
- Key Takeaways
- Choose Healthy Breeding Corn Snakes
- Prepare Seasonal Breeding Conditions
- Introduce Snakes for Mating
- Support Egg Laying Safely
- Incubate Eggs and Hatchlings
- Frequently Asked Questions (FAQs)
- How many times can you breed a corn snake?
- What month do corn snakes breed?
- What month is breeding season for snakes?
- Do corn snakes stop eating during breeding season?
- How long do corn snakes live in captivity?
- Can corn snakes be bred in small spaces?
- What colors can corn snakes be bred in?
- How often should I handle breeding snakes?
- Can I breed corn snakes with other species?
- What incubator or setup works best for beginners?
- Conclusion
Key Takeaways
- Successful breeding hinges on recreating a full seasonal cycle indoors, including a 60–75 day cooling period at 45–65°F followed by a gradual photoperiod ramp and return to warm basking temperatures.
- Accurate species identification and sexing (via probing or manual eversion) before pairing prevents wasted seasons from mismatched or same-sex snakes.
- Careful monitoring during mating, egg-laying, and incubation—tracking cloacal alignment, gravid signs, nest humidity, and incubation temperature (78–82°F, 80–100% RH)—directly determines hatch success.
- Post-breeding care matters as much as the breeding itself, since females need close health monitoring and gradual refeeding after laying to recover fully before any future clutch.
Choose Healthy Breeding Corn Snakes
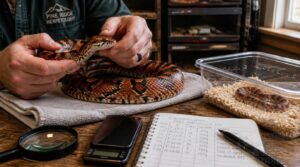
Every successful clutch starts long before the cool-down, with the animals you choose to pair. Get the fundamentals wrong here, species ID, sex, size, age, and you’re troubleshooting problems that never needed to happen. Here’s what you need to check before any snake earns a spot in your breeding rack.
If you’re unsure what normal courtship actually looks like, this guide to corn snake breeding behavior can help you tell genuine readiness from stress.
Confirm Scientific Identification
Why gamble your breeding season on a mislabeled snake? Confirm you’re working with Pantherophis guttatus before anything else—check dorsal blotches, subcaudal scales, and habitat cues against a reliable key.
Five verification steps:
- Photograph diagnostic voucher views
- Compare morphological markers
- Verify scale counts
- Cross-check DNA barcoding if uncertain
- Confirm phylogenetic placement
Corn snake herpetology rewards precision—skip it, and you’re breeding blind.
Sex Males and Females
Once you’ve nailed species identification, sexing comes next. Probing for hemipenes remains the most reliable method, though manual eversion works on juveniles. Males carry paired reproductive organs females lack entirely—straightforward anatomical differences once you know the landmarks.
Skip guesswork. Misreading sex means wasted seasons, mismatched hormonal cycles, and zero gamete production between same-sex pairs. Get an experienced hand to confirm your first few reads before trusting your own thumb.
Check Adult Size
Sex confirmed, now check size. Breeding adults need roughly three feet minimum, reflecting sexual dimorphism—females tend to run larger than males at maturity.
Assess growth potential alongside length:
- Consistent midbody girth
- Palpable but non-protruding ribs
- No sunken or bloated sections
- Smooth, cylindrical body condition
- Weight proportional to overall length
Sound morphology matters more than a tape measure alone when judging true breeding readiness.
Review Age and Condition
Length isn’t the whole story—healthy breeding line corn snakes usually produce their first clutch between 2 and 3 years old, once size and reproductive history line up.
Run a quick condition score: firm muscle tone, no protruding spine, clear vent. Screen for respiratory issues or retained shed beforehand.
Older females often show thicker girth; watch for slower clutch cycles as a senescence signal.
Avoid Same-Sex Pairing Errors
How many failed pairings trace back to two males or two females housed together too long? More than you’d think. When you sex your corn snakes, use hands-on probing or manual eversion rather than guesswork, and cross-check against breeding records before introductions.
Research suggests that postpairing behavioral similarity can help mismatched partners improve their reproductive success.
- Vent-sex every juvenile individually
- Flag ambiguous specimens, don’t pair them
- Cross-reference lineage history
- Keep accurate breeding records yearly
Prepare Seasonal Breeding Conditions
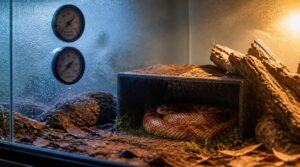
Once you’ve picked healthy, well-sexed pairs, the next job is convincing their bodies it’s time to breed. Corn snakes take their cues from the seasons, so you’ll need to recreate winter’s chill and spring’s lengthening days indoors. Here’s how to walk them through that cycle, step by step.
While your pairs go through brumation, keep their substrate lightly damp using a peat-perlite mix, since maintaining proper moisture requirements during shed supports healthy skin as breeding season approaches.
Plan Breeding Season Timing
Timing is everything here. Your target mating window should line up with your region’s natural spring climate shift, not a fixed calendar date.
Track local temperature trends and past incubation outcomes to build a seasonal readiness calendar.
Schedule cooling cycle start dates around fall’s cooling nights, then set an end date that lets females recover fully before laying.
Set Cooling Period
Once your calendar’s set, drop temperatures gradually into the 45 to 65°F range for a solid 60 to 75 day dormancy period. Before committing, run quick health checks and reassess pairings—cooling too fast stresses snakes unnecessarily.
Keep the room stable, dark, and undisturbed.
Document start and end dates in your breeding log; this environmental conditioning triggers the seasonal cues your snakes need to breed successfully.
Adjust Spring Photoperiod
Light is the switch that flips your snakes from dormancy into breeding mode. Once the cool-down ends, bring them into a gradual photoperiod ramp: increase light duration by 15-30 minutes every two weeks, building toward 9-10 hours by spring.
- Set fixed dawn/dusk timers
- Keep light intensity at 5-20 lux
- Watch for courtship behavioral response
- Adjust if aggression spikes
These seasonal triggers kickstart the reproductive cycle reliably.
Restore Warm Temperatures
Once the light ramp’s underway, warmth needs to follow. Push daytime temps above 28°C for at least 12 weeks, with basking zones hitting 32–34°C, and don’t let nights dip below 22°C.
Calibrated thermostats and backup ceramic heaters keep things stable—thermal stability monitoring catches drift before it stalls mating or delays sperm production.
Mist for Pheromone Cues
Think of misting as painting the air with pheromone cues—the right droplet size (5–20 micrometers) lets scent travel farther, setting the stage for mating. Mist 2–3 hours pre-introduction, using clean, additive-free water and passive nozzles. Adjust airflow so plumes don’t dissipate too quickly. Remember:
- Mist timing aligns with photoperiod
- Water purity preserves cue clarity
- Droplet size shapes dispersal
- Controlled airflow extends plume
Introduce Snakes for Mating
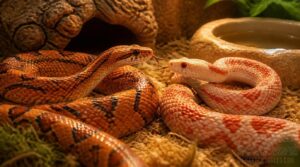
Once your cooling and light cycles are behind you, it’s time to bring your pair together with a plan, not guesswork. Timing and technique matter here, since a rushed introduction can stress both snakes and stall the whole process. Here’s what you need to watch for, from that first sign of readiness through the moment you separate them again.
Watch Female Readiness Signs
Rarely does a receptive female stay still—she’ll hold her body higher off the substrate, straighten out with minimal coiling, and tilt her head toward the male. Watch for collar flaring, slow tail waves, and light mucus discharge near the vent.
These courtship behavioral patterns, paired with detectable pheromones, confirm ovulation’s underway before mating begins.
Pair Male and Female
Once she’s showing those cues, transfer the male into her enclosure using a clean, pheromone-free container—never the reverse.
Keep the introduction brief and calm:
- Handle both snakes minimally beforehand
- Skip recent shed transfers
- Watch for aggression, not courtship
- Separate immediately if either snake shows distress
Corn snake pairing works best when stress stays low and instinct takes over naturally.
Observe Cloacal Alignment
Once courtship settles, you’ll see the male curl his tail beneath the female, working toward true cloacal alignment. This positioning cue signals readiness for copulation, so keep your distance and let it unfold.
Mucous secretions near the vent aid lubrication, and both snakes often go still for a moment—that’s your sign this pairing among breeding corn snakes is progressing naturally toward successful mating behavior.
Track Mating Duration
Once alignment locks in, start your timer—first mount marks the beginning, final disengagement marks the end. Pairs usually stay locked 10 to 20 minutes, though duration shifts with temperature, pair familiarity, and body condition.
Track it for every attempt:
- Note mount time
- Log disengagement
- Record pauses
- Watch for guarding
- Compare across pairs
Longer sessions often mean better fertilization odds for your breeding season clutch.
Separate After Breeding
Once disengagement happens, move the male out within minutes to a few hours—don’t let him linger. Separation timing accuracy matters here; lingering pairs risk injury and post-mating stress on your now-possibly-gravid female.
House him in a secure, separate enclosure for male containment safety. Check both snakes for agitation, then log the exact separation time in your breeding log documentation—this reference point matters for tracking ovipositing later.
Support Egg Laying Safely
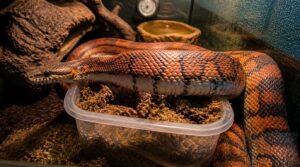
Once mating’s done, your female’s body starts telling you what she needs next. Watch for the physical cues that signal she’s carrying eggs, then get her setup ready before she comes looking for a place to lay. Here’s what that support looks like, step by step.
Identify Gravid Female Signs
Gravid females don’t hide it well: watch for a fuller, rounded midsection and slower, secretive behavior.
- Firm, rounded bumps under the skin
- A darker, fuller vent area
- Reduced appetite as follicles mature
- Quiet corner-seeking instead of active roaming
Gently palpate the lower abdomen; you’ll feel egg outlines forming a clustered pattern as oviposition nears.
Add a Nest Box
Once cloudy eyes signal the countdown, slide in a translucent plastic nesting box with one round entry hole.
| Feature | Why It Matters |
|---|---|
| Box Material Safety | Non-toxic, unfinished plastic prevents chemical exposure |
| Entrance Hole Sizing | Round, snug opening limits drafts and light |
| Best Box Placement | Dim, quiet corner away from traffic |
| Predator Protection | Enclosed lid deters disturbance during laying |
Use Damp Nesting Substrate
Fill the nesting box with a coconut coir and sphagnum moss mix, kept damp enough to hold a tunnel shape without collapsing. Add 10-20% perlite for aeration.
Water from the side to soak deeper layers while leaving the surface drier, which curbs mold.
Keep nest temps 2-4°F cooler than the enclosure, protecting the clutch until hatchlings emerge.
Monitor Post-Lay Condition
Laying a clutch takes a real toll, so daily body condition checks for two weeks after, matter as much as the eggs themselves.
Watch for rapid weight loss, cloacal swelling, or discharge—early signs of reproductive tract trouble. Track appetite, activity, and skin condition for rips or wounds.
Log every observation; a simple health record now saves you guesswork if recovery stress turns into something worse.
Feed Thin Females Carefully
Skinny after a clutch? Don’t rush the food back—smaller, frequent meals protect her gut from regurgitation risk during this fragile post-lay window.
- Offer easily digestible, moderate-fat prey
- Feed smaller portions more often
- Check body condition daily
- Keep fresh water available for electrolyte balance
- Log feeding intolerance signs like lethargy
Steady, documented progress beats rushed weight gain every time in reptile husbandry.
Incubate Eggs and Hatchlings
Once those eggs are laid, your job shifts from matchmaker to incubator technician, and precision matters more than ever now.
Temperature and humidity swings can undo weeks of careful breeding work in a matter of hours, so you can’t afford to guess.
Temperature and humidity swings can undo weeks of careful breeding work in mere hours
Here’s what you need to dial in from the moment those eggs hit the incubator to the day hatchlings break free.
Set Incubation Temperature
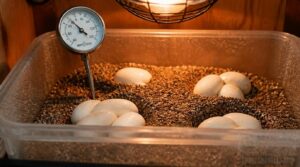
Dial in your incubator to 78–82°F, keeping the embryo-level reading steady since drift over 0.2°C slows development and hurts hatch rates.
| Phase | Target Range |
|---|---|
| Days 1–7 | ~78°F |
| Mid-incubation | 78–82°F |
| Day 18+ | Slightly cooler |
Place your thermometer an inch above the vermiculite, right at egg level, not just floating air—that’s where embryo metabolism actually happens.
Maintain High Humidity
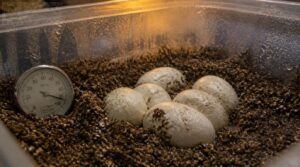
Once temperature’s steady, humidity becomes your next watch item—keep vermiculite at a 1:1 water ratio, holding 80–100% RH on your hygrometer. Place it right at substrate level, not the incubator wall, for accurate readings.
Check daily for dew condensation or mold; crack the lid briefly for airflow if you spot either. Avoid drying cycles altogether—stable moisture protects your clutch through seasonal swings.
Candle Eggs Midway
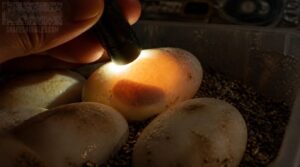
Around day 30 of egg incubation, grab your flashlight for a midpoint inspection—it’s time to check embryo viability signs.
Hold the light briefly against each shell in your clutch of eggs: visible vessels and a defined outline mean healthy growth, while clear yolks signal stalled development.
Follow candling safety protocols, keeping sessions short to protect humidity. Log findings immediately, then handle nonviable eggs by removing them promptly.
Watch for Egg Problems
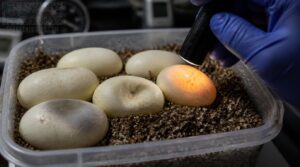
Identifying mold growth means checking daily for fuzzy patches, while off odors signal bacterial spoilage—pull those eggs immediately.
Managing humidity risks matters too: too much moisture invites fungal growth, too little causes shrinkage. Since these oviparous eggs depend on steady conditions, watch for inward denting or dark irregular patterns during candling, which flag embryo anomalies needing your attention before they spread through the clutch.
Record Hatchling Development
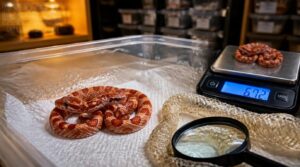
Once hatchlings emerge, give them roughly a day to absorb yolk fluids before handling.
Track weight gain daily—expect 0.25 to 0.75 grams per day under proper feeding. Log shedding frequency, feeding success rates, and key signs like righting response.
This record-keeping, standard practice through every reptile breeding season, reveals growth trajectory patterns and helps you flag issues across morphs before the next incubation cycle.
Frequently Asked Questions (FAQs)
How many times can you breed a corn snake?
Once a year is the safe rule for annual breeding frequency. A well-conditioned female might handle a second clutch, but that risks fertility and hatchling vigor—full recovery takes 6 to 12 months, so managing reproductive stress matters more than pushing output.
What month do corn snakes breed?
Spring rolls in like an alarm clock for corn snakes: March and April usually kick off breeding in temperate regions, following brumation, while warm-climate populations may cycle earlier or nearly year-round as local temperature shifts dictate mating patterns.
What month is breeding season for snakes?
Most temperate snakes mate March through May, once brumation ends and temps climb above species-specific thresholds. Southern Hemisphere populations shift to September onward.
Tropical species may breed year-round, peaking with rainy season prey cycles and rising photoperiod cues.
Do corn snakes stop eating during breeding season?
Love takes precedence over lunch in the reptile world.
Yes—reproductive energy allocation shifts appetite dramatically: courting males and gravid females often pause feeding for days or weeks, redirecting energy toward mating and egg development before appetite naturally rebounds afterward.
How long do corn snakes live in captivity?
With good husbandry, expect 15 to 20 years, sometimes 25-plus. Lifespan factors like diet quality, enclosure stability, and routine vet checks matter most—especially for breeders, since reproduction stresses senior individuals differently than younger, faster-recovering snakes.
Can corn snakes be bred in small spaces?
Yes, with vertical rack systems, compact hatchling tubs, and space-efficient nesting boxes, you can breed these constrictors in tight quarters, provided micro-climate control stays precise and you’ve planned ahead for population growth as clutches hatch.
What colors can corn snakes be bred in?
From muted wild type patterns to snow-white albinos, corn snake morphs cover a wide spectrum. You’ll find lavender combinations, anerythristic grays, and rare scaleless lines—each reflecting distinct snake morphology shaped through selective reptile breeding.
How often should I handle breeding snakes?
Keep handling brief and purposeful—1 to 2 minutes per session, only for health checks or pairing observation. Stretch intervals during cooling and ovulation. Track behavioral responses closely, and always prioritize stress reduction over routine handling during active breeding season.
Can I breed corn snakes with other species?
Funny enough, some breeders stumble into hybrids by accident, pairing corn snakes with Texas rat snakes—fertile offspring result, but expect unpredictable patterns, ethical trade-offs, and escape risks. Stick with pure lines for reliable morph work.
What incubator or setup works best for beginners?
A small digital incubator with forced-air circulation beats still-air units for beginners — tighter temperature regulation, easier humidity control.
Cabinet-style models add capacity later, but portable compact incubators offer affordable, forgiving practice for your first reptile breeding season’s egg incubation.
Conclusion
Good things come to those who wait, and nowhere is that truer than in the cooling box.
Every stage of this corn snake breeding season guide hinges on patience, not luck: proper temperature drops, careful pairing, and steady incubation stack the odds in your favor.
Skip a step, and clutches fail. Follow the sequence, and you’ll hold warm, wriggling proof that timing beats guesswork every single season.