This site is supported by our readers. We may earn a commission, at no cost to you, if you purchase through links.
A snake’s waste hides in plain sight. Urates dry into chalky white clumps that match substrate within hours, and a missed patch can breed bacteria long before you notice the smell. That’s the real risk: not the mess itself, but what grows underneath it.
Getting removing snake waste from substrate safely right protects your snake’s respiratory health and keeps bacterial buildup from taking hold in corners you can’t always see. It also builds trust between you and your snake, since calm, predictable handling during cleanup matters as much as the cleaning itself.
Here’s exactly how to spot it, lift it, and disinfect the area without stressing your snake or missing what’s hiding beneath the surface.
Table Of Contents
- Key Takeaways
- Prepare Safe Snake Waste Cleaning Supplies
- Move Your Snake Before Cleaning
- Remove Waste and Soiled Substrate
- Disinfect and Refill The Cleaned Area
- Prevent Odor and Hidden Waste Buildup
- Top 5 Products for Snake Waste Removal
- Frequently Asked Questions (FAQs)
- How to clean snake poop from enclosure?
- How to get rid of snake poop?
- Can I reuse substrate after disinfecting it?
- How do bioactive tanks handle waste removal?
- What water should I use for misting?
- Should I quarantine new substrate before adding?
- How do I identify ammonia hotspots?
- How often should I weigh my snake?
- What temperature should the enclosure be after cleaning?
- How long should lighting warm up before reintroducing my snake?
- Conclusion
Key Takeaways
- The real danger isn’t the mess you can see, it’s the bacteria that grows in missed spots, like chalky white urate clumps that blend right into your substrate.
- Keep your snake calm and separated in a secure temporary container while you clean, using slow, deliberate movements since quick motions read as danger to your snake.
- Never reuse substrate after disinfecting it, since pathogens like Salmonella can survive in damp material, so toss soiled bedding and start fresh every time.
- Daily checks and a simple waste log help you catch problems early, letting you spot unusual moisture, odor, or discoloration before it turns into a bigger issue.
Prepare Safe Snake Waste Cleaning Supplies
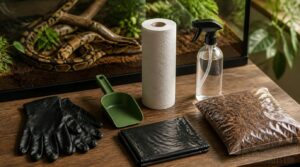
Good waste cleanup starts before you ever touch the substrate. Having the right supplies on hand keeps the job quick, safe, and free of cross-contamination. Here’s what you’ll want gathered and ready.
If you’re still choosing your setup, picking a substrate that supports healthy shedding from the start makes routine waste cleanup far less of a hassle.
Dedicated Scoop and Waste Bin
Your snake’s cleaning routine starts with the right tools, not a random scoop from the kitchen drawer.
- Rigid, disinfectant-resistant plastic holds up to bleach without cracking
- Sealed lid keeps odor contained between cleanings
- Fits up to 2.5 liters per cycle
A beveled edge lifts waste without snagging substrate, and one handed use keeps handling calm and quick. Just as a data-centered approach to reading can improve how students process information through structured, repeated practice, a consistent, well-organized cleaning routine builds habits that make each waste removal faster and less stressful over time.
Disposable Gloves for Safe Handling
Your hands touch waste, bleach, and substrate all in one session, so bare skin has no business in the mix. Nitrile gloves resist punctures and chemicals while staying latex free.
Pull them on before opening the bin, and always wash your hands first. Remove and dispose of gloves right after, then wash again. That habit alone prevents cross-contamination between cleanings.
Paper Towels and Plastic Scraper
Once your gloves are on, grab paper towels and a plastic scraper before touching the substrate. Loose fibers soak up moisture fast, lifting feces and dried urates in one wipe. The scraper’s flexible blade bends across curved corners without gouging surfaces.
Toss each sheet after one use. Fresh paper towels every time keep cross contamination out of your enclosure.
Properly Diluted Disinfecting Solution
Once surfaces are scraped clean, mix your bleach solution. Follow the label’s exact dilution ratio, using cool water since heat breaks down bleach’s active ingredients. Make a fresh batch every session, never reuse yesterday’s mix.
- Label the container with product name and date
- Store away from your snake and food areas
- Ventilate the room during application
Fresh Replacement Substrate
Ready-to-use substrate matters as much as the cleaning itself. Keep a dust-free bag on hand, aspen or coconut fiber both absorb moisture fast, within minutes.
Depth should hit two inches, enough to buffer waste without trapping odor. Match substrate to species: ball pythons like it deeper, corn snakes do fine with aspen mixes.
Fresh bedding keeps enclosures smelling clean.
Move Your Snake Before Cleaning
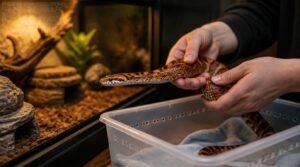
Before you touch any waste, get your snake somewhere safe first. This protects your snake from stress and keeps your hands free to work. Here’s exactly how to handle the move, step by step.
Prepare a Secure Temporary Container
Before removing any waste, set your snake up in a secure temporary container. Choose one with a tight, latching lid and leak-proof gaskets, plus a spill tray for accidents. Check that it tolerates 60°C heat and -20°C cold, and carries clear safety labeling. This keeps your snake calm and contained while you focus on cleaning.
Wash Hands Before Handling
Before relocating your snake, wet your hands under clean running water and build a full lather, covering your palms, backs, and between your fingers.
Scrub for at least 20 seconds, rinse thoroughly, and dry with a clean towel. This simple habit stops germs from transferring during handling.
Use Calm, Gentle Movements
A snake reads speed as danger, so slow down before you even touch the enclosure.
Once you’re moving calmly, choosing a substrate that won’t cause harm if swallowed matters too—see this guide on whether snakes can safely ingest bedding while eating for what to watch for.
A snake reads speed as danger, so slow, deliberate movements keep it calm
Use smooth, predictable motions, guiding with long steady strokes at chest height. Pause after each gentle repositioning. Speak softly, keep noise minimal.
- Slow tempo, calm nerves
- Chest height, less vibration
- Pauses build trust
- Quiet voice, steady hands
- Predictable motion, no surprises
Watch for Defensive Stress Signs
A hiss or an "S" coil means stop and reassess. Watch for flattened posture, tight muscle tone, or musking, these are defensive stress signs, not curiosity. Clouded eyes from shedding raise bite risk too.
If withdrawal or freezing shows up, pause the whole terrarium sanitation routine and log it in your Snake Care Logbook before trying again.
Remove Waste and Soiled Substrate
Once your snake is safely tucked away, it’s time to get down to business. Waste removal isn’t just about grabbing what you see; it’s a step-by-step process that keeps your snake’s home truly clean. Here’s exactly how to spot, lift, and clear soiled substrate the right way.
Locate Feces, Urates, and Dampness
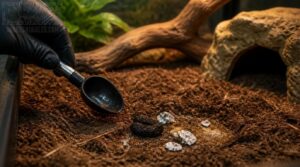
Before you touch any bedding, do a quick scan. You’re hunting for three things:
- Dark, pellet-like feces on top of the substrate
- Chalky white urate clumps stuck to bedding
- Damp, discolored patches with a faint ammonia smell
Waste usually clusters near your snake’s favorite resting spot, so check that hotspot first.
Lift Waste Without Scattering Bedding
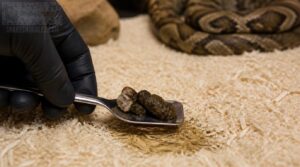
Once you’ve spotted the mess, technique matters. Slide your scoop under it at a shallow angle, staying close and level to the bedding. Lift solid waste first, then the damp layer beneath, avoiding sudden jerks that fling particles outward.
| Do | Avoid |
|---|---|
| Shallow scoop angle | Digging straight down |
| Solid then damp lift | Yanking bedding up fast |
| Slow, steady extraction | Sudden jerky pulling |
Clear The Surrounding Soiled Radius
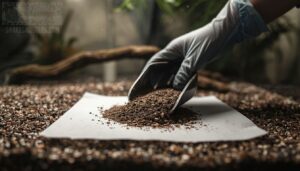
Waste rarely stays put. Urine seeps outward, so check a one to two inch buffer around the mess.
Lay a disposable towel to mark the zone, then use your scoop for controlled substrate transfer within it. Skip shaking bedding.
Ventilate the area for odor control, and glove up before touching anything damp.
Scrape Dried Urates Carefully
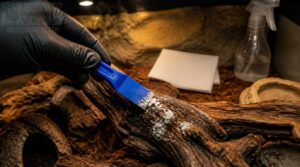
Once loose bedding is cleared, dried urates often remain stuck to surfaces. These crumbly white deposits need a plastic scraper, not metal, to lift without gouging substrate or scratching decor.
Work edges inward, lightly moisten if stubborn, then wipe with paper towels. Sanitize your scraper afterward, and recheck the spot within 30 minutes for lingering residue.
Bag Waste Immediately for Disposal
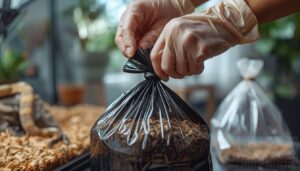
Once you’re done withdrawing waste, don’t let it sit around. Seal bags promptly in a sealable trash bag, double bag wet waste, and take away right to an outdoor trash can.
- Label bags if storing temporarily
- Double bag heavy or wet waste
- Dispose within 24 hours
Skip these steps and odor becomes your enclosure’s new roommate.
Disinfect and Refill The Cleaned Area
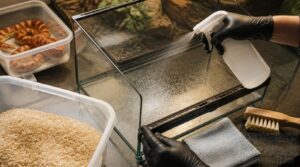
Waste removal is only half the job. Now it’s time to disinfect what’s left behind and get the enclosure ready for your snake again. Here’s exactly how to do it, step by step.
Keep Your Snake Safely Separated
Why disinfect with your snake still inside? Keep it in its temporary housing setup until every surface is dry.
| Step | Action | Purpose |
|---|---|---|
| 1 | Confirm secure lid | Escape prevention |
| 2 | Verify container ventilation | Stress-free handling |
| 3 | Delay reintroduction | Safe separation |
Relocation during disinfecting protects your snake from fumes while you finish transferring supplies.
Clean Surfaces Before Disinfecting
Before bleach touches anything, wipe down the enclosure with a detergent pre-wash to lift dirt and organic matter. This surface cleaning sequence stops contaminant redistribution: work clean areas toward dirty ones, never the reverse.
Rinse away soap residue so it won’t weaken your disinfectant. Keep cleaning tools separate from disinfecting supplies, always, following strict tool separation protocol.
Rinse Away All Chemical Residue
With bleach still clinging to every surface, running water becomes your next tool. Flowing water lifts detergents from crevices and corners that a wipe alone misses.
- Rinse for at least 30 seconds
- Flush crevices and corners directly
- Check for foam, film, or streaks
- Repeat until surfaces show no residue
A quick wipe test confirms rinse effectiveness before proceeding.
Let Surfaces Dry Completely
A damp enclosure invites bacteria back in, so patience here pays off. Give surfaces at least one hour to air dry before moving on.
Improve airflow by propping doors open, and check corners with a dry fingertip for lingering moisture. Wood and porous décor need extra time. Store drying tools separately to prevent recontamination.
Add Fresh Substrate Evenly
An even floor isn’t cosmetic, it’s how you stop hotspots before they start. Fill to two inches, using a uniform spreading method in small passes, not one big dump. Check depth with your fingers at the corners. Watch particle size selection, since uneven grains cause channeling. This limits displacement when your snake is moving, shedding, or removing loose bedding.
Prevent Odor and Hidden Waste Buildup
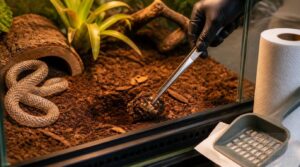
Cleaning up the mess isn’t the finish line. Waste hides in ways you won’t always see or smell right away, and that’s where trouble builds. Here’s how to stay ahead of it, day by day.
Check Substrate for Waste Daily
A quick daily glance catches trouble before it grows. Check corners first, since waste often hides there.
Look for darkened, damp patches and compare the top layer to what’s underneath. Note any color changes.
Record what you find. Tracking waste patterns helps you catch odor early, adjust cleaning frequency, and know when substrate needs replacing.
Remove Damp or Discolored Bedding
Once you’ve spotted a suspect patch, don’t wait. Identify damp bedding by pressing it lightly, if it feels cool or clumps together, pull it out.
Check discoloration signs too: brownish or gray stains mean urine soaked through. Remove soiled substrate down to the liner, then replace fresh bedding to the usual two-inch depth and keep monitoring moisture levels daily.
Monitor Persistent Enclosure Odors
Your nose is a diagnostic tool. Trust it.
A whiff of ammonia or sulfur during handling means something’s brewing beneath the surface. Rate what you smell, faint to strong, and track it.
- Check ventilation rate (2-3 air exchanges hourly)
- Sniff within 15 minutes of access
- Rate odor: faint to strong
- Note any smell lasting past 24 hours
- Log moisture alongside odor findings
Deep-clean After Widespread Soiling
If odor lingers after spot checks, it’s time for a full breakdown. Widespread soiling calls for complete substrate replacement and full enclosure surface sanitation, not just a touch-up.
Follow your waste containment protocol, transfer your snake safely, then scrub and disinfect every surface. Schedule these deep cleans every two to three months, or sooner after major accidents.
Record Waste and Substrate Changes
A deep clean means little if you can’t spot the next problem coming. Keep a simple log: date, waste type, substrate moisture, and odor rating.
This waste logging habit turns substrate monitoring into pattern recognition, catching wicking or bacterial buildup before it spreads. Note replacement dates too. Over weeks, these records reveal your snake’s normal, so abnormal changes stand out fast.
Top 5 Products for Snake Waste Removal
Having the right tools on hand makes cleanup faster and safer for both you and your snake. You don’t need a full shopping list, just a handful of reliable products that get the job done well. Here are five worth keeping in your cleaning kit.
1. Van Ness Cat Litter Scoop
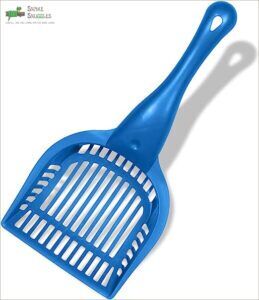
A good scoop earns its place in your kit fast. The Van Ness Stainless Steel Cat Litter Scoop is built for daily digging, with a fine mesh design that sifts substrate while trapping solid waste and urates.
Its beveled edge scrapes stuck material off pan surfaces without gouging liners. Stainless steel resists denting and washes clean under hot water, which matters when you’re handling waste every single day.
| Best For | This scoop is best for cat owners who need a lightweight, easy-to-clean tool for scooping both clumping and non-clumping litter from small to large litter pans. |
|---|---|
| Material | Plastic |
| Weight | 1.12 oz |
| Dimensions | 11 x 4.88 x 2.25 in |
| Brand | Generic |
| Primary Use | Litter Scooping |
| Durability Concern | May bend |
| Additional Features |
|
- Made from high impact plastic that holds up to regular use
- High polished finish resists odors and stains for easier upkeep
- Lightweight build makes handling and daily scooping simple
- Plastic construction may bend or flex under heavy use
- Slots can be too large to catch fine litter particles
- Handle may feel flimsy when digging through deep litter
2. Exo Terra Reptile Mister Bottle
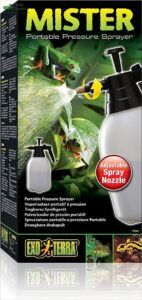
Humidity control matters just as much as waste removal, and this is where the Exo Terra Mister Bottle earns its spot. The 2 liter reservoir and adjustable nozzle let you switch between fine mist and a stronger stream, useful when rinsing bleach residue off décor after disinfecting.
Its locking trigger means you won’t cramp your hand mid-spray. Just remember to depressurize after each use. Leftover pressure is a common cause of leaks around the seal.
| Best For | Reptile and amphibian keepers who need to maintain humidity in large or multiple terrarium setups, as well as plant lovers misting bromeliads, orchids, and mosses. |
|---|---|
| Material | Plastic |
| Weight | 8.82 oz |
| Dimensions | 7 x 7 x 12.5 in |
| Brand | Hagen |
| Primary Use | Terrarium Misting |
| Durability Concern | Leak reports |
| Additional Features |
|
- Large 67.5 fl oz (2 liter) reservoir means fewer refills during extended misting sessions
- Adjustable nozzle switches easily between fine mist and a stronger stream for different tasks
- Locking trigger allows continuous spraying without holding the trigger the whole time
- Some users report leaks from the top seal or nozzle, especially when pressurized
- Mist fineness and long-term durability get mixed reviews
- Flexible plastic handle can feel wobbly during use
3. Bounty Paper Towels
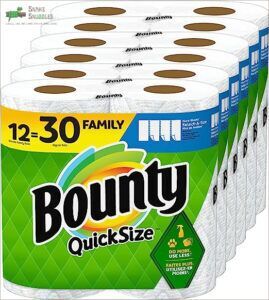
Regarding wiping down surfaces after disinfecting, not all paper towels hold up. Bounty’s double-ply construction stays intact even when soaked in your bleach solution, so you won’t be picking apart shredded bits from the glass.
The quilted texture grips grime instead of pushing it around, and sheets tear cleanly along the perforations when you need a smaller piece for spot cleaning. That durability matters more than people expect once bleach is involved.
| Best For | Bounty Paper Towels are best for households that want a reliable, heavy-duty option for tackling spills, disinfecting surfaces, and cleaning delicate items like glass and electronics. |
|---|---|
| Material | Paper |
| Weight | 8.67 lbs |
| Dimensions | 17.05 x 11.46 x 22.64 in |
| Brand | Generic |
| Primary Use | Cleanup |
| Durability Concern | Uneven thickness |
| Additional Features |
|
- Double-ply construction holds up well even when soaked, resisting shredding during tough cleanup jobs
- Lint-free material makes it safe for wiping glass, screens, and other delicate surfaces
- Quick-Size perforations let you tear off just the right amount for the task at hand
- Costs more than generic paper towel brands
- Some users notice inconsistent thickness and softness between rolls
- Sheets don’t always tear evenly along the perforation lines
4. Clorox Splash Less Bleach Liquid
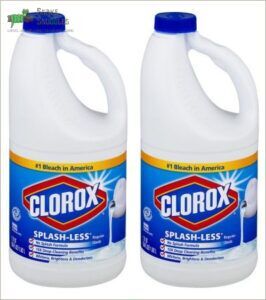
Bleach is still the best for killing what soap can’t touch, and Clorox’s splash-less formula pours without the mess of standard bottles. You get two 55-ounce bottles per pack, plenty for months of enclosure disinfecting.
Mix 1/3 cup per gallon of water for your Exo Terra spray bottle, then let surfaces stay wet for 5 to 6 minutes before rinsing. Some owners report occasional leaking, so store it upright and check the cap.
| Best For | Pet owners and reptile keepers who need a reliable, no-mess bleach for disinfecting enclosures, laundry, and household surfaces. |
|---|---|
| Material | Liquid |
| Weight | 110 fl oz |
| Dimensions | N/A |
| Brand | Clorox |
| Primary Use | Whitening/Cleaning |
| Durability Concern | Leak reports |
| Additional Features |
|
- No-splash formula pours cleanly without spilling or splattering
- Two 55-ounce bottles give you months of use for both laundry and cleaning tasks
- Works in both standard and high-efficiency washing machines
- Some customers report leaking despite the splash-free design
- Mixed reviews on whether the size justifies the price
- Comes as two separate bottles rather than one larger container, which some find inconvenient
5. Zoo Med Aspen Snake Bedding
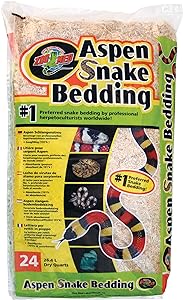
Every cleanup ends the same way: fresh substrate goes back in. Zoo Med’s aspen bedding is a solid pick, made from 100% renewable aspen with 191% absorbency to wick moisture away from your snake’s skin.
It’s marketed as 99.9% dust free, which matters if your snake has a sensitive respiratory tract. No cedar oils, no toxins, just a naturalistic layer that allows burrowing while keeping odor in check between deep cleans.
| Best For | Reptile and small pet owners with snakes, lizards, tortoises, birds, tarantulas, or insects who want a natural, odor-controlling substrate that supports burrowing behavior. |
|---|---|
| Material | Aspen Wood |
| Weight | 5.4 lbs |
| Dimensions | 21.1 x 13.3 x 5 in |
| Brand | Zoo Med |
| Primary Use | Reptile Bedding |
| Durability Concern | Dust variability |
| Additional Features |
|
- High 191% absorbency rating keeps enclosures dry and odor-free
- Free of toxic oils like cedar, making it a safer, odorless choice
- Supports natural burrowing and nesting while needing only occasional full changes
- Dust levels can vary, with some users finding it quite dusty
- Not recommended for outdoor use
- May be harder to find in physical retail stores
Frequently Asked Questions (FAQs)
How to clean snake poop from enclosure?
Grab a scoop and sealed bin, then lift feces without scattering bedding. Wipe wet spots with paper towels, scrape dried urates with a plastic card, and apply reptile-safe disinfectant before adding fresh substrate.
How to get rid of snake poop?
Out, damned spot, as Shakespeare’s Lady Macbeth might say. Scoop waste with a dedicated tool, bag it in a lined bin, then wipe the area with paper towels before disinfecting and adding fresh substrate.
Can I reuse substrate after disinfecting it?
No, loose substrate isn’t meant for reuse. Disinfectants can’t fully penetrate damp material, and pathogens like Salmonella or mite eggs often survive. Toss soiled bedding and start fresh. It’s cheaper and far safer than risking your snake’s health.
How do bioactive tanks handle waste removal?
Think of it as a tiny rainforest floor. Beneficial bacteria and detritivores like isopods break down waste continuously, converting ammonia into nitrate. You’ll still spot-clean, but the system takes care of most decomposition on its own.
What water should I use for misting?
Stick with distilled or reverse osmosis water for misting. Both stay free of minerals that clog nozzles. Filtered tap water works in a pinch. If using tap water, let it sit 24 hours to dechlorinate first.
For guidance on pairing the right water with the safest snake water bowl materials, non-porous options like ceramic or stainless steel hold up best without trapping residue.
Should I quarantine new substrate before adding?
Yes. Quarantining new substrate protects against mold, mites, and hidden moisture. Store it separately, check for odor or clumping, and let it dry fully before use, this keeps contaminants away from your snake’s clean enclosure.
How do I identify ammonia hotspots?
Check corners near the substrate surface with a handheld ammonia meter, focusing on damp or soiled spots. Repeated high readings in the same location, especially after feeding or cleaning, confirm a true hotspot rather than a passing spike.
How often should I weigh my snake?
Letting your snake’s scale tip the truth matters. Weigh hatchlings weekly, adults every 2-3 weeks, and juveniles twice monthly. Always weigh before feeding, same scale, same routine, to catch weight loss over 5% early.
What temperature should the enclosure be after cleaning?
Aim for species-specific ranges, like 88-92°F basking and 76-80°F cool zones for ball pythons. Maintain a 10-15°F gradient, and confirm with a thermometer before returning your snake, usually within 15-30 minutes.
How long should lighting warm up before reintroducing my snake?
Rushing this step could cook your snake’s homecoming plans entirely. Give heat lamps 2 to 4 hours to stabilize before your snake goes back in, letting the thermal gradient settle so basking and cool zones both read accurately.
Conclusion
A tech once found a dime-sized urate patch hiding under fresh aspen, a small clue with big consequences left unchecked. That’s the pattern behind removing snake waste from substrate safely: what’s invisible today becomes bacteria tomorrow. Your scoop, gloves, and disinfectant aren’t just supplies, they’re your snake’s first line of defense. Check daily, clean promptly, and trust your eyes over your nose. A clean enclosure isn’t glamorous work. It’s quiet, steady care that keeps your snake breathing easy for years.