This site is supported by our readers. We may earn a commission, at no cost to you, if you purchase through links.

A wrinkled liner traps waste under its folds. Ammonia builds fast in that gap, and your snake’s belly scales pay the price. Most keepers find this out the hard way, after a mystery odor or a scale infection sends them scrambling.
Here’s the truth: how to install a substrate liner in terrarium setups comes down to precision, not luck. Loose edges, poor fit, and the wrong material cause more harm than no liner at all.
Get the measurements right, secure every edge, and you’ll build a clean, low-stress home your snake actually thrives in.
Table Of Contents
Key Takeaways
- Pick a liner that’s non-toxic, washable, and the right texture, since grip and material safety matter just as much as fit.
- Always empty, clean, disinfect, and fully dry the terrarium before measuring or cutting your liner.
- Measure carefully, trim slightly inside your chalk lines, and secure edges with weights instead of tape to keep the liner flush and mold-free.
- Spot-clean waste daily, wash the liner weekly or biweekly, and replace it every 6 to 12 months to prevent ammonia buildup and skin damage.
Choose The Right Terrarium Substrate Liner
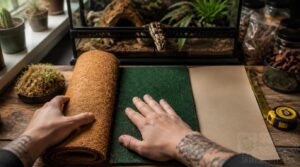
Not every liner works for every snake. Size, texture, and material all matter more than you’d think. Here’s what to check before you buy.
If you’re still weighing whether a liner makes sense at all, this guide on whether snakes actually need substrate liners is a solid place to start.
Confirm Liner Suits Your Snake
Not every liner belongs in your snake’s home. Run a quick Scale Safety Review: check for BPA, phthalates, or VOCs that offgas.
For beginners, stick with food-grade or aquarium-grade material. Confirm a Fit Verification too, no gaps, no bulk, edges sealed snug against the base. A data-centered approach to reading product labels and material specs can help you evaluate liner safety with the same rigor researchers apply to primary literature.
Compare Texture and Traction
Scale safety matters, but so does grip. Run a quick Texture Assessment: coarser weaves bite better for slow-moving snakes, while finer textures protect delicate scales from snagging. Roughness affects dry friction, so moderate is best, enough traction without scale damage.
For a fair Traction Comparison, check nonslip backing, weave and durability, and edge reinforcement strips before buying.
Check Moisture and Absorbency
Grip only matters if the liner stays dry underneath it. Run a quick moisture test: dab water on the surface and time the absorption rate, aim for 5 to 15 seconds.
Good moisture-wicking materials spread liquid evenly instead of pooling in corners, keeping terrarium moisture balance steady and drainage working the way it should.
Choose Washable, Non-Toxic Material
Passing the moisture test isn’t enough. The material touching your snake’s belly every day needs to be non-toxic and washable too.
Look for natural cotton with non-pigment dyes, PEva or silicone-backed liners, or bamboo viscose fibers. These reptile-safe options resist bacterial buildup, wipe clean with reptile-safe cleaning solutions, and won’t irritate sensitive skin.
Avoid Frayed or Loose Fibers
Run your fingers along every edge before buying. Loose threads snag on hides and doors, raising escape risk for smaller snakes.
Look for overlocked or serged edges and tightly bound fibers. Skip pile or fuzzy weaves, they shed constantly. Smooth, low-lint synthetics with sealed seams wear better and won’t abrade delicate skin during daily movement.
Prepare The Terrarium for Installation
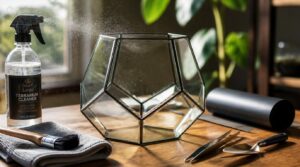
A good liner install starts long before the liner touches the glass. Your terrarium needs to be empty, clean, and bone dry first. Here’s exactly how to get there.
Move Snake to Safe Container
Never work with substrate near a loose snake. Move it to a secure, ventilated container first, approaching from the side and using a snake hook if needed.
Once the snake is safely contained, take a moment to review essential snake cage security tips so escapes like this become far less likely in the future.
- Check the lid latches
- Confirm airflow holes
- Block nearby escape routes
Handle calmly, keep movements slow, and inspect the snake briefly before setting the container aside.
Remove Decor and Old Substrate
With your snake safely tucked away, clear the terrarium space completely. Pull out hides, water bowls, branches, and any decor first.
Scoop or sweep loose substrate into a bag for disposal. Check corners and crevices for hidden debris, sharp edges, or loose glass seals before proceeding. This step sets up everything that follows.
Clean and Disinfect The Base
An empty terrarium is a blank slate, but only if it’s actually clean. Pre-clean the base to strip away debris, then wipe with an EPA-registered disinfectant or a bleach solution of one tablespoon per gallon, letting it sit for five minutes.
Follow up with residue-free wiping. Skipping this invites bacteria your new liner can’t fix.
Dry Every Surface Completely
Damp corners breed mold fast. Grab a microfiber towel and work top to bottom, letting gravity-assisted drying pull moisture down and out.
- Wipe every surface dry
- Blast crevices with a hair dryer on cool
- Check seams under light for damp patches
Air dry liners fully before layering substrate. Skipping this risks bacterial buildup your enclosure can’t afford.
Gather Measuring and Cutting Tools
Grab your tools before you touch the liner. You’ll need a 12 inch ruler or tape measure, utility knife, and heavyduty fabric shears for thicker sheets.
Use the glass bottom as a template, tracing its exact shape for template-based fitting. A straight edge guides custom cutting methods and keeps edge alignment precision tight, no crooked corners, no wasted material.
Install The Substrate Liner Step by Step
Your terrarium is clean, dry, and ready. Now it’s time to get the liner in place, from measuring to that final smooth, wrinkle-free fit. Follow these five steps in order, and you’ll set up a surface built to last.
Measure The Interior Base
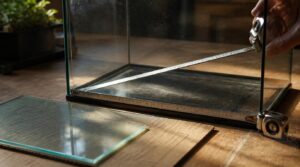
A calibrated tape gives you the real numbers. Measure length, width, and height from wall to wall, checking three spots for taper.
Confirm square corners with equal diagonals, within 1/16 inch. For front-opening enclosures, the glass bottom acts as a template, guiding edge alignment and custom cutting before you trim anything.
Mark The Liner Dimensions
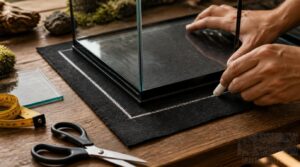
With numbers in hand, lay the liner flat and use the glass bottom as a template. Trace the base outline with fabric chalk, marking corner contours where curves meet.
Leave edge clearance of roughly an inch all around. This template-based fitting keeps your line straight before you touch the scissors.
Trim Slightly Inside The Edges
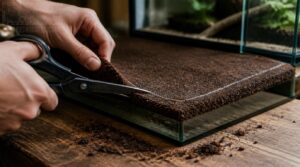
Now cut just inside your chalk line, never on it. A 2 to 5 millimeter inside margin stops raw fibers from fraying and reduces snag risk on decor or hinge clearance near front-opening doors.
This edge trimming technique also curbs moisture wicking to outer surfaces, since damp liners expand slightly. Recessed edges seal better against the base lip.
Cut Around Corners and Fixtures
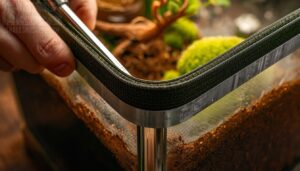
Corners need their own approach. Trace the interior angle, then cut small interlocking reliefs so the liner bends smoothly instead of bunching.
For round fixtures like thermostats or water bowls, use nested cuts that hug the contour, no exposed substrate underneath. Strengthen seams with heat transfer tape, then wipe each corner dry to stop fiber fraying before it starts.
Lay Flat Without Wrinkles
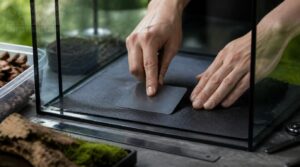
Once corners are trimmed, smooth base preparation makes the rest easy. Work from center outward, applying gentle tensioning during installation to prevent sagging.
Check edge alignment against your straightedge. Any lift means air pocket elimination is needed, use a plastic card for wrinkle removal.
- Confirm edges sit flush, no ridges
- Recheck center for trapped air
- Verify front-opening enclosure fit
- Note wear and tear signs early
Secure The Liner Safely
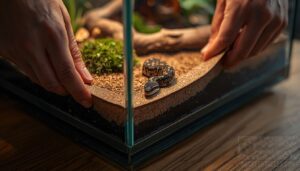
A flat liner means nothing if it slides the moment your snake moves. Securing it right keeps your setup safe, tidy, and stress-free for both of you. Here’s what to check before you call the job done.
Test Doors and Ventilation Openings
A liner that blocks vents kills airflow fast. Before you settle in, swing the door and check every vent for a clear airflow path. Run your hand along seals for gaps, confirm the front-opening fit closes flush, and clear any fibers snagged in vent slats.
Blocked vents trap humidity, and that invites mold.
Weigh Down Shifting Edges
Shifting edges undo hours of careful trimming. Set weighted strips or smooth river pebbles along each border for real shifting prevention, especially where edge taper design leaves a 2 mm gap.
- Fixed-mass edge weights
- High-friction rubberized base strips
- Small river pebbles
- Pea gravel pockets
- Contoured corner weights
This setup holds firm within 0.5 mm under load, even as temperatures swing between 15 and 30°C.
Avoid Exposed Tape and Adhesives
Tape feels like a shortcut, but it’s the fastest way to invite trouble. Adhesive residue traps waste and breeds biofilm in humid enclosures.
Stick with non-adhesive securing: weighted edging, grippy mats, or precise templatebased fitting. These safe mounting methods use friction and weight, not glue, for edge sealing that won’t peel, off-gas, or trap moisture against your snake’s skin.
Replace Hides, Bowls, and Decor
Old hides trap odor. Swap them for snug, non-porous hides sized to your snake, plus shallow ceramic bowls that resist tipping.
Choose smooth, splinter-free decor with waterproof coatings for humid tanks, but keep pieces breathable enough for airflow. Check for deep cracks or punctures before reuse. Worn items harbor bacteria your new liner can’t fix.
Check for Gaps or Shifting
Daylight under any edge means trouble. Run the pull tight test around the whole perimeter, pressing firmly into corners where curling starts first.
Grab a flashlight and check the underside for gaps past 2mm, a sign of moisture seepage risk. Confirm doors and vents clear the edges, then tug each side after 24 hours to verify a flush, stable fit.
Clean and Replace The Liner
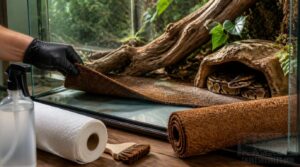
Installing the liner is only half the job. Keeping it clean is what actually protects your snake day to day. Here’s how to stay on top of it, from daily wipe-downs to knowing when it’s time for a fresh one.
Spot-Clean Waste Every Day
Every day, grab your flashlight and check corners for hidden waste. Spot-clean within 24 hours to stop ammonia buildup and staining before it starts.
Wipe with a soft cloth, mild soap, and warm water, then blot dry with paper towels. Note waste color and frequency. It’s your daily window for health monitoring too: eyes, scales, shed skin, all worth a glance.
Remove and Wash Regularly
Spot-cleaning takes care of daily mess, but the liner itself needs a full wash regularly. Pull it out weekly, or biweekly for a deeper clean, and scrub with warm water and mild, unscented, reptile-safe soap.
Rinse thoroughly, no soap residue left behind. For stains, extra scrubbing works. Deep-stained or persistently smelly liners? Toss them, bacteria’s already winning.
Dry Fully Before Reinstallation
Rinsed liners can’t go back in wet. Air dry liners fully, 24 to 72 hours, dust-free area, humidity under 40%. A fan speeds evaporation without direct heat.
Check for dampness with a moisture meter, aim sub-5%. No sheen, no tackiness, no cool spots. Skip this and you’re inviting mold or persistent odor right back into the terrarium.
Watch for Mold and Fraying
Even dry liners need regular eyes on them. Check weekly for fuzzy patches, musty odor, or dark staining, all signs of hidden mold. Look closer at seams and corners, where fraying starts and humidity pockets form.
Curling edges or loose threads mean fiber breakdown, snagging scales and trapping moisture. Catch these early, before biofilm builds and enclosure sanitation slips.
Replace Worn Liners Promptly
Once fraying, curling edges, or permanent stains show up, don’t wait. Replace worn liners promptly, ideally within the 6 to 12 month window most materials last. Waiting invites bacterial buildup and skin sores.
Don’t wait for damage to spread, replace worn terrarium liners within six to twelve months to prevent bacterial buildup and skin sores
A quick safety check takes seconds: press seams, sniff for mustiness, glance for thinning patches. If in doubt, swap it out.
Frequently Asked Questions (FAQs)
How often should I add a drainage layer?
Deep drainage decisions depend on your setup. Inspect the drainage layer monthly, then top it off every 6 to 12 months as material settles. Spot decay or waterlogging? Refresh it right away to protect your terrarium foundation.
Can I use a substrate liner in planted terrariums?
Yes. Non-toxic, moisture-wicking liners suit bioactive setups, sitting above a drainage layer for proper ventilation between layers. They protect plant roots, regulate moisture, and keep a clean surface, making them a solid pick for beginners building planted terrariums.
How long does a substrate liner typically last?
Most liners hold up 6 to 18 months, depending on cleaning frequency and humidity. Synthetic, washable materials outlast natural fibers. Watch for fraying or thinning edges as your cue for replacement scheduling before moisture damage sets in.
What causes odor buildup between liner cleanings?
Bacterial growth feeds on leftover waste residue, releasing ammonia and sulfur compounds. Moisture retention and poor ventilation trap those smells against the liner. Fiber degradation makes odors worse, which is why daily spot-cleaning and a biweekly deep clean matter so much.
Should I use adhesive tape or mechanical fastening?
It’s really six of one, half a dozen of the other, but weigh your priorities.
Mechanical fastener safety wins for humid tanks since tape adhesion weakens near moisture barrier backing, while proper edge sealing techniques give tape better long-term bond durability elsewhere.
Conclusion
The devil is in the details, and that’s especially true here. Once you know how to install a substrate liner in terrarium enclosures, the payoff is obvious: no odor, no ammonia buildup, no scale damage. Measure twice, cut once, and secure every edge like your snake’s health depends on it, because it does.
A properly fitted liner isn’t decoration. It’s the foundation of a clean, low-stress home your snake can actually trust, day after day.