This site is supported by our readers. We may earn a commission, at no cost to you, if you purchase through links.
A brand-new hygrometer can read up to 10% off right out of the box. If you’ve been trusting the number on your screen without questioning it, the humidity you’re managing might be completely wrong.
Placement, calibration drift, temperature gradients, and contamination all pull readings in different directions. A sensor sitting next to your heat lamp or above your misting nozzle isn’t measuring the ambient humidity in your enclosure. It’s measuring its own microenvironment.
Understanding why your hygrometer reading is inaccurate starts with knowing what’s driving the sensor off course. From there, the right fixes become clear and the guesswork stops.
Table Of Contents
- Key Takeaways
- Analog Versus Digital Differences
- Poor Placement and Calibration Cause Inaccurate Readings
- Temperature Gradients Change Humidity Readings
- Test Your Hygrometer’s Accuracy at Home
- Fix Power, Probe, and Display Problems
- Clean and Reposition Your Hygrometer Correctly
- Replace or Upgrade an Unreliable Hygrometer
- Frequently Asked Questions (FAQs)
- How do I know if my humidity meter is accurate?
- How do I calibrate my hygrometer?
- Are cheap hygrometers accurate?
- How long does it take for a hygrometer to get an accurate reading?
- Can nearby electronics interfere with hygrometer readings?
- How long does a hygrometer sensor typically last?
- Does altitude or air pressure affect hygrometer accuracy?
- Can household chemicals damage the sensor over time?
- How should I store my hygrometer when unused?
- Conclusion
Key Takeaways
- A brand-new hygrometer can already be off by up to 10%, so never trust it out of the box—run a salt test first and know your baseline before you start making humidity decisions.
- Where you mount your sensor matters as much as the sensor itself, because placing it near a heat lamp, misting nozzle, or wet substrate means it’s reading its own little microclimate, not your enclosure.
- Calibration drift is silent and cumulative—sensor aging, humidity cycling, and temperature swings can quietly pull your readings off by several percent over time, so recalibrate at least once a year.
- When a hygrometer keeps drifting after repeated calibration or its display freezes up, no amount of cleaning or repositioning will save it—replace it, and consider running two sensors side by side so you always have a cross-check.
Analog Versus Digital Differences
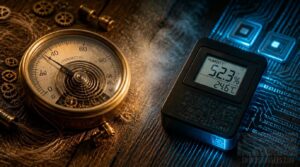
The type of hygrometer you’re using shapes how it fails and why. Analog models rely on mechanical sensors, like a coiled strip or human hair that expands and contracts with moisture. They respond in real time, draw minimal power consumption levels, and often need no battery. The downside is drift over time and considerably higher calibration complexity.
For snakes like the emerald tree boa, where humidity precision directly affects health, understanding emerald tree boa humidity requirements and ideal hygrometer choice can help you weigh analog drift against digital accuracy.
Capacitive hygrometers detect moisture through shifts in electrical capacitance, giving them faster signal processing speed and better environmental resistance against sudden humidity spikes. Many also include data storage methods for logging recent readings. They’re generally more precise, but sensor contamination from dust or oils can still cause inaccurate readings. When you calibrate the hygrometer, digital units make that correction process much simpler. Unlike analog models, digital hygrometers use discrete binary signal states that maintain better integrity in noisy environments, reducing the likelihood of inaccurate readings caused by interference.
Poor Placement and Calibration Cause Inaccurate Readings
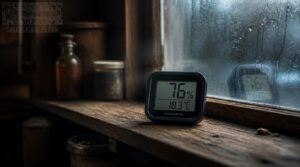
Where you put your hygrometer matters more than most people realize, and so does keeping it calibrated over time. A bad location or a sensor that’s drifted off course can throw your readings off by more than you’d expect. Here are the most common placement and calibration problems that lead to inaccurate humidity readings.
Too Close to Heat
Heat is one of the most overlooked placement mistakes. Positioning your hygrometer within 6 inches of a heat source can cause false high readings, accelerate sensor drift, and push sensitive hygroscopic materials past their operating range.
Warm adjacent surfaces also drive internal moisture migration, quietly shifting calibration without any visible warning sign.
Mist Hitting The Sensor
Mist doesn’t lie — but it does mislead. When moisture droplets land directly on your sensor, you get an instant humidity spike that has nothing to do with actual ambient conditions.
- The sensor reads the droplet’s microenvironment, not the air.
- Pooled surface moisture evaporates slowly, pulling readings down in a gradual drift.
- Venting gaps accelerate this effect through direct evaporation contact.
Dust and Substrate Contamination
Droplets aren’t the only culprit. Dust and substrate contamination coat the sensor surface over time, trapping moisture or blocking airflow and shifting readings by several points.
Wood-based substrates release VOCs that interact with sensor coatings, and bedding fibers shed micro-particles that settle inside the housing. Regular wiping with a soft dry cloth keeps buildup from compounding into a real accuracy problem.
Calibration Drift Over Time
Calibration drift builds slowly and is easy to overlook. Sensor aging effects cut sensor accuracy by up to 3% RH over five years.
Four drivers of drift:
- Sensor aging reduces sensitivity gradually
- Humidity cycling speeds up baseline shift
- Temperature swing drift offsets readings by 2%
- Calibration standard variability can add new error
Recalibrate annually for reliable humidity measurement.
Condensation Inside The Housing
When humid air hits a cold sensor housing, water vapor turns to liquid on contact. That condensation doesn’t just sit there — it seeps onto the circuit board, corrupts sensor readings, and can cause short circuits.
Sealed housings with poor venting trap this moisture inside, keeping your hygrometer locked in a false high-humidity loop.
Temperature Gradients Change Humidity Readings
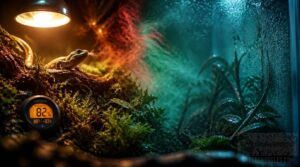
Temperature isn’t just a background variable — it actively shapes the humidity numbers your hygrometer displays. A reading that looks accurate on one side of your enclosure can tell a completely different story a few inches away. Here’s what’s driving those inconsistencies and how each factor plays into your readings.
Understanding these variables becomes especially useful when you’re setting up a baby boa enclosure, where stable humidity directly impacts shedding and overall health.
Warm and Cool Side Differences
Your enclosure’s warm and cool sides behave like two separate rooms. Convection air movement constantly pulls moisture toward the heat, creating noticeably uneven readings.
- Warm side: faster response from thermal layering
- Cool side: sensor response lag during sudden changes
- Dew point variance can mislead your readings
- Temperature differential grows with poor ventilation
- Cool surfaces condense moisture, causing brief reading spikes
Humidity Changes With Temperature
Temperature doesn’t just affect comfort, it rewrites what your sensor reports. When the air warms, relative humidity drops even if no moisture leaves the space. That’s humidity-temperature coupling, and it catches a lot of keepers off guard.
Warmer air drops relative humidity even when moisture stays constant — that’s humidity-temperature coupling at work
Rapid temp swings worsen this further, triggering thermal lag where your sensor trails behind the actual change, making readings temporarily unreliable.
Snake Enclosure Microclimates
A snake enclosure isn’t one environment, it’s two. The warm basking side runs 88-92°F, while the cool zone drops to 75-80°F, and that 10-plus degree gap directly causes humidity stratification across the whole tank. One sensor can’t accurately report both zones at once.
Sensor placement determines what you actually measure. Mount it where your snake spends most of its time.
Airflow and Ventilation Effects
Airflow inside a reptile enclosure actively redistributes moisture, not just air. Ventilation rate and airflow direction both shape what your hygrometer reads.
A sensor sitting in a draft often reads lower than true ambient humidity due to evaporative cooling.
Closed vents or blocked doors reduce air exchange, creating stagnant pockets where humidity accumulates and skews your readings.
Relocation Stabilization Time
Moving your hygrometer to a new spot doesn’t give you instant reliable data. Sensors need 24 to 48 hours to settle after relocation, and full humidity convergence can take up to 72 hours. Keep the enclosure sealed during this window to reduce external interference.
Use a reference meter alongside to track whether readings are genuinely stabilizing or still actively drifting.
Test Your Hygrometer’s Accuracy at Home
Before you blame the hygrometer, it’s worth checking whether it’s actually off in the first place. A few simple tests you can do at home will tell you if your readings are trustworthy or if something needs to be corrected. Here’s how to put your device to the test.
Salt Test Calibration Method

The salt test method lets you calibrate your hygrometer without special equipment. Mix pure salt with distilled water into a damp slurry, place it in a sealed chamber with your sensor nearby, and wait 20-30 minutes for temperature equilibrium.
Your humidity reading should land near 75 percent. Run multiple tests on different days and average the results for accuracy.
Compare With a Trusted Meter
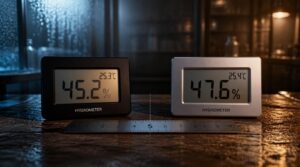
Once you’ve run the salt test, a trusted reference meter gives you a real-world cross-check. Place both hygrometers in the same spot and compare their readings across a few stable temperatures.
If your suspect meter consistently reads 5% higher or lower, that gap is your calibration offset. Adjust accordingly, or note the difference when monitoring humidity levels.
Wait for Readings to Stabilize
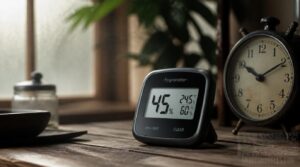
After cross-checking your calibration offset, don’t record a reading right away. Your sensor needs time to stabilize, usually 5 to 15 minutes, before accurate numbers appear.
- Minimize any airflow around the device
- Shield from direct light and heat sources
- Allow a full warm-up period to pass
- Confirm the reading holds steady for one minute
- Maintain placement consistency between each test
Repeat Tests for Reliability
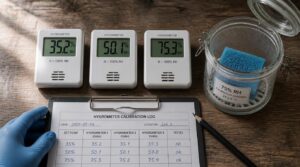
One reading rarely tells the whole story. Run the same test at least three times under identical conditions, then compare your results carefully. If your numbers cluster tightly, your sensor is consistent.
Calibration drift or contamination usually shows up as persistent spread across trials. Tracking the coefficient of variation helps you measure precision objectively and catch problems early.
Fix Power, Probe, and Display Problems
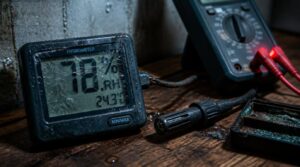
Sometimes the problem has nothing to do with placement or calibration — it’s the hardware itself letting you down. Power issues, damaged probe cables, and moisture-related damage can all throw off your readings just as easily as a sensor out of position. Here are the most common hardware problems to check and how to address each one.
Replace Weak Batteries
A weak battery is often the first culprit when your hygrometer starts acting up. Low battery voltage can cause dim displays, erratic readings, or numbers that stop updating entirely.
- Watch for a blinking screen, which usually signals low power first.
- Replace all batteries rather than mixing old and new cells.
- After swapping, power cycle the device to reset the sensor.
Clean Corroded Battery Contacts
Corrosion on battery terminals quietly robs your hygrometer of steady power. Even minor oxidation raises contact resistance enough to cause erratic or frozen readings.
Use a baking soda paste or isopropyl alcohol with a cotton swab to dissolve buildup without scratching the contacts. After cleaning, wait at least 5 minutes before reinserting batteries, ensuring no moisture remains to cause short circuits.
Inspect Remote Probe Cables
A damaged probe cable can mimic sensor failure convincingly. Feel along the full length for cracked insulation or pinched sections, especially near entry points where bending stress concentrates.
Check connectors for bent pins, oxidation, or loose housings. Broken shield continuity invites electromagnetic interference, producing erratic readings. Heat discoloration along the jacket is a clear sign the cable needs replacing entirely.
Check Adapters and Connections
The adapter is often the last thing you check. Confirm it delivers the exact voltage specified in your manual, and verify that the connector polarity matches the device port. Inspect pins for bends or oxidation, then seat the plug firmly.
If readings stay erratic, test continuity with a multimeter. Shielded cables reduce electromagnetic interference when nearby electronics are causing signal noise.
Watch for Moisture Damage
Moisture inside your hygrometer is a slow killer. Watch for these warning signs:
- Fogging or haze on the display that shifts with ambient temperature
- Blank LCD segments or dark spots from moisture-corroded internal traces
- Musty odor near the device, signaling mold on damp components
If you spot any of these, replace the unit before sensor contamination spreads.
Clean and Reposition Your Hygrometer Correctly
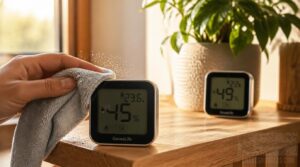
Even a well-calibrated hygrometer will give you bad readings if it’s dirty or sitting in the wrong spot. Cleaning and repositioning takes only a few minutes, but doing it right makes all the difference. Here’s what you need to know to get it done correctly.
The same attention to detail applies to your snake’s environment as a whole — accurate humidity readings matter most when paired with a proper day-night lighting cycle tailored to your snake’s species, since both factors work together to keep your snake healthy and stress-free.
Use a Soft Dry Cloth
When cleaning your hygrometer, reach for a microfiber cloth rather than anything damp. A lint-free cloth lifts dust effectively, cutting the risk of sensor contamination without introducing moisture.
Use short, even strokes with light pressure to prevent static buildup that attracts more debris. Treat this as part of regular maintenance, and recheck readings afterward to verify the unit is accurate.
Avoid Chemicals and Direct Spraying
A dry cloth experiences dust, but chemical residue causes a different kind of sensor degradation that recalibration can’t fix. Keep pesticides and aerosols away.
- Remove the hygrometer before any spray application
- Use protective barriers to block chemical drift
- Wipe nearby surfaces to prevent surface contamination
- Keep the device away from chemical containers
- Use plain water only if housing contacts residue
Mount Away From Heat Sources
Once chemical residue isn’t a concern, heat becomes the next issue. A sensor too close to heat sources reads the microclimate around it, not the room. Keep at least 1 meter from heaters and radiators, and avoid direct sunlight and restricted airflow patterns.
| Heat Source | Minimum Distance | Effect |
|---|---|---|
| Heaters/radiators | 1 meter | Raises RH several percent |
| Direct sunlight | Full shade | Biases temp and humidity |
| Hot appliances | 6 inches | Creates localized warming |
A stable environment with adequate appliance heat clearance helps consistent temperature compensation over time.
Keep Above Wet Substrate
Your sensor placement height is just as important as distance from heat. Wet substrate inside a closed container drives soil moisture into the sensing element, causing inaccurate readings and sensor drift.
Three quick rules:
- Keep 1-2 inches of clearance above the substrate
- Set the device on a non-absorbing raised stand as a moisture barrier
- Check clearance maintenance after every substrate change
Retest After Thirty Minutes
Once you’ve repositioned the hygrometer, wait thirty minutes before recording anything. That interval is your stabilization time check, clearing out transient fluctuations from airflow and movement.
Take a second reading at the thirty-minute mark. If values differ by more than 2-3%, the sensor hasn’t equilibrated yet. Humidity reading consistency between both checks confirms your post-relocation accuracy test is complete.
Replace or Upgrade an Unreliable Hygrometer
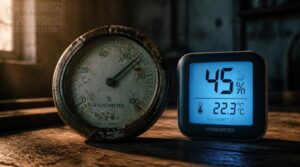
Sometimes, no amount of cleaning, repositioning, or recalibration can fix a sensor that’s simply past its prime. Before you keep chasing ghost readings, it’s worth knowing the signs that point to a replacement rather than another repair attempt. Here’s what to look for when deciding whether to swap out your hygrometer for something more reliable.
Persistent Drift After Calibration
If your hygrometer keeps drifting after every calibration, the unit may be past saving.
Sensor hysteresis, internal component drift, and firmware bias accumulation compound over time, pulling readings off course. A reference salt shift can introduce a persistent offset that recalibration won’t fix.
When calibration interval optimization no longer restores accuracy, replacing the sensor is your best move.
Slow or Frozen Readings
When a display stops updating or lags real conditions, it has likely failed past repair. Sensor response delay and signal processing lag compound over time, with airflow obstruction or internal desiccant buildup making sensor drift worse.
- Dust slows humidity equilibrium time
- Power issues cause circuit board problems
- Electrical interference can trigger LCD display failure
Choose The Proper Humidity Range
Not every hygrometer is built for every environment. Most consumer models measure 20% to 90% RH, which falls short in dry climates or high-humidity enclosures. Match the sensor’s range to your actual conditions, because a device pushed past its limits won’t drift gradually, it simply reports garbage.
For winter settings targeting 30 to 40% RH, any capable unit works, but greenhouses and terrariums need a wider-range meter.
Check Published Accuracy Tolerance
Before you write off a unit as defective, check the published accuracy tolerance on its datasheet. Consumer hygrometers often specify ±2 to 5% RH, so a reading of 60% could legitimately range from 55% to 65%.
That tolerance widens as sensors age or face temperature stress, and if it no longer aligns with your calibration results, replacement makes sense.
Use Multiple Sensors for Verification
One unit can’t tell you the full story. Running multiple sensors for verification lets you cross-compare readings and catch drift before it skews your decisions. If two sensors agree but a third diverges by more than 5%, that outlier needs calibration or replacement.
Sensor data blending through weighted averaging gives you a trusted humidity value you can actually rely on.
Frequently Asked Questions (FAQs)
How do I know if my humidity meter is accurate?
Think of your hygrometer like a compass, utterly useless if it points the wrong direction. Run a salt test calibration, clean the sensor surface, and compare readings against a trusted reference meter to verify accuracy.
How do I calibrate my hygrometer?
The simplest approach to device calibration is the salt solution method. Seal your hygrometer in a container with saturated NaCl, without letting them touch, then wait 6-12 hours and adjust the calibration screw toward 75% RH.
Are cheap hygrometers accurate?
Budget digital hygrometers claim ±2-3% RH accuracy, but sensor drift, material aging, and response time delays mean real-world performance often falls short. Calibrate yours with the salt test before trusting it.
How long does it take for a hygrometer to get an accurate reading?
Most hygrometers need 20 to 60 minutes to settle after relocation. Digital sensors stabilize faster, around 5 to 15 minutes, while analog types can take the full hour. Always wait before trusting any reading.
Can nearby electronics interfere with hygrometer readings?
Yes, nearby electronics can interfere with hygrometer readings. High-frequency fields couple into capacitive humidity sensors, skewing measurements. Poor power supplies introduce ripple noise. Moving the device away from electronics stabilizes output.
How long does a hygrometer sensor typically last?
Most digital sensors hold up for 7 to 10 years, while analog types drift sooner, often within 3 to 7 years. Harsh environments and heavy humidity cycling shorten that window considerably.
Does altitude or air pressure affect hygrometer accuracy?
Air pressure affects your readings more than most expect. At higher elevations, lower total pressure reduces how much water vapor is needed to reach saturation, so a sensor calibrated at sea level can report misleading values.
Can household chemicals damage the sensor over time?
Yes, chemical vapor exposure from cleaning sprays, air fresheners, or VOCs can corrode the sensor surface over time, causing sensor drift and degraded accuracy. Calibrate after any chemical exposure to verify your sensor’s readings.
How should I store my hygrometer when unused?
Store your hygrometer somewhere stable and sheltered — 65 to 75°F, humidity around 40 to 60% RH, away from direct sunlight, chemicals, and dust. A clean, dry pouch keeps the sensor calibration-ready for next use.
Conclusion
Here’s what most people never stop to ask: why is my hygrometer reading inaccurate, and what have I actually done to fix it?
Placement, calibration, and contamination each quietly distort the numbers you trust most. One bad reading shapes every humidity decision you make.
Clean the sensor. Reposition it. Test it at least twice. A hygrometer that’s drifted off course doesn’t just give you wrong data. It gives you false confidence in a failing environment.