This site is supported by our readers. We may earn a commission, at no cost to you, if you purchase through links.
A six-foot boa constrictor doesn’t need much room to feel cramped, and a 40-gallon tank built for a hatchling won’t cut it once your snake triples in length. Boas grow fast in their first two years, then keep filling out for several more, and their enclosure has to keep pace with thermoregulation needs, humidity control, and sheer physical mass. Get the sizing wrong, and you’ll fight shedding problems, stress behaviors, and stunted growth for years.
This boa terrarium setup guide walks through the measurements, materials, and maintenance rhythms that turn a glass box into an environment your boa can actually thrive in.
Table Of Contents
- Key Takeaways
- Plan The Right Boa Terrarium Size
- Choose The Best Boa Enclosure
- Build a Safe Bioactive Substrate System
- Install Boa Heating and Lighting
- Finish and Maintain The Boa Terrarium
- Frequently Asked Questions (FAQs)
- What size terrarium do boa constrictors need?
- How do I create a bioactive boa constrictor enclosure?
- What size enclosure does a boa constrictor need?
- Do boa constrictors need a vivarium?
- How do I heat and light a boa constrictor terrarium?
- How do you clean a boa constrictor terrarium?
- What enrichment items work best for boas?
- How often should I feed my boa?
- Can I house two boas together safely?
- What signs indicate my boa is stressed?
- Conclusion
Key Takeaways
- Size your boa’s enclosure using the length × ½ length × ½ length rule, working up to a full 8x4x4 feet for large adults, since undersized housing causes shedding problems and stress.
- PVC beats glass and wood for enclosure material because it’s lightweight, moisture-resistant, and won’t warp under constant humidity.
- Build a bioactive substrate with four inches of coco fiber, topsoil, and sphagnum moss over a drainage layer, then let isopods and springtails cycle through it for a few weeks before your boa moves in.
- Keep a steady thermal gradient (88-90°F basking, 75-82°F cool side) and 60-80% humidity year-round, pushing humidity up to 70-90% during shedding to prevent incomplete sheds.
Plan The Right Boa Terrarium Size
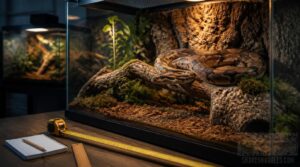
Getting terrarium size right isn’t guesswork—it’s math based on your boa’s actual length, and skipping that step sets you up for problems down the road.
This complete guide to calculating ideal boa terrarium dimensions breaks down the length-to-enclosure ratio so you can size things correctly from the start.
Every stage of your snake’s life calls for different dimensions, from hatchling to full-grown adult.
Here’s how to work through the sizing process from start to finish.
Measure Your Boa Accurately
Every terrarium decision starts with one number: your boa’s actual length. Measure snout to vent, then snout to tail tip, using a flexible tape while two handlers keep the snake straight. Repeat three times, average the results, and measure at the same time daily.
Add a girth measurement behind the head, or estimate against a known reference object if handling isn’t possible.
Calculate Minimum Adult Dimensions
Once you’ve got that length number, run it through the Enclosure Dimension Rule: length × ½ length × ½ length. A 6-foot boa needs 6ft x 3ft x 3ft; an 8-footer needs 8ft x 4ft x 4ft. That’s your Adult Size Minimum, non-negotiable for real thermoregulation and Space for Movement, not a "someday" upgrade goal.
Size Housing for Juveniles
That adult math doesn’t apply to hatchlings, though. Juvenile floor space starts small: 24"x12" for babies under 12 inches, expanding to 36"x18" once they hit 12-30 inches. Juvenile enclosure height stays modest, 12-16 inches for full vertical movement.
Keep substrate depth juveniles at 4 inches for burrowing, and place hides on opposite sides so your snake can thermoregulate confidently.
Plan Enclosure Growth Upgrades
That 12-16 inch juvenile setup won’t last. Boas gain length fast, so growth projection planning matters early.
- Chart size at 6, 12, 24, and 36 months
- Schedule upgrades at defined length triggers
- Budget for substrate, fixtures, and airflow per phase
- Design modular panels for expandable enclosure footage
Build a relocation maintenance plan too, minimizing stress during each transfer between enclosures.
Accommodate Large Adult Boas
Six feet just won’t cut it once your boa hits full size. A boa constrictor terrarium needs 8’L x 4’W x 4’H minimum, with front door security, solid thermal gradient control (88-92°F basking, 75-78°F cool side), and 4" bioactive substrates for burrowing. As a general guideline, enclosure dimensions should follow the snake’s length multiplied by half its length for both width and height.
| Adult Length | Min Enclosure |
|---|---|
| 6-8 ft | 4x2x2 |
| 8-10+ ft | 8x4x4 |
| Over 40 lbs | 8x4x4 |
Choose The Best Boa Enclosure
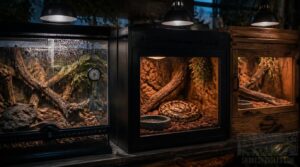
Once you’ve nailed down the dimensions, the next decision is what material actually holds them. Glass, PVC, and wood each handle heat, humidity, and durability differently, and picking wrong means fighting your setup for years. Here’s how the three stack up, along with the practical build choices that make an enclosure work.
Even the right material won’t help if placement stresses your snake out, so it’s worth checking signs your ball python feels insecure in its enclosure before finalizing where it goes.
Compare Glass, PVC, and Wood
Glass, PVC, or wood, your choice shapes daily husbandry for years. PVC offers the best balance: lightweight, moisture-resistant, and easy to clean without warping.
- Glass: heavy, low insulation, spot-prone
- PVC: lightweight, moisture-resistant, moderate insulation
- Wood: natural insulation, warps under humidity
- Glass: chemical-resistant, breakable
- PVC: pest-resistant, yellows under UV
Wood insulates well but degrades fast; glass shows every fingerprint.
Choose Secure Front-Opening Doors
Boas are escape artists with muscle, so frontopening doors need real locking mechanisms, not friction latches. Choose a recessed latch or multipoint locking system over simple magnetic catches.
Pair secure locks with frame reinforcement using steel inserts and anchoring screws into studs. Solid center or steel-faced door material options resist prying, and professional installation guarantees escapeproof alignment.
Balance Ventilation and Heat Retention
Vents work like lungs, breathing stale air out while pulling fresh air in without stealing your basking heat.
Place low and high vents for vertical airflow, angle openings away from the basking zone, and use screened ports for slow turnover every 5-10 minutes, protecting your thermal gradient from drafts while retaining warmth efficiently.
Seal and Waterproof The Interior
Water and wood don’t mix, which is why PVC enclosures hold up best against boa humidity demands.
Run reptile-safe silicone sealant along every seam, let it cure fully, then apply two epoxy coats with a 24-hour interval, extending coverage two inches above substrate. Install a 6-8 mil liner beneath your substrate, sealing edges to prevent moisture creep, and always allow full waterproofing cure before adding humidity.
Position The Terrarium Safely
Where you put an 8-foot enclosure matters as much as what’s inside it.
Choose a level surface away from doorways and foot traffic, out of direct sunlight, and at an easy access height for feeding. Add a non-skid mat for stability.
- Level, sturdy surface
- Low-traffic location
- No direct sun
- Comfortable working height
- Non-skid mat or feet
Build a Safe Bioactive Substrate System
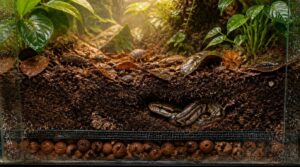
Substrate does more than sit at the bottom of your boa’s enclosure—it drives humidity, helps with natural burrowing, and keeps waste from becoming a health hazard.
Getting it right means thinking beyond a single bag of bedding and building a system with layers, purpose, and safe materials from the ground up.
Here’s how to construct one that actually works.
Choose Safe Substrate Ingredients
Building a bioactive substrate starts with ingredient selection, not layering. Stick to organic topsoil, coconut fiber, and sphagnum moss for moisture retention; skip pine, cedar, and calcium sand entirely (impaction and respiratory risk).
Run through your substrate safety checklist: no essential oils, no metallic additives, neutral pH. That’s toxic material avoidance 101, before you even think about substrate depth.
Build Drainage and Soil Layers
Once ingredients are sorted, layering turns loose material into a working drainage system. Start with a 1–2 inch drainage layer (gravel or clay balls), add a geotextile barrier, then your moisture-holding soil layer of coco coir and leaf litter.
This substrate layering prevents waterlogging while supporting a true bioactive substrate, so root and burrow zones stay aerated, not swampy.
Provide Four Inches for Burrowing
With drainage sorted, depth becomes the next variable worth nailing down. Give your boa a full four inches of loose substrate for burrowing, tunneling, and thermal refuge.
- Helps snake-sized tunnels
- Aids shedding-cycle humidity pockets
- Reduces compaction from movement
- Minimizes collapse in soft mulch
- Deepen hide zones for extra cooling
Add and Cycle Cleanup Crews
Four inches of depth means nothing without life working through it. A true bioactive substrate relies on a cleanup crew of isopods and springtails, introduced after curing, to break down waste and keep microfauna activity steady.
For tropical setups especially, pairing your cleanup crew with the right base layer makes all the difference—check out these substrate options for tropical snake species to find mixes that support both microfauna activity and stable humidity.
Seed them lightly, skip feeding for two weeks, and let colonies establish before your boa moves in.
Avoid Pine, Cedar, and Sand
Since pine and cedar off-gas phenols and terpenes that irritate a boa’s respiratory tract, skip them entirely. Sand risks impaction if ingested.
Stick with resin-free materials for your bioactive substrate:
- Coconut fiber or coco coir
- Kiln-dried cypress mulch
- Aquarium-safe soil blends
- Sphagnum moss mixed with coir
- Coconut husk chunks
These dust-free bedding options support humidity control without toxic wood risks.
Install Boa Heating and Lighting
Your substrate is in place, but a boa without the right heat and light is like an engine without fuel—technically there, but going nowhere.
A boa without proper heat and light is an engine without fuel—present, but going nowhere
Getting this system right means thinking beyond a single heat lamp and building an actual gradient your snake can navigate.
Here’s what that setup requires, piece by piece.
Create The Thermal Gradient
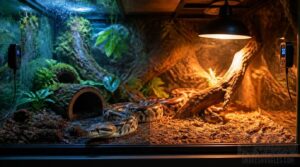
Think of your terrarium as two rooms in one: a hot end for basking and a cool retreat for downtime. Position the heat source at one end, place probes at the basking surface and cool hide, then track the split with a reliable gradient tool.
This split drives proper thermal regulation, not guesswork.
Set an 88–90°F Basking Surface
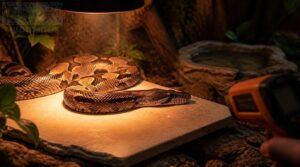
Nail the basking zone and everything else falls into place. Target 88–90°F on a smooth, non-porous surface like reptile-safe tile.
- Verify readings with an infrared thermometer
- Sample 3-4 spots per session
- Raise the zone for full-body stretching
- Position away from water dishes
- Log temps daily to catch drift
Connect Heating to Thermostats
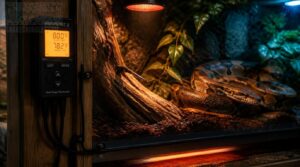
A thermostat is the brain of your heating setup, reading sensor data and deciding when to fire your heat lamps, ceramic heat emitter, or undertank heater. Skip a plug-and-play thermostat wiring guide, and you’re gambling with your boa’s life.
Choose a dual-stage heating configuration like the Exo Terra Thermostat for separate day/night control, and run 24V wiring cleanly through your heater control setup.
Position Digital Temperature Probes
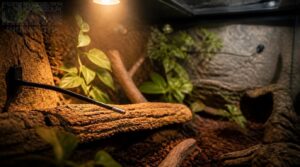
A thermostat is only as smart as the data it receives, so probe placement accuracy matters immensely.
Mount one probe at the basking surface, one at the cool end, keeping both an inch above substrate and away from airflow.
Calibrate against a reference thermometer, log readings every 5-15 minutes, and route wiring safely along the back wall.
Set UVB Height and Photoperiod
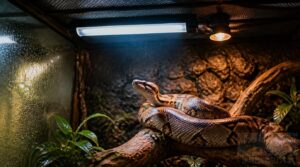
Boas don’t bask under UVB the way a leopard gecko does, but skipping it invites metabolic trouble.
Mount the UVB lamp 12-18 inches above the basking surface, positioned so it overlaps the heat zone without stacking directly beneath a ceramic emitter.
- Photoperiod: 12 hours on, 12 off
- Replace bulbs every 6-12 months
- Watch for avoidance behavior signaling excess intensity
Finish and Maintain The Boa Terrarium
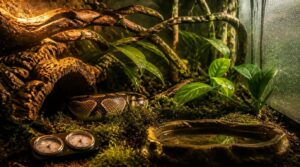
With the thermal gradient locked in, your terrarium still needs the finishing touches that turn a heated box into a livable habitat.
Humidity, furnishings, and daily upkeep work together to keep your boa healthy and stress-free long after setup day.
Here’s exactly what that ongoing maintenance looks like.
Maintain 60–80% Ambient Humidity
A properly humid enclosure keeps your boa’s skin supple and its respiratory tract clear. Target 60-80% RH using dual hygrometers (warm and cool sides), moisture-retentive substrate, and 2-4 daily mistings paired with active airflow.
| Zone | Target RH |
|---|---|
| Warm side | 65-75% |
| Cool side | 60-70% |
Calibrate monthly and log readings, this catches drift before dysecdysis becomes a problem.
Increase Humidity During Shedding
Once your boa’s eyes cloud over, it’s time to push humidity higher. Target 70-90% RH during dysecdysis using a shallow water dish near the basking zone, sphagnum moss patches, and misting every 6-8 hours.
Track levels with a digital hygrometer, not guesswork, since incomplete sheds often trace back to dry spells you never measured.
Balance Misting With Ventilation
Cranking up misting during shedding won’t help if stale air traps that moisture against the glass. Vent placement matters as much as timing.
| Vent Position | Effect |
|---|---|
| Low intake | Fresh airflow rate |
| High exhaust | Removes stale moisture |
| Mesh top | Prevents condensation buildup |
| Adjustable slats | Speeds drying post-mist |
| Sealed gaps | Skews sensor readings |
Match your misting routine to airflow, or you’ll invite mold instead of a clean shed.
Add Hides, Branches, and Water
Good airflow means nothing if your snake has nowhere to settle. Place a hide box on each thermal zone, warm and cool, sized for the snake to turn around fully. Use inert cork or plastic, off the substrate for drainage.
Add a sturdy natural branch for climbing, and a heavy water bowl near the cool hide for soaking and hydration.
Clean and Monitor Health Signs
Once housing and hydration are sorted, your job shifts to routine vigilance. Disinfect the enclosure weekly with a 3% bleach solution, spot-clean waste within hours, and swap 50% of substrate every 2-3 fecal events.
Check eye clarity, body condition, and vent area daily. Watch tongue-flicking, feeding patterns, and shedding success, since cloudy eyes or wheezing warrant immediate veterinary attention.
Frequently Asked Questions (FAQs)
What size terrarium do boa constrictors need?
Space requirements scale directly with snake length. Adults need an 8x4x4 enclosure minimum, while juveniles start smaller. Plan growth upgrades early, since undersized housing restricts thermoregulation and stresses your boa long before it outgrows the glass.
How do I create a bioactive boa constrictor enclosure?
Layer organic topsoil, leaf litter, and sphagnum moss over a drainage layer, keep substrate at four inches deep, and introduce isopods and springtails as your cleanup crew. Cycle four weeks before adding your boa, then maintain humidity for lasting natural balance.
What size enclosure does a boa constrictor need?
Tiny hatchling, massive adult: that gap defines your sizing plan. Follow the length × ½ rule for minimum dimensions, a 4x2x2 juvenile starter growing toward 8x4x4 for large adults, with upgrades planned well before your boa outgrows each stage.
Do boa constrictors need a vivarium?
Not strictly, but a proper vivarium beats a bare tank every time. You’ll get precise humidity control, secure locks, and layered substrate that helps with thermoregulation, healthy shedding, and natural climbing behavior your boa actually needs.
How do I heat and light a boa constrictor terrarium?
Get this wrong and your boa cooks, freezes, or goes blind from bad UVB. Nail the thermal gradient: 88-90°F basking surface, 75-82°F cool end, thermostatic control, probe placement at both zones, plus a proper UVB lamp running 12 hours daily.
How do you clean a boa constrictor terrarium?
Cleaning combines a daily spot cleaning routine with monthly enclosure disinfection. Remove waste, sanitize the water dish, replace substrate every 3-6 months, and monitor humidity afterward, since disrupted moisture levels stress your boa and slow recovery from handling.
What enrichment items work best for boas?
Like furnishing a studio apartment, your boa’s terrarium needs purpose in every corner. Offer sturdy climbing branches, multiple hide boxes, water features for soaking, live plants, and tactile textures, since varied naturalistic setups drive genuine exploratory behavior and environmental enrichment.
How often should I feed my boa?
Feed juveniles under a year every 7-10 days; adults over three years, every 14-21 days. Match prey to your boa’s widest girth, adjust seasonally, and monitor body condition to prevent regurgitation or refusal.
Can I house two boas together safely?
Two boas sharing one enclosure might look peaceful until feeding time reveals territorial aggression. Vets discourage cohousing: boas are solitary, competing for hides and basking spots.
Watch for weaving or refusal to hide, quarantine newcomers first, and always feed separately.
What signs indicate my boa is stressed?
Watch for defensive tension in the coils, rapid or absent tongue flicking, hissing, feeding refusal, and restless weaving. These body language shifts, paired with poor shedding success, signal it’s time to adjust temperature, humidity, or handling frequency.
Conclusion
Nobody dreams of becoming a snake plumber, measuring gallons and drainage layers for a pet that mostly just lies there looking smug. Yet that’s the job.
A solid boa terrarium setup guide isn’t about decoration, it’s survival math: correct dimensions, stable thermal gradients, and humidity that doesn’t waver. Get those numbers right, and your boa rewards you with clean sheds and calm behavior. Get them wrong, and you’ll troubleshoot for years. Precision now buys peace later.