This site is supported by our readers. We may earn a commission, at no cost to you, if you purchase through links.

That hygrometer reading you’re checking twice a day could be off by 10% or more, and you’d never know it. Cheap sensors drift out of the box, and even good ones lose accuracy over time. If you’re managing a reptile enclosure, a humidor, or a home office, that gap between "displayed" and "actual" humidity can wreck your setup without a single warning sign.
Here’s the good news: you don’t need lab equipment to fix it. Table salt, water, and a Ziploc bag create a known reference point that any hygrometer can be checked against.
Learning how to calibrate a hygrometer at home takes under an hour of hands-on work, spread across a short waiting period. Get the setup right, and you’ll know exactly how far off your readings run, and how to correct them for good.
Table Of Contents
Key Takeaways
- A sealed bag with table salt and water settles at 75.29% RH near 25°C, giving you a reliable reference point to test any hygrometer against.
- Mix salt and water to a "wet sand" texture, seal it with your hygrometer in an airtight bag, and wait for readings to stabilize before comparing them to the 75% mark.
- Consumer hygrometers should land within 5% RH of that reference, and analog units use a calibration knob while digital ones use +/- buttons to correct the offset.
- Retest every 30 days (or more often in high-humidity setups), keep hygrometers away from drafts and heat sources, and replace any unit that stays out of tolerance after three checks.
Calibrate a Hygrometer Using Salt
A cheap hygrometer can throw off your whole enclosure setup if it’s reading wrong. The good news is you can check its accuracy at home with plain table salt. Here’s what you’ll need and how to run the test, step by step.
Once you’ve got your results, this step-by-step guide to reading a humidity gauge will help you make sense of any discrepancy and decide whether recalibration is needed.
Gather Salt Test Supplies
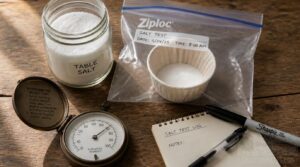
Accuracy starts with the right gear. Grab plain table salt, a small jar, a sealable Ziploc bag, your hygrometer, and a marker.
You’ll need:
- Table salt (no additives)
- Small jar or lid
- Sealable Ziploc bag
- Hygrometer with case
- Marker and notepad
Skip iodized blends. Record your date and starting reading now, before mixing anything. Careful record-keeping matters in science too—studies show that structured, data-centered reading approaches can measurably improve how accurately people interpret results.
Mix Salt and Water
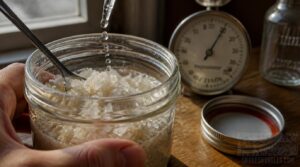
Now fill your jar about halfway with salt. Add water a few drops at a time, mixing as you go.
Stop once it feels like wet sand, no puddles, no dry patches. Undissolved crystals should still be visible. Warm water speeds dissolution, but don’t dissolve it fully. Too wet? Add more salt.
Seal Bag With Hygrometer
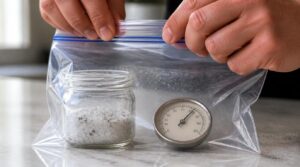
Grab a Ziploc bag big enough to fit the jar and hygrometer without cramping. Place the hygrometer face-up, sensor clear of the salt mix.
Zip it shut and press out excess air for an airtight seal. Any gaps let outside air sneak in, throwing off your salt solution equilibrium and skewing the whole test.
Maintain a Stable Temperature
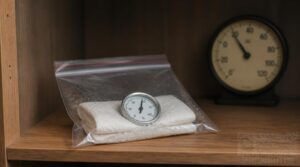
With the bag sealed, set it somewhere with temperature stability, away from windows, vents, or exterior walls. Heat swings mess with your saturated salt solution and skew the equilibrium.
Aim for conditions near 25C. Skip drafty spots. Good airflow management and steady setpoint stability practices keep readings honest before you check for equilibrium.
Wait for Readings to Stabilize
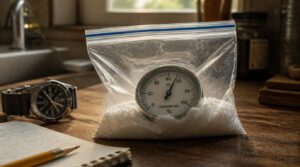
Check the sealed bag every hour or so. Most readings hit equilibrium within 5 to 10 minutes, but slower polymer sensors need up to 15 minutes.
Watch for:
- Fluctuations under 0.5% RH per minute
- No drift over several checks
- Steady readings for a full stretch, ideally 24 hours for full confidence
Temperature stability still matters here. Drafts cause swings of plus or minus 2%.
Sealing gaps around doors and vents helps you avoid these fluctuations, so check out this guide to snake habitat temperature control for practical fixes.
Calculate and Apply The Humidity Offset
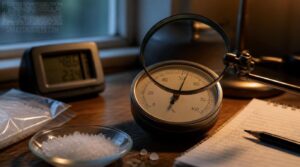
Your hygrometer’s given you a number, but that number’s only useful once you know what to do with it. Now you’ll turn that reading into a real correction, whether your unit adjusts on the spot or needs the offset written down. Here’s how to handle each type.
Use The 75 Percent Reference
Table salt in a sealed bag settles at 75.29% RH near 25°C, your reference humidity for this calibration procedure.
Compare your stabilized hygrometer reading to that number. Subtract to find your offset. A reading of 76.7% means a -1.41 offset.
Small temperature swings won’t throw this off, so trust the number once it holds steady.
Adjust an Analog Hygrometer
Find the small calibration knob on the back or bottom of your analog hygrometer. Turn it slowly while watching the needle.
Set the needle position to 75% RH, matching your salt test reference. This screw tension adjustment brings dial alignment in line with actual conditions.
Check for mechanical drift first. A stuck needle won’t hold calibration.
Adjust a Digital Hygrometer
Most digital hygrometers skip the knob entirely. Look for small + or – buttons on the side or back, sometimes labeled "CAL."
Press and hold until the digital offset setting appears. Tap the buttons to move the reading to 75% RH. Confirm your reading stabilization process finished first, and check temperature stability before locking in the number.
Record Unadjustable Sensor Offsets
Some hygrometers won’t budge no matter what you try. That’s a factory offset, baked into the sensor itself.
Write the offset number down anyway. Note the date, temperature, and your salt test result.
Apply this fixed number to every future reading. Recheck it every few months, since sensor accuracy can still shift over time.
Verify Your Hygrometer’s Calibration
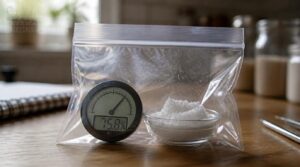
You adjusted your hygrometer, but don’t trust it yet. One good reading doesn’t prove the fix worked. Here’s how to confirm your calibration actually holds up.
Repeat The Salt Test
Don’t trust one reading. Mix a fresh batch of salt and water, seal it in a new plastic bag with your hygrometer, and start over.
Re-testing after adjustment confirms your fix held. Check sealed environment verification, no gaps or leaks, and hold temperature consistency checks steady. Wait for stabilizing humidity readings before recording anything.
Compare Both Final Readings
Once your second test settles, set both numbers side by side. Close numbers mean your offset held steady.
A gap over 2% RH points to drift, a loose seal, or a sensor losing accuracy. Write down both readings and the temperature.
This log builds your reliability standard for the hygrometer over time.
Check Acceptable Accuracy Tolerance
Your log means nothing without a standard to measure it against. Tolerance range basics matter here: consumer hygrometers should land within 5% RH of 75%, high-end units within 2%.
Check your numbers:
- Both readings within 5% RH? You’re calibrated.
- Off by more, but under 7%? Borderline, retest.
- Way off? Move to troubleshooting.
Temperature swings widen tolerance, so keep it near 25°C.
Troubleshoot Unstable Measurements
Way off doesn’t always mean bad math. Check the room first.
| Cause | Fix |
|---|---|
| Temperature drift | Move away from vents, windows |
| Poor sealing | Reseal bag, recheck zipper track |
| Sensor aging | Replace hygrometer if old |
| EMI interference | Relocate away from electronics |
Calibrator drift in your salt reference throws numbers off too. Retest before blaming the hygrometer.
Try Alternative At-Home Humidity Checks
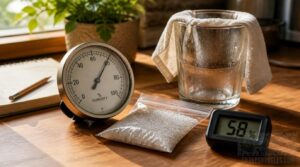
Not every check needs a full salt test. Sometimes you just want a quick gut check on your hygrometer’s accuracy. Here are a few backup methods worth knowing.
Use Commercial Calibration Kits
Not ready to mix your own salt slurry? Grab a commercial calibration kit instead.
The Boveda One-Step kit uses a sealed plastic bag with saturated salt for 24 hours, no mixing required. Kits include traceable certification, temperature compensation charts, and documentation support. Most cover a wide humidity range, giving you fast, reliable humidity measurement checks with less setup work.
Perform a Damp Towel Check
Grab a hand towel, run it under water, then wring it out until it stops dripping.
- Wet a towel, wring until damp, not soaked
- Seal hygrometer and towel in a container
- Wait 20 minutes, keep the seal shut
- Check for a 75-95% RH reading
- Note the offset for calibration
Watch container seal integrity. Leaks skew results fast.
Try an Ice-Water Test
Cold water offers a fast backup check when salt isn’t handy.
- Fill a bag with ice and a little water
- Seal the hygrometer inside, avoid submerging probes
- Wait 5-8 minutes for the ice water humidity to settle
- Expect a reading near 32 percent relative humidity
This ice bath test won’t replace a full salt calibration, but it confirms your sensor responds correctly.
Know These Methods’ Limitations
Under and around every quick check sits one truth: these tests confirm function, not precision.
The damp towel and ice-water methods can’t match table salt’s fixed 75% RH reference.
- Salt approximation limits affect accuracy
- Temperature swings skew readings fast
- Seal imperfections let moisture leak in
- Analog drift and digital sensor aging still apply
Use them for quick checks. Trust salt calibration for real hygrometer accuracy.
Maintain Accurate Snake Enclosure Readings
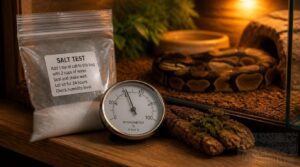
A snake enclosure isn’t a one-and-done calibration job. Humidity swings fast in a small space, and your hygrometer needs to keep up with it. Here’s how to keep your readings honest over time.
Recalibrate on a Schedule
A drifting hygrometer can cost you a snake’s health before you even notice. Set a monthly calibration reminder and run the salt test every 30 days.
A drifting hygrometer can silently harm your snake, so run the salt test every 30 days
| Condition | Action |
|---|---|
| Normal drift | 30-day interval |
| Rapid drift | 14-day interval |
| Season change | Recheck sooner |
Seasonal shifts affect relative humidity standards, so adjust your calibration frequency and log results for consistency.
Test High-Humidity Sensors Often
High humidity speeds up sensor drift, plain and simple. A snake tank sitting at 90% RH stresses parts faster than a 40% RH room.
Check your humidity sensor every 1 to 3 months. Low quality units drift 1 to 3% RH monthly.
- Log each offset
- Watch for rapid drift
- Recheck after heat swings
- Recalibrate with salt sooner
Avoid Heat and Drafts
Your sensor’s placement matters as much as the salt test itself. Keep hygrometers away from windows, exterior walls, and heat sources like vents or basking lamps.
Thermal stability keeps readings honest. Pick a draft-free spot, away from doors, to avoid sudden humidity swings that throw off your calibration and skew ambient conditions inside the enclosure.
Replace Persistently Inaccurate Hygrometers
Even a well-placed hygrometer wears out. If offset stays past tolerance for three straight checks, that’s a tolerance threshold exceeded and it’s time to replace it.
Pick a replacement rated for your enclosure’s range. Log purchase date, last calibration, and reason for swap. Follow e-waste and manufacturer take-back rules when you toss the old one.
Frequently Asked Questions (FAQs)
How often should I calibrate a new hygrometer?
Trust, but verify: run your first-week accuracy check right away, then confirm stable readings. Stable units get annual checks. Critical environments need a 30-day follow-up test against factory tolerance.
Can I use other salts besides table salt?
Stick with sodium chloride as your calibration standard.
Potassium chloride, magnesium chloride, calcium chloride, sea salt, and Himalayan salt all produce different saturated solution humidity levels, throwing off your relative humidity reading.
Table salt gives the tested, reliable 75% reference every time.
Why does my hygrometer read differently in different rooms?
Room airflow patterns, temperature gradients, and nearby humidity sources (kitchens, bathrooms, plants) all skew readings. Sensor placement effects matter too. Run a salt test in each room, then calibrate your hygrometer separately for accurate, room-specific relative humidity data.
Do digital hygrometers drift faster than analog ones?
Picture two hygrometers in a snake rack for a year. The analog dial creeps 3-5% off from mechanical hair drift. The digital unit slips only 1-3% from sensor aging, proving digital sensor drift usually beats analog long term.
What humidity range is ideal for most reptile enclosures?
Most reptiles do well between 40 and 60 percent relative humidity, though species specific needs vary widely. Once you calibrate your hygrometer with a salt test, you’ll trust readings and keep enclosure conditions stable for real reptile health balance.
Conclusion
A drifting hygrometer can quietly sink an entire enclosure before you notice a single symptom. That’s why learning how to calibrate a hygrometer at home matters more than any fancy gadget on the market.
Salt, water, and a sealed bag give you a fixed truth to measure against. Once you know your offset, trust it and apply it. Check it twice a year, keep drafts away, and your readings will finally match reality, not guesswork.