This site is supported by our readers. We may earn a commission, at no cost to you, if you purchase through links.

Stick a hygrometer to the warm side glass and call it done. That’s what most keepers do, and it’s why their readings lie to them. Heat lamps bake that spot dry, so the number on the display can sit 20% below what your snake actually feels near the substrate.
Best placement for humidity gauge in terrarium setups isn’t about picking a wall and hoping. It’s about zones: ground level, cool side, hide interiors, each with its own microclimate.
Get the placement right and you’ll catch problems before a bad shed ever starts.
Table Of Contents
- Key Takeaways
- Best Terrarium Humidity Gauge Placement
- Why Placement Affects Humidity Accuracy
- Place Gauges Near Snake Level
- Monitor The Cool Side First
- Add a Warm-Side Gauge
- Avoid Water Bowl Placement
- Keep Gauges Away From Heat
- Use Probes for Precise Zones
- Adjust Placement by Snake Species
- Check Gauge Accuracy Regularly
- Frequently Asked Questions (FAQs)
- Where to place a hygrometer in a tent?
- Can I use a smart hygrometer with app alerts?
- How many hygrometers does a bioactive enclosure need?
- Does enclosure size change ideal gauge placement?
- Can room humidity levels affect terrarium readings?
- Should hatchling enclosures be monitored differently than adults?
- Conclusion
Key Takeaways
- A single hygrometer near the warm glass gives a false reading, since heat lamps dry the sensor and can show up to 20% below actual humidity near the substrate.
- Place gauges at multiple zones—ground level, cool side, and hide interiors—since each has its own microclimate and the cool side typically reads 20-25% higher than the warm side.
- Keep gauges away from water bowls, heat lamps, heat mats, and direct sunlight, since splash, heat, and sun exposure all skew readings toward false highs or lows.
- Test and calibrate gauges regularly using a salt test and a 3-6 month calibration schedule, since sensor drift happens gradually and can go unnoticed without routine checks.
Best Terrarium Humidity Gauge Placement

Where you put your humidity gauge changes what it actually tells you. A gauge sitting in the wrong spot can lead you to believe your terrarium is dryer or wetter than it really is. Here’s exactly where placement matters most, zone by zone.
If you’re setting one up in a shared space, this guide to choosing humidity gauges for classroom reptile habitats walks through picking a model that holds up to daily handling.
Ground-level Readings
Your snake lives on the floor, so that’s where your gauge needs to be. Place it at or near substrate level to catch evaporation driven humidity and ground level interaction accurately.
Quick checklist:
- Set gauges on the substrate surface, not buried in it
- Add a second gauge just above for vertical air column comparison
- Check a moist hide separately for true microclimate readings
Clean probes regularly to prevent mineral buildup.
Cool-side Monitoring
Once your floor gauge is set, pay closest attention to the cool side probe. Cool zones run 20-25% more humid than the warm end, thanks to slower evaporation rates and settled air. That gap matters for condensation risk assessment on glass and decor.
Use a dedicated Cool End Probe here, not your ambient humidity probe from the warm side. This gives real humidity gradient mapping, not guesswork.
Snake Hide Zones
Your snake’s hide zones need their own attention, not just floor and cool-side readings. A Moist Hide Probe tracks humidity inside damp moss linings, critical for shedding support. Burrowing microclimates run higher than open floor space, so don’t assume one reading covers both.
Elevated perch retreats need separate monitoring too, since climbing species experience different humidity levels entirely. Good reptile husbandry means checking each zone on its own.
Avoid False Readings
Bad spots ruin good gauges. Water bowl proximity inflates readings toward false 99% marks, while heat lamp interference dries sensors out fast.
Avoid these four traps:
- Substrate moisture pockets skewing local readings
- Airflow obstruction from decorations trapping stagnant air
- Sensor condensation errors from splashes
- Direct sunlight baking your probe placement
Best hygrometer placement means clear air, no heat, no splash zones nearby.
Why Placement Affects Humidity Accuracy
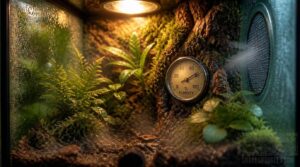
Your gauge can only tell you the truth if it’s sitting in the right spot. Heat, airflow, and substrate all pull moisture in different directions inside the same tank. Here’s what’s actually happening in each zone, and why it matters.
Warm Side Evaporation
Heat drives moisture into the air fast. Higher water temperature near your basking spot raises vapor pressure, speeding evaporation and causing surface cooling where the water sits.
| Warm Side Factor | Effect on Readings |
|---|---|
| High basking temperature | Faster evaporation |
| Poor airflow | Trapped moisture, dry spots |
| Direct heat exposure | Skewed sensor data |
| Low substrate absorption | Humidity fluctuation |
| Watch condensation patterns | Signals imbalance |
Cool Side Moisture
Often the cool end holds more moisture than you’d expect, since slower evaporation lets humidity levels build and linger.
- Condensation forming on cool glass at night
- Substrate moisture pockets staying damp for days
- Shed quality improving near these microclimates
- Ambient humidity spiking after lights-out
- Hides trapping consistent moisture for comfort
That stability helps microclimate shed quality, though nighttime humidity swings still need daily monitoring to catch drift early.
Airflow Differences
If you’ve got a fan or vent nearby, air won’t move the same way in every corner.
Near walls, a thin boundary layer traps extra moisture. Open floor space sees turbulent air mixing, while corners stay calmer, almost laminar flow. Add rising heat and you get vertical thermal stratification—so probe placement near these zones changes your humidity levels a lot.
Substrate Moisture Pockets
Ever dig into substrate and hit a damp spot right next to dry material? That’s a moisture pocket, and it throws off humidity monitoring fast.
- Particle Size Heterogeneity traps water in gaps
- Organic Material Impact slows drainage in peat mixes
- Localized Moisture Spikes hit 5-20% above target
- Poor vertical water movement compacts bottom layers
Run moisture mapping routines across multiple points for real substrate accuracy.
For enclosures housing several tanks, try placing a reptile humidity gauge for multiple tanks at each corner and the center to catch hidden dry or damp spots.
Place Gauges Near Snake Level
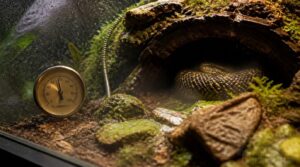
Your snake doesn’t live at the top of the tank, so your gauge shouldn’t measure from there either. Most species spend their time on the ground, tucked in hides, so that’s where accurate readings matter most. Here’s how to get your gauge placement right for the way your snake actually lives.
Floor-dwelling Species
Snakes that live on the floor experience the world close to the substrate, so that’s where humidity really matters.
Isopod body adaptations show why: flattened shapes and moisture-sensing antennae evolved for ground-level microclimates.
In a terrestrial enclosure, ambient humidity near leaf litter often runs higher than air above it. Placing your gauge at floor level captures real moisture levels your snake actually feels.
Two Inches Above Substrate
Two inches puts you right in your snake’s thoracic comfort height, the zone it actually breathes and rests in.
This spot balances substrate moisture with ambient air, giving you real microclimate accuracy instead of a skewed reading. You’ll dodge evaporative cooling spikes near wet substrate and reduce sensor fouling from dust. Keep the probe close but not touching, for cleaner, trustworthy humidity monitoring.
Near Primary Hides
Hides create their own microclimate, so a probe placed nearby won’t match a reading from open floor space. Humidity inside a moist hide used for shedding can run 5 to 15 percent higher than the surrounding air.
Place a sensor just outside the hide entrance. This captures the humidity gradient between the retreat and the enclosure, without disturbing your snake’s thermoregulation zone.
Real Snake Conditions
Your gauge should reflect what your snake actually feels, not open-air numbers near the glass. Placement at snake height captures true ambient humidity across the temperature gradient, from basking temperature zones to cooler retreats.
Properly managing these microclimates is essential to meeting their basic biological needs and ensuring overall welfare.
Watch shedding quality and skin elasticity as real-world checks. If readings match good sheds and proper hydration, your reptile enclosure setup is doing its job, supporting healthy digestion and moisture pockets throughout.
Monitor The Cool Side First

The cool side of your terrarium tells you the most honest story about humidity. It runs wetter than the warm side, so it’s the best place to start checking your numbers. Here’s what you need to know before you place that gauge.
Higher Humidity Readings
Cooler temperatures hold less moisture vapor, which is why the cool side almost always reads 20-25% higher than the warm side. Slower evaporation rates leave more water vapor sitting in the air.
That higher baseline reflects real ambient humidity, not a faulty gauge, so use it as your starting reference point before checking probe placement anywhere else in the enclosure.
Shedding Support
That extra moisture on the cool side does more than pad your readings, it directly helps skin hydration balance during a shed cycle. Soft tissue needs consistent moisture to separate cleanly from new skin underneath. Low humidity here raises shedding stress and often causes stuck patches. Keep this zone monitored closely, since it’s doing real work toward successful skin separation.
Safer Baseline Zone
Under all that shed-cycle talk sits a bigger goal: establishing stability. A safer baseline zone means humidity stays within 5-10% of your target, checked over 24-72 hours. You’re validating consistency, not chasing single readings.
Use your ambient humidity probe here for habitat monitoring, then track shifts over time. This microclimate control step catches fluctuations before they become real problems.
Cool Hide Placement
Where you put the hide matters as much as the hide itself. Set it on the cool end, away from heat sources, so it helps maintain thermal gradient stability and gives your snake a true retreat option.
- Secure retreat positioning for stress reduction
- Better microclimate moisture retention
- Reliable shedding support zones
- Consistent humidity levels for habitat monitoring
- Improved microclimate control overall
Add a Warm-Side Gauge

One hygrometer only tells half the story. If you want the full picture, you’ll need a second gauge on the warm side too. Here’s what that setup should cover.
Humidity Gradient Tracking
One gauge tells you a number. Two gauges tell you a story: side-by-side comparison reveals the gradient magnitude between warm and cool zones. You’ll spot damp pockets fast and catch nocturnal moisture shifts that a single sensor misses.
Cross-side verification keeps your ambient humidity probe honest, so microclimate control becomes precise instead of guesswork.
Heat Lamp Effects
Heat lamps don’t just warm the air, they blast infrared radiation straight onto surfaces below.
- Surface temps can jump 2–5°C in minutes
- Evaporation rate spikes near the beam
- Ambient temperature stays lower than basking spot
- Thermal gradient stability depends on lamp placement
- Metabolic rate shifts with prolonged heat exposure
That’s why probe placement near a heat lamp skews humidity levels—readings won’t reflect real conditions.
Dry Basking Areas
Dry basking zones need their own read, separate from the humid hide side.
Position your sensor face horizontally at ground level, 2-4 inches up, away from vents and substrate moisture pockets.
| Zone | Target Range |
|---|---|
| Basking rock surface | Warmer, drier |
| Ground-level air | 30-40% |
| Near vent | Skewed low |
| Substrate pocket | Skewed high |
| True resting spot | Accurate |
This gives real-time resting humidity, not vent noise.
Balanced Enclosure Readings
Two gauges beat one every time, and here’s why: gradient mapping only works when both readings sync up.
Compare warm and cool numbers daily to spot moisture distribution patterns before they cause problems.
- Warm side: 30-40%
- Cool side: 50-60%
- Gap over 25%: adjust misting
- Stable gap: healthy microclimate stability
Consistent gradients mean your humidity monitoring setup actually reflects real conditions, not guesswork.
Avoid Water Bowl Placement

Water bowls seem like a handy spot for your gauge, but they’ll wreck your readings fast. The moisture right above the surface throws off numbers that don’t match the rest of the enclosure. Here’s what goes wrong, and where to put your gauge instead.
Artificially High Humidity
Placing your humidity gauge near the water bowl skews readings toward artificially high humidity, often reading close to 100%. Sustained readings above 60% RH invite mold growth and bacterial activity in substrate. Condensation forms microhabitats for pathogens.
| Placement | Effect |
|---|---|
| Near bowl | False high reading |
| Mid-enclosure | Accurate ambient probe data |
| Poor airflow | Pathogen survival increases |
Splash Zone Problems
Water bowls create a mini splash zone inside your terrarium, and that’s a problem for accurate humidity monitoring. Splashed water hits nearby surfaces, causing repeated wetting and drying that skews your ambient humidity probe’s readings. This constant moisture cycling can even speed up corrosion on metal gauge parts over time. Your humidity gauge needs distance from splash areas to reflect true enclosure conditions, not bowl-side extremes.
Misleading 99% Readings
A gauge glued near your water bowl often flashes a 99% reading, but that number is a trap. It’s just splash contamination, not real ambient humidity.
Trusting it’s like judging your whole enclosure from one soggy corner. Your probe placement decides whether you get true humidity levels or a false alarm dressed up as good news.
Judging your whole enclosure by one soggy corner turns a false alarm into false reassurance
Better Nearby Alternatives
So skip the bowl and give your ambient humidity probe a few inches of breathing room instead. That’s real best hygrometer placement.
Ground level near a hide works better for true humidity levels. Pair it with a substrate moisture meter for a dual sensor network, so your terrarium hygrometer reflects actual air conditions, not splash residue.
Keep Gauges Away From Heat
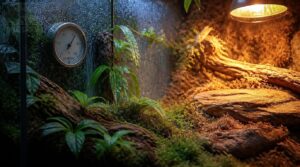
Heat and humidity gauges don’t mix well. If a sensor sits too close to a warm spot, it’ll dry out fast and start feeding you bad numbers. Here’s where the trouble spots usually are, and how to steer clear of them.
Heat Lamps
Heat radiates outward from these fixtures, so keep your hygrometer at least six inches away from any heat lamp. Infrared bulbs, whether short or long wave, dry out sensors fast and skew readings low. Ceramic housing withstands high wattage, but that same heat throws off nearby thermometer-hygrometer combos. Mount lamps securely, then check basking temperature separately from ambient humidity monitoring.
Heat Mats
Never set your hygrometer on top of a heat mat. These mats often use carbon fiber elements or resistive wire layered for even output, which dries the sensor and skews readings low.
Waterproof housings protect internal parts, but heat still causes drift.
If your enclosure has Mylar insulation backing, place probes on the opposite wall instead.
Direct Sunlight
If a window lets in unshaded sun, don’t put your hygrometer anywhere near it. Solar noon intensity heats glass and plastic fast, and the greenhouse effect can spike temperature and humidity readings within minutes. UV rays also degrade sensor materials over time.
Seasonal light shifts move that hotspot around, so recheck placement each season, and rely on ambient humidity probes positioned in shade instead.
Dried-out Sensors
Constant heat exposure dries out your sensor’s moisture-sensing element, and that’s a problem you won’t notice until readings go haywire. Polymer coatings turn brittle and crack, electrical resistance shifts, and response delays creep in. Recovery from desiccation takes time too.
Test accuracy monthly, and if drift keeps showing up despite calibration, replace the sensor rather than fighting it.
Wire Safety
A frayed wire near your basking spot can do more damage than a bad reading ever could. Route probe cables away from heat sources and secure them with clips, not tape.
- Cable management prevents pull on terminations
- Check insulation integrity monthly
- Keep cords clear of hot surfaces
- Use grommets at panel edges
- Inspect for cracking regularly
Use Probes for Precise Zones
A single hygrometer stuck on the glass won’t tell you everything. If you want real accuracy, you’ll need a probe that can reach into specific spots. Here’s what to know before you start placing one.
Probe-based Hygrometers
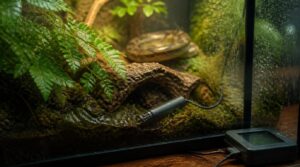
Want humidity data that actually means something? Probe-based hygrometers put the sensing tip exactly where your snake lives, not just floating in open air.
| Sensor Type | Mechanism | Best Use |
|---|---|---|
| Polymer | Absorbs moisture, shifts capacitance | General zones |
| Ceramic | Porous oxide adsorbs water | Humid areas |
| Digital probe | Converts signal, adds temp compensation | Precise spots |
Response times run 1-60 seconds, so accuracy stays reliable.
Hide-level Readings
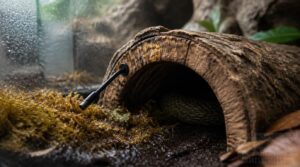
Snout-level accuracy matters more than open-air numbers. Insert your probe through a vent or small access hole so the snake stays undisturbed.
- Match the reading to where the snake breathes
- Compare hides for microclimate differences
- Catch moisture fluctuation during shedding cycles
- Skip guesswork with real humidity monitoring data
Log readings often across your terrestrial or arboreal enclosure to track true moisture levels.
Moist Hide Checks
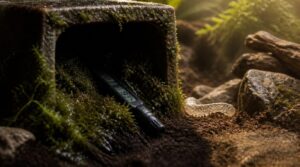
Moist hides need their own probe check, not a guess. Aim for ideal shedding moisture between 70-90% inside.
Line the hide with damp moss and swap it every 1-2 weeks to stop mold growth. Check substrate moisture distribution around the hide, too, since dry pockets form even when the reading looks fine. A humid but never dripping interior keeps skin sheds clean.
Secure Probe Routing
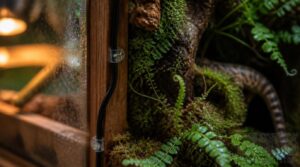
Once you’ve checked the moist hide, the probe wire still needs a safe path out. Route it away from heat mats and lamps so the cable doesn’t melt or drift out of place.
Use zip ties or hot glue to anchor the wire along the enclosure wall. Loose cords sag into water bowls or substrate, causing bad ambient humidity probe readings during regular reptile enclosure maintenance.
Digital Display Placement
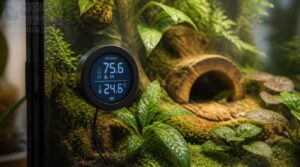
The probe does the sensing, but the display’s job is being readable. Mount it at eye level so you can check readings at a glance without crouching.
- Avoid glare from windows or lamps
- Keep it clear of high-traffic bumps
- Route cables neatly for easy reading
Good best hygrometer placement pairs a hidden probe with a visible, accessible screen.
Adjust Placement by Snake Species

Not every snake uses its space the same way, so your gauge placement shouldn’t be a one-size-fits-all setup. A ball python hiding under cork bark has different needs than a corn snake exploring open branches. Here’s how to adjust your approach based on the species you keep.
Ball Python Setups
Ball pythons hide most of the day, so your ambient humidity probe needs to sit where they actually curl up, not just center enclosure.
| Zone | Target Humidity |
|---|---|
| Cool hide | 60-70% |
| Warm side | 50-60% |
Track shedding microclimates inside hides closely. Poor hide readings mean rough sheds, retained eye caps, and stressed-out snakes hiding from bad conditions.
Corn Snake Enclosures
Corn snakes spend most of their time on the ground, so your ambient humidity probe belongs near the substrate, not mounted up high. Keep the enclosure between 40 and 60 percent humidity, with substrate 2 to 3 inches deep to hold moisture evenly.
Place a probe near hides on both warm and cool sides, and mist during shedding to prevent stuck skin.
Boa Constrictor Habitats
Wild boas thrive in rainforest microclimates at 70-90% humidity, so your reptile enclosure setup should mirror that.
- Ambient humidity probe mid-tank
- Basking spot probe on warm side
- Mimic riparian corridor benefits with moisture pockets
- Reflect woodland strata with elevated hides
- Note human landscape interaction near water dishes
Adults use low branches like savanna adaptation to open ground, so combine temperature monitoring with humidity checks for balance.
Burrowing Behavior
Some species dig instead of climb, and your gauge setup needs to follow suit. Sand boas and similar burrowers spend most of their time underground, where nest chamber humidity runs higher than surface air. Place your ambient humidity probe near the substrate, not the enclosure top.
Digging burns real energy, so stable, moisture-retentive substrate matters for tunnel stability and easier habitat maintenance.
Climbing Behavior
Tree-dwelling snakes grip bark using coordinated locomotion, alternating propulsion and stabilization as they climb. Rough surfaces boost adhesion, so arboreal enclosure setups need branches with real texture, not smooth dowels.
Mount your ambient humidity probe at perch height, where your snake actually rests. For thorough humidity monitoring, this best hygrometer placement beats floor readings, since upper zones run drier than ground level and directly affect shedding success.
Check Gauge Accuracy Regularly
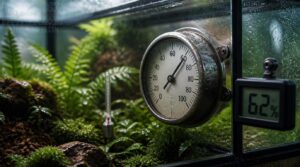
A gauge that’s placed right can still lie to you if it’s never been checked. Sensors drift over time and lose accuracy without any obvious sign. Here’s how to test yours and know when it’s time for a new one.
New Device Testing
A brand-new gauge isn’t automatically trustworthy. Run Response Time Verification first, humidity readings should shift within one minute of a real change.
Follow with Humidity Reference Calibration at 25, 50, and 75 percent RH, plus Temperature Compensation Testing across 18-30°C.
Finish with a Long-term Drift Evaluation over 30 days before trusting it in your terrarium setup.
Salt Test Method
Once your gauge passes the 30-day drift check, confirm sensor accuracy with a quick salt test. Mix table salt with distilled water into a thick paste, seal it in a container with your thermometerhygrometer, and wait six hours.
- Read the display: it should land near 75% humidity
- Compare against baseline: note any gap
- Repeat quarterly: catch drift early
This mimics saline mist delivery used in real corrosion rate quantification testing.
Calibration Schedule
Calibration Frequency depends on how hard your gauge works. Most home setups do fine with checks every 3 to 6 months. High-humidity species or washdown-prone rooms need shorter intervals.
Log each calibration schedule in a notebook: date tested, results, next due date. This documentation log helps you catch drift detection patterns early and set automated reminders so you never miss a check.
Sensor Drift Signs
Even with a solid schedule, your gauge can slip between checks. Thermal expansion drift shifts readings as parts swell or shrink. Loose mounts cause mechanical stress effects, while old batteries bring voltage supply fluctuations. Dust or moisture leads to component aging and environmental contaminant impact. If numbers jump randomly, calibrate sooner and keep your humidity reading trustworthy for real environmental monitoring.
When to Replace Gauges
Drift you can fix with calibration, but some problems mean the gauge is done for good. If it fails a salt test twice in a row, or you spot corrosion on the sensor port, retire it.
Replace your gauge when:
- Cumulative error exceeds tolerance after recalibration
- Wear shows on probes, seals, or connectors
- It’s exceeded its service life
Frequently Asked Questions (FAQs)
Where to place a hygrometer in a tent?
You’ll want it near floor level, a few inches above substrate, away from water dishes and door flaps. Add a second gauge on the cool side, around 12-18 inches up, to catch vertical moisture gradients accurately.
Can I use a smart hygrometer with app alerts?
Yes, and it’s worth its weight in gold. Smart hygrometers send real-time mobile notifications over Bluetooth or Wi-Fi, letting you set custom alert thresholds and review historical data trends for humidity and temperature and humidity gradients remotely.
How many hygrometers does a bioactive enclosure need?
Two hygrometers cover most bioactive setups: one for cool-side moisture, one for warm-side evaporation. This gives proper mapping humidity gradients across environmental parameters.
Add a substrate probe for burrowers—redundant monitoring benefits catch pockets a single sensor misses entirely.
Does enclosure size change ideal gauge placement?
A 20-gallon tank and a six-foot enclosure don’t share the same air. Size absolutely changes placement: larger tanks need multi-gauge necessity for vertical gradient mapping, since volume versus accuracy tradeoffs create separate microclimate air zones a single gauge can’t catch.
If you’re placing a gauge in each zone, this guide to choosing accurate digital hygrometers for reptile enclosures can help you pick ones that actually hold up to daily humidity swings.
Can room humidity levels affect terrarium readings?
Room air exchange near doors or vents can bias readings, and dry rooms cause slower evaporation, lowering results. Condensation bias near glass also skews numbers. For accurate measurements, keep gauges central, away from drafts and openings.
Should hatchling enclosures be monitored differently than adults?
Growth rate sensitivity makes hatchlings up to 3 times more prone to shedding issues than adults. Check readings at multiple microhabitat zones daily, since young reptiles need stable humidity for healthy sheds and steady metabolic function.
Conclusion
You might think one gauge near the front glass is enough, but that single reading can’t capture ground level, hide interiors, or the cool side.
The best placement for humidity gauge in terrarium setups means multiple probes, checked weekly, calibrated with a salt test.
Your snake doesn’t live in one spot, so your monitoring shouldn’t either.
Get the zones right, and clean sheds become routine, not luck.