This site is supported by our readers. We may earn a commission, at no cost to you, if you purchase through links.

A boa in a bare tub survives. A boa in a well-built display thrives, and the difference shows in every coil and flick of the tongue. Most keepers stall out guessing at tank size, then bolt on decor as an afterthought.
Build it backward and you’ll fight the animal’s biology for years: wrong gradients, stagnant air, substrate that molds by week two.
Get the bones right first, and boa constrictor enclosures for naturalistic displays practically build themselves from there. Dimensions, thermal zones, substrate depth, secure hardware, each piece locks into the next like a puzzle you’re finally solving correctly.
Table Of Contents
- Key Takeaways
- Plan Your Naturalistic Boa Enclosure
- Build Safe Heat and Humidity Zones
- Choose Substrate and Bioactive Layers
- Add Secure Naturalistic Decor
- Escape-Proof The Display Setup
- Frequently Asked Questions (FAQs)
- How to decorate a boa enclosure?
- How big of an enclosure do boas need?
- What materials work best for boa enclosure walls?
- How often should decorations be rearranged for enrichment?
- What lighting setup supports a healthy photoperiod?
- Which UVB bulb strength and placement is recommended?
- How do I minimize glare and reflections inside?
- Conclusion
Key Takeaways
- Size your enclosure using length-based formulas (adults need 6-12+ sq ft, juveniles 1.5-2x body length) and always build in room for growth, ideally with modular expandable designs.
- Create distinct thermal zones—32°C basking spot, 27-32°C warm gradient, and a cool side 4-8°F lower—while allowing gradual nighttime temperature drops of 2-4°C. Because each species has its own natural habitat, building a naturalistic reptile environment helps you match these temperature zones to your snake’s real needs.
- Layer bioactive substrate (coco husk, leaf litter, sphagnum moss) at proper depths—4-8 inches for adults, 1.5-2 inches for neonates—to support natural burrowing and self-sustaining humidity control.
- Secure all decor and access points with heavy-duty hardware, including load-rated platforms, deadbolt locks, weighted lids, and moisture-rated wiring, then inspect everything monthly to keep the enclosure escape-proof and safe.
Plan Your Naturalistic Boa Enclosure
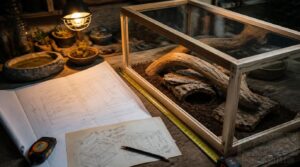
Every great boa enclosure starts on paper, not in the reptile store. Before you buy a single panel, you need to nail down size, shape, and growth room. Here’s what to keep in mind before you build.
For a full breakdown of tank dimensions, humidity levels, and heating setups, check out this detailed boa constrictor care sheet before finalizing your design.
Adult Enclosure Dimensions
Six square feet of floor space is the bare minimum for a small adult boa—bigger females need 8 to 12.
Footprint sizing formula: length times half-length, in feet, for width. A 6-foot boa wants roughly a 4-foot-wide base.
- Weight distribution stability favors wide, low builds
- Rectangular footprints beat tall, narrow towers
- Multi-animal setups need 15 sq ft each
- Dry, open floor prevents waste buildup
Juvenile Enclosure Sizing
Juvenile boas don’t need adult-sized real estate—they need room to grow into. Start with 1.5 to 2.0 times body length, usually 60-90 cm enclosures with 30-45 cm height.
Hatchlings under six months do fine with 25-40 cm floor space. By 12-18 months, bump that to 80-120 cm, always preserving one full body length of unobstructed travel for natural movement. Incorporating enrichment tools can also help prevent boredom as they mature.
Semi-arboreal Space Needs
Boa constrictors are semiarboreal, so once they outgrow starter tubs, height matters as much as floor space. Vertical space should match enclosure length, giving room for genuine climbing.
- Anchor sturdy climbing branches for stable movement paths
- Place hides at multiple elevations
- Create height-based thermal zones near basking perches
- Add elevated humidity pockets using moss
Naturalistic environments thrive on layered structure, not flat real estate.
Display Viewing Angles
Place the display where your best bias angle lines up with the room’s main sitting spot.
IPS panels beat basic LCDs for off-axis color distortion, holding truer color across a wider viewing cone range. Skip public kiosk visibility specs; you’re building for one viewing zone.
Angle within ±30° for glare-free, richly colored naturalistic environment viewing.
Growth-ready Modular Designs
Six-foot hatchlings become eight-foot adults fast, so build for tomorrow’s boa, not today’s.
Enclosure modularity matters most here. Zen Habitat-style systems use standardized interfaces, letting you expand within 4-6 weeks instead of months.
Since modular enclosures make it easy to adjust space and hides, you can better accommodate why snakes are naturally wired to hunt at night as you scale up their habitat.
- Each module adds 40% capacity without retooling
- Snap-lock panels need no specialized tools
- Cross-bracing keeps modular frame rigidity intact
Pair this with quick-connect climate zones for easy capacity planning across your PVC reptile enclosure’s lifespan.
Build Safe Heat and Humidity Zones
Your boa can’t tell you when it’s uncomfortable, so the enclosure has to do the talking. Getting temperature and humidity right isn’t guesswork, it’s building specific zones your snake can move between. Here’s what each zone needs to function properly.
Your boa can’t voice discomfort, so the enclosure must speak for it through carefully built temperature and humidity zones
Warm Side Temperatures
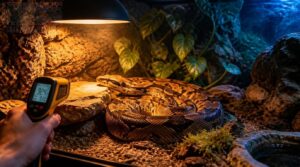
Heat drives digestion in boas — get it wrong, and feeding slows fast.
Basking spot accuracy matters: hold 32°C at the warm end, with the broader gradient between 27-32°C for adults. Use thermostat precision to keep swings within ±2°C.
Overhead lamps, never touching substrate, create stable microclimates. Heavier boas processing meals need that upper range most for proper digestion heat.
Cool Side Temperatures
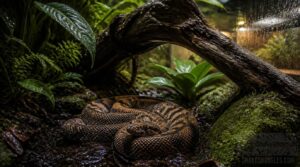
Where does your boa go to cool off? The cool end should sit 4-8°F below the warm side, landing around 75-82°F. Thermal mapping catches hidden hot spots.
Pair this zone with airflow management: a small fan moving 4-6 CFM refreshes air without stressing your snake. Damp substrate here helps with evaporative cooling and humidity microclimates, aiding shedding while thermostat fail-safes protect the whole gradient.
Nighttime Temperature Drops
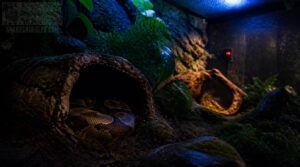
Night doesn’t mean neglect. Let your thermostats ease temperatures down 2-4°C gradually rather than cutting heat abruptly—boas tolerate drops but not shock.
- Keep the total nighttime decline under 6-8°C
- Let hides create microclimate shelter pockets
- Trust radiative cooling to lower ambient air naturally
- Preserve nocturnal gradient stability with light insulation
This helps with thermoregulation and habitat stability heading into morning.
Humidity Monitoring Points
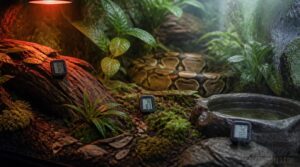
One hygrometer can’t tell the whole story.
Place three sensors: one near the warm side, one at center, one by the water dish, to track microclimates accurately. Keep them level with your boa, away from mist spray.
Watch dew point—condensation risk rises when it nears surface temps. Calibrate every 3-6 months against a reference hygrometer for accuracy within 3% RH.
Cross-ventilation Placement
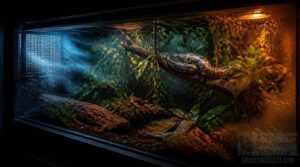
Stagnant air breeds trouble faster than any thermostat glitch.
Position your inlet on the windward side, larger than the outlet, so airflow moves steadily without drafts. Keep the path clear.
- Musty, damp corners
- Labored breathing
- Mold creeping in
- Stale, heavy air
- A boa gasping at the glass
PVC enclosures hold humidity well, but blocked corridors wreck microclimate management. Adjust seasonally for respiratory health.
Choose Substrate and Bioactive Layers
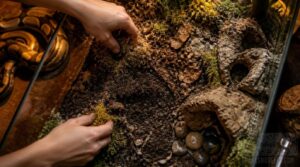
Substrate is the foundation your boa lives on, literally. Get it wrong and you’re fighting mold, odor, or impaction; get it right and it does half the work for you. Here’s what goes into building that base layer.
Natural Substrate Options
Ground your enclosure right, and the whole environment falls into place. Skip pine, cedar, or sand entirely.
| Substrate | Function |
|---|---|
| Coco husk + topsoil | Moisture retention, drainage |
| Leaf litter | Nutrient cycling, microbes |
| Sphagnum moss | Humidity pockets |
A bioactive substrate balances soil drainage with microbial breakdown, keeping your setup self-sustaining rather than a chore.
Adult Substrate Depth
Depth matters as much as material. Adults need 4 to 8 inches of substrate, giving them room to burrow and stabilizing humidity near cool hides.
Deeper layers (6+ inches) support natural burrowing behavior and buffer microclimate stability. Watch for compaction, though — it blocks access and traps stagnant moisture. Rotate substrate periodically, and keep a drainage layer underneath to prevent waterlogged, anaerobic pockets.
Neonate Substrate Depth
Scale everything down for hatchlings. Start with 1.5 to 2 inches of fine, low-dust substrate — sifted coconut fiber works well, supporting burrowing instincts without respiratory irritation.
Shallow beds dry fast, so check moisture retention daily. Too little depth risks scale rubbing and impaction; increase gradually as your neonate grows, keeping hides partially buried for secure, natural retreats.
Leaf Litter and Moss
Once your neonate graduates to adult depth, layer in deciduous leaf litter for a truly bioactive substrate. Broadleaf litter breaks down fast, cycling nutrients while boosting moisture retention 10-25%.
Add Chilean Sphagnum Moss on top — it thrives in shaded microhabitats, creating topography where microbial activity stabilizes soil and mimics the naturalistic environments boas evolved in.
Spot-cleaning Schedule
Rarely does a bioactive setup stay clean on its own, so spotcleaning keeps things sanitary between deep cleans.
- Wipe spills within minutes, before substrate compaction sets in
- Inspect high-traffic zones daily near hides and water dishes
- Log spill type and location to track patterns over time
- Skip harsh cleaners — protect bioactive microfauna doing the real work
Restore substrate depth after each spot clean, and schedule full substrate replacement following your maintenance log’s hotspots.
Add Secure Naturalistic Decor
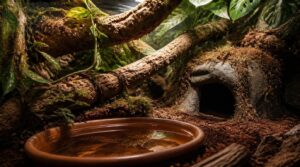
Your substrate is down, so now it’s time to build up. Decor isn’t just decoration here, it’s functional equipment your boa will climb, hide in, and soak inside. Here’s what to secure before your snake moves in.
Heavy Climbing Branches
An adult boa can weigh 30 pounds or more, so flimsy decor won’t cut it. Choose branches with real weight support capacity — thick grapevine, cork bark, or spider wood work best.
Secure mounting methods matter: bolt or wire branches directly to enclosure walls. Vary wood texture and diameter to mimic natural climbing surfaces, encouraging muscle development and genuine habitat enrichment.
Stable Platforms and Ledges
Ledges need real engineering behind them. Each platform should handle 250 pounds of load per square foot, with rounded edges and non-slip surfaces for secure bracing.
Space perches 6-12 inches apart vertically, mounted with corrosion-resistant hardware at multiple points. Position them above 4 inches of substrate—cushioning any fall and rounding out your naturalistic environment’s climbing structures.
Warm and Cool Hides
Your boa needs two hides, not one. Place the warm hide on the heated end and the cool hide on the opposite side, matching each other in size and design for consistent comfort.
Snug interiors touching multiple walls help seal out drafts. Choose smooth, nonabrasive materials that support thermal transfer and easy cleaning between uses.
Heavy Soaking Dish
Water bowls won’t cut it for a boa this size. You need a heavy soaking dish, one that resists tipping when your snake coils in for a long aquatic soak.
Look for thick plastic or silicone builds, 8-12 liters capacity, with a drain plug for fast cleanup. Boil silicone dishes to sanitize between uses. Wide, low-sided designs allow for more immersion depth without spillage.
Visual Barriers and Plants
A snake that feels watched won’t settle. Layer evergreen screening species like Thuja alongside mid-height plants, staggered rather than flat, so sightlines break at every angle.
Place taller specimens 1.5-2 times their height back from the glass. Skip anything toxic near cork bark or climbing branches—stick to wildlife-safe foliage that softens the enclosure into a true naturalistic environment, not a display case.
Escape-Proof The Display Setup
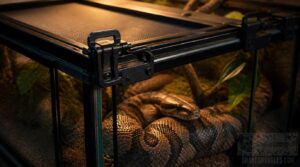
A beautiful enclosure means nothing if your boa can push through it. Adult boas are strong enough to test every seam, lid, and latch you install. Here’s what actually keeps them contained.
Locking Door Systems
Escape artists deserve serious hardware. Deadbolt locks outperform basic latch bolts, resisting forced entry far better since the solid bolt fully extends into the strike plate.
For daily use, front-opening doors paired with keyless entry keypads offer convenience without sacrificing security. Smart lock features add activity logs and remote control, while tamper resistant screws stop determined boas—and curious hands—from working hardware loose over time.
Weighted or Secured Lids
Doors aren’t the only weak point. A boa can lift an unsecured lid with surprising force, so weight and locking mechanisms matter just as much.
- Cross-bar locking resists 12-30 lbs of push force
- Magnetic latch strength holds firm against vibration
- Waterproof lid seals keep humidity locked in
Reinforced hinge durability and tamper-evident hardware round out a truly escapeproof design.
Front-opening Access
Front opening doors put the whole enclosure at eye level, so you reach in without hauling the unit off its stand. Look for hinge durability and tight gasket seal integrity — both hold humidity steady while resisting warping.
Mount access at ergonomic access height, and choose panel material selection like tempered glass or acrylic for clear viewing without sacrificing strength.
Cable and Thermostat Safety
Good access means little if the wiring behind it isn’t safe. Use moisture-rated cables throughout, paired with GFCI outlets and independent overheat protection switches.
Keep thermostat probes clear of metal decor, mount controllers where you can actually see them, and route everything away from climbing paths.
Secure locks and tight wiring go hand-in-hand for real thermoregulation control.
Monthly Hardware Inspections
Once a month, run a full sweep on every mechanical part. Check secure locks and locking mechanisms for smooth action, inspect latch wear, and confirm thermostats and hygrometers match ambient readings.
Log thermostat accuracy and sensor calibration trends over time. Test backup power readiness, check electrical cord integrity, and finish with your sanitization protocols before closing up.
Frequently Asked Questions (FAQs)
How to decorate a boa enclosure?
Want your enclosure to feel alive, not staged? Layer cork bark climbing branches diagonally, place hides on both temperature ends, add leaf litter for foraging scents, live plants for visual privacy, and rough textures that aid shedding.
How big of an enclosure do boas need?
Size scales with length: aim for 6 to 8 feet long, 5 to 3 feet wide, and 2 to 3 feet tall for adults. Full-grown giants need 8x4x4 minimum, giving room to stretch, climb, and coil comfortably.
What materials work best for boa enclosure walls?
Think of walls like a boa’s skin — they hold moisture in or let it escape. PVC and moisture resistant panels outperform bare glass for insulated wall construction, while wood needs proper sealing techniques to avoid rot in humid vivarium design.
How often should decorations be rearranged for enrichment?
Rearrange decor every 2 to 4 weeks, swapping just one or two items at a time. Rotate microclimate zones, watch for behavioral response shifts, and vary textures every 3 to 6 weeks to keep exploration active without overwhelming your boa.
What lighting setup supports a healthy photoperiod?
Get the light wrong and you’ll wreck a thousand years of evolutionary programming overnight.
Run automated timer settings for 12-14 hour days with gradual dawn-dusk transitions, basking lamps for warmth, and full-spectrum reptile lighting solutions like a Green Gro LED Fixture for steady circadian rhythm stability.
Which UVB bulb strength and placement is recommended?
Go with 5-7% UVB tubes mounted 12-18 inches above resting areas, mimicking dappled tropical light. Avoid mercury vapor bulbs’ intense output. Use a UVB meter for accuracy, replacing bulbs every 6-12 months to prevent overexposure.
How do I minimize glare and reflections inside?
Angle lighting indirectly instead of straight-on, and add anti-reflective glass coatings or matte contact paper on glossy panels. Diffusers, staggered decor, and visual barriers scatter light before it bounces back, keeping your vivarium’s ambiance clear and glare-free.
Conclusion
What separates a tank your boa merely tolerates from one it actually inhabits? The answer sits in the details you locked down first: dimensions, gradients, hardware. Well-planned boa constrictor enclosures for naturalistic displays reward patience with a snake that explores instead of hiding, that basks instead of pacing glass.
Check your latches monthly, watch your gauges weekly, and the display keeps working long after the build is finished. That’s the payoff: a habitat that runs itself.