This site is supported by our readers. We may earn a commission, at no cost to you, if you purchase through links.

Most corn snake keepers spend more time cleaning their enclosure than their snake ever spends exploring it. A sterile tub with paper towels works, but it’s the reptile equivalent of living in a studio apartment with white walls and a single chair.
A corn snake bioactive enclosure changes that completely. It’s a living system where cleanup crews handle waste, plants regulate humidity, and your snake gets to behave like an actual snake. The setup takes planning, but once it cycles, it runs itself.
Getting the layers right from the start means you won’t be tearing it all down six weeks later.
Table Of Contents
- Key Takeaways
- Plan Your Corn Snake Bioactive Enclosure
- Build The Drainage and Substrate Layers
- Add Hardscape, Hides, and Live Plants
- Set Up Heat, Lighting, and Humidity
- Establish and Maintain The Bioactive Ecosystem
- Frequently Asked Questions (FAQs)
- What is the best bioactive substrate for a corn snake?
- What isopods are good for corn snakes?
- What is the best enclosure setup for a corn snake?
- Are bioactive enclosures good for snakes?
- How do I create a bioactive corn snake vivarium?
- Are bioactive substrates good for corn snakes?
- How do you choose a bioactive enclosure for a snake?
- How do you care for a corn snake?
- Do corn snakes need enclosures?
- How big should a corn snake enclosure be?
- Conclusion
Key Takeaways
- A properly layered bioactive enclosure — drainage, soil mix, and leaf litter in the right order — is what keeps the whole system from turning into a soggy, smelly mess six weeks in.
- Your cleanup crew of springtails and isopods does the heavy lifting once the enclosure cycles for six to eight weeks, breaking down waste so you barely have to.
- Nailing the temperature gradient (basking side around 85–90°F, cool side in the mid-70s) isn’t optional — your corn snake literally can’t digest food or stay healthy without it.
- Bigger is better when it comes to enclosure size: adults need at least a 4×2×2-foot space with front-opening access, secure latches, and solid ventilation to actually thrive.
Plan Your Corn Snake Bioactive Enclosure
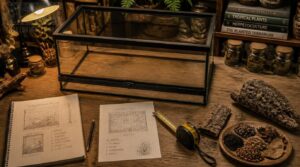
Before you buy a single piece of cork bark, you need to get the enclosure right. The size, access style, security, and airflow you choose will shape everything that follows. Here’s what to nail down first.
Adult Enclosure Size
The right enclosure size can make or break your setup. Adults over 4 feet need a 55-gallon bioactive enclosure to maintain a stable temperature gradient and humidity levels. A front-opening 55-gallon terrarium makes daily feeding and spot-cleaning far less stressful for both you and your snake.
For a snake over 4 feet, that translates to a 48″ × 24″ × 24″ footprint — closer to 75 gallons — so use a ball python enclosure size calculator to dial in the exact dimensions before you buy.
- At least 4–6 square feet of floor space
- Enough substrate depth for safe burrowing
- Separate warm and cool retreat zones
Don’t go smaller. Your corn snake simply needs that space to thrive. In fact, minimum enclosure size standards are based on species, age, and activity levels to prevent overcrowding and stress-related health issues.
Juvenile Setup Considerations
Young corn snakes don’t need a mansion yet. A juvenile bioactive setup calls for 1.5 to 2 times the snake’s body length in floor space.
Keep substrate depth at 2-3 inches for safe burrowing. Smaller enclosures hold your temperature gradient and humidity levels more consistently, and a small cleanup crew thrives in them too. Plan to upgrade every 6-12 months.
Front-Opening Access
Now that size is settled, go with front-opening access for your bioactive enclosure. Top-down entry triggers your snake’s prey instinct. Front doors won’t.
Four reasons keepers love them:
- Reach hides without wrecking your substrate layering.
- Feeding stays calm in your corn snake setup for bioactive.
- Magnetic latches keep the escape-proof lid sealed.
- Soft-close hinges prevent door slams that startle snakes.
Escape-Proof Security
Those front-opening doors only work if your escape-proof lid and frame actually hold. Never underestimate a corn snake’s problem-solving drive.
Your secure enclosure design needs magnetic friction latches, dual locking points, and quick-release locks requiring two motions. A spring-loaded hinge closes gaps automatically.
Rounded interior corners remove climbing footholds. Silicone-sealed joints block every tiny gap a curious nose might test.
Cross-Ventilation Requirements
The secret to crossventilation is simple: two openings, one path. Your enclosure ventilation needs an inlet facing prevailing air and a high outlet to push warmth out.
- Inlet opening faces prevailing airflow
- Outlet sits high for warm air escape
- Fine mesh screens block pests
Your escapeproof lid and frontopening access panels both need ventilated coverage. Balanced humidity control follows naturally.
Fine mesh panels or screen covers tied into a secure snake enclosure setup let you maintain airflow without sacrificing the tight seals your escape-proofing depends on.
Build The Drainage and Substrate Layers
The foundation of a bioactive enclosure starts from the ground up — literally. Getting these substrate layers right means the difference between a thriving, self-cleaning setup and a soggy, moldy mess. Here’s exactly what you need to build it properly.
LECA Drainage Layer
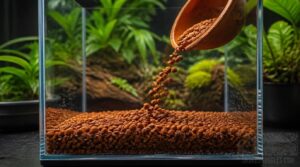
Think of LECA as your enclosure’s hidden plumbing. Pour a 25 to 50 mm drainage layer across the enclosure floor before adding anything else. These porous clay beads won’t compact over time, so excess moisture stays below the bioactive substrate instead of waterlogging roots or creating soggy, anaerobic pockets your corn snake definitely doesn’t want to live above.
Geotextile Barrier Placement
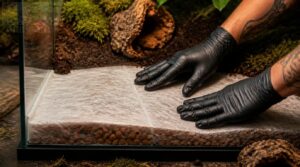
Lay the geotextile barrier directly over your clay pebbles LECA drainage layer. This fabric separates soil from drainage without blocking moisture retention or substrate aeration.
Keep it right with these tips:
- Use nonwoven, high-permeability fabric
- Extend edges flush to enclosure walls
- Overlap seams 2 to 4 inches
- Seal overlaps with geotextile tape
- Check for tears before adding substrate depth
Bioactive Soil Mix
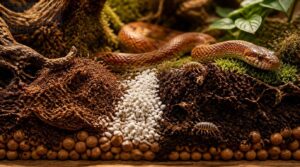
Your soil mix sits on top of the clay pebbles LECA layer. Aim for a bioactive soil mix ratio of 60% organic topsoil or coconut coir, 20% compost, and 20% perlite. This bioactive substrate holds moisture without waterlogging and stays loose enough for healthy microbial activity.
Skip peat. It compacts fast and creates anaerobic spots your cleanup crew can’t fix.
Safe Burrowing Depth
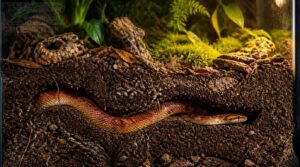
Depth matters more than you’d expect. Adults actually need 12 to 18 inches of substrate to fully support natural burrowing behavior. Juveniles do just fine with 8 to 12 inches.
Your organic topsoil and coconut coir soil mix ratio makes this easy. It stays loose enough for tunneling without collapsing. Pack it firm but not dense, and you’re all set.
Leaf Litter Coverage
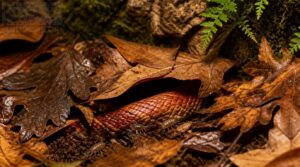
The leaf litter is the finishing touch on your bioactive substrate. Aim for 2 to 3 centimeters on top of your organic topsoil and coconut coir mix. That’s enough to give springtails and isopods a cozy home without blocking airflow.
Skip pine needles. Their resins throw off microbial balance. Swap it out every 4 to 8 weeks.
Add Hardscape, Hides, and Live Plants
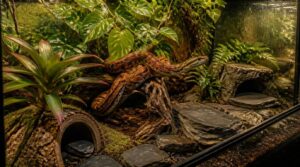
Now that your substrate layers are locked in, it’s time to give your corn snake somewhere to actually live. Hides, climbing structures, and live plants transform an empty box into a functional habitat your snake will explore and use every day. Here’s what to add before you introduce your cleanup crew.
Warm and Cool Hides
Every corn snake needs two hides in its bioactive enclosure. Place a warm hide on the heated side at 28 to 32°C using a thermostat-controlled heat mat. Keep it snug for full body contact.
On the opposite side, add a cool hide at 22 to 26°C. Together, warm and cool hides complete your temperature gradient and help keep humidity levels stable during rest.
Humid Hide Placement
Your humid hide placement lives on the warm side, nestled into the bioactive substrate where the temperature gradient naturally keeps things moist.
Keep humidity levels high by blocking airflow near the entry. Springtails and isopods thrive in that cozy corner.
- Mossy interior, snug enough to feel safe
- Entry low, no climbing needed
- Sheltered from drafts
- Substrate refreshed every two weeks
Secure Climbing Structures
Wedge cork bark rounds against the back wall so they stay put. Driftwood tunnels laid diagonally give ground-level routes to investigate.
Stack natural stone shelters no more than two layers high. Hollow log hideaways tucked in corners make great rest stops. Anchor climbing branches at a gentle angle, and you’ve built a vertical trail your corn snake will use daily.
Snake-Safe Plant Selection
Those climbing branches look even better with live plants filling the gaps. It’s a simple upgrade.
Pick snake-safe flora that stays non-toxic and low-maintenance:
- Pothos: trails beautifully and thrives in low light
- Snake plants: upright growers, nearly indestructible
- Bromeliads: add terrarium aesthetics without sharp edges
- Ferns: boost habitat complexity and hold moisture nicely
Skip anything with milky sap or thorns.
Plant Preparation and Placement
Getting your live plants ready before placement makes a real difference. Rinse roots thoroughly, trim dead growth, and soak each plant briefly to reduce transplant shock.
Arrange for terrarium aesthetics and function together. Place taller snake-safe flora toward the back. Position pothos or snake plants where pruning live plants stays easy. Keep burrow zones open so your corn snake navigates freely.
Set Up Heat, Lighting, and Humidity
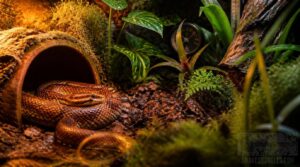
Getting the heat and lighting right is what separates a thriving enclosure from a struggling one. Your corn snake depends on specific temperature zones, proper UVB exposure, and steady humidity to stay healthy and active. Here’s how to nail each piece of the setup.
Corn Snake Temperature Gradient
Your corn snake literally thinks with its body heat. A proper temperature gradient gives it choices. Smart choices keep it healthy and active.
A corn snake thinks with its body heat — give it a temperature gradient, and it thrives
- Basking zone: 85–90°F for digestion
- Cool side temperatures: mid-70s°F for rest
- Aim for a 10–15°F spread
This thermoregulation gradient isn’t optional. Without it, your snake can’t properly regulate metabolism or digest meals at all.
Thermostat-Controlled Basking Heat
Let your heat mat take off without a thermostat and your basking zone turns dangerous fast. A thermostat-controlled setup maintains the temperature gradient your snake needs for stable thermal regulation around the clock.
| Thermostat Type | Best For |
|---|---|
| Dimming | Bright basking lamps |
| Pulse proportional | Flicker-free steady heat |
Place the probe near the warm side surface, never directly underneath the heat source.
UVB Positioning and Exposure
UVB lighting isn’t optional anymore. For proper UVB placement, position your bulb 12 to 18 inches above the basking zone so your snake benefits from real exposure.
Keep the beam clear of plants or decor. Shadowed spots create dead zones where UVB synthesis stops. Replace bulbs every 6 to 12 months since output fades long before the light burns out.
Plant Lighting Schedule
Your live plants need a consistent schedule. Run lights 12 to 14 hours daily and use a smart timer. Pothos and snake plants do best with gradual dimming, not sudden darkness.
Nighttime blackouts matter. Uninterrupted darkness keeps plant rhythms steady and benefits your cleanup crew. Sync your UVB lighting cycle with plant lights to maintain stable humidity levels across your bioactive setup.
Digital Climate Monitoring
Your bioactive setup runs on data. A digital thermometer and hygrometer at both ends gives you real-time readings without guesswork. Don’t trust just one sensor; microclimate stability means knowing your full gradient.
Good temperature monitoring and humidity monitoring catch problems early. Set alerts for readings that swing past safe ranges. Environmental stability isn’t luck. It’s consistent tracking, every single day.
Establish and Maintain The Bioactive Ecosystem
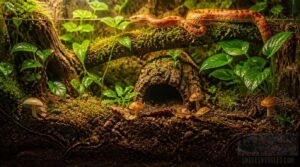
Once the layers are in place and the climate is dialed in, it’s time to bring the enclosure to life. A thriving bioactive setup depends on a few key players working behind the scenes. Here’s what you need to introduce, time, and maintain to keep the system running smoothly.
Springtails and Isopods
Once your substrate is fully layered, introduce springtails and isopods into the bioactive substrate. These tiny workers fuel detritivore activity around the clock, chewing through waste, eating mold, and supporting a steady microfauna population.
Now add your cleanup crew in three simple steps:
- Drop your springtails in first
- Add isopods one week later
- Mist the surface lightly after each group
Cleanup Crew Population
Getting the numbers right is half the battle. Your cleanup crew does best at 50 to 200 springtails and 5 to 10 isopods per liter of substrate.
| Factor | Guideline |
|---|---|
| Springtail density | 50–200 per liter |
| Isopod density | 5–10 adults per liter |
| Humidity target | Above 60% |
| Food source | Leaf litter and decaying matter |
| Check frequency | Weekly visual count |
A balanced detritivore population drives organic matter breakdown all day, every day. Mold spikes signal your microfauna colony needs more leaf litter. Springtails and isopods self-regulate when moisture stays consistent.
Six-to-Eight-Week Cycling Period
Once your cleanup crew is settled, the waiting game begins. The six-to-eight-week cycling period lets springtails, isopods, and soil microbes find their rhythm together.
Check humidity weekly and keep an eye out for mold, foul smells, or slimy patches. Those are warning signs.
After eight weeks, a full evaluation confirms your bioactive cycle readiness before you shift to routine care.
Routine Ecosystem Maintenance
After cycling wraps up, routine bioactive maintenance becomes your new normal. Weekly debris removal and routine spot checks keep odors and mold away.
Monitor humidity daily. Every two weeks, check your cleanup crew populations and adjust their feeding. Monthly substrate refreshment keeps microbial diversity strong.
Log everything. Good habitat monitoring turns scattered tasks into a system that practically runs itself.
Frequently Asked Questions (FAQs)
What is the best bioactive substrate for a corn snake?
Want your corn snake to actually thrive underground? Mix organic topsoil, coconut fiber, coarse sand, and sphagnum moss. Add leaf litter on top. Keep the bioactive substrate pH balance stable and always skip all fertilizers.
What isopods are good for corn snakes?
Four isopods work well for corn snakes: Porcellionides pruinosus, Porcellio scaber, Porcellio laevis, and Armadillidium vulgare. Mix two or three species to build a layered cleanup crew that steadily controls leaf litter from every angle.
What is the best enclosure setup for a corn snake?
What is the best enclosure setup for a corn snake? A shoebox won’t cut it. A 4×2×2 enclosure with bioactive substrate, live plants, and a cleanup crew of springtails and isopods creates a naturalistic habitat.
Are bioactive enclosures good for snakes?
Are bioactive enclosures good for snakes? Absolutely. A naturalistic habitat with bioactive substrate and a cleanup crew keeps waste down, reduces terrarium maintenance, and gives your snake a richer, more stimulating environment to thrive in.
How do I create a bioactive corn snake vivarium?
Like a tiny rain forest packed into a glass box, a corn snake vivarium starts with layered drainage and bioactive substrate, adds live plants, hides, thermostat-controlled heat, and a cleanup crew of springtails and isopods.
Are bioactive substrates good for corn snakes?
Yes, corn snakes absolutely thrive in a bioactive substrate setup. Springtails and isopods break down waste naturally, live plants help stabilize humidity, and a solid drainage layer keeps the whole system clean, balanced, and healthy.
How do you choose a bioactive enclosure for a snake?
What’s the one thing every great snake setup really needs? Space to thrive. Pick an enclosure with front-opening access, secure latches, solid ventilation, and enough depth to layer substrate for plants and your cleanup crew.
How do you care for a corn snake?
Caring for a corn snake means mastering the basics: a thermostat-controlled heat gradient, natural hiding spots, proper humidity gradient, and regular feeding. Add a cleanup crew and your corn snake bioactive enclosure practically maintains itself.
Do corn snakes need enclosures?
Without one, your corn snake truly can’t regulate body temperature, stay secure, or thrive. A proper enclosure size controls heat, humidity, and safety: the three pillars of good snake care.
How big should a corn snake enclosure be?
For adults, a 40-gallon minimum (36 by 18 by 18 inches) is your baseline. But upgrading to a 4-by-2-by-2-foot enclosure gives your snake plenty of space to explore, thermoregulate, and thrive in a naturalistic vivarium.
Conclusion
Layers lock the whole system into place. Think of this corn snake bioactive enclosure guide as your blueprint and the build itself as your foundation.
Get the substrate right, seed your cleanup crew, and let the cycle run its full course. Plants take root, isopods multiply, and your snake stops pacing the glass.
Burrowing, exploring, feeding on schedule. That’s the shift from a box with a snake in it to a space that actually lives.