This site is supported by our readers. We may earn a commission, at no cost to you, if you purchase through links.
Most captive reptiles don’t suffer from neglect. They suffer from poorly designed enclosures that look fine on the surface but fail the animal’s biological needs. A ball python curled in a 20-gallon tank can’t thermoregulate properly. A crested gecko in a glass box with no vertical space barely moves.
The gap between a reptile surviving and thriving comes down to design. Enclosure dimensions, substrate depth, temperature gradients, ventilation: these aren’t aesthetic choices. They’re welfare decisions backed by measurable data.
The reptile habitat design ideas ahead give you exact numbers, species-tested layouts, and builds that match how your animal lives in the wild.
Table Of Contents
- Key Takeaways
- Choose a Species-Appropriate Reptile Enclosure
- Recreate Five Natural Reptile Habitats
- Design Reliable Heat, Light, and Humidity
- Layer Substrate, Hardscape, and Enrichment
- Try Creative DIY Reptile Habitat Ideas
- Frequently Asked Questions (FAQs)
- What is the best habitat for a reptile?
- What are common reptile enclosure mistakes?
- How do I build my own reptile enclosure?
- How can I create an outdoor habitat for lizards?
- How do I introduce new reptiles safely?
- What plants are toxic to reptiles?
- Can multiple species share one enclosure?
- How often should I replace habitat decorations?
- Whats the best feeding schedule for reptiles?
- How often should reptile enclosures be fully replaced?
- Conclusion
Key Takeaways
- Enclosure size isn’t optional — terrestrial reptiles need floor space at least 2.5–3× their body length, and skimping on this creates chronic stress that no amount of décor can fix.
- Your reptile’s native habitat should drive every design decision, from temperature gradients (34–38°C basking to 20–26°C cool side) and UVB intensity to humidity levels and substrate depth.
- Substrate does far more than cover the floor — species that burrow need 12–18 inches of the right mix to behave naturally, and a bioactive drainage layer keeps the whole system stable without constant intervention.
- Smart monitoring closes the loop: wireless sensors, thermostatic controllers, and automated misting systems keep conditions within tight tolerances so small drifts don’t quietly become health problems.
Choose a Species-Appropriate Reptile Enclosure
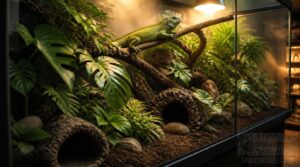
The enclosure you choose sets the foundation for everything else — get it wrong, and no amount of decor or lighting will make up for it. Your reptile’s size, behavior, and natural habitat all dictate what "right" actually looks like. Here’s what to think about before you commit to a setup.
For a deeper breakdown of floor-space ratios and species-specific sizing, snake enclosure sizing and habitat setup is a solid starting point before you buy anything.
Adult Enclosure Dimensions
One measurement shapes every other decision in your reptile enclosure design: floor space. Terrestrial adults need at least 2.5 to 3 times their full body length in one dimension. A ball python over three feet, for instance, requires a minimum 48×24×24 inch enclosure to stretch fully and thermoregulate properly.
Tight quarters don’t just look cramped, they create chronic, compounding stress. These size guidelines align with broader animal welfare enclosure standards that link insufficient space to increased stress, aggression, and health issues in captive animals.
Arboreal Versus Terrestrial Layouts
Floor space tells only half the story. Arboreal species need vertical climbing structures 80-120 cm high, with perches spaced 8-15 cm apart for movement variety. Terrestrial setups prioritize floor footprint over height.
- Climbing height: 80-120 cm above substrate
- Perch spacing: 8-15 cm for movement variety
- Lid clearance: space for fixtures, no escape gaps
- Floor footprint: drives airflow and humidity spread
Glass, PVC, and Wood
Once you’ve nailed your layout, the material you build with determines visibility, maintenance, and long-term cost.
Glass panels transmit 85%+ light and wipe clean fast, but double-pane builds reduce heat loss by 20-30%.
Food-grade PVC resists warping at 90% humidity, stays waterproof, and lasts 20+ years. Sealed plywood costs $40-50 per sheet but needs periodic resealing to prevent fungal growth.
Ventilation and Access Points
Your material choice shapes your ventilation options directly. Desert species need 15-20% of one wall open to prevent heat buildup, while tropical setups require just 8-12% to hold humidity.
Fine mesh ventilation screens allow steady airflow without creating drafts. Dual front-opening doors make feeding and maintenance far easier, letting you work without disturbing the whole enclosure. Position intake vents low, exhaust high, and you’ll get natural cross-ventilation without a fan.
Escape-Proof Safety Features
Even the best enclosure becomes a liability without locking mechanisms your reptile can’t defeat. Stainless steel pins, sealed drainage channels, and smooth sharp edges form the baseline of any escape-proof enclosure.
- 0.5 mm mesh screens block gap escapes
- Corner fills seal burrowing tunnels
- One-way burrow vents allow airflow, block entry
- Magnetic catches prevent accidental openings
- Recessed grips deny reptiles grip
Recreate Five Natural Reptile Habitats
Every reptile species evolved to thrive in a specific environment, and your enclosure should reflect that.
Matching temperature gradients, humidity levels, and lighting to your species’ native habitat is key — a solid reptile health check guide can help you spot when those conditions aren’t quite right.
The five habitat types below cover the most common setups — from sun-baked desert floors to humid canopy branches. Match your build to your animal’s natural world, and everything else falls into place.
Desert Basking Landscape
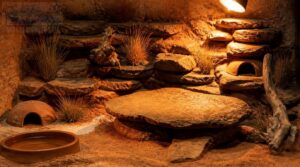
Desert reptiles thrive where rock meets sun.
Sloped terraces create gradient microclimates, from a basking zone peaking at 40-45°C down to cooler, shaded retreats with hides. A kiln-dried sand and soil mix at 8-15 cm retains heat and allows burrowing. Keep UVB lighting 15-20 cm above the basking area, with a shallow water dish tucked into a cooler corner for hydration.
Tropical Rainforest Canopy
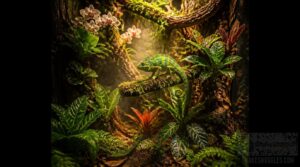
Think vertically. Arboreal species like chameleons and green tree pythons need layered climbing structures at varied heights, mimicking the canopy’s natural tiers. Research shows this alone boosts locomotion by 35%.
Attach bromeliads or orchids to cork bark for epiphyte blending that doubles as humidity regulation. Coconut fiber substrate and a misting system hold moisture at 60-80%.
Spot-lit breaks in your canopy replicate natural light gaps, encouraging active thermoregulation.
Forest Floor Retreat
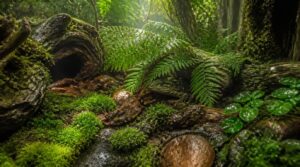
Forest floor reptiles need a naturalistic terrarium built from the ground up. Here’s your four-layer approach:
- Leaf litter depth: 5-10 cm for burrowing and microhabitats
- Log cavities: 3-6°C cooler, ideal for shaded retreats
- Moss coverage: 40-60% of floor, holding humidity zones at 60-75%
- Bioactive substrate: springtails and isopods handle moisture control
Branch climbing between downed logs completes the temperature gradient.
Open Savannah Setup
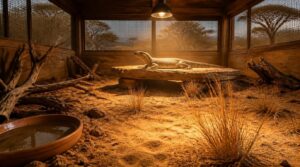
The open savannah setup replicates semi-arid grassland with wide open floor space and sparse shelter.
| Element | Specification |
|---|---|
| Savannah Temperature Range | 90–110°F day, 70–85°F night |
| Basking Spot Placement | 12–18 inches above ground |
| Airflow Ventilation Design | 2–3 vents, under 40% humidity |
| Substrate Composition Mix | Sandy loam, reptile-safe topsoil |
Water trough spacing every 4–6 feet encourages hydration. Keep 20% of the floor bare.
Aquatic and Semi-Aquatic Zones
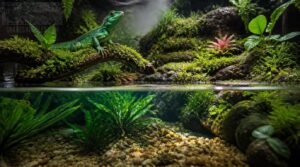
Paludarium design splits the enclosure into water and land, giving species like Chinese water dragons room to swim, wade, and bask within a single setup.
Keep aquatic zones at 4 to 12 inches deep and shallow land margins at 2 to 6 inches. Run continuous mechanical and biological filtration to hold ammonia under 0.25 mg/L. Submerged plants pull excess nutrients and double as cover.
Design Reliable Heat, Light, and Humidity
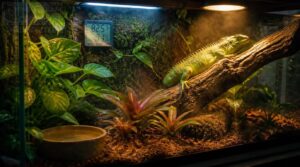
Getting the heat, light, and humidity right is what separates a reptile that merely survives from one that genuinely thrives. Every species has a specific set of environmental needs, and even small miscalculations can lead to stress, illness, or worse.
Dialing in heat, light, and humidity is what separates a reptile that survives from one that truly thrives
Here’s what you need to know to get each element dialed in correctly.
Warm-to-Cool Temperature Gradients
A proper warm-to-cool gradient is the engine behind every behavior your reptile displays. Place your heat source on one end, building a basking zone of 34 to 38°C, with temperatures dropping to 20 to 26°C on the opposite side across at least 40 cm.
Use separate probes in both zones, and let the cool side settle to 20 to 24°C overnight.
Safe Basking Zone Placement
Once your temperature gradient is set, basking spot placement is next. On the warm side, position the basking area 15-20 cm below the enclosure top, within 8-12 inches of your heat lamps:
- Allow multi-angle access to the platform
- Avoid draft zones near doors or gaps
- Use a thermostatic controller for steady temps
- Never place heat lamps against glass
UVB Strength and Positioning
Basking spot placement gets you halfway there. Without adequate UVB intensity, your reptile can’t make vitamin D3, regardless of enclosure warmth.
Use Ferguson zones as your guide: desert species need a UVI of 3-6 at the basking spot. Position bulbs 12-18 inches above the surface, verify monthly with a UVI meter, and replace every 6-12 months even if the bulb still glows.
Species-Appropriate Humidity Control
UVB handled, now shift to humidity control. Target zones differ sharply by species: tree frogs need 70-90% RH, desert reptiles sit comfortably at 20-40%.
Misting systems can spike RH by 10-25% per cycle. Balance that with smart ventilation and substrate moisture balance using coco coir, which holds 8-10 times its dry weight in water, keeping setups stable between mists.
Digital Monitoring and Automation
Wireless sensors track your enclosure every 5 minutes, relaying temperature and humidity data to a secure cloud dashboard around the clock. Smart thermostats hold gradients within 1 degree, while push alerts fire quickly if temps drift 2 degrees off target.
You can review 30 days of logged data, export it as CSV, and adjust settings remotely, all from your phone.
Layer Substrate, Hardscape, and Enrichment
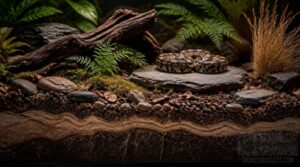
The bottom of your enclosure does more work than most keepers realize — it shapes temperature, humidity, hygiene, and your reptile’s mental well-being all at once. Getting the substrate, structure, and enrichment right means choosing materials that actually match how your animal lives in the wild. Here’s how to build each layer with purpose.
Species-Safe Substrate Blends
Wrong substrate can quietly harm your reptile long before symptoms appear. Three mixes cover most setups:
- Dusty Desert Mix: coarse sand, 1.4–2.5 mm grain size, pH-neutral, dry surface for claw traction
- Forest Floor Mix: coconut fiber and sphagnum moss retain moisture without waterlogging
- Bioactive Tropical Mix: orchid bark with cleanup crews maintains hygiene naturally
Match your substrate to species needs.
Burrowing-Friendly Substrate Depth
Depth is where burrowing instinct becomes functional. Species like hognose snakes or skinks need 12 to 18 inches of substrate to tunnel fully without hitting the enclosure floor.
A 50-70% loam, 30-50% sand mix with particles under 2 mm holds tunnel walls and resists compaction.
Check depth monthly and keep burrow humidity between 60 and 85 percent to prevent collapse.
Bioactive Drainage and Cleanup Crews
A bioactive drainage layer beneath your substrate channels excess water away while feeding moisture to beneficial microbes. Springtails and isopods do the rest, breaking down waste and leaf litter before it builds up.
Keep invertebrate populations balanced. Too many isopods can stress your reptile or skew humidity. Steady ventilation prevents moisture pockets near drainage zones and keeps the whole system working.
Stable Rocks, Branches, and Hides
Every rock, branch, and hide needs to earn its place. Flat rocks create stable basking platforms, while rounded edges prevent injuries during fast movement. Check for cracks regularly.
Branches should match your reptile’s body width and include multiple anchor points. Cork bark hides offer cool microclimates and smooth interiors that won’t abrade skin. Rotate enrichment items to maintain engagement.
Live Plants and Water Features
Live plants pull double duty in any enclosure. Pothos thrives under 1,500 lux, climbing vertical surfaces without needing rich soil.
Small water features add localized humidity through evaporation, while floating plants like duckweed reduce surface algae by covering 10-20% of the water area. Use LED grow lights set to 6,000-6,500 Kelvin, positioned 12-24 inches above foliage for steady, reliable growth.
Try Creative DIY Reptile Habitat Ideas
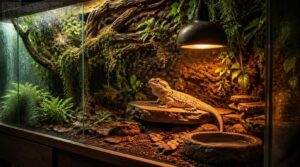
Building your own reptile enclosure doesn’t have to mean starting from scratch with raw lumber and a YouTube tutorial.
With the right approach, you can repurpose everyday materials, make the most of tight spaces, and keep maintenance genuinely simple — all without sacrificing what your animal actually needs.
Here are five DIY directions worth considering.
Repurposed Furniture Enclosures
Old dressers and entertainment units make surprisingly capable reptile enclosures. Strengthen them with upcycled wood frames, seal every interior joint with non-toxic sealant, and fit reclaimed glass fronts from display cases for clear viewing. Salvaged metal doors handle access points well. Repurposed drawer shelves become instant perches.
The real priority is proper sealing; without it, humidity escapes and wood warps fast.
Multi-Level Space-Saving Layouts
Once the frame is sealed, think upward. Vertical shelf systems stack distinct basking zones, hides, and plant platforms without expanding the footprint at all.
Elevated bridge design spans 60 to 120 centimeters to connect climbing points, and sliding drawer substrates keep cleanup fast and contained. Modular hide stacking rounds out the layout, keeping habitat complexity high and floor clutter low.
Naturalistic Versus Themed Styling
Once your vertical layout is set, styling is where your vision really takes shape. Naturalistic designs use real stone, driftwood, and earth tones like brown, tan, and muted green. Plants mirror actual ecosystems, and lighting shifts gradually to simulate natural sun movement.
Themed terrariums trade habitat authenticity for visual personality, but they often place looks well above your reptile’s behavioral needs.
Budget-Safe Building Materials
Styling sets the look, but your building materials determine how long it lasts.
Sealed exterior plywood costs far less than PVC sheets and controls moderate humidity well when properly coated. Repurposed wardrobes or bookshelves make spacious DIY enclosures with minimal effort. Wire mesh cut into panel sections provides cheap, reliable ventilation.
Foil-faced bubble insulation behind walls locks heat in without adding bulk.
Cleaning-Friendly Design Choices
Building with maintenance in mind saves you hours each week. Nonporous materials like PVC or sealed plywood wipe clean in seconds and resist mold. Front-opening doors give you easy cleaning access to every corner without contorting. Integrated drainage channels handle water runoff cleanly.
For substrate, low-dust blends with compact burrowing layers make daily spot cleaning fast and weekly disinfection straightforward.
Frequently Asked Questions (FAQs)
What is the best habitat for a reptile?
The best habitat is a paradox: it looks completely wild, but every detail is deliberately controlled by you. Match your reptile’s native climate, thermal zones, and humidity, and you’ve already done most of the work.
What are common reptile enclosure mistakes?
Most enclosure problems come down to a few repeat offenders: no temperature gradient, UVB bulbs blocked by glass, substrate moisture that breeds mold, humidity levels that don’t match the species, and lids that don’t actually seal.
How do I build my own reptile enclosure?
Start with material sourcing: food-grade PVC, sealed plywood, or HDPE. Cut panels to spec, assemble the frame, seal seams, and install a lockable access door with mesh ventilation panels.
How can I create an outdoor habitat for lizards?
Think of it as borrowing directly from nature’s blueprint. Your outdoor lizard habitat design needs the right enclosure size, sun exposure planning, predator protection barriers, windbreaks, moisture microhabitats, and natural substrate layering for natural behaviors.
How do I introduce new reptiles safely?
Isolate every new arrival in a quarantine period of 30 days with no shared airflow or equipment. Then swap hides between enclosures for a week before attempting any gradual introduction with short, supervised contact sessions.
What plants are toxic to reptiles?
Pothos, azaleas, poinsettias, and ivy are toxic to reptiles. Ingestion can cause drooling, lethargy, and digestive distress. Spider plants and bromeliads are safe alternatives. See a vet immediately if exposure occurs.
Can multiple species share one enclosure?
Two rivers can share the same channel, but only when their currents truly match. Species compatibility demands matching behavioral traits, space, and environmental needs. Resource competition, stress, and disease transmission spike quickly when requirements conflict.
How often should I replace habitat decorations?
Replace decorations when they crack, splinter, or develop persistent mold. Porous items like cork bark last one to three years. Plastic and resin pieces need inspection every three to six months for fading or rough edges.
Whats the best feeding schedule for reptiles?
Feeding frequency depends on species. Most herbivores eat daily, while adult carnivores feed weekly or biweekly. Match prey size to your reptile’s head width, gut-load insects 24 hours before feeding, and dust them with calcium for juveniles.
How often should reptile enclosures be fully replaced?
It’s no coincidence that most enclosure problems surface around year three. Plan full replacement every 5 to 7 years for PVC or sealed wood, sooner if high humidity warps seals, cracks panels, or triggers mold.
Conclusion
The most visually impressive enclosures are sometimes the worst for the animal inside. That’s the uncomfortable truth most keepers learn too late.
The best reptile habitat design ideas don’t start with how something looks on a shelf. They start with biology. Get the temperature gradient right, nail the substrate depth, and match your layout to how your species naturally moves in the wild. Do that consistently every time, and survival quietly becomes genuine, measurable thriving.