This site is supported by our readers. We may earn a commission, at no cost to you, if you purchase through links.

A number on a screen won’t save your snake if you don’t know what it’s telling you. Plenty of keepers glance at their thermometer, see "88," and feel good—without checking if that reading even comes from the basking spot. That gap between glancing and understanding causes more overheating and cold snakes than any faulty equipment ever does.
Your terrarium thermometer holds real information: skin-contact temperatures, humidity swings, overnight lows your snake felt while you slept. Reading it right means catching a heat lamp that’s crept too close, or a cool side that’s dropped below safe range, before it becomes a problem.
Learning how to read a terrarium thermometer turns that plastic display into a tool you actually trust—one probe placement, one number, one habit at a time.
Table Of Contents
- Key Takeaways
- Read The Display First
- Check Units and Symbols
- Identify Warm and Cool Zones
- Place Probes Where Snakes Rest
- Read Digital Probe Thermometers
- Read Dial and Strip Thermometers
- Use Infrared Guns for Spots
- Compare Readings to Snake Needs
- Fix Strange or Changing Readings
- Record Temperatures and Adjust Setup
- Frequently Asked Questions (FAQs)
- How to measure temperature in terrarium?
- How to read an aquarium thermometer?
- How to correctly read a thermometer?
- How accurate is a probe temperature reader for reptiles?
- How often should I replace a terrarium thermometer entirely?
- Can extreme humidity levels damage a thermometers sensor?
- How long do digital probe thermometers typically last?
- Conclusion
Key Takeaways
- Probe placement matters more than the number itself, since basking surface readings should come from direct skin-contact points, not open air, to reflect what your snake actually feels.
- A healthy enclosure needs a full temperature gradient, not just one reading, spanning roughly 88-92°F basking zones down to 75-80°F cool retreats, with nighttime drops factored in as normal.
- Regular verification habits, like waiting 60-90 seconds for stable readings, comparing digital probes against a reference thermometer, and recalibrating after battery changes or drift over 2°F, keep your data trustworthy.
- Species-specific needs drive every adjustment, since ball pythons, corn snakes, and boas each require different basking, cool-side, and humidity ranges to stay healthy and shed properly.
Read The Display First
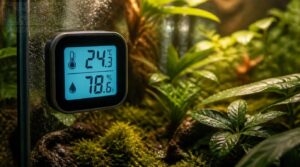
Before you touch a single probe, take a look at what’s already on screen. Your thermometer is packing more information than you might expect. Here’s what you’ll want to check first.
Check the display mode and battery indicator first, since a probe pressed firmly against the surface only gives an accurate reading when the unit itself is working properly, something worth confirming if you’re troubleshooting whether corn snakes can go without a heating pad.
Temperature Number
That first number on your display is the main reading—your temperature number. Most terrariums show Fahrenheit or Celsius, sometimes both. Whatever the scale, it reflects thermal equilibrium between the probe and its surroundings.
A digital probe thermometer converts sensor data into that numeric temperature representation. Trust it, but confirm thermometer accuracy against a separate ambient air thermometer before relying on the number alone. Understanding the Celsius and Fahrenheit scales helps interpret these readings accurately in different measurement systems.
Humidity Percentage
Right next to that temperature number sits the humidity percentage, usually marked with a % RH symbol. This tells you moisture levels in your terrarium’s air.
Most tropical reptiles need 60 to 80 percent RH. Place your sensor away from misting nozzles and vents for stable readings. Calibrate it every few weeks, since drift affects shedding and skin health directly.
Min Max Values
Below the humidity reading, look for min and max values, often labeled as separate memory buttons. This is your MinMax function at work, logging the highest and lowest points recorded since the last reset.
It’s a simple form of historical data logging that helps with temperature range tracking and catching heat fluctuation alerts before they become real problems for your reptile.
Battery Indicator
Once you’ve checked min and max values, glance at the battery icon in the corner. A dropping symbol or dim digital display signals battery voltage drift from aging cells.
Watch for:
- Full bars (good charge)
- Half-drained icon
- Low battery warning
- Blank screen (dead battery)
Weak batteries throw off sensor calibration, so replace them at the first low-battery alert.
Alarm Icons
If a small triangle or bell shape lights up on the display, that’s your alarm icon flagging a reading outside your alert threshold settings. Red usually means critical, amber means watch closely.
You’ll spot different alarm icon types for temperature, humidity, or system faults. Check acknowledged versus active states, some fade once you confirm them, keeping your digital display easy to scan during daily temperature monitoring.
Check Units and Symbols
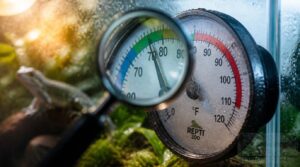
Once you’ve got a handle on the numbers, it’s time to look at what’s around them. Small symbols and labels on the display carry real meaning, and missing one can throw off your whole setup. Here’s what to check next.
Fahrenheit Versus Celsius
Two numbers, same heat, different math. Your thermometer likely shows Fahrenheit, invented by Daniel Gabriel Fahrenheit in 1724, where water freezes at 32°F. Celsius, created by Anders Celsius in the 1740s, sets freezing at 0°C.
Most reptile keepers outside the US will see Celsius, since it’s the global standard. Either works, as long as you know which one you’re reading.
Relative Humidity Symbol
Right next to your temperature reading, you’ll spot RH, which just stands for relative humidity. It’s shown as a percentage, like 55% RH, telling you how much moisture the air holds compared to its max capacity at that temperature.
Many digital thermohygrometers add color coding, green for safe ranges, red for trouble, making a quick glance all you need for enclosure checks.
High Low Memory
MEM or MEM+/MEM- buttons store your highest and lowest readings, letting you check overnight lows without staying up. This "high low memory" works like a computer’s memory architecture division, separating recent data for quick access, much like low memory optimization in kernel address space design.
For your terrarium setup, this reveals nighttime temperature drops affecting reptile tanks, catching dips regular checks would miss.
Probe Channel Labels
Ever run two probes and forget which one’s which? That’s what channel labels solve.
Your thermometer marks each probe as Channel 1 or 2, or names them Basking and Cooling. In a dual sensor system, matching labels to cable colors prevents mixing up your warm and cool zone readings. Check labels regularly since moisture can fade them, and reprint or reassign through your unit’s menu if one gets hard to read.
Error Messages
A blinking "Err" or flashing code means your unit caught something wrong, don’t ignore it. Common codes point to sensor contamination or a probe reading out of range from bad placement.
Check your manual for the code lookup, since severity levels vary: some warnings clear on their own, others need battery replacement or recalibration.
If errors persist, recalibrate using ice water to confirm accuracy.
Identify Warm and Cool Zones
Once you can read the numbers, you need to know what they mean for different parts of the enclosure. Your terrarium isn’t one temperature, it’s several zones working together. Here’s what to check as you scan from the warm side to the cool side.
Warm Basking Side
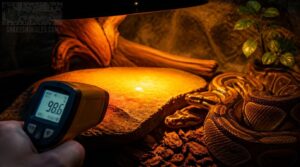
Point your thermometer at the hottest part of the enclosure first, since this is where your snake goes to digest food and warm up.
The basking surface temperature should read 88 to 92°F. Position your heat lamp so it creates a real hotspot, not just warm air. Your basking probe should sit right on that surface, confirming true readings snakes actually experience.
Cool Retreat Side
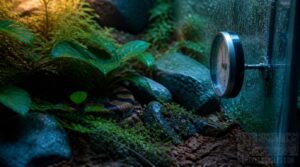
Now check the cool side of the enclosure, where your snake retreats to cool down and hide.
This spot should read 75 to 80°F, roughly 2-3 cm from any heat-retaining rocks. Sensor placement matters here just as much as on the basking side. Shade planting tips like adding cool ground cover help create a natural temperature gradient your snake relies on for comfort.
Since juveniles often perch several meters up in shrubs to escape danger, check out this guide on why rattlesnakes climb and how high they go to better understand their enclosure needs.
Nighttime Temperature Drop

Once lights go off, your enclosure cools fast. Solar input stops and the ground starts losing heat straight to the air, a nighttime temperature drop you should expect every night.
This normal diurnal fluctuation can pull temps down several degrees. Calm, clear nights cool quicker through radiative heat loss, so don’t panic if your readings dip after dark.
Air Versus Surface
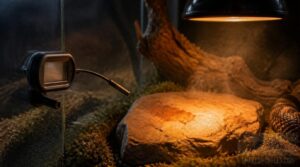
Your thermometer’s air reading and the basking rock’s surface reading rarely match. Rock and wood hold heat through thermal mass, absorbing lamp radiation slowly, then releasing it long after air temps shift.
That’s why a basking surface often runs hotter than the air around it. Use both readings together: air probes catch ambient comfort, surface checks confirm your snake’s actual basking spot.
Gradient Across Enclosure

Think of your enclosure as a map with hot and cool countries, not just two spots. A well-managed temperature gradient spans 10 to 15°C, from a 28-32°C basking zone to a 22-26°C cool side.
Your enclosure is a map of hot and cool countries, not just two spots
Your snake wanders this range daily, picking microhabitats that match its needs. Solid walls and smart heat lamp placement keep that gradient stable, without cold drafts collapsing it.
Place Probes Where Snakes Rest
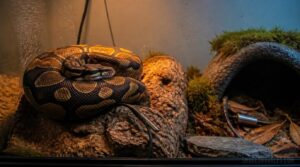
Where you put a probe matters as much as what it reads. A snake spends most of its time in just a few spots, and those are the places you need real numbers from. Here’s where to set your probes for readings you can actually trust.
Basking Surface Probe
Skin contact matters more than air temperature regarding basking readings. Your probe needs to sit right on the surface your snake lies on, not floating above it.
- Tape or clip it directly onto stone, wood, or substrate
- Confirm accuracy with an infrared thermometer gun
- Keep the lead away from lamp beams
- Recalibrate if readings drift over 2°C
Shaded Hide Probe
Every hide needs its own set of eyes. Place this probe inside the shelter where your snake actually curls up, since retreat zone monitoring only works if the sensor sits where the animal rests.
Keep it low, near substrate level. This spot naturally reads cooler than the basking side, giving you honest data for hide temperature logs and shedding conditions alike.
Avoid Direct Lamp Beams
A direct beam hitting your probe gives you a lie, not a reading. The sensor picks up radiant heat instead of true ambient temperature, so numbers spike unrealistically.
Angle your heat lamp slightly away from sensor placement, or add a shield to block direct contact. Indirect lighting setups and avoiding reflective surfaces nearby keep basking probe readings honest and your temperature gradient accurate.
Keep Away From Water
Water and electronics don’t mix, and your thermometer or hygrometer is no exception. Splashed drops from misting or a tipped water dish can corrode connectors or short out low-voltage sensors.
Moisture also skews readings through condensation on the probe housing. Keep sensors a few inches from water dishes and drip lines, use waterproof models where you can, and check cables often for damage.
Arboreal Height Readings
Arboreal snakes climb, so you can’t just check ground level. Take tree top measurement readings with a clinometer or AR app from multiple vantage points, adjusting for ground slope.
This tells you canopy access potential for your snake. Place a digital reptile thermometer near the top, middle, and bottom to map the full temperature gradient and track humidity as height changes.
Read Digital Probe Thermometers
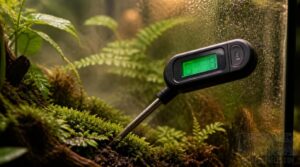
Digital probes give you exact numbers, but only if you know how to read them right. A few habits make the difference between a real reading and a false one. Here’s what to check every time you glance at the screen.
Wait for Stable Numbers
Patience pays off here. When you first power on a digital probe, give it 60 to 90 seconds to reach thermal equilibrium before trusting the number.
Watch for stable readings, not jumpy ones bouncing within a few degrees. If the display keeps shifting past that window, check for sensor drift or a battery issue before logging any baseline comparison.
Read Probe Location
Once the number settles, look at where that reading is coming from. A basking probe near the hot rock tells you the surface temperature snakes feel, while a cool side probe in the hide reflects retreat zones.
For arboreal setups, check elevation too. Readings up top won’t match branch-level or floor conditions, so match probe placement to where your snake actually rests.
Check Min Max History
Most digital thermometers store a min max history you can pull up with one button press. This log shows the maximum and minimum temperature your enclosure hit over the past day or week, plus exact timestamps.
Verify historical extremes against what you’d expect for that probe’s zone. If numbers seem off, check timestamp accuracy first, since unsynced clocks can misreport when spikes occurred.
Reset After Adjustments
Once you move a probe or change sensor placement, you’ll need a power reset procedure: pull the batteries for 30 seconds, then reinsert.
This clears old min-max memory and restores default alarms.
After any adjustment, run these steps:
- Power cycle the unit
- Reapply ice water calibration
- Confirm alarm reinitialization
If drift continues, try a factory menu reset.
Watch for Sluggish Response
Watch your unit’s response time before trusting a number. A healthy temperature sensor or humidity sensor updates within seconds, so lag over 8-12 seconds points to weak batteries — run a battery voltage check first.
If readings still crawl, suspect sensor probe health, signal interference, or overdue calibration timing. Rule out environmental lag causes like sunlight or splash before assuming your device accuracy is off.
Read Dial and Strip Thermometers
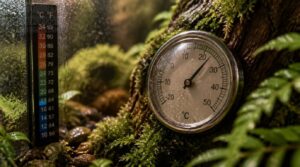
Dial and strip thermometers work a little differently than digital probes, so reading them takes its own approach. You’ll need to check the angle, the lighting, and a few other small details to get an accurate number. Here’s what to keep in mind when you’re checking these two types.
View Straight On
Your eyes and the dial should line up dead center, like looking straight at a clock face instead of squinting from the side. This view straight on approach keeps the needle’s true position visible, avoiding the skewed numbers you’d get from an angled glance.
Position yourself directly in front of the terrarium glass for accurate readings, keeping your gaze level and steady before checking any dial or strip thermometer.
Avoid Glass Glare
If sunlight bounces off the glass, the dial can vanish behind a wash of light. Angle your viewing position slightly off the window’s line, and dim harsh room lighting when checking readings.
A matte finish or anti-reflective coating on the thermometer face cuts surface glare noticeably. Overcast mornings often give the clearest view of your reptile tank’s dial thermometer.
Read Color Band Center
Think of the center band as home base. On most dial-type ThermometerHygrometer units, this reference point reading shows your species’ target temperature. Everything else gets judged against it.
Check center band alignment with the numbered scale first. Then use adjacent band comparison to see if your terrarium tank is running warm or cool for your reptile.
Replace Faded Strips
A faded strip can lose up to 60% of its readability in direct light, turning a once-clear color band into guesswork.
Peel it off gently, clean the channel with alcohol, and match the new strip’s width and gradient exactly. Check adhesive backing is chemical-resistant, and choose UV-stable colors. This simple swap, done every 2 to 5 years, keeps your analog dial thermometer accurate and readable long-term.
Confirm With Digital Probe
A dial thermometer alone can drift 3-5°C without you knowing it. That’s why your digital reptile thermometer with a thermistor probe matters as your reality check.
- Wait for stable numbers
- Compare both readings side-by-side
- Check for sensor drift alerts
- Verify battery status
- Confirm probe data logging matches
If both agree, you’re set. If not, trust the digital probe.
Use Infrared Guns for Spots
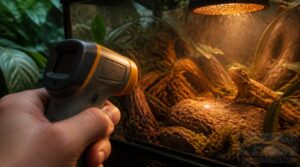
An infrared gun gives you a fast surface reading without touching anything, which makes it perfect for quick spot checks around the enclosure. You just point and pull the trigger, and the number pops up right away. Here’s where you’ll want to aim it for the most useful readings.
Aim at Basking Surface
Point that infrared gun straight down at the basking surface, right where your snake actually rests, not the general area around it. A quick pull of the trigger gives you an instant infrared temperature reading of the exact spot.
This matters since basking surface temperature depends on heat lamp distance and surface material choice. Match readings against normal basking behavior observation before adjusting your thermal gradient setup.
Avoid Measuring Air
Here’s a common mistake: swinging that infrared gun across open air instead of a hard surface. Surface heat focus is the whole point of this tool, so waving it at empty space between basking zone and hide gives you meaningless numbers.
Air readings miss the actual microclimate vs air difference your snake feels. Stick to rocks, wood, and substrate for readings that matter.
Check Hide Floors
Once you’ve got your surface readings down, turn that gun toward the hide floor itself. This spot matters because snakes rest here for hours, so surface temperature accuracy affects their whole thermal experience.
Check for even heat across slate, cork, or resin. Uneven spots often mean moisture buildup underneath, so a quick substrate moisture check helps you catch problems before they cause shedding trouble.
Scan Warm Rocks
Rocks in the basking zone hold heat differently than slate or cork, so scan them next. Point the gun at sunlit surfaces first, then shaded sides of the same rock.
Warm rock zones often run 5 to 15°C hotter than surrounding substrate. Rock mass and coating affect rock temp stability, keeping some surfaces warm minutes after the heat lamp cycles off.
Compare Multiple Spots
Once you’ve scanned individual rocks, widen your view. Sweep the gun across basking spots, hides, and floor level to build a full spot temperature comparison.
You’re checking for a smooth thermal gradient, not sudden jumps. If one zone reads oddly warm or cool, note it and recheck tomorrow to catch real trends versus one-off flukes.
Compare Readings to Snake Needs
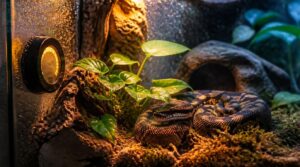
A number on a screen doesn’t mean much until you know what your snake actually needs. Every species has its own comfort zone, and yours won’t thrive outside of it. Here’s how those needs break down by species.
Species Temperature Range
Every snake has a thermal optimum range, the sweet spot where digestion, growth, and activity all run smoothly. Stray past those tolerance limits, and you’ll see a performance curve dropping fast, sluggish behavior, poor appetite, even illness.
Your thermometer readings only mean something when you know your species specific temperature needs. Compare basking temperature and cool zone numbers against that range before assuming anything’s wrong.
Ball Python Needs
Ball pythons live for a gradient, not a single number. Your thermometer should show a basking zone around 88 to 92°F, cool retreat side near 76 to 80°F, and overall ambient temps at 78 to 80°F.
Watch three spots:
- Basking surface
- Cool hide
- Mid-tank air
Pair this with 50-60% humidity and a thermostat controlling any heat source directly.
Corn Snake Needs
Corn snakes want a basking zone of 82 to 90°F, with the cool side sitting at 75 to 80°F. Check your thermometer twice daily, since nighttime temps should drop to 72 to 75°F. Humidity matters just as much as heat, so pairing your temperature routine with a solid corn snake humidity and moisture control guide helps you avoid the respiratory issues that come with a poorly balanced enclosure.
Keep humidity between 40 and 60 percent for clean sheds. Feed juveniles weekly, adults every 7 to 14 days, and always recalibrate your probe if readings seem off.
Boa Constrictor Needs
Boas need a bigger gradient than smaller snakes: 82 to 88°F on the warm side, 75 to 80°F cool side. Nighttime should drop to 72 to 78°F.
Given their size, adults need enclosures at least 4 feet long by 2 feet deep by 2 feet tall. Keep your thermohygrometer near the basking zone and check readings during morning and evening feedings, every 7 to 14 days.
Humidity and Shedding
Getting the temperature right only solves half the puzzle. Your thermometer/hygrometer combo matters just as much for shedding success.
Most species shed cleanly at 55-70% humidity, but rainbow boas need 75%+. If you’re seeing retained eye caps or patchy sheds, check your humidity tracking first. A humid hide with moisture-retention substrate, placed away from direct heat, often fixes incomplete reptile shedding within one cycle.
Fix Strange or Changing Readings
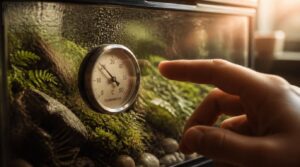
Sometimes a thermometer starts giving you numbers that don’t add up. A reading that jumps around or seems too high or too low usually points to a fixable problem. Here’s what to check first when something looks off.
Move Overheated Sensors
Feel the probe’s housing warm to the touch? That’s a sign your sensor sits too close to a heat lamp or mat. Relocate it 2–3 inches away, improve ventilation around the enclosure, and check the display for stable readings afterward.
Common fixes:
- Add clearance from heat sources
- Improve airflow
- Use heat shielding
- Recalibrate after moving
Replace Weak Batteries
Once repositioning solves overheating, a dim or sluggish display often points to a different culprit: weak batteries.
Check your thermometer’s label for correct battery type compatibility, then swap in fresh alkaline or lithium cells matching the original voltage. Clean any corrosion off contacts first. Alkaline batteries usually last 6 to 12 months; recalibrate after replacing them to confirm your digital readings hold steady.
Clean Probe Surfaces
Fresh batteries won’t fix a dirty probe. If your readings still drift, wipe the sensor tip with a lint-free cloth and 70-99% isopropyl alcohol, using straight passes only.
Rinse with distilled water to clear mineral residue, then let it air-dry naturally. Check the tip under a magnifier for leftover film. Clean after every major session to prevent buildup and keep readings accurate.
Check Damaged Cables
If cleaning didn’t help, check the cable itself. Look for jacket cracks near clamps, or bent radii where strands may fatigue.
Termination points with green corrosion signal moisture damage. Melted jacket hotspots mean heat exposure.
- Inspect insulation for cracks or discoloration
- Check bend points for stress damage
- Look for corroded terminations
Replace damaged external sensors before testing further.
Calibrate if Uncertain
Two thermometers rarely agree perfectly, and that’s fine, until the gap grows past 2°F or 1°C. When that happens, grab a reference thermometer with known accuracy and compare readings side by side. Log the offset you find.
Recalibrate after any battery swap or environmental change. If numbers still won’t align, you’re likely dealing with a faulty sensor, not a calibration problem.
Record Temperatures and Adjust Setup
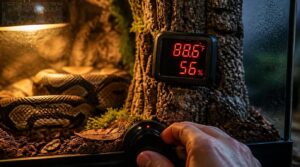
Reading the thermometer is only half the job. What you do with that number is what keeps your snake healthy. Here’s how to turn a quick check into real changes around the enclosure.
Morning and Evening Checks
Your enclosure tells a different story at 7 a.m. than it does at 7 p.m., so twice-daily readings matter more than a single glance ever will.
Morning checks confirm overnight lows and battery status. Evening checks capture peak heat and humidity drift.
Compare both against memory values for reading consistency, and scan for alarm icons before closing up shop each night.
Heat Lamp Height
If your basking spot runs hot, raise the heat lamp in 2-inch steps and recheck after a few days. Too cool means lowering it the same way.
Adjustments should always respect species-specific height needs and lamp mount stability, since a wobbly fixture ruins any thermal gradient mapping you’ve done.
Log each change against probe readings for heat distribution safety.
Thermostat Settings
A thermostat is only as smart as the setpoint you give it. Setpoint adjustment should match your species’ daytime range, with a hysteresis range of 2–4°F for stable cycling.
- Set basking zone to species range
- Add cool zone probe for gradient
- Enable heat mat regulation
- Run secondary monitoring for backup
- Log setpoint changes weekly
Misting Schedule Changes
Your thermometer readings should drive misting changes, not guesswork. Start with a baseline of one misting per day for two weeks, tracking humidity before touching anything.
From there, adjust frequency by one session weekly based on what the hygrometer shows. Shift timing to early morning or late evening to match plant activity. Always document each change—date, duration, humidity reading—and move gradually to avoid stressing your animals.
Weekly Care Log
A written record turns scattered readings into real proof of care. Each day, jot down morning and evening numbers from your terrarium thermometer, noting temperature and humidity for both reptile tanks and plant zones.
Track completed tasks, feeding, misting, and any signs you check. Over a week, patterns emerge, showing you exactly when to adjust heat lamps or thermostat settings.
Frequently Asked Questions (FAQs)
How to measure temperature in terrarium?
You’ll need a digital probe or infrared gun placed near the heat lamp and cool substrate side. Check gradient readings in Celsius or Fahrenheit, clean sensors monthly, and calibrate every few months for accurate reptile tank temperatures.
How to read an aquarium thermometer?
Check the numeric display for water temperature, then confirm units on the label. Digital models update every few seconds; place probes near heaters or filters for accurate gradient readings, avoiding surface splashes that skew calibration.
How to correctly read a thermometer?
Wait for a stable display and steady probe response time before noting the temperature reading. Confirm units, run a quick sensor drift check, and follow proper calibration frequency for reading consistency—accurate results depend on patience, not a rushed glance.
How accurate is a probe temperature reader for reptiles?
Picture a probe nestled in warm sand, quietly reading heat like a thermostat for your snake’s world. A good digital probe stays accurate within 5 to 5°C, far tighter than infrared guns, though weak batteries and sensor drift can throw numbers off.
How often should I replace a terrarium thermometer entirely?
Digital units last 5 to 10 years, but swap them sooner if readings drift 2 to 3 degrees, calibration fails after three tries, or humidity accuracy slips alongside temperature — signs your thermostat can’t trust the data anymore.
Can extreme humidity levels damage a thermometers sensor?
A humid gecko tank once fogged its hygrometer for weeks, causing slow drift. Yes—humidity sensor corrosion, condensation buildup, and moisture ingress damage capacitive or resistive thermohygrometers over time, so protective seal failure should prompt quick sensor replacement.
How long do digital probe thermometers typically last?
You’ll get 3 to 5 years from most digital probe thermometers, though batteries need swapping every 1-2 years. The thermistor sensor drifts after 2-4 years, so annual calibration and replacing worn cables keeps readings accurate longer.
Conclusion
A thermometer is a translator, turning silence into a language your snake can’t speak for itself. Once you know how to read a terrarium thermometer, that screen stops being decoration and starts being dialogue.
Digital displays refresh almost instantly, so a quick check against this digital vs analog terrarium thermometer accuracy comparison helps you trust what that flickering number is actually telling you.
You’ll catch the drift before it becomes a drop, the crawl before it becomes a spike. Trust the probe placement, not the glance. Check it daily, log what you see, adjust with confidence.
That habit, small as it seems, keeps your snake steady through every season.