This site is supported by our readers. We may earn a commission, at no cost to you, if you purchase through links.

Most boa constrictors don’t fail because their owners don’t care. They fail because the enclosure looks right but doesn’t actually function right. A hide placed on the wrong side, a water dish sitting under a heat lamp, a humidity reading taken from the wrong height — small mistakes that compound quietly over months.
Creating a boa-friendly environment isn’t about buying the most expensive setup. It’s about understanding what your snake’s body actually needs: a warm side to digest, a cool side to recover, moisture to shed cleanly, and enough security to stay calm. Get those fundamentals right, and everything else follows.
The steps below build that environment from the ground up.
Table Of Contents
- Key Takeaways
- Choose The Right Boa Enclosure
- Create a Safe Temperature Gradient
- Balance Humidity, Hydration, and Airflow
- Layer Substrate, Hides, and Décor
- Maintain a Calm, Enriching Habitat
- Frequently Asked Questions (FAQs)
- How do you set up a boa habitat?
- How cold is too cold for a boa?
- What is the best habitat for a boa?
- How often should I clean my boas water bowl?
- Can multiple boas live together in one enclosure?
- What are signs my boa is ready to eat?
- How do I introduce a new boa to its home?
- Do boas need calcium or vitamin supplements regularly?
- How can I reduce noise stress for my boa?
- What are signs my boa is bored or understimulated?
- Conclusion
Key Takeaways
- Getting your temperature gradient right — a warm side at 28–32°C and a cool side at 24–28°C — is the single most critical factor for your boa’s digestion, immunity, and overall behavior.
- Ambient humidity should stay between 50–75%, with probes placed at your boa’s actual resting height on both sides of the enclosure, not at the floor or ceiling where readings mislead you.
- A front-opening PVC enclosure with escape-proof locks isn’t just convenient — it cuts maintenance time by roughly 40% and keeps your boa safer every single day.
- Small, consistent habits — daily water changes, weekly probe checks, and a full substrate swap every 3–4 months — matter more than any one-time setup decision you’ll ever make.
Choose The Right Boa Enclosure
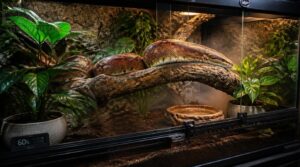
The enclosure you choose sets the tone for everything else — your boa’s comfort, health, and safety all start here. Not every setup works for every snake, so knowing what to look for before you buy saves you a lot of backtracking later. Here’s what actually matters when picking the right enclosure for your boa.
If you want a deeper breakdown of what that looks like in practice, this guide to choosing the right reptile and pet snake habitat walks through the key factors with boas specifically in mind.
Match Size to Life Stage
Your boa won’t stay small for long. Hatchlings start in 12x12x18-inch enclosures, but juveniles reaching 3 feet need an upgrade to 18x18x24 inches within 6 to 12 months. Adults need at least 6 by 2 by 2 feet. Upgrade when your snake hits 60 percent of adult length. Substrate depth scales from 2 inches for hatchlings to 6 for adults.
Just as reptile keepers track growth milestones, researchers have found that using a data-centered reading approach helps students better interpret scientific figures and growth data over time.
Compare PVC and Glass
PVC plastic enclosures weigh 40 to 60 percent less than comparable glass terrariums, which helps during setup and cleaning. PVC also retains heat well, resists impacts, and won’t shatter under thermal stress.
Glass offers sharper optical clarity with almost no distortion, but it accumulates condensation quickly, complicating temperature monitoring. For most keepers, PVC is the easier and more durable choice.
Prefer Front-Opening Access
Front-opening enclosures cut routine maintenance time by roughly 40 percent. You reach straight in without repositioning the snake, which means less stress for both of you. Feeding, spot-cleaning, and emergency checks all happen without major disruption.
Pair that enclosure front access design with multi-point secure locks for escape prevention, and you’ve got a setup that’s practical and safe every day.
Balance Ventilation and Heat Retention
Securing the front panel means little if heat bleeds through every vent. Airflow balancing preserves your temperature gradient.
- Position vents high and low to circulate air without disrupting thermal zoning.
- Use insulated ventilation paths to stop heat loss through intakes.
- Choose PVC for better thermal mass storage, holding warmth longer.
This keeps humidity control stable too.
Install Escape-Proof Locks
A boa’s curiosity is relentless, and a loose latch is all the invitation it needs.
A boa’s curiosity never rests, and one loose latch is all the escape it needs
Use magnetic or roller bolt locks, mounted at or below the top third of the door to limit the force your boa can apply. Choose stainless steel hardware to resist humidity. Lubricate moving parts every three to six months, and test the lock after any enclosure maintenance.
Create a Safe Temperature Gradient
Temperature is everything for a boa — get it wrong, and digestion, immunity, and behavior all suffer. The good news is that building the right gradient isn’t complicated once you know what to set up and where. Here’s exactly how to do it, step by step.
For a deeper look at exact temperature ranges and gear recommendations, the boa constrictor enclosure temperature gradient guide walks you through every detail you’ll need.
Set Warm and Cool Zones
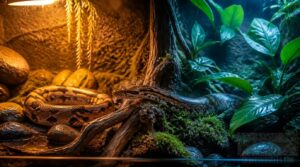
Your boa can’t self-regulate, so a clear temperature gradient is non-negotiable.
- Warm zone: 28–32°C for basking and digestion
- Cool side: 24–28°C for retreat and thermoregulation
- Zone separation: keep 15 cm of décor between zones
- Probe placement: one probe per zone at resting height
A visible boundary helps your boa locate its preferred spot without stress. Check both zones every day.
Choose Thermostat-Controlled Heat Sources
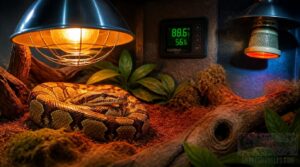
Without a thermostat, any heat source can spike into dangerous territory fast. Thermostat-controlled heating locks your basking and ambient temperatures in place.
| Heat Source | Safe Range | Best Use |
|---|---|---|
| Halogen bulb | 88–95°F | Basking zone |
| Ceramic emitter | 75–82°F | Overnight warmth |
| Under-tank heater | 80–88°F | Floor-level heat |
Always pair each with its own thermostat. Mount lamp shields over every heating element to prevent burns.
Position Probes at Resting Height
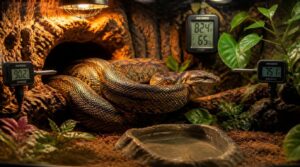
Place thermostat and hygrometer probes at your boa’s actual resting height, not the floor or ceiling. That’s where readings matter most. A probe sitting two inches too high misses what your snake actually feels in the basking area.
Check both warm and cool hides separately. Probes shift when your boa moves, so verify placement weekly, especially as your snake grows.
Shield Every Heating Element
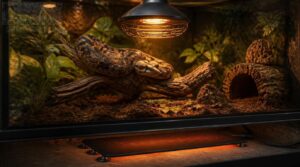
Burns happen fast. Halogen bulbs, ceramic heat emitters, and under-tank heaters all cause serious burns on contact, even when paired with a thermostat. Use lamp shields and protective housing on overhead fixtures, and mount under-tank heaters outside the enclosure floor.
Shielded elements, enclosed in metal with insulating powder, resist oxidation and deliver steady output. Check shields weekly and never remove them during operation.
Add UVB and Daylight Cycles

UVB lighting does more than light up the enclosure. It helps your boa produce vitamin D3 for calcium metabolism. Aim for 5–10% UVB transmission at the basking area, and control cycles with a timer:
- Run 12 hours on, 12 hours off
- Shift gradually across seasons to mimic natural light
- Replace UVB bulbs every 6–12 months
Balance Humidity, Hydration, and Airflow
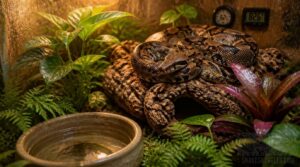
Getting humidity right is one of the most important things you can do for your boa’s long-term health. Too dry and you’ll see stuck sheds and respiratory issues; too wet and you’re inviting mold and bacterial infections. Here’s what you need to manage to keep that balance working in your favor.
Maintain 50–75% Ambient Humidity
Keeping ambient humidity levels between 50 and 75 percent is the baseline your boa needs to breathe comfortably and shed properly.
Track it with a hygrometer placed at mid-enclosure height for accurate humidity monitoring. Lightly mist the terrarium daily or adjust substrate moisture to hold that range. Good airflow balance keeps fresh air circulating without drying the enclosure out.
Raise Humidity During Shedding
When your boa enters a shed cycle, push humidity to 65–75 percent for 48–72 hours. Mist the terrarium twice daily with dechlorinated water, and prep a humid hide with damp sphagnum moss. Watch for these three signs:
- Eyes turn cloudy and blue-gray
- Skin color dulls across the body
- Your boa retreats more often to its humid hide
Place Water on Cool Side
The water dish belongs on the cool side only. Heat evaporates water quickly, which pushes ambient humidity up and can raise enclosure temperatures beyond your target range. A non-porous ceramic or plastic bowl placed away from basking spots holds steady and won’t warp.
Refill it daily and wash it each week. Check for cracks, since bacteria settle into grooves fast.
Monitor With Hygrometer Probes
A single reading from one spot tells you almost nothing. Use two probes placed at the boa’s resting height on opposite sides to capture the real humidity gradient. Keep them at least 15 cm from glass walls to avoid skewed edge readings, and mount them away from substrate surfaces where evaporating moisture can push numbers artificially high.
Calibrate monthly with a salt solution standard. Probes drift over time, so replace sensors every one to two years to stay reliable.
Prevent Mold and Stagnant Air
Stagnant air is mold’s best friend. Run a quiet circulation fan to move air through the room at least three times per hour, and avoid placing the enclosure in corners where airflow naturally dies.
Clean ventilation grilles monthly with mild soap and water, then set up humidity monitoring alerts to flag anything climbing above 75% before mold gets a foothold.
Layer Substrate, Hides, and Décor
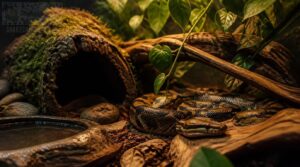
What’s inside your boa’s enclosure matters just as much as the enclosure itself. The right substrate, hides, and décor give your snake somewhere to burrow, hide, climb, and feel genuinely at home. Here’s what to get right, layer by layer.
Choose Safe Moisture-Retaining Substrates
Think of substrate as your enclosure’s humidity engine. Coconut fiber and cypress mulch are your two safest options, holding moisture without waterlogging and staying loose enough to prevent mold buildup.
Blending the two gives you balanced retention and steady airflow. Avoid pine and cedar entirely, their aromatic oils are toxic to boas, and skip sand or gravel, which cause impaction.
Match Depth to Boa Size
Depth isn’t just comfort, it’s function. Your boa needs enough substrate to bury roughly two-thirds of its body while resting, and to rotate fully without compressing the spine.
- Neonates: 1–2 inches of substrate
- Juveniles: 2–4 inches
- Adults: 4–6 inches
Too shallow limits burrowing. Too deep can overwhelm small boas and hide early warning signs.
Place Warm and Cool Hides
Every boa needs two hides minimum: one on the warm side, one on the cool side.
| Hide Type | Placement Rule |
|---|---|
| Warm hide | Basking side, entrance clear |
| Cool hide | Opposite end, near ventilation |
| Both | Partially buried in substrate |
Position warm hides away from drafts. Cool hides should align with airflow. Check that neither tips or rolls when your boa settles in.
Anchor Branches and Climbing Décor
A loose branch can injure your boa fast. Use stainless steel screws and washers for every anchor point, and check them weekly for looseness.
Grapevine and corkscrew willow resist mold and give real grip. Layer branches at varying heights, spacing connections 6 to 10 inches apart so your boa has a route to work through, not just a shelf to sit on.
Add Snake-Safe Plants
Plants do double duty in a boa enclosure. Pothos and spider plants boost ambient humidity through transpiration and give your boa visual cover without sharp edges or toxins.
Pot them on the cool side with well-draining inert soil so water doesn’t pool near electrical equipment. Trim dead leaves weekly, wash foliage monthly, and pull anything showing mold immediately.
Maintain a Calm, Enriching Habitat
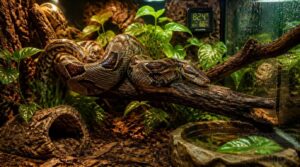
Getting the setup right is only half the job — keeping it right is where good husbandry really shows. Your boa needs a stable, low-stress environment maintained through consistent daily and weekly habits. Here’s what that routine looks like in practice.
Reduce Noise and Vibration
Boas sense vibration through their whole body, so chronic disturbance adds real stress. Vibration isolation pads cut floor vibrations by up to 12 dB.
- Fit rubber grommets on cabinet feet
- Apply floating floor decoupling for airborne noise
- Verify weight rating compliance so pads perform
- Place a slip-resistant mat under front-opening enclosures
- Keep the enclosure away from speakers and vents
Rotate Enrichment Without Overcrowding
Once vibration stress is controlled, behavioral stimulation becomes the next real priority. Swap two-thirds of enrichment items weekly, but always keep one familiar object in place. Introduce one new item per session: scent, texture, or climbing branches.
Leave 12 inches of clearance around each piece. Track what your boa investigates first. Tongue-flicking signals genuine interest; avoidance signals too much change.
Spot-Clean and Refresh Water Daily
Place the water dish on the cool side to slow evaporation and keep the temperature stable. Refill daily with fresh, room-temperature water to prevent thermal shock. During spot-cleaning, wipe down dish edges to remove slime and mineral deposits.
Watch how your boa uses the water, since shifts in drinking behavior often flag stress or early dehydration before other signs appear.
Deep-Clean and Replace Substrate
Daily spot-cleaning keeps things tidy, but it doesn’t fully reset the enclosure. Every 3–4 months, remove all décor, scoop out old substrate, and vacuum loose debris.
Wipe every surface with a reptile-safe disinfectant that targets bacteria and fungi, rinse thoroughly, then let everything air dry completely before adding fresh substrate. Seal the used material in a bag to prevent cross-contamination.
Check Behavior, Shedding, and Appetite
Watch your boa closely twice a day. Behavioral stress signs like persistent hiding or unusual aggression often appear before any physical symptom.
- Log weekly weight to catch sudden loss early
- Note shedding frequency – cloudy eyes and dull skin signal a shed
- Track appetite changes – refusal near shed cycles is normal
- Inspect scale condition and vent area for discharge or lesions
Frequently Asked Questions (FAQs)
How do you set up a boa habitat?
A smaller enclosure doesn’t mean a safer boa, and that’s the paradox most beginners miss. Enclosure size, substrate choice, thermal regulation, and humidity control all work together, so getting one wrong throws off everything else.
How cold is too cold for a boa?
Anything below 75°F on the cool side slows your boa’s metabolism and disrupts digestion. When nighttime temps fall below 70°F, expect appetite loss, sluggish movement, and shedding problems. Those are your warning signs.
What is the best habitat for a boa?
The best habitat for a boa is a front-opening PVC enclosure properly sized for your snake’s current stage, with a stable thermal gradient, 50-75% ambient humidity, safe burrowing substrate, and at least two secure hides.
How often should I clean my boas water bowl?
Change the water every day, scrub the bowl weekly with hot water and unscented soap, and sanitize it monthly with a diluted vinegar rinse. Always place it on the cool side to slow bacterial growth.
Can multiple boas live together in one enclosure?
Most boas do best on their own. Co-habitation raises real risks: resource competition, territorial stress, and faster disease spread. If you must house two together, match species and size, then monitor both snakes every day.
What are signs my boa is ready to eat?
A ready boa shows calm, outstretched posture and increased tongue flicking near prey. It strikes cleanly within 30 seconds, grips firmly, and swallows steadily, with clear eyes and a clean vent.
How do I introduce a new boa to its home?
Give your new boa a quiet acclimation period of 5 to 7 days. Leave hiding spots accessible, keep humidity levels stable, and don’t rush any handling. Start a feeding schedule only once stress signs clear.
Do boas need calcium or vitamin supplements regularly?
Not usually. Whole-animal prey already covers most of your boa’s main nutritional needs. Even so, occasional light dusting with a 50/50 calcium and multivitamin mix helps close feeder nutrient gaps and aids long-term bone health.
How can I reduce noise stress for my boa?
Picture a monk in a library. Silence isn’t just comfort, it’s essential function. Place the enclosure away from high-traffic areas, use front-opening access, and keep heat on a steady thermostat to minimize sudden noise spikes.
What are signs my boa is bored or understimulated?
Watch your boa closely for corner dwelling, limited hide usage, and basking avoidance. These behavioral needs go unmet when environmental enrichment isn’t varied, leading to water dish neglect, reduced movement patterns, and excessive hiding behavior.
Conclusion
Squeeze every advantage from the setup you build. Creating a boa friendly environment comes down to a handful of real non-negotiables: the right temperatures, controlled humidity, secure hides on both sides, and a substrate that works with your snake’s biology.
Get those right, and your boa controls everything else with ease. A thriving snake doesn’t need a perfect enclosure. It needs a functional one. Build it right, and you’ll see the difference in every shed.
- http://CAESgQEB6zswFf6YsO7Osz7oKk0vk297mrtO6_Vbq2hLjxzpt0SgDodtwMLHXlNAub6TIYIKP9ui_dE-TJAjMJYt_tFgw1OTarg8TaeLPKYMokGgIpUJ92kVAevB9PWtB_lUEtzMlRNvVdS8VsJwcAIxU67P0amluB8MYafOC6VwXLqJ_Y0
- https://reptifiles.com/boa-constrictor-care/boa-constrictor-temperatures
- https://www.petmd.com/reptile/boa-constrictor-care-sheet